Cranberry Almond Shortbread Cookies


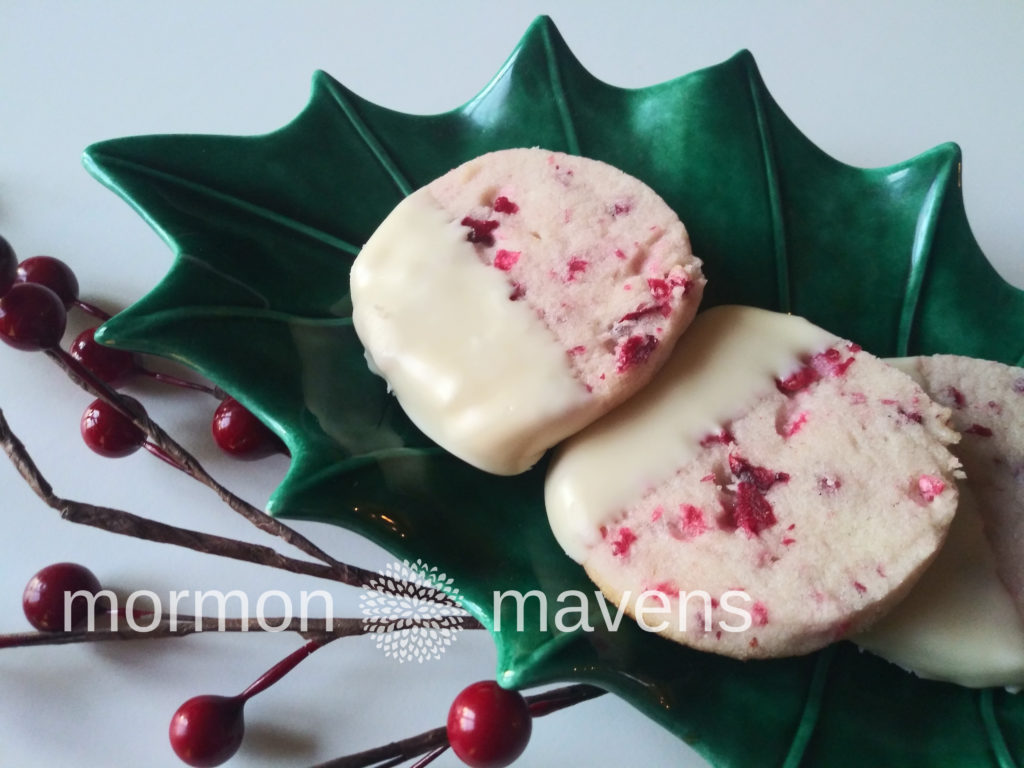
This Cranberry Almond Shortbread cookie recipe has been in my TRY ME folder for about a year. They look so elegant, right?

Since you are probably already in holiday mode right now–earlier than last year, it seems–this would be a good cookie to add you your Christmas Cookie Platter or next Cookie Exchange.  My batch is already in the freezer to be ready to use at a moment’s notice.

I thought this was a very easy recipe to make and I have never made shortbread anything before.  Enjoy!
Cranberry Almond Shortbread Cookies
Yields 56
A sweet shortbread cookie with the joy of cranberries & almond flavoring. Then there's white chocolate...
Write a review
Print
Ingredients
  1. 1 cup butter, softened
  2. 3/4 cup sugar
  3. 1 teaspoon almond extract
  4. 1/4 teaspoon salt
  5. 2 cups all-purpose flour
  6. 1 cup finely chopped, sweetened cranberries
  7. 8 oz. white chocolate (with cocoa butter), cut up
  8. 2 teaspoons shortening
Instructions
  1. In a stand mixer, beat butter on medium to high for 30 seconds. Add sugar, almond extract, and salt. Beat until combined, occasionally scraping sides of bowl. Gradually beat in flour. Stir in cranberries.
  2. Divide dough in half, shaping each half into a 7-inch log, 1 1/2-inch in diameter. Wrap each in waxed paper, twisting the ends of the paper to seal. Chill for at least 2 hours or up to 2 days.
  3. Preheat oven to 375 degrees F. Line cookie sheets with parchment paper and set aside. Cut chilled or frozen logs into 1/4-inch slices. Place slices about 1 inch apart on cookie sheets.
  4. Bake about 10 minutes or just until firm and lightly browned on bottoms. Cool on cookie sheets for 1 minute then transfer to wire racks to cool completely.
  5. In a heavy, medium saucepan combine the white chocolate and shortening and stir over low heat until melted.
  6. Dip each cookie in melted chocolate just halfway then place on wire rack over waxed paper and let stand until set.
Adapted from Better Homes & Gardens
Mormon Mavens https://www.mormonmavens.com/

Frosted Marshmallow Brownies

‘Tis the season for all those summer get-togethers and family reunions.  Running out of ideas for what to take? 

Whether you say “dish to pass” or “potluck”, sometimes it’s just hard to come up with something yummy and easy.  Here is a great idea we shared last summer.

And who can resist a recipe post that starts out with Captain Jack Sparrow?  Savvy?


 Yesterday, my kids asked for “you know, those marshmallow brownie things we used to make all the time” and I was like…

jack sparrow brownies

Seriously, I had completely forgotten.  It’s been years!

It’s a recipe out of my husband’s family’s cookbook.  The original recipe has a scratch brownie, but when I’ve got Thrive Life Brownie Mix lying around, why not use it?  It’s a “just add water” mix so I love that.  But you can use your favorite store mix or your favorite basic brownie recipe!  The fun part comes in what you put on top!

Frosted Marshmallow Brownies
Yields 16
A quick and easy brownie makeover!
Write a review
Print
Prep Time
5 min
Cook Time
35 min
Prep Time
5 min
Cook Time
35 min
Ingredients
  1. 3 3/4 c. THRIVE Fudge Brownie Mix
  2. 1/2 c. hot water
  3. 2 c. mini marshmallows
Frosting
  1. 1/4 c. butter, softened
  2. 1/3 c. unsweetened cocoa
  3. 2/3 c. powdered sugar (approximately)
  4. 1/4 c. milk
  5. 1 tsp. Vanilla Extract
Instructions
  1. Preheat oven to 350 degrees.
  2. Add the hot water to the brownie mix in a medium bowl. Stir just until the mix is fully moistened. Allow to sit for 5 minutes. (If not using Thrive mix, just prepare your favorite box mix or brownie recipe as directed.)
  3. Spread brownie batter into a greased 9x9-inch baking pan. Bake for about 35 minutes or until a toothpick inserted into the center comes out almost completely clean.
  4. Turn off the oven, pour the marshmallows out in an even layer on top of the brownies, and return the pan to the oven for 3-5 minutes. Remove and set aside to cool.
  5. Mix the frosting ingredients together, adding more powdered sugar if necessary to make the frosting spreadable. Spread the frosting over the cooled marshmallow layer. Cut into squares and enjoy!
Mormon Mavens https://www.mormonmavens.com/

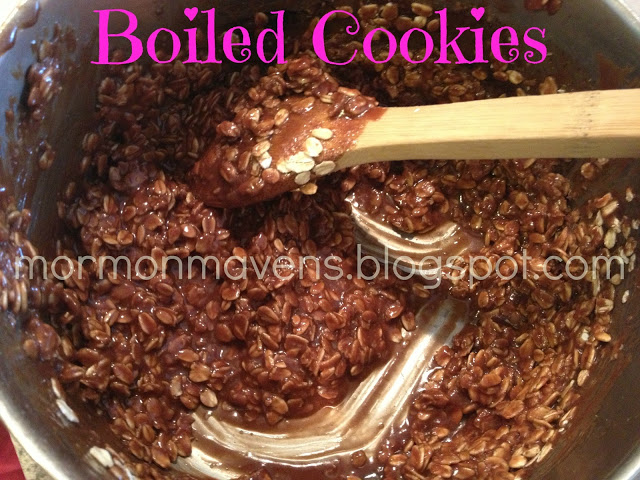
Boiled Cookies

I had a friend once who thought this was a disgusting name for a cookie.  She said in her family they called them Gorilla Poops.  Not sure why my family’s title won the gross-out award over hers.  Anyhow, it’s a tried and true recipe that brings back lots of memories for me.  Sunday afternoons were the traditional occasions for these quick treats when I was growing up, and it’s a tradition I’ve kept going in my own family.

Ingredients:
1/4 c. butter
1/2 c. milk
3 Tbsp. cocoa
1/4 tsp. salt
2 c. sugar
1 tsp. vanilla
1/2 c. peanut butter
2 1/2 c. oats (quick or old-fashioned)

1.  Combine the butter, milk, cocoa, salt, and sugar in a large saucepan and bring to a boil.  Cook for 1-2 minutes more and then remove from heat.
2.  Stir in vanilla, peanut butter, and oats.  Drop by spoonfuls onto waxed paper and allow to set.

Makes about 3 dozen

Notes:

  • My personal favorite way to make these is to omit the cocoa from the boiling mixture, and then add in 1/2 cup or so of coconut after the boil.  Yum!
  • I used to always use quick oats until I experimented with old-fashioned, which I use more often.  Quick oats give a bit softer texture, but I like them with the old-fashioned oats better.
  • You can pour the mixture into an 8″x 8″ pan, sprayed with cooking spray, but it takes a lot longer to set before you can cut it into bars.
  • My ten-year-old made this batch and has become quite an expert at the process!
  • We like to use a cookie scoop for easy portioning onto the waxed paper.
 
Source:  my mom, but this recipe has been around forever!
Originally posted on February 4, 2013.

(Amazing!) Mint Brownies

I’ve tried many brownie recipes over the 20+ years that I have been married.  I recently found a great basic brownie recipe that has served us well so far.  But recently I found a special brownie recipe that is….well, I’ll just say it….life-changing.

Okay, well maybe you’d have to be married to a man who is in love with mint to call this recipe life-changing!  But even I adore these mint brownies; and I only like mint as a friend.


Ingredients:
4 ounces unsweetened baking chocolate
1 cup butter (2 sticks)
4 eggs
2 cups sugar
1 tsp. vanilla
1 1/4 cups flour
1/2 tsp. baking powder
—–
Frosting:
1-2 Tbsp. milk
2 cups powdered sugar
1/4 cup butter, softened (1/2 stick)
1 1/2 tsp. peppermint extract
green food coloring (2-3 drops)
—–
Glaze:
6 ounces semisweet chocolate chips
6 Tbsp. butter

1.  Set oven to 350 degrees.  Line a 9″x 13″ pan with foil, making sure the foil can extend over the edge by a couple of inches (you’ll lift the brownies out later with that).  Spray with cooking spray.
2.  Chop your unsweetened chocolate and the butter into chunks.  Place in a microwave-safe bowl and microwave for 30 seconds at a time, stirring in between, until the chocolate is melted and smooth.*  Set aside to cool.
3.  In a mixer, beat eggs, sugar, and vanilla for two minutes.  While that’s beating, mix together the flour and baking powder in a separate bowl.  With the mixer running, slowly pour in the melted chocolate and beat until it is well-combined.  With the mixer on low, add the flour mixture by spoonfuls and mix just until combined.**  Pour batter into pan and bake for 20-30 minutes, or until a knife poked into the center comes out clean.
4.  Cool brownies completely on a wire rack for better air circulation around the pan.  Once the brownies are room temperature, make the frosting.  Combine all the ingredients, starting with 1 1/2 Tbsp. of milk and adding more after mixing if necessary.  Spread evenly over the brownies and chill while you make the glaze.
5.  Place the chocolate chips and butter in a microwave safe bowl.  Microwave in 30-second increments until melted, making sure to stir well in between.  Set this aside to cool for about 15 minutes, then pour atop the brownies and carefully spread it out over the mint frosting.  Chill again.  When the chocolate has set, lift the brownies out of the pan with the foil “handles”.  Cut and serve.***

Notes:
*Don’t over heat.  Stirring well in between will help the chocolate melt a little more.  It should just barely have melted all the way.
**It’s okay for a bit of flour to not be mixed in.  Over-mixing the batter will mess up the texture.
***I cut mine in a 4 x 6 grid to get 24 brownies.

Source:  Our Best Bites: Mormon Moms in the Kitchen (I didn’t realize how close our blog name is to their cookbook until our blog had already been named.  At any rate, they have a wonderful website and an exceptionally beautiful cookbook!)

Originally posted on June 25, 2012.

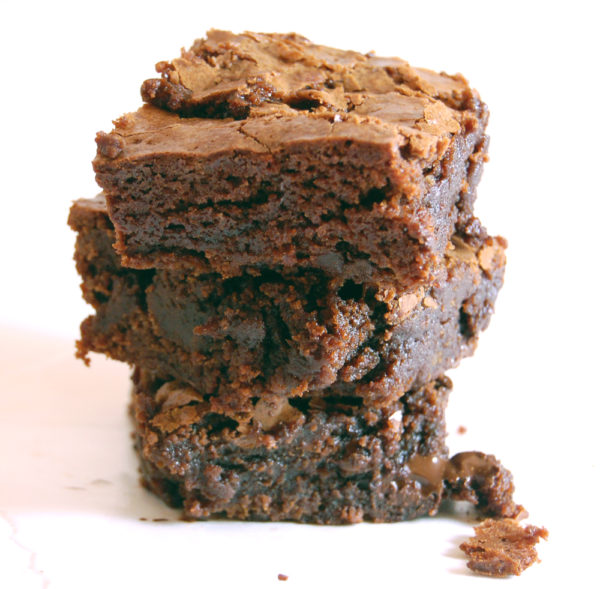
Chewy Brownies

chewy brownies


Originally posted on July 20, 2011.

Call me crazy, but I love brownie-mix brownies.  I love the flavor, but I especially love the texture of them.  Every once in a while I’ll try a recommended brownie recipe, but I’m always disappointed in the results.  I found this recipe in a Google search for “scratch brownies that taste like a mix”.  This recipe is good enough to keep using, in place of the box mix, until I find an even better one.  It’s awesome with warmed up peanut butter for a sauce with Bittersweet Chocolate Sauce and 3 Ingredient Ice Cream.

Ingredients:
1/3 c. cocoa
1/2 c. plus 2 Tbsp. boiling water
2 ounces unsweetened chocolate, finely chopped
4 Tbsp. butter, melted
1/2 c. plus 2 Tbsp. vegetable oil
2 large eggs
2 large egg yolks
2 tsp. vanilla extract
2 1/2 c. sugar
1 3/4 c. all-purpose flour
3/4 tsp. salt
6 ounces bittersweet or semisweet chocolate, cut into 1/2″ pieces

1. Adjust oven rack to lowest position and heat oven to 350 degrees.  Line a 9×13-inch baking pan with foil, leaving about a one-inch overhang on all sides (do this in two foil layers).  Spray with non-stick cooking spray.
2.  Whisk together the cocoa and boiling water in a large bowl until smooth.
3.  Add unsweetened chocolate and whisk until chocolate is melted.
4.  Whisk in melted butter and oil (mixture may look curdled).
5.  Add eggs, yolks, and vanilla and continue to whisk until smooth.
6.  Whisk in sugar until fully incorporated.
7.  Add flour and salt and mix with rubber spatula until combined.
8.  Fold in bittersweet or semisweet chocolate pieces.
9.  Scrape batter into prepared pan and bake until a toothpick inserted halfway between the edge and center comes out with just a few moist crumbs on it, about 30-35 minutes.  Transfer pan to wire rack and cool 1 1/2 hours.
10.  Using foil overhang, lift brownies from pan.  Return them to wire rack and let cool completely, about 1 hour.  Cut into 2″ squares and serve.

If you like thicker brownies, just bake in a smaller pan and increase cooking time.

Makes 24 brownies 


Source:  Adapted from Cook’s Illustrated

Best Chocolate Chip Cookies Ever


I. Can’t. Even.  How many chocolate chip recipes are there in the world?  I have no idea.

The best ones I had ever had, UNTIL NOW, were from The Cookie Place in Rexburg, Idaho.  Seriously.  Four big cookies in a box for $12, but so dang worth it!

Then one day I was making chocolate chip cookies with Thrive’s Classic Cookie Dough Mix and my husband said add pecans. So I did.  And then he asked “What’s Thrive Macaroon Cookie Mix?”  And I said that it was a little piece of coconut heaven, so we added that as well.

The results were simply life changing.  Enough said.  Try them for yourself. You’re welcome.


Ingredients:

3 1/3 cups Thrive Classic Cookie Dough mix

2 sticks of butter (1 cup), softened

1/4 cup Thrive Macaroon Cookie Mix

1 1/2 cups semisweet chocolate chips

1 cup chopped pecans

3 T. water


  1. Preheat oven on convection bake to 325 degrees F., or regular bake at 350 degrees.
  2. Place the butter in a stand mixer and mix until creamy.
  3. Add in the cookie mixes, semisweet chocolate chips, pecans, and water.  Mix until well combined.
  4. Line two cookie sheets with parchment paper and drop cookie dough on each.  I used a medium cookie scoop and got about 13 cookies on each sheet.
  5. Bake on convection for about 12 minutes–we like our cookies a little softer so 12 minutes worked for us.


Source: Thrive Classic Cookie Dough Mix recipe on can with my variations.

Holiday Swirled Sugar Cookies


These cookies look pretty similar to the ones I saw on the Food Network site, and were a big hit at a Cookie Swap I attended last week. In typical ME fashion, I tried a new recipe to make cookies for the swap and this was also my first time working with Royal frosting.

But it’s all good.  Everyone asked how I did the cool swirl and we all thought they were quite tasty.  I squirreled away more of the cookies that I brought than any other cookie on the table.  I can be selfish, right?  Everyone was so full from the dinner we had that I don’t think they noticed.  LOL!!

One of the reasons the cookies were so good was that I used  Thrive Foods Vanilla Sugar Cookie Mix . What a time saver!

Still experiencing technical difficulties with the recipe format, so enjoy the old school way!


Ingredients:

COOKIES:

Thrive Vanilla Sugar Cookie Mix, pantry can

2 T. flour

3/4 c. butter

1 egg

2 T. water


ROYAL ICING:

1 lb. powdered sugar

2 T. meringue powder

Red and Green gel food coloring

White sugar sprinkles


Instructions:

  1. Follow the directions on the can of cookie mix, adding the 2 T. of flour to the dry cookie mix (for rolled and cut cookies).
  2. Shape the dough into a disk, wrap and refrigerate until firm, about 1 hour*.
  3. Line 2 baking sheets with parchment paper.
  4. Generously dust your work surface with powdered sugar and roll out the dough to 1/2 inch thick.
  5. Cut cookie dough with a 2-inch round cookie cutter, re-rolling scraps and cutting more cookies.
  6. Place cookies about 2 inches apart on the prepared baking sheets.
  7. Refrigerate cookies until firm, about 1 hour.
  8. Place oven racks in the upper and lower thirds of the oven and preheat to 325 degrees F. on Convection bake (350 degrees for regular oven).
  9. Bake the cookies, rotating the pans halfway through, until lightly browned around the edges, 9-11 minutes.  Cool completely on cookie sheets.
  10. For the Royal Icing: combine the powdered sugar and meringue powder in a large bowl.  Add 7 T. water and beat with an electric mixer on medium-high speed until soft glossy peaks form, adding up to 8 T. of water  if necessary to make a smooth icing that thickly coats the back of a spoon.
  11. Line a baking sheet with parchment and set a cooling rack on top.
  12. Put 1/4 c. icing into each of 2 small bowls.  Add 9 drops red food coloring to one bowl, stirring until evenly combined. Add 2 drops of green food coloring to the second bowl and stir until evenly combined.
  13. Pour the remaining white icing into a clean, rimmed baking sheet and spread or shake evenly to coat it.  Drizzle the red icing over the white, then the green icing.
  14. One at a time, put the cookies face-down into the icing, taking the cookies out one at a time, shaking gently to let excess icing drip off.
  15. Place cookies right side up on the prepared cooling rack. Decorate with sprinkles, if desired.
  16. Let icing harden completely before serving, about an hour.


Note: you can place the dough in the freezer if you are short on time.  That’s what I had to do!

Source: adapted from Food Network.

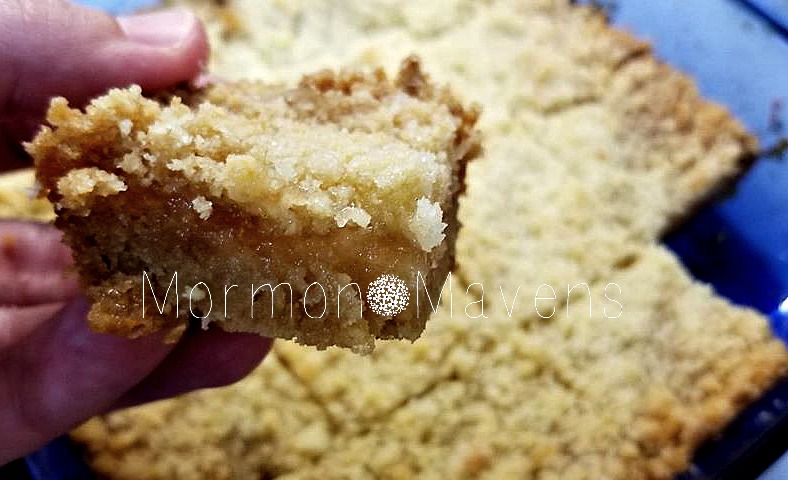
Use-it-Up Jam Bars

jam bars

If you have too many jam jars in the fridge and you’d like to free up some space, this recipe is for you.  And the beauty of it is that you can just mix together whatever jam flavors you’ve got!  

Now for this particular batch, I had a jar of pear jam that I wanted to use up (nobody would eat it on toast).  Once I made it into a cookie bar creation, it was a hit!

But I’ve taken a few jars and simply combined what was left of the jam residue…..just need a cup total.  The results are always tasty.

Hmmm….wonder how it would be with fruit butters!  I’ll have to try that next.

I make this with Thrive Life’s Vanilla Sugar Cookie Dough Mix because that’s what I always keep on hand, but you can use another mix.

Use-It-Up Jam Bars
Yields 16
A tasty way to use up leftover jams and jellies from the fridge.
Write a review
Print
Prep Time
10 min
Cook Time
35 min
Total Time
45 min
Prep Time
10 min
Cook Time
35 min
Total Time
45 min
Ingredients
  1. 2 1/4 cups Thrive Life Vanilla Sugar Cookie Dough Mix
  2. 1/2 cup cold butter
  3. 3 Tbsp. water
  4. 1 cup jam or jelly
Instructions
  1. Preheat oven to 375 degrees. Grease an 8x8-inch baking pan.
  2. Cut the cold butter into large dices. Place the cookie mix and the butter into a food processor with the water. Pulse until the mixture resembles coarse crumbs. Remove 1 1/2 cups of this mixture and set aside.
  3. Pour remaining crumb mixture into the baking dish and evenly spread it out. Using the bottom of a measuring cup, press the mixture down to form the bottom crust.
  4. Spread the jam over the bottom crust evenly.
  5. Sprinkle the reserved crumb mixture evenly over the jam.
  6. Bake for 30-35 minutes. Allow to cool completely before cutting into squares and eating.
Notes
  1. Use any combination of fruit jams and/or jellies to equal the 1 cup of jam in the ingredient list.
Mormon Mavens https://www.mormonmavens.com/

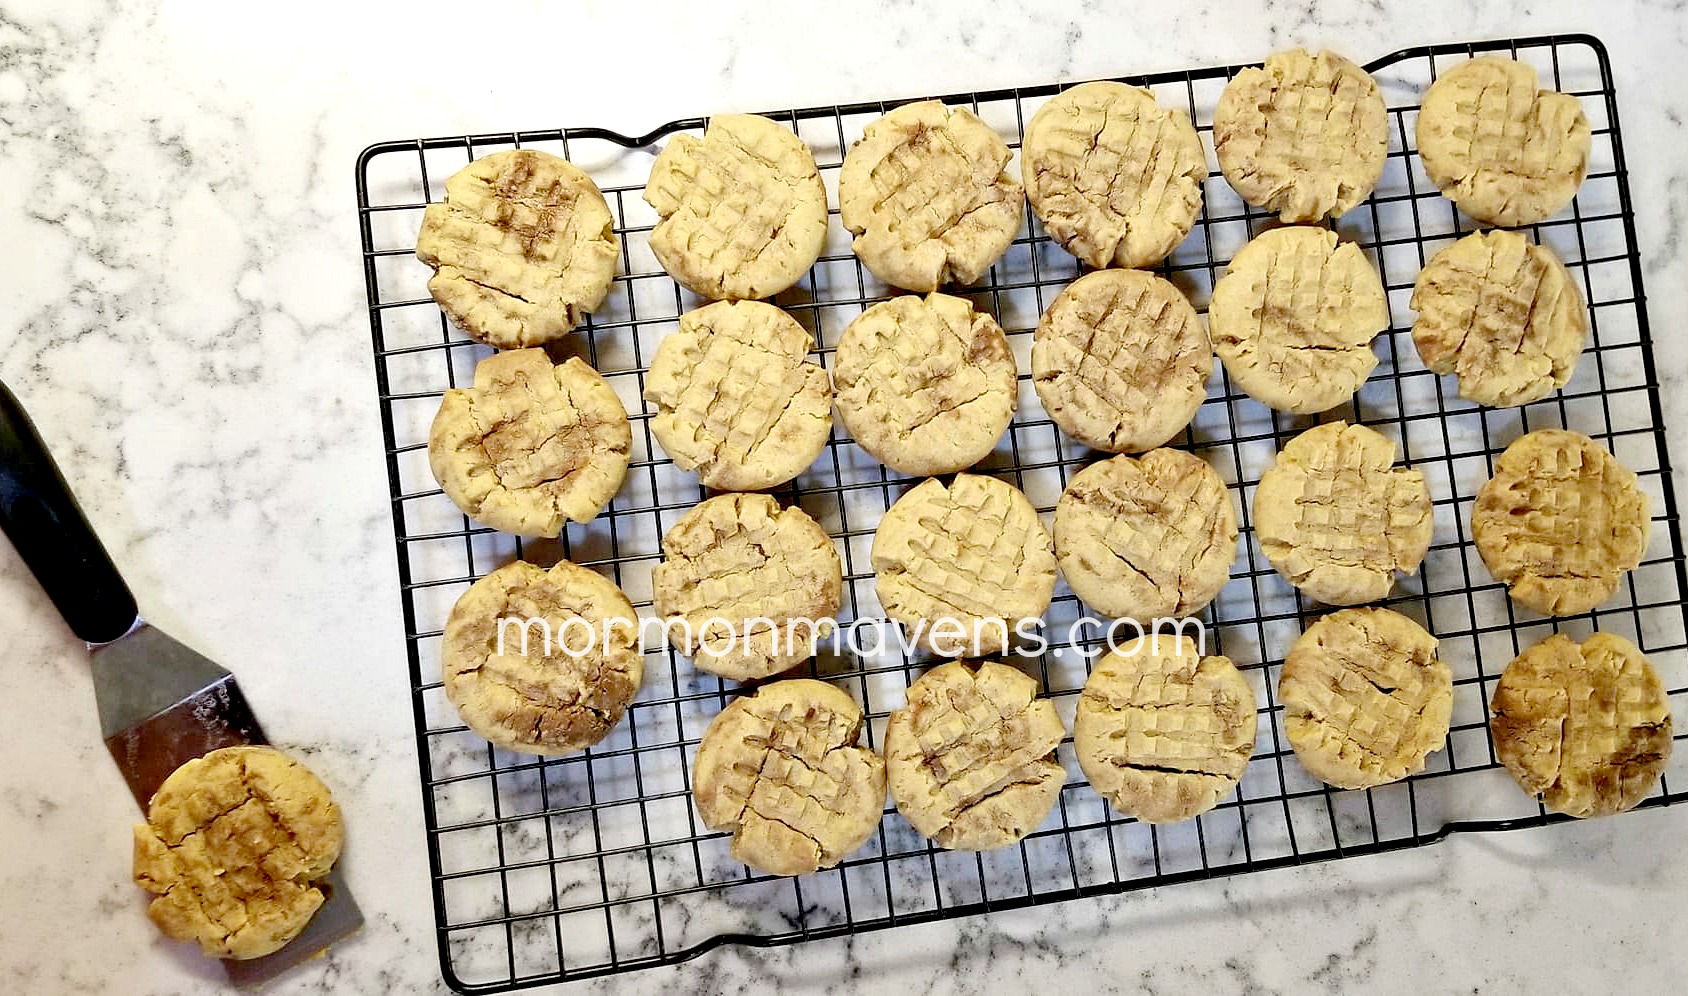
Nutella Peanut Butter Cookies

Anyone who knows my family knows that we love our peanut butter.  I mean, we buy the giant 5-pound Peter Pan canisters at Sam’s, for cryin’ out loud.  

Nutella?  Well, we may or may not have been known to just grab some by the spoonful.  

So combining the two was sure to be a hit!

nutella peanut butter cookies

I think what I love most about these cookies, though, is the texture.  They have this wonderful, melt-in-your-mouth-ness. 

Heavenly.

nutella peanut butter cookies

Nutella Peanut Butter Cookies
Yields 2
An easy recipe with a great texture!
Write a review
Print
Prep Time
30 min
Cook Time
15 min
Total Time
45 min
Prep Time
30 min
Cook Time
15 min
Total Time
45 min
Ingredients
  1. 1/2 cup butter, softened
  2. 3/4 cup creamy peanut butter
  3. 1/2 cup sugar
  4. 1/2 cup brown sugar, packed
  5. 1 egg
  6. 1/2 tsp. vanilla
  7. 1 3/4 cup all-purpose flour
  8. 3/4 tsp. baking soda
  9. 1/4 tsp. salt
  10. 1/3 cup Nutella
Instructions
  1. Cream the butter, peanut butter, and sugars in a mixer for several minutes until light and fluffy. Add in the egg and vanilla and mix till well-combined.
  2. In a separate bowl, combine the flour, baking soda, and salt and whisk together.
  3. With the mixer on low, slowly add the flour mixture until it just barely comes together.
  4. Scoop the Nutella into a microwave-safe bowl and nuke it for about 30 seconds. Drizzle this over the cookie dough and fold/cut in the Nutella just to the point where the dough is marbled.
  5. Cover the dough and place in the fridge to chill for 15 minutes. Preheat the oven to 350 degrees.
  6. Remove the dough from the fridge and form into balls. Place about an inch apart on a cookie sheet (I used parchment paper on mine for easy clean up!). Use a fork to make criss-cross marks, gently pressing the balls down to about half their "starting" height.
  7. Bake for 12-15 minutes, but keep an eye on them. You only want them to bake until the edges are just barely starting to turn a light brown. Allow them to cool for a few minutes, then place them on a cooling rack to finish cooling.
Notes
  1. The original recipe from Six Sisters Stuff recommended 8-10 minutes for baking, but this was not nearly long enough in my oven.
Mormon Mavens https://www.mormonmavens.com/

Peppermint Bark Rice Krispie Treats

This recipe was originally posted on February 16, 2012.  We thought we would bring it back for the holidays!

These are a tasty rendition of the classic Rice Krispie Treat and are great for any holiday involving chocolate and mint–and they are so pretty!  I have made these for our youth at church and for several family gatherings and they are a big hit.  Personally, I can’t stay away from the platter–so many favorite flavors.

Peppermint Bark Rice Krispie Treats
Write a review
Print
Ingredients
  1. 1 10.5 oz. bag of peppermint mini marshmallows*
  2. 4 tablespoons butter, plus extra to butter the pan
  3. 5-6 oz. krispy rice cereal
  4. 3 tablespoons semi-sweet or dark chocolate chips
  5. 3 tablespoons white chocolate chips
  6. 1/2 teaspoon vegetable oil, divided (I used shortening)
  7. a few drops peppermint extract
  8. 2-3 medium sized candy canes, crushed
Instructions
  1. Line a 9×13 pan with foil and lightly butter bottom of pan and about 1 inch up the sides.
  2. Melt butter in a very large bowl in the microwave. Add marshmallows and stir to coat. Microwave on high for 30 seconds at a time until melted and smooth, stirring as you go.
  3. Add the krispy rice cereal and stir to evenly combine. With buttered hands, press mixture into pan.
  4. Place the white chocolate chips and about 1/2 teaspoon or less of shortening in a small bowl. Heat in microwave in 30 second intervals on 50% power, stirring in between until melted and smooth. Repeat same process with the semi-sweet chocolate chips and add a few drops of peppermint extract.
  5. Drizzle both chocolates on top of the treats and sprinkle with the crushed candy canes–I used those that are more porous, you know, the kind you can stick into a hole in an orange and suck the juice through? Really…have you never tried that? Anyway, let sit until chocolate is set. You can put it in the refrigerator to speed up the process. Cut into squares and oh my goodness….
Notes
  1. * If you can’t find the peppermint marshmallows, use regular and add about 1/4 teaspoon peppermint extract to the melted marshmallow mixture.
Adapted from Our Best Bites
Mormon Mavens https://www.mormonmavens.com/