Jezebel Sauce

This was a very popular post from December 17,2015, especially during the holiday season and into the New Year.  Anna served it as part of her Christmas Eve meal appetizer offering this year.  Just can’t tell you how good this is so you will have to experience it for yourself.

Don’t be afraid of the horseradish!  It’s a subtle kick and the sweetness of the preserves and marmalade pair well with it.

I must apologize for the size of the cream cheese block on the image.  Someone–who shall remain nameless–decided to cut a chunk off for their bagel one morning.  Although the whipped cream cheese container was RIGHT NEXT TO IT.  Just sayin’.  I really need to label my blog recipe ingredients or something.

And a shout out for holding on to your Mom’s wedding china. This is served on a salad plate from her pattern.  I have this and a bread plate.  I try to use these treasured pieces from Mom, and from my grandmothers, to honor their memory and their homemaking.
Jezebel Sauce
Write a review
Print
Ingredients
  1. 18-oz. jar of pineapple preserves
  2. 18-oz. jar of apricot preserves
  3. 1/2 cup orange marmalade
  4. 3.5-oz. jar of prepared horseradish
  5. 1 tablespoon dry mustard
  6. 8-oz. pkg. of cream cheese (I use the lower fat Neufchatel version)
Instructions
  1. Combine all ingredients and store in refrigerator. This will keep well for about 2 weeks. Makes about 3 cups of sauce.
  2. To serve, pour over cream cheese and serve with snack crackers, or use your imagination! But it’s really good on cream cheese. I bet it would be great on a cream cheese bagel.
Adapted from Paula Deen
Mormon Mavens https://www.mormonmavens.com/

Slow Cooker Apple Butter

How often do you use apple butter?  Yeah, I didn’t used to use it that much. Maybe I would buy some at a country store up in the mountains, but it was not a staple in my kitchen.

And then I found this great recipe for bran muffins–moist and sweet and healthy and delicious.  And one of the ingredients is apple butter.  Now, they have some pretty good options at the grocery store but I didn’t see a jar small enough for just a portion for the recipe.  Enter Magnolia Journal and all the tastes.

This is a slow cooker apple butter and it is so good.  Not too sweet, just the right amount of spice.

Go ahead and slather some on a piece of buttered toast–yeah, that good.  We will be eating it more often around here–and it freezes well, so that’s a plus.

Slow Cooker Apple Butter
Write a review
Print
Ingredients
  1. 12 medium cooking apples (I used McIntosh and a few Galas) peeled, cored, and sliced.
  2. 2 cups sugar
  3. 1/2 teaspoon ground cinnamon
  4. 1 1/2 teaspoons ground cloves
  5. 1/2 teaspoon ground nutmeg
  6. 1/4 teaspoon salt
Instructions
  1. Place apples in a 5 or 6-quart slow cooker. Stir in sugar, cinnamon, cloves, nutmeg, and salt.
  2. Cover and cook on high for 4 hours. Uncover and stir. Leave uncovered and cook on high 2-2 1/2 hours more or until apples are very tender and most of the liquid is evaporated, stirring occasionally.
  3. Cool mixture at least 1 hour or cover and chill overnight. Process with an immersion blender.
  4. Spoon apple butter into half-pint freezer containers, leaving a 1/2 inch head space.
  5. Seal and label. Store for 1 week in the refrigerator or up to 1 year in the freezer.
Notes
  1. Note: You can also process this in a blender or food processor, half a batch at a time. It will be slightly lighter in color and have a thinner consistency.
Adapted from Magnolia Journal
Mormon Mavens https://www.mormonmavens.com/

Berry Honey


Berry Honey highlights the versatility of a pantry basic that’s the “bees knees.” How many things can you think of that pair well with berries and honey?

This recipe is a versatile little sauce that can be drizzled over ice cream–I think vanilla would be awesome–pancakes, waffles, fresh fruit.  We used it in place of maple syrup over Honey-Lemon Cottage Cheese Pancakes.

Ooh…put it on toast!

Quick prep and readily available ingredients make this Berry Honey a great addition to your pantry.

Berry Honey
Write a review
Print
Ingredients
  1. 2 cups fresh strawberries, raspberries or blackberries
  2. 1 cup honey, mild
Instructions
  1. Blend berries until smooth. Strain through a fine mesh strainer into a medium bowl and discard seeds.
  2. Let puree stand 10 minutes and skim off any foam.
  3. Whisk the honey into the puree. Transfer to a jar with a lid.
Notes
  1. Keeps in refrigerator for up to 2 weeks.
Adapted from Magnolia Journal
Mormon Mavens https://www.mormonmavens.com/

Chocolate Fondue


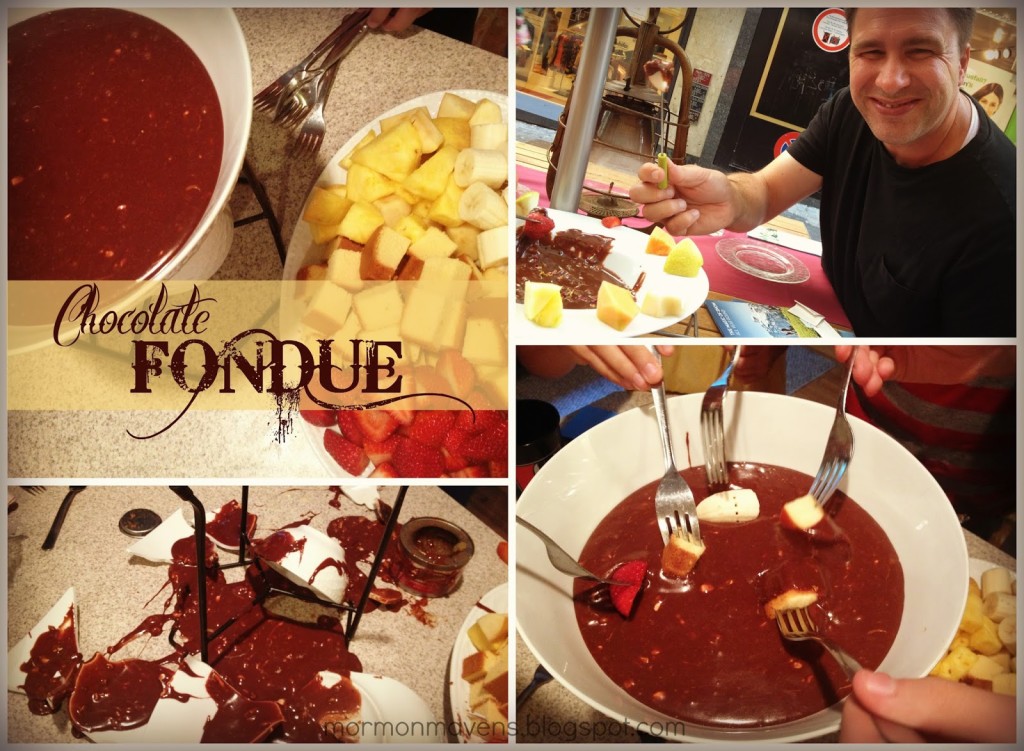
I recently returned from a wonderful river cruise in Europe with my husband and my parents.  We had a wonderful time!  Our first stop before boarding the boat was Lucerne, Switzerland.  Chocolate everywhere!  My kind of place.  We had lunch one day at a little restaurant on a side street….a fondue house.  We grabbed a table outside and checked out the menu.  We had every intention of having cheese fondue but when we saw the prices (holy cheese!) we quickly decided on the cheapest fondue item for our meal:  chocolate fondue (and that was still really expensive).  

 
It. was. uh. mazing.  (That’s my hubby in the pic above, enjoying a tasty chocolate lunch in the heart of Lucerne.)  Then we found out it was nothing more than melted chocolate bars and cream.  What?!?  I knew as soon as we got home I had to try this with the kids.  So we did.  And it tasted exactly the same!  Well, until our makeshift fondue pot exploded.  Yeah, that wasn’t as tasty.  The next time we made it we didn’t worry about having it on a flame.  It didn’t stay in the bowl long enough to harden up anyway….we ate it too fast!
 
 
Ingredients:
6 small Toblerone bars
heavy cream, about 1/2 cup to start
 
1.  Unwrap the bars of chocolate, break them up, and place the pieces in a saucepan with the cream.  
2.  Stir while it melts and remove from heat when the mixture is smooth.  Add more cream to get your preferred consistency for dipping.
3.  Serve with cut up fruit, pretzels, cubed pound cake, etc.  My personal favorites are strawberries and fresh pineapple.
 
You can use any combination of Toblerone flavors.  We used half-yellow packaged bar, half blue-packaged bar (I believe those are the technical terms).  My local grocery store carries those as well as a dark chocolate and a white chocolate.  Mix and match to your heart’s content!
 
Originally posted on September 30, 2013.

Pizza Dip


When I found this recipe on–where else?–Pinterest, I figured it would be pretty good.  I didn’t know it would be AWESOME.  I made the original dip but also made a second dip with different toppings.  Both were a hit. But I have some bad news. If you make this for an event or party, you will have no leftovers to enjoy.


Ingredients:
4 ounces cream cheese, softened
1/4 cup sour cream
1/4 cup mayonnaise
1/2 cup shredded mozzarella cheese
1/4 cup grated Parmesan cheese
1 cup pizza or spaghetti sauce
1/2 cup shredded mozzarella cheese
1/4 cup grated Parmesan cheese
pizza toppings of your choice

1.  Mix the cream cheese, sour cream, mayonnaise, 1/2 cup mozzarella, and 1/4 cup parmesan together in a bowl. Spread this into a shallow dish, like pie plate.
2.  Spread the pizza or spaghetti sauce on top. Sprinkle on the remaining cheeses and whatever toppings you like (I chose mini pepperoni slices for one and pineapple tidbits and Canadian bacon for the other).
3.  Bake at 350 degrees for about 20 minutes, or until it all looks deliciously melted and slightly bubbling along the edges.
4.  Serve with crackers of your choice, bread slices, bread sticks, etc.

For serving:  I got baguettes and sliced them diagonally, about 1/2″ thick.  I drizzled them with a little olive oil, sprinkled them with salt and pepper, and baked them for about 8 minutes in a 425 degree oven.
nomorepizzadip.jpg


Originally posted on April 29, 2013.


Bittersweet Chocolate Sauce


Bittersweet-Chocolate-Sauce.jpg

Originally posted on July 29, 2011.

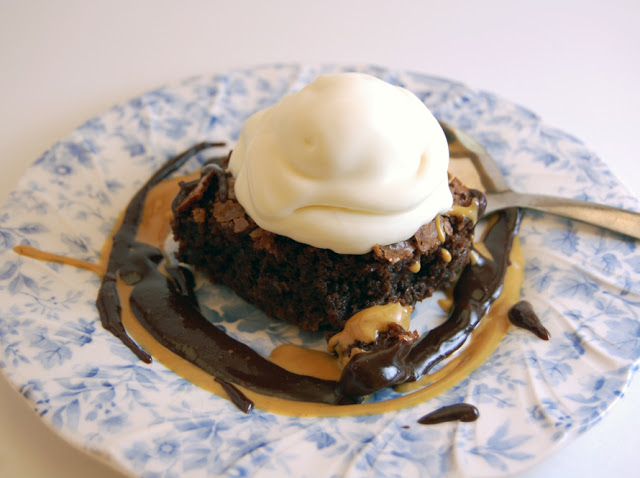
This is great served over vanilla ice cream with toasted coconut and toasted almonds.  Or on a Chewy Brownie sundae with 3 Ingredient Ice Cream and warmed peanut butter as a second sauce.

And by the way, this peanut butter thing is one of the most amazing secrets I’ve ever found.  While on vacation at Disney World one year, we visited the wonderful ice cream parlor, Beaches and Cream.  I ordered something with hot fudge and peanut butter sauce and was in utter ecstasy!  When I asked how they made the peanut butter sauce I was floored when they said it’s just warmed up peanut butter.  Now whenever we have sundaes at home, we always have this peanut butter “sauce” with this chocolate sauce recipe.  Yeah.  Utter ecstasy.

Brownie-Sundae.jpg


Bittersweet Chocolate Sauce
Write a review
Print
Ingredients
  1. 1/4 c. butter
  2. 1 1/2 ounces unsweetened chocolate
  3. 3/4 c. sugar
  4. 1/4 c. cocoa
  5. 1/4 c. half and half, whole milk, or heavy cream
  6. 1/8 tsp. salt
  7. 1 tsp. vanilla
Instructions
  1. Place butter and unsweetened chocolate in a small saucepan and melt over low heat, stirring constantly.
  2. Add sugar, cocoa, half and half, and salt. Stir until combined. Bring slowly to a gentle boil withOUT stirring (well, maybe you could stir a couple of times). If you let it go too long, the sides begin to burn; but if you don’t let it go long enough, the sugar crystals won’t dissolve and the sauce will be gritty.
  3. Remove from heat and add vanilla.
Adapted from Betty Crocker Chocolate Cookbook
Mormon Mavens https://www.mormonmavens.com/


Quick Bean Dip


It was one of those nights when I needed a really quick meal because it had been a busy day of Body Pump, Yoga, a couple of errands–one out of town–finishing up the mowing, paying bills, updating files…  Oh sorry.  I guess you didn’t need all those details, but you get my point.

I just wanted to relax and not have to go out to eat (yes I really said that) or spend a lot of time in the kitchen.

Have you tried any of the Delimex Taquitos? They used to be a good back-up entree back when the girls were little, before we were all freaking out about processed foods, and when we lived in a predominantly Hispanic city and anything Mexican was where we went.

Usually I just put these guys in a baking dish, sprinkle grated Mexican cheese blend on them and top them with green enchilada sauce.  Pop them in the oven for 14 minutes and there you go. 

Today I just wanted them a little crunchier so I actually followed the directions on the box and laid them out on a cookie sheet NAKED (the taquitos not the cook!) and baked them.  Well of course I would need some kind of sauce or dip, so I whipped up (literally in like 4 or 5 minutes) a small batch of Thrive Refried Beans, added sour cream, the shredded Mexican blend cheese and some spicy, tasty salsa.

SCORE!!

Quick Bean Dip
Write a review
Print
Ingredients
  1. 1 3/4 c. Thrive Instant Refried Beans
  2. 1 c. water (I added about 2 T. to thin them out a little)
  3. 1/4 c. sour cream
  4. 1/3 c. shredded Mexican Blend cheese
  5. 2-3 T. Herdez Guacamole Salsa
  6. salt to taste
Instructions
  1. Whisk water into beans in a medium saucepan. Bring to a simmer over medium heat for about 3-4 minutes.
  2. Add sour cream, cheese, and salsa and stir to combine.
  3. You're done!
  4. Serve with taquitos or tostadas, whatever your little heart desires.
Mormon Mavens https://www.mormonmavens.com/

Pesto Grilled Cheese


Pesto Grilled Cheese. <sigh>

So my son came back from a recent trip to visit his girlfriend in Utah, and mentioned that he’d had a grilled cheese with pesto. 

“Mom, can we make pesto?”

Duh.  Thrive Life has freeze dried basil, and why have I not tried that before and why am I drooling right now typing this?

Cuz I stinkin’ love basil, that’s why.

So, shaking my head in wonder as to why I’d never thought to make homemade pesto before, I pulled out my phone and searched the Thrive Life recipe site because I just knew our Chef Todd had a recipe for it.  He did.  Yay! 

I told my son he could make it.  (You gotta make them do the things, right?)

IT. WAS. AMAZING.

So of course, I have to share it with you!  The pesto is exactly the same as Chef Todd’s recipe, we just smeared it on our grilled cheese.  We’ve used Gouda, Provolone, Cheddar, and Colby Jack so far.  My fave is Cheddar.  Experiment with your fave cheeses and let me know which turned out best for you!

Pesto Grilled Cheese
Serves 4
This is by far my favorite way to eat a grilled cheese sandwich! If you love pesto.....well, you're welcome.
Write a review
Print
Prep Time
5 min
Cook Time
5 min
Total Time
10 min
Prep Time
5 min
Cook Time
5 min
Total Time
10 min
Ingredients
  1. 1/4 c. pine nuts
  2. 1/4 c. Grated Parmesan Cheese
  3. 1/2 tsp. minced garlic
  4. 2 tbsp. water
  5. 1/4 c. THRIVE Basil
  6. 1 tbsp. THRIVE Parsley
  7. 1/4 tsp. Salt, Table
  8. 1/8 tsp. THRIVE Peppercorn
  9. 1/4 c. really good olive oil
  10. The Sandwich
  11. 8 sli. bread of your choice
  12. 16 sli. cheese of your choice (thin sliced is what we used)
  13. 8 tbsp. butter
Instructions
  1. Using a food processor, pulse together the pine nuts, parmesan, and garlic until well-combined. Add in water, herbs, and salt & peppercorn and pulse again until combined.
  2. Add in the olive oil slowly through the chute while the processor is running. Once combined, remove pesto to a bowl and stir by hand to incorporate all the oil.
  3. Heat a griddle or skillet to medium heat.
  4. Butter one side of each slice of bread. Have your pesto and cheese slices at the ready.
  5. When cook surface is at temperature, place one slice of bread (butter side down) on the griddle, add 2 slices of cheese and spread a heaping tablespoon of pesto over the cheese. Top with a slice of bread, butter side up.
  6. Cook on both sides until golden brown. Enjoy!
Notes
  1. Make up the pesto and keep it in the fridge. Then you can have a pesto grilled cheese anytime you want!
  2. I like my pesto with just a little more salt than Chef Todd's recipe. Adjust according to your tastes.
  3. We've tried Cheddar, Colby Jack, Gouda, and Provolone in these. I think Cheddar is my favorite!
  4. We actually used our George Foreman grill for this at home. An advantage to using this, if you have one, is that you can use much thicker bread and it will compress. We were able to use up some thick sandwich rolls this way!
  5. Really good olive oil? I use a Picual from Beaufort Olive Oil Company. It makes a difference, in my opinion. But use what you have.
Mormon Mavens https://www.mormonmavens.com/

Hummus


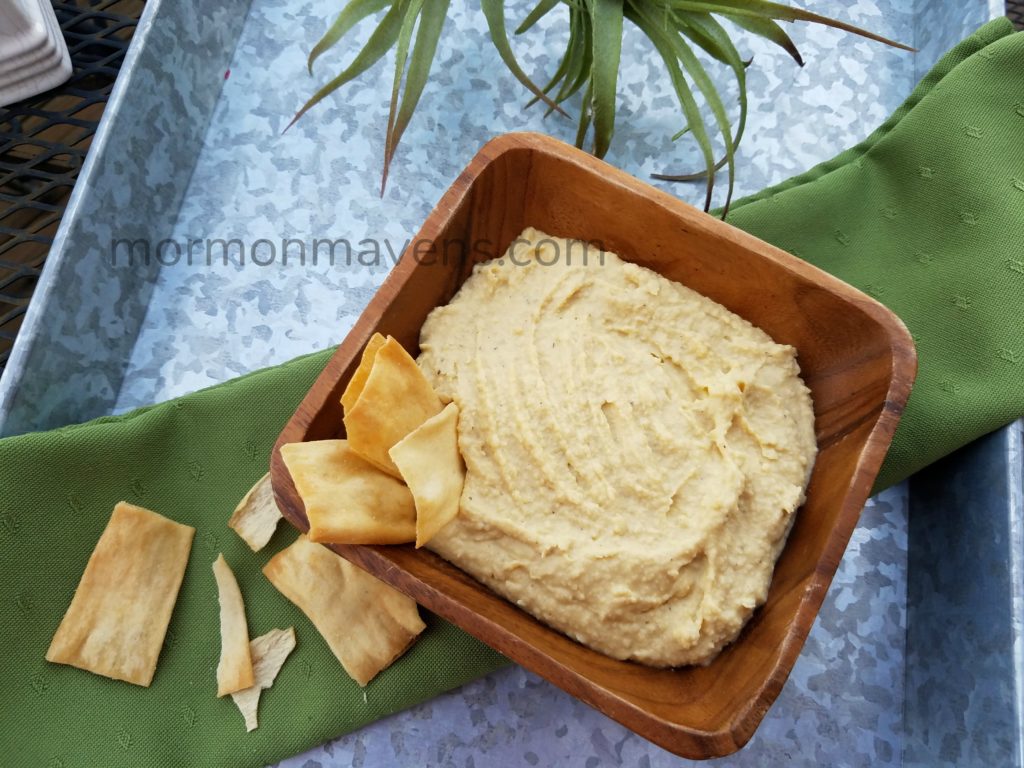
So, I spend a lot of time at our local Family YMCA.  Between Yoga, Body Pump and Zumba, I put in about 6 hours a week–and I work out at home a couple of days.  Anyway, sometimes our Y staff will provide copies of healthy, easy recipes for the patrons to take home.  I have tried a few and they usually turn out pretty tasty.  This hummus is no exception.  I think it took about 5 minutes or so to put together.  It took longer for me to do the “photo shoot” than it did to prepare the recipe.

This is an easy dish to customize, so if you DO like hummus–it’s an acquired taste–and you want a little something extra, try these:

  • Roasted Garlic–for a more mellow flavor, roast the garlic in the oven or on the stove top before adding to the chickpeas.
  • Roasted Red Pepper–use a small jar of red pepper strips (pimientos) and mix most of the peppers in with the hummus in the blender. For more flavor you can use the liquid in the jar in place of some of the oil.  Garnish with a few pepper strips.
  • Southwestern–Decrease the salt and pepper.  Add about 1/8 t. of cumin and a dash of cayenne pepper.


Hummus
Write a review
Print
Ingredients
  1. 1 15-oz. can of chickpeas, drained
  2. 1/4 cup extra virgin olive oil
  3. a few drops of sesame oil
  4. 1 t. fresh minced garlic
  5. 1 T. lemon juice
  6. 1/2 t. salt & 1/4 t. black pepper (to taste)
Instructions
  1. Combine the chickpeas, oils, garlic, and lemon juice in a food processor or blender.
  2. Process to desired consistency, scraping down the sides of the food processor a couple of times during the blending.
  3. If texture is too thick, drizzle in a little more olive oil or a small amount of water.
  4. Scoop into a bowl, stirring in salt and pepper to taste.
Notes
  1. Serve with pita chips, pretzels, or vegetables for dipping.
Adapted from unknown source
Mormon Mavens https://www.mormonmavens.com/

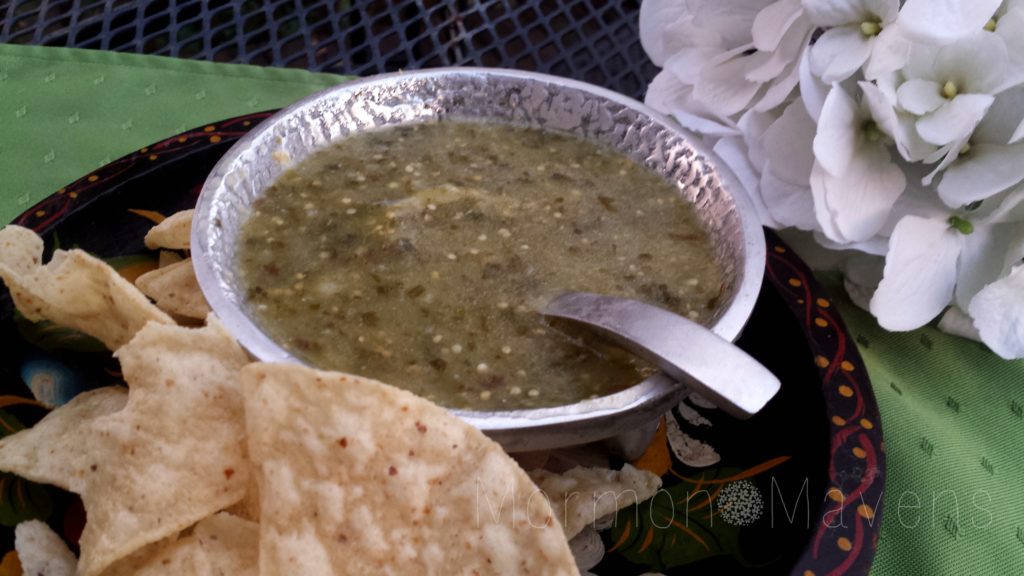
Salsa Verde

salsa-verde


Saucy Recipe #2!  Okay I warned you last week we would have two sauces in a row.  Can I just say QUE RICO!  That means, another yummy recipe for you to try  out.  This is a tasty, fresh, cooked version of what you might have had in your favorite Mexican restaurant.  Hope you enjoy this dish!  Adios!

Salsa Verde
Write a review
Print
Ingredients
  1. 2 lbs. green tomatillos, husks removed and rinsed
  2. 2 garlic cloves peeled
  3. 2 serrano chilies, or more for taste
  4. 1 c. cilantro leaves
  5. 1/4 c. white onion, roughly chopped
  6. 1 t. kosher or sea salt, to taste
  7. 2 T. safflower or corn oil
Instructions
  1. Place the tomatillos, garlic cloves, and chilies in a pot and cover with water. Place over high heat until it comes to a boil. Simmer at medium for about 10 minutes, or until tomatillos change color from a bright to a pale green, are cooked through and are soft but are not coming apart.
  2. Place tomatillos, garlic and chile (start with one and add the other if you need more "heat") and 1/2 cup of the cooking liquid in the blender and puree until smooth.
  3. Add the cilantro leaves, onion and salt and process again. Adjust for taste with salt.
  4. Heat the oil in a pot over medium heat. Once it is hot, but not smoking, pour in the sauce and bring it to a boil. Simmer over medium heat for 6 to 7 minutes, until it thickens and deepens its flavor and color. Turn off the heat.
Notes
  1. Sauce can be stored in a closed container in the refrigerator for weeks. However, the heat level of the sauce will fade with time.
Adapted from Pati's Mexican Table
Mormon Mavens https://www.mormonmavens.com/