Cranberry Almond Shortbread Cookies


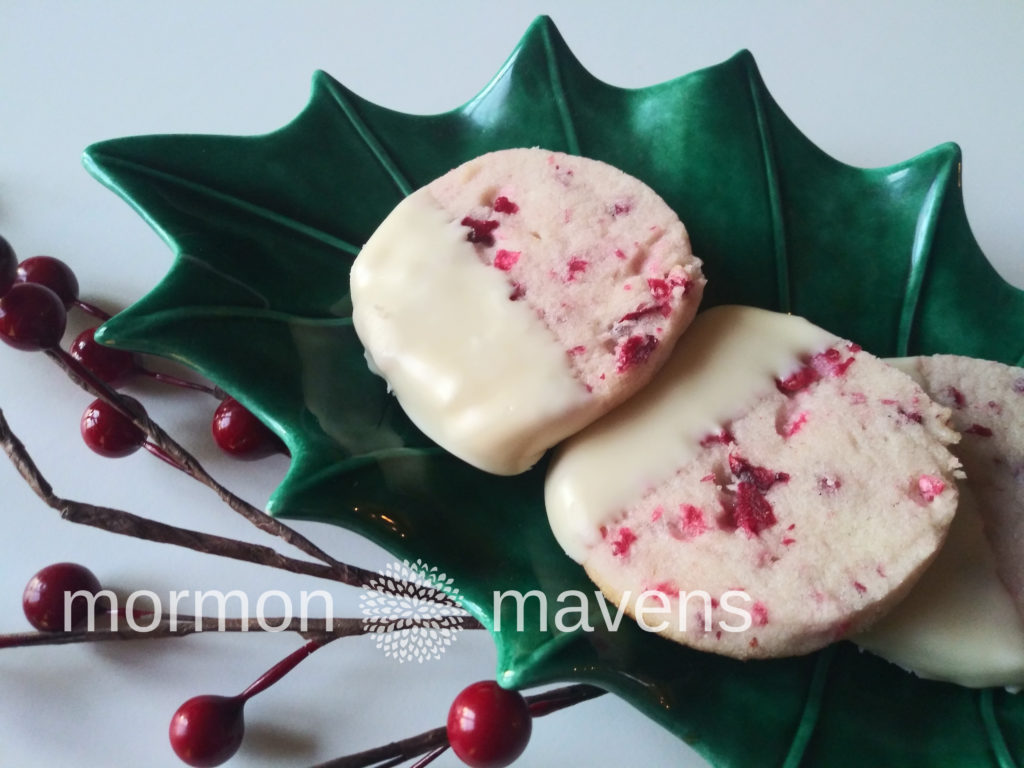
This Cranberry Almond Shortbread cookie recipe has been in my TRY ME folder for about a year. They look so elegant, right?

Since you are probably already in holiday mode right now–earlier than last year, it seems–this would be a good cookie to add you your Christmas Cookie Platter or next Cookie Exchange.  My batch is already in the freezer to be ready to use at a moment’s notice.

I thought this was a very easy recipe to make and I have never made shortbread anything before.  Enjoy!

Cranberry Almond Shortbread Cookies
Yields 56
A sweet shortbread cookie with the joy of cranberries & almond flavoring. Then there's white chocolate...
Write a review
Print
Ingredients
  1. 1 cup butter, softened
  2. 3/4 cup sugar
  3. 1 teaspoon almond extract
  4. 1/4 teaspoon salt
  5. 2 cups all-purpose flour
  6. 1 cup finely chopped, sweetened cranberries
  7. 8 oz. white chocolate (with cocoa butter), cut up
  8. 2 teaspoons shortening
Instructions
  1. In a stand mixer, beat butter on medium to high for 30 seconds. Add sugar, almond extract, and salt. Beat until combined, occasionally scraping sides of bowl. Gradually beat in flour. Stir in cranberries.
  2. Divide dough in half, shaping each half into a 7-inch log, 1 1/2-inch in diameter. Wrap each in waxed paper, twisting the ends of the paper to seal. Chill for at least 2 hours or up to 2 days.
  3. Preheat oven to 375 degrees F. Line cookie sheets with parchment paper and set aside. Cut chilled or frozen logs into 1/4-inch slices. Place slices about 1 inch apart on cookie sheets.
  4. Bake about 10 minutes or just until firm and lightly browned on bottoms. Cool on cookie sheets for 1 minute then transfer to wire racks to cool completely.
  5. In a heavy, medium saucepan combine the white chocolate and shortening and stir over low heat until melted.
  6. Dip each cookie in melted chocolate just halfway then place on wire rack over waxed paper and let stand until set.
Adapted from Better Homes & Gardens
Mormon Mavens https://www.mormonmavens.com/

Holiday Swirled Sugar Cookies


These cookies look pretty similar to the ones I saw on the Food Network site, and were a big hit at a Cookie Swap I attended last week. In typical ME fashion, I tried a new recipe to make cookies for the swap and this was also my first time working with Royal frosting.

But it’s all good.  Everyone asked how I did the cool swirl and we all thought they were quite tasty.  I squirreled away more of the cookies that I brought than any other cookie on the table.  I can be selfish, right?  Everyone was so full from the dinner we had that I don’t think they noticed.  LOL!!

One of the reasons the cookies were so good was that I used  Thrive Foods Vanilla Sugar Cookie Mix . What a time saver!

Still experiencing technical difficulties with the recipe format, so enjoy the old school way!


Ingredients:

COOKIES:

Thrive Vanilla Sugar Cookie Mix, pantry can

2 T. flour

3/4 c. butter

1 egg

2 T. water


ROYAL ICING:

1 lb. powdered sugar

2 T. meringue powder

Red and Green gel food coloring

White sugar sprinkles


Instructions:

  1. Follow the directions on the can of cookie mix, adding the 2 T. of flour to the dry cookie mix (for rolled and cut cookies).
  2. Shape the dough into a disk, wrap and refrigerate until firm, about 1 hour*.
  3. Line 2 baking sheets with parchment paper.
  4. Generously dust your work surface with powdered sugar and roll out the dough to 1/2 inch thick.
  5. Cut cookie dough with a 2-inch round cookie cutter, re-rolling scraps and cutting more cookies.
  6. Place cookies about 2 inches apart on the prepared baking sheets.
  7. Refrigerate cookies until firm, about 1 hour.
  8. Place oven racks in the upper and lower thirds of the oven and preheat to 325 degrees F. on Convection bake (350 degrees for regular oven).
  9. Bake the cookies, rotating the pans halfway through, until lightly browned around the edges, 9-11 minutes.  Cool completely on cookie sheets.
  10. For the Royal Icing: combine the powdered sugar and meringue powder in a large bowl.  Add 7 T. water and beat with an electric mixer on medium-high speed until soft glossy peaks form, adding up to 8 T. of water  if necessary to make a smooth icing that thickly coats the back of a spoon.
  11. Line a baking sheet with parchment and set a cooling rack on top.
  12. Put 1/4 c. icing into each of 2 small bowls.  Add 9 drops red food coloring to one bowl, stirring until evenly combined. Add 2 drops of green food coloring to the second bowl and stir until evenly combined.
  13. Pour the remaining white icing into a clean, rimmed baking sheet and spread or shake evenly to coat it.  Drizzle the red icing over the white, then the green icing.
  14. One at a time, put the cookies face-down into the icing, taking the cookies out one at a time, shaking gently to let excess icing drip off.
  15. Place cookies right side up on the prepared cooling rack. Decorate with sprinkles, if desired.
  16. Let icing harden completely before serving, about an hour.


Note: you can place the dough in the freezer if you are short on time.  That’s what I had to do!

Source: adapted from Food Network.