Fudgy Bonbons with Candy Cane Sprinkles


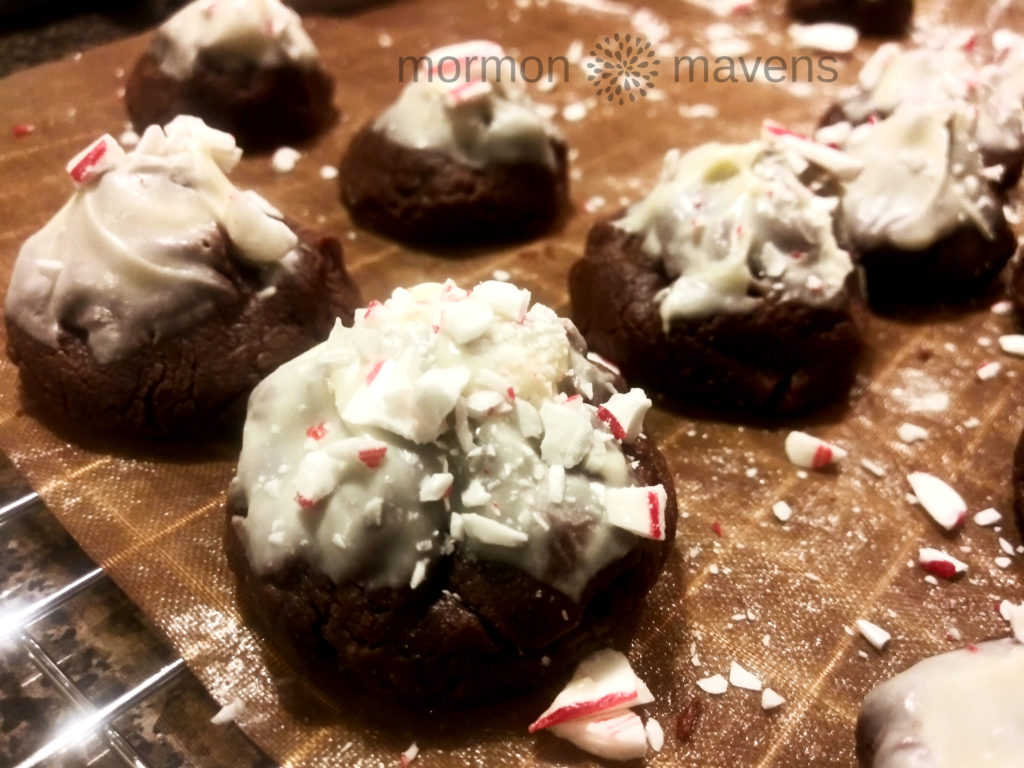
Did you know that today is National Candy Cane Day?  Yeah, me neither. I found out when I was thinking of something to post for today and looked up a list of holidays.  I took one of my favorite candy recipes and added a little peppermint sparkle for a family Christmas party.
  
I can’t really remember the year that I got the original recipe.  I think maybe the first Christmas that we flew home from El Paso, Texas–maybe 1996 or 1997.
  
Anyway, we were at my mother-in-law’s house and I was trying to find something sweet to eat.  There were some holiday cookies and stuff over on top of her chest freezer and so I picked up something chocolate.  I thought it tasted pretty good, although it was dry from sitting out all day. I asked Verna where they came from and she said her sister, Gertie Sutton, had brought them over.  I contacted Aunt Gertie and she sent me the recipe.
  
The first time I made them I thought I was in Chocolate Heaven!  These have wowed my friends and family for years.
 
This recipe, from Mary Anne Tyndall of North Carolina, won $50,000 in the 1994 Pillsbury Bake-Off.
 
 
WARNING: Side effects of this product include addiction and sheer pleasure!
Fudgy Bonbons with Candy Cane Sprinkles
A delectable combination of semi-sweet and white chocolate, with a touch of peppermint sparkle.
Write a review
Print
Ingredients
  1. 60 milk chocolate Hershey’s Hugs, unwrapped
  2. 1 (12-oz.) pkg. semi-sweet chocolate chips
  3. 1/4 cup butter or margarine
  4. 1 (14-oz.) can sweetened condensed milk
  5. 2 cups all-purpose flour
  6. 1 teaspoon vanilla extract
  7. 1/3 cup white chocolate chips
  8. crushed candy canes (opt.)
Instructions
  1. Heat oven to 350 degrees F.
  2. In medium saucepan combine Hugs and butter. Cook and stir over very low heat until chips are melted and smooth.
  3. Add sweetened condensed milk to chocolate mixture and mix well. Remove from heat.
  4. Lightly spoon flour into measuring cup and level off before putting in stand mixer bowl. Add chocolate mixture and vanilla. Mix well on medium speed.
  5. Shape 1 tablespoon of dough around each Hug, covering completely. Place bonbons 1 inch apart on UNGREASED cookie sheet (I use parchment for ease of release from pan for cooling).
  6. Bake for 6-8 minutes. DO NOT OVER BAKE. Cookies will be soft and shiny but will become firm as they cool.
  7. Cool bonbons completely on cooling racks.
  8. Melt the white chocolate chips in the microwave according to package directions. You can add a little shortening to thin, if necessary.
  9. Dip the tip of each bonbon into the white chocolate or drizzle over.
  10. Sprinkle tops with candy cane pieces.
Notes
  1. You can get really creative with the basic bonbon recipe by tinting the color of your white chocolate topping/drizzle or by using a completely different topping.
  2. The basic recipe was originally published in September, 2011.
Adapted from Mary Anne Tyndall
Mormon Mavens https://www.mormonmavens.com/

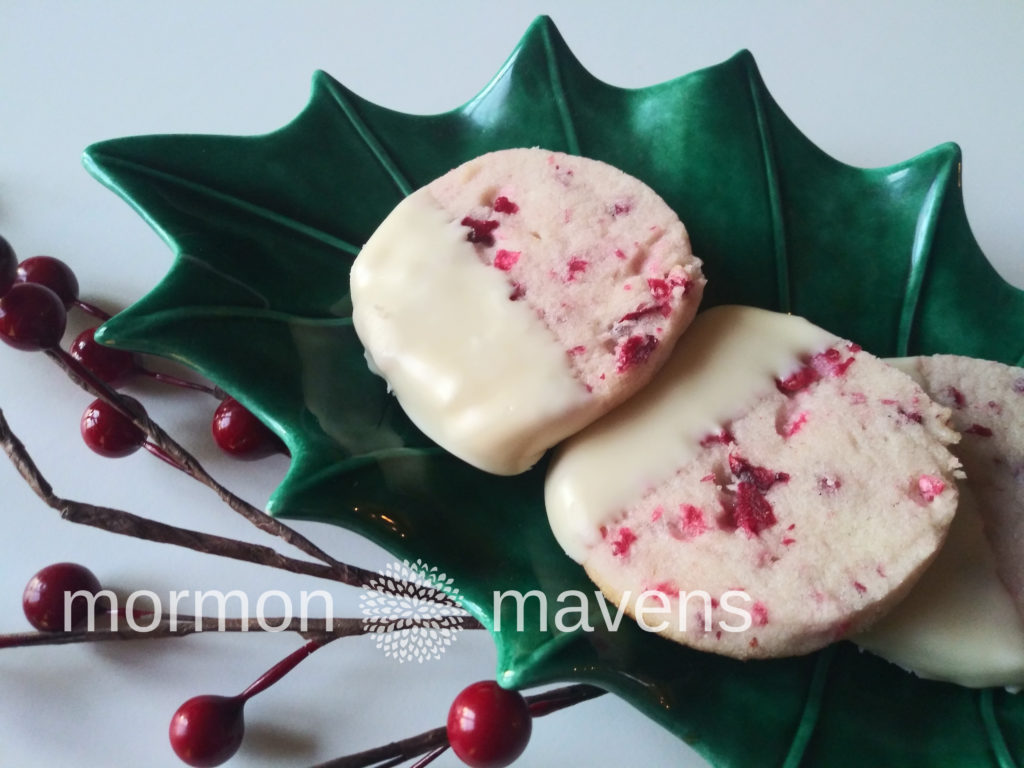
Cranberry Almond Shortbread Cookies


This Cranberry Almond Shortbread cookie recipe has been in my TRY ME folder for about a year. They look so elegant, right?

Since you are probably already in holiday mode right now–earlier than last year, it seems–this would be a good cookie to add you your Christmas Cookie Platter or next Cookie Exchange.  My batch is already in the freezer to be ready to use at a moment’s notice.

I thought this was a very easy recipe to make and I have never made shortbread anything before.  Enjoy!

Cranberry Almond Shortbread Cookies
Yields 56
A sweet shortbread cookie with the joy of cranberries & almond flavoring. Then there's white chocolate...
Write a review
Print
Ingredients
  1. 1 cup butter, softened
  2. 3/4 cup sugar
  3. 1 teaspoon almond extract
  4. 1/4 teaspoon salt
  5. 2 cups all-purpose flour
  6. 1 cup finely chopped, sweetened cranberries
  7. 8 oz. white chocolate (with cocoa butter), cut up
  8. 2 teaspoons shortening
Instructions
  1. In a stand mixer, beat butter on medium to high for 30 seconds. Add sugar, almond extract, and salt. Beat until combined, occasionally scraping sides of bowl. Gradually beat in flour. Stir in cranberries.
  2. Divide dough in half, shaping each half into a 7-inch log, 1 1/2-inch in diameter. Wrap each in waxed paper, twisting the ends of the paper to seal. Chill for at least 2 hours or up to 2 days.
  3. Preheat oven to 375 degrees F. Line cookie sheets with parchment paper and set aside. Cut chilled or frozen logs into 1/4-inch slices. Place slices about 1 inch apart on cookie sheets.
  4. Bake about 10 minutes or just until firm and lightly browned on bottoms. Cool on cookie sheets for 1 minute then transfer to wire racks to cool completely.
  5. In a heavy, medium saucepan combine the white chocolate and shortening and stir over low heat until melted.
  6. Dip each cookie in melted chocolate just halfway then place on wire rack over waxed paper and let stand until set.
Adapted from Better Homes & Gardens
Mormon Mavens https://www.mormonmavens.com/

Christmas Cranberry Bread


Cold weather and Hallmark Christmas movies have me in the mood to make holiday dishes, so this Christmas Cranberry Bread recipe caught my eye. It’s from Magnolia Journal, of course.  Hope you aren’t tired of me sharing!

The combination of cranberries, lemon zest and walnuts had my mouth watering, and when you bite into this delicious quick bread you will be in holiday heaven.

I used freeze-dried sweetened cranberries that I already had in my pantry, so the bread was probably a little sweeter than using frozen or fresh, but it wasn’t overly sweet to me.

Christmas Cranberry Bread
A tasty holiday quick bread full of fruity, nutty goodness.
Write a review
Print
Ingredients
  1. 3 1/2 cups all-purpose flour
  2. 2 cups sugar
  3. 2 tablespoons lemon zest
  4. 4 1/2 teaspoons baking powder
  5. 1 teaspoon ground cinnamon
  6. Dash of nutmeg
  7. 4 eggs
  8. 1 cup vegetable oil
  9. 1/2 cup milk
  10. 1 tablespoon pure maple syrup
  11. 2 cups fresh or frozen cranberries, halved
  12. 1 cup chopped walnuts
Instructions
  1. Preheat oven to 375 degrees F. Grease the bottom and 1/2 inch up the sides of 2 9×5-inch or 8×4-inch loaf pans.
  2. In a very large bowl stir together the flour, sugar, lemon zest, baking powder, salt, cinnamon and nutmeg.
  3. In a medium bowl, lightly beat the eggs. Whisk in the oil, milk and maple syrup. Add to flour mixture and stir to combine (this is a stiff batter). Stir in cranberries and walnuts.
  4. Divide batter between the two prepared loaf pans and spread evenly.
  5. Bake about 60 minutes or until a cake tester placed in the center comes out clean. Let stand in pans on a wire rack for 10 minutes.
  6. Remove loaves from pans and cool completely on rack.
  7. Wrap loaves in plastic wrap or foil and store overnight before slicing, Really. It will crumble like crazy if you don’t.
Adapted from Magnolia Journal
Mormon Mavens https://www.mormonmavens.com/

Our Traditional Thanksgiving Menu


Hi everyone!  I am sitting here at my desk organizing my Holiday Planner.

Every year I tell myself I will be ready earlier than the previous year, and this year is no exception.  We are actually going to be at my youngest daughter’s home for Thanksgiving this year, but I am sure I will be helping out with the meal there.

I will be making a booklet of these recipes, which have been passed down to the cooks in our family, to leave with her so that she has copies of our family’s traditional food.

I thought that I would share this with you a couple of weeks before the big day, just in case you needed some ideas for your feast. You might remember our post from last year, so this is just an updated version.

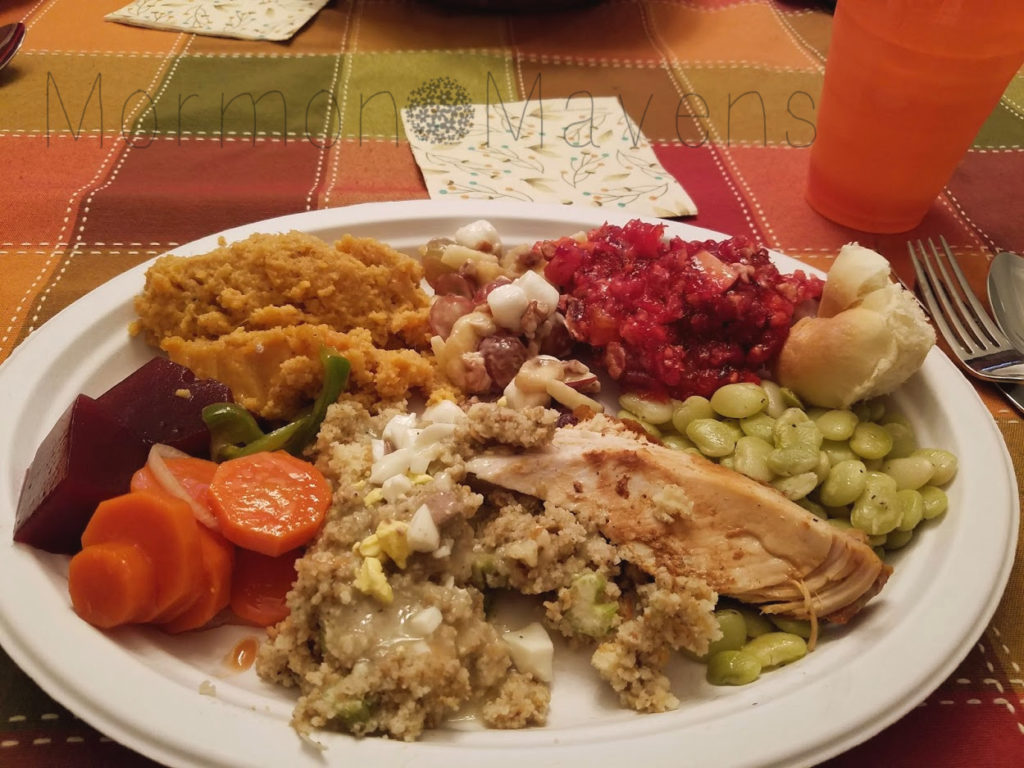
So here it is. I have also provided a link to the dishes that we shared on this blog. Thank goodness I took a picture of my plate last year so that you can see it up close and personal.

If you see another one on the list that you would like to have the recipe for just let me know! For the yeast rolls, we have several recipes to choose from but the one I use is not on the blog yet.


Thanksgiving Menu from Our House to Yours

Deep Fried Turkey
Mother’s Southern Cornbread Dressing
Sweet Potato Pudding
Cranberry Relish
James’ Fruit Salad
Copper Penny Carrots
Seasoned Baby Lima Beans
Giblet Gravy
Homemade Yeast Rolls
Pumpkin Pie with Homemade Whipped Cream


Well, that’s a mouthful–literally. Feel free to share your Thanksgiving favorites in the comments.  We love hearing from you.


Halloween Bat Cupcakes

Want a great alternative to candy, candy, candy for your kids or grand kids at Halloween time?   These fun Bat Cupcakes are a great choice, and their little friends, clementine “pumpkins”, are a healthy sidekick.  Pair these with some green milk and you have a great treat to serve.

Fall is my favorite season and each year I think of how cool it would be to host a little family Halloween party at my house–not quite to the standards of  Tim “The Tool Man” Taylor–but fun, nonetheless.  It would be mostly for my grandchildren, but I think the rest of the family would enjoy it, as well.

But alas, every year I let the precious moment slip by without doing anything but a quick goodie bag for the 3 grands that live close by and a rushed package sent out to the other two who live way out in Utah.  I am lucky to even get it together in time for them to have their goodies before October 31st!  Do ya feel me?

Well, this year I set the intention to do it, and I did!  Yay me!

It wasn’t really a party, but we had a fun Taco Bar for supper and then I had the boys stay in the front room while I got out the treats and arranged them beside our Halloween Tree on the kitchen island.

Let’s just say that they loved the Taco Bar and were thrilled with their fun treats.  I might make this a tradition and maybe add to it as we go.

Halloween Bat Cupcakes
Serves 24
Write a review
Print
Ingredients
  1. 1 box Betty Crocker SuperMoist Dark Chocolate Cake Mix
  2. 1 1/4 cups buttermilk
  3. 1/2 cup vegetable oil
  4. 3 large eggs
  5. 1 pkg. Oreo Mini Chocolate Creme Sandwich Cookies--crush 1 cup & save 24 whole cookies for the bat bodies
  6. Betty Crocker Rich & Creamy Chocolate Frosting (I made my own because I prefer that to the store-bought kind)
  7. 24 Keebler Grasshopper Cookies, cut in halves
  8. White decorating cookie icing (you won't need a lot)
  9. 48 candy eyes
Instructions
  1. Heat oven to 350 degrees F (325 for dark or nonstick pans). Place paper baking cup in each of 24 regular muffin cups. I doubled up on the papers because it just looks nicer when you take them out of the pan.
  2. In a large bowl, beat cake mix, buttermilk, oil and eggs on low speed for 30 seconds, then on medium for 2 minutes. Stir in crushed cookies. Divide batter evenly among muffin cups.
  3. Bake 15 minutes or until toothpick inserted in center comes out clean. Cool 10 minutes in the pans, then remove to cooling racks to cool completely.
  4. Frost cupcakes. Insert 1 grasshopper cookie half on each side of cupcake top to look like bat wings. Squeeze 2 small dots of icing onto each of the 24 mini Oreos and attach candy eyes. Place 1 mini Oreo between bat wings for the body.
Notes
  1. The original recipe does not list food coloring as an ingredient, but makes reference to it in the instructions. They don’t mention a color so I added some black to darken the frosting. It doesn’t really need it because the bat is brown anyway. But, whatever squeals your wheels.
Adapted from Betty Crocker
Mormon Mavens https://www.mormonmavens.com/


Soft Caramel Dip


I love this yummy dip.  It reminds me of all things fall, so I’m posting it today in honor of our first day of school which also reminds me of fall (even though technically it’s still summer!).  I usually serve it with cut up apples and bananas, but you could experiment with other fruits as well as pretzels and various types of cookies (I bet Ginger Snaps would be awesome).  It’s normal for small bits of caramel to never quite get mixed in.  Think of those as hidden treasures.


Ingredients:
1 8-oz. pkg cream cheese, softened
1 cup sour cream
50 store-bought caramels, unwrapped

1.  In a mixer, blend the cream cheese and sour cream together until smooth.
2.  Melt caramels in a microwave safe bowl.
3.  Immediately pour caramel into creamed mixture and blend well until smooth.
4.  Eat right away or store in the fridge.  You may need to warm it a bit in the microwave if it is too stiff from refrigeration.

Source:  my recipe box (no clue where it came from, sorry!)

Originally posted on August 22, 2011.

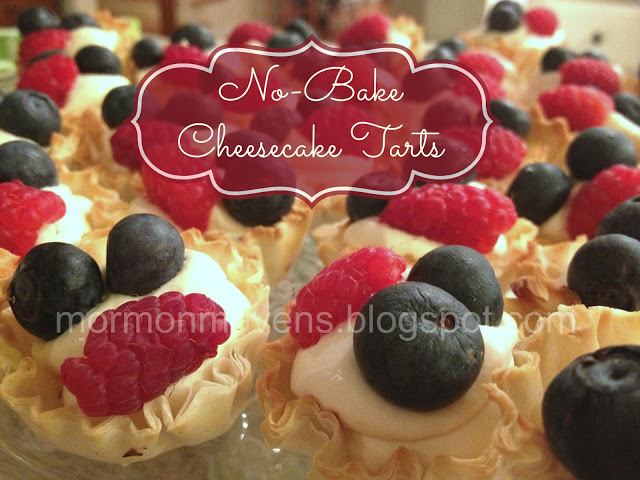
No-Bake Cheesecake Bites

Recently I had some ladies over to my house for a little get together and I wanted to serve something that looked pretty and tasted good but was super easy to make.  I searched the internet and finally decided to try these tasty little morsels.  I’m glad I did.  They were a success, and I’ll be using this recipe again for sure!  These are perfect for parties and showers.  You can make the filling ahead of time and fill the cups just before your guests arrive.  Definitely a keeper!

 
Ingredients:
2 Tbsp. packed brown sugar
1/4 cup. sour cream
1/4 tsp. vanilla
4 ounces cream cheese, softened
1 Tbsp. heavy whipping cream
15 mini Phyllo tart shells (1 package)
berries for garnish
 
1.  In a mixing bowl, beat the brown sugar, sour cream, and vanilla together until well blended.  Add the cream cheese and beat until smooth.  Add the whipping cream and beat until light and fluffy.
2.  If serving right away, simply spoon some of the mix into each tart shell.  If you want to chill it until later, spoon the mix into a zip-top bag, seal, and place in the fridge till you are ready.  Then take the bag out, snip one corner with scissors, and squeeze the mixture through the hole into the tart shells.
3.  Garnish with berries.
 
Source:  Kitchen Treaty (although that recipe adds 1 heaping teaspoon of lemon zest, which I omitted)
Originally posted on March 6, 2013.

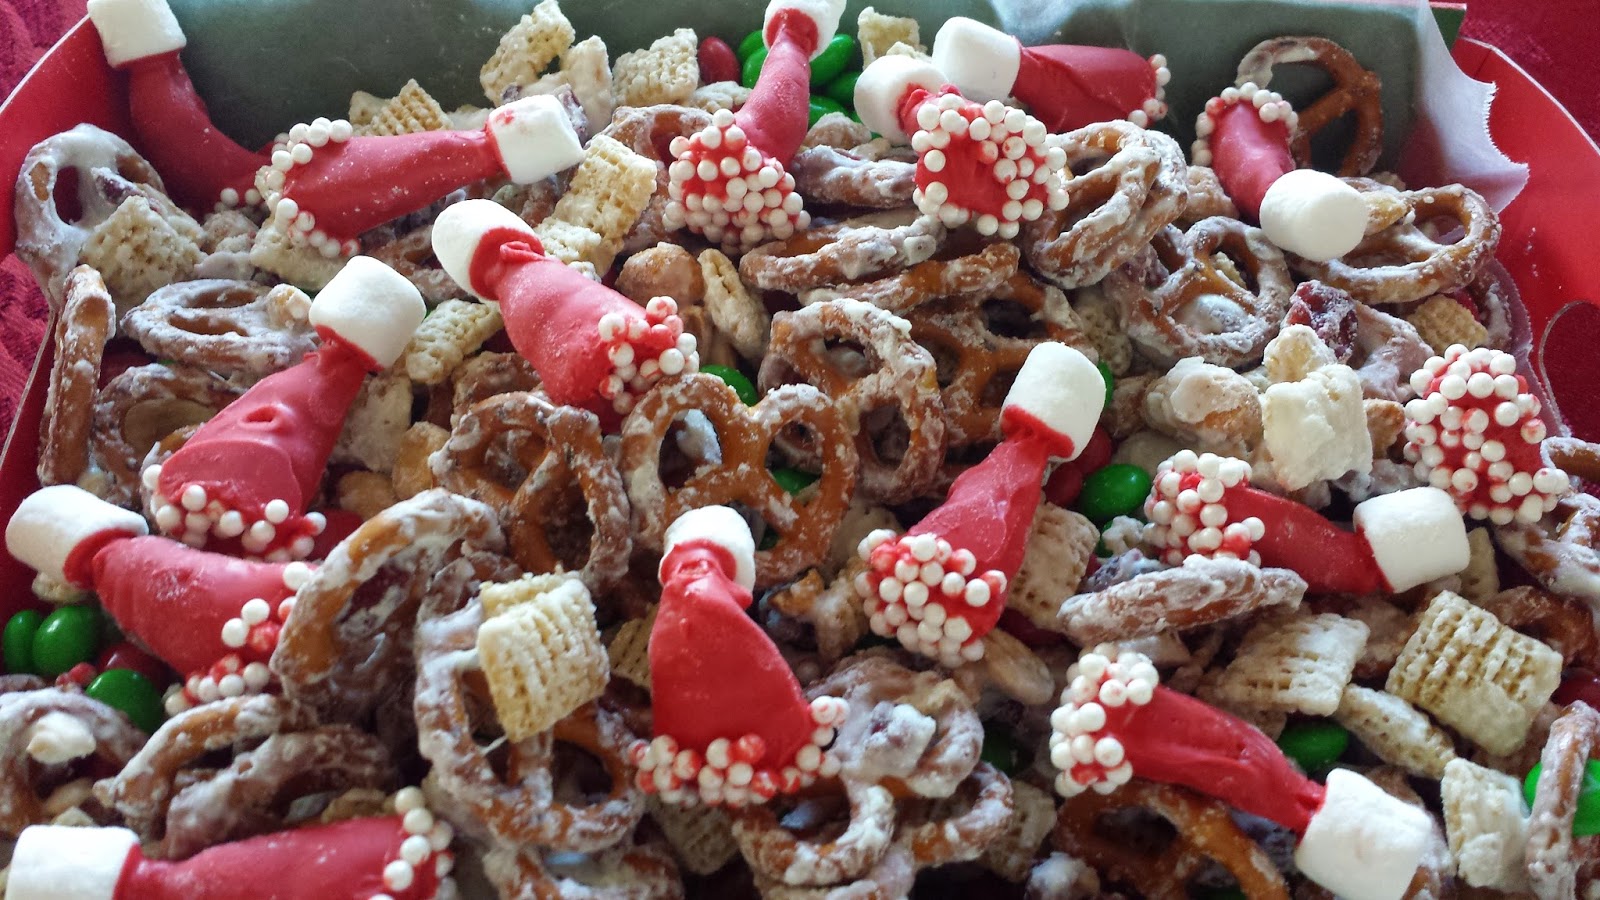
Santa Hat Party Mix

This recipe was originally published on December 16, 2014.  It is such a fun and tasty looking Christmas treat that we thought we would bring it back.  Hats off to Amy for sharing it! (pun intended)

This is so yummy and fun to make and to eat!  You’ll definitely want to take it to one of the many Christmas parties of the season.

Ingredients:

Santa Hats

  • Bugles
  • Red melting disks
  • mini marshmallows
  • white sprinkles (nonpareils)

Snack Mix

  • 3 c. mini pretzels
  • 1/2 c. craisins
  • 1 c. salted dry roasted peanuts
  • 2 c. Rice Chex
  • 2 c. holiday colored M&M’s
  • 8 oz. white chocolate for metling

How to Make

 
Santa Hats
 
1.  Melt the candy melts, along with a tablespoon of shortening (to help thin the melted candy), in 30 second intervals on half power in your microwave until melted.
2.  Immediately start dipping.
3.  Let them set up for 10 minutes or so on parchment or wax paper.
4.  When they are set, remelt the red candy disks (if necessary) and dip just the bottoms (the large part of the Bugle) into the white sprinkles.
5.  Then flip it over and dip the top in the melted candy and press a mini marshmallow on top.
6.  Let dry on wax paper.
 
Snack Mix
1.  Spread all your ingredients, EXCEPT M&M’s and Santa Hats, out on a baking sheet lined with parchment or wax paper.
2.  Melt your white chocolate according to package directions and drizzle over the pretzel mix.  Transfer to a large bowl.
3.  When chocolate is set, sprinkle M&M’s and Bugle Santa Hats over the mix.
 
Source:  cookiesandcups.com


Holiday Swirled Sugar Cookies


These cookies look pretty similar to the ones I saw on the Food Network site, and were a big hit at a Cookie Swap I attended last week. In typical ME fashion, I tried a new recipe to make cookies for the swap and this was also my first time working with Royal frosting.

But it’s all good.  Everyone asked how I did the cool swirl and we all thought they were quite tasty.  I squirreled away more of the cookies that I brought than any other cookie on the table.  I can be selfish, right?  Everyone was so full from the dinner we had that I don’t think they noticed.  LOL!!

One of the reasons the cookies were so good was that I used  Thrive Foods Vanilla Sugar Cookie Mix . What a time saver!

Still experiencing technical difficulties with the recipe format, so enjoy the old school way!


Ingredients:

COOKIES:

Thrive Vanilla Sugar Cookie Mix, pantry can

2 T. flour

3/4 c. butter

1 egg

2 T. water


ROYAL ICING:

1 lb. powdered sugar

2 T. meringue powder

Red and Green gel food coloring

White sugar sprinkles


Instructions:

  1. Follow the directions on the can of cookie mix, adding the 2 T. of flour to the dry cookie mix (for rolled and cut cookies).
  2. Shape the dough into a disk, wrap and refrigerate until firm, about 1 hour*.
  3. Line 2 baking sheets with parchment paper.
  4. Generously dust your work surface with powdered sugar and roll out the dough to 1/2 inch thick.
  5. Cut cookie dough with a 2-inch round cookie cutter, re-rolling scraps and cutting more cookies.
  6. Place cookies about 2 inches apart on the prepared baking sheets.
  7. Refrigerate cookies until firm, about 1 hour.
  8. Place oven racks in the upper and lower thirds of the oven and preheat to 325 degrees F. on Convection bake (350 degrees for regular oven).
  9. Bake the cookies, rotating the pans halfway through, until lightly browned around the edges, 9-11 minutes.  Cool completely on cookie sheets.
  10. For the Royal Icing: combine the powdered sugar and meringue powder in a large bowl.  Add 7 T. water and beat with an electric mixer on medium-high speed until soft glossy peaks form, adding up to 8 T. of water  if necessary to make a smooth icing that thickly coats the back of a spoon.
  11. Line a baking sheet with parchment and set a cooling rack on top.
  12. Put 1/4 c. icing into each of 2 small bowls.  Add 9 drops red food coloring to one bowl, stirring until evenly combined. Add 2 drops of green food coloring to the second bowl and stir until evenly combined.
  13. Pour the remaining white icing into a clean, rimmed baking sheet and spread or shake evenly to coat it.  Drizzle the red icing over the white, then the green icing.
  14. One at a time, put the cookies face-down into the icing, taking the cookies out one at a time, shaking gently to let excess icing drip off.
  15. Place cookies right side up on the prepared cooling rack. Decorate with sprinkles, if desired.
  16. Let icing harden completely before serving, about an hour.


Note: you can place the dough in the freezer if you are short on time.  That’s what I had to do!

Source: adapted from Food Network.