Santa Hat Party Mix

This recipe was originally published on December 16, 2014.  It is such a fun and tasty looking Christmas treat that we thought we would bring it back.  Hats off to Amy for sharing it! (pun intended)

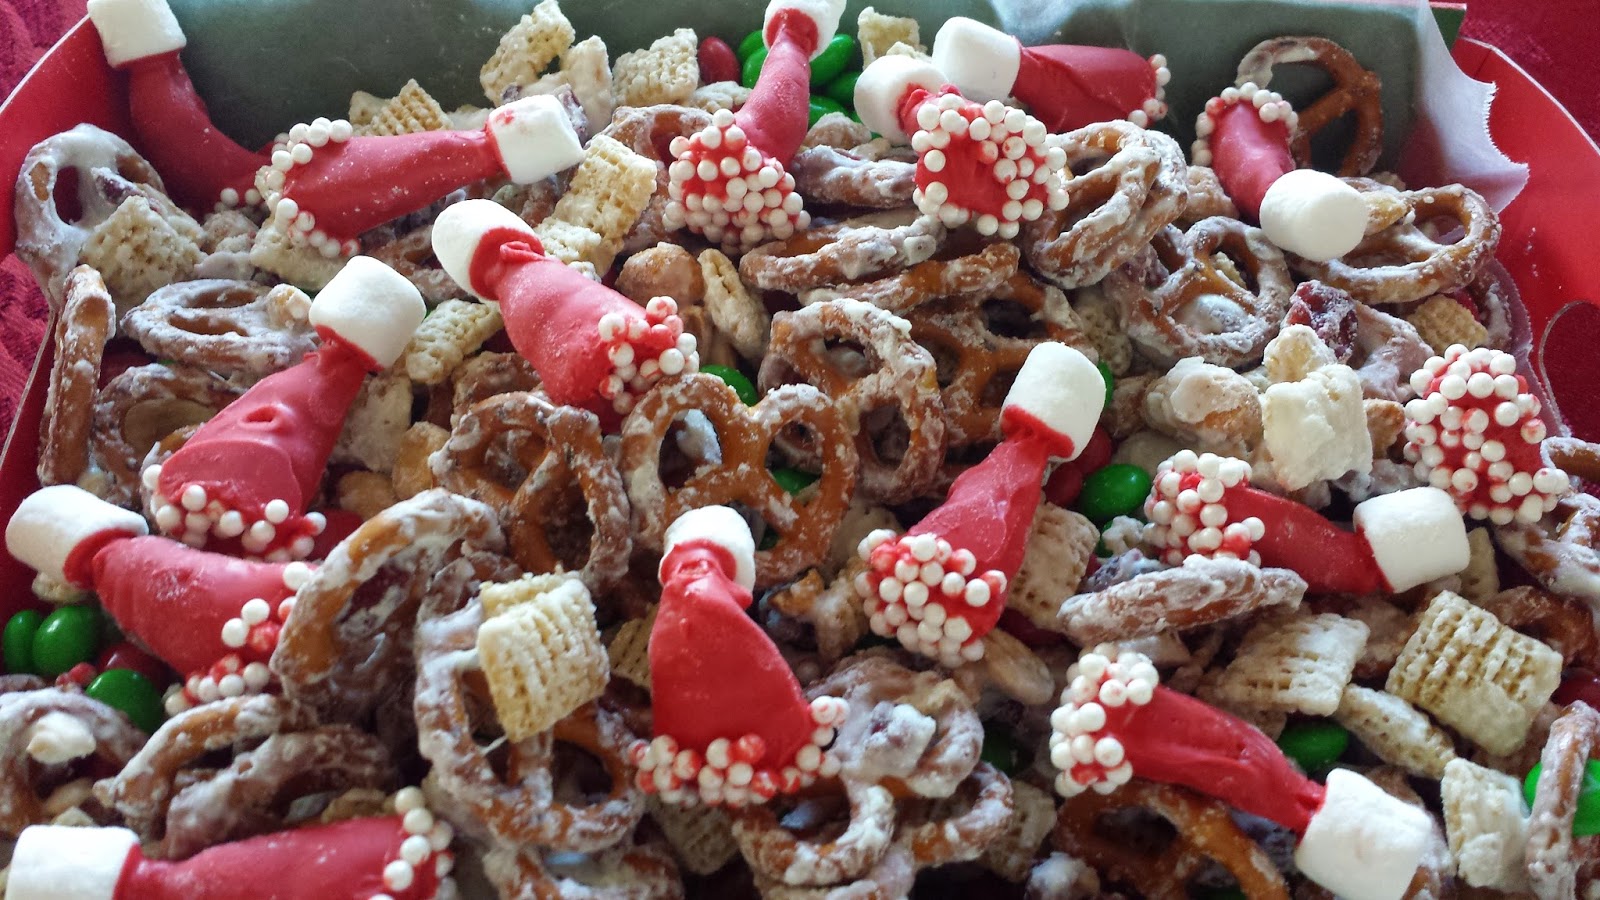
This is so yummy and fun to make and to eat!  You’ll definitely want to take it to one of the many Christmas parties of the season.

Ingredients:

Santa Hats

  • Bugles
  • Red melting disks
  • mini marshmallows
  • white sprinkles (nonpareils)

Snack Mix

  • 3 c. mini pretzels
  • 1/2 c. craisins
  • 1 c. salted dry roasted peanuts
  • 2 c. Rice Chex
  • 2 c. holiday colored M&M’s
  • 8 oz. white chocolate for metling

How to Make

 
Santa Hats
 
1.  Melt the candy melts, along with a tablespoon of shortening (to help thin the melted candy), in 30 second intervals on half power in your microwave until melted.
2.  Immediately start dipping.
3.  Let them set up for 10 minutes or so on parchment or wax paper.
4.  When they are set, remelt the red candy disks (if necessary) and dip just the bottoms (the large part of the Bugle) into the white sprinkles.
5.  Then flip it over and dip the top in the melted candy and press a mini marshmallow on top.
6.  Let dry on wax paper.
 
Snack Mix
1.  Spread all your ingredients, EXCEPT M&M’s and Santa Hats, out on a baking sheet lined with parchment or wax paper.
2.  Melt your white chocolate according to package directions and drizzle over the pretzel mix.  Transfer to a large bowl.
3.  When chocolate is set, sprinkle M&M’s and Bugle Santa Hats over the mix.
 
Source:  cookiesandcups.com


Changing Your Christmas Experience

Photo by Tyler Delgado on Unsplash


It’s beginning to look a lot like Christmas.  Everywhere you go.  My decorating, however, has still not happened but I have finally taken down my fall decor.  I left it up as long as possible because it is my favorite season AND it took forever for the leaves to change this year in our part of the world. On the other hand, once it got here it lasted a good long while.

How about other Christmas prep?  Are you done with your shopping?  Have you hit the stores as often as I have?  Actually, Wal-Mart meets my prep needs pretty darn well.  Don’t you even turn your nose up at that.  I like to shop local and also avoid all the traffic and drama in the larger cities.  My family has simple tastes and they don’t demand the trends like some.  I am grateful for that.

I have had discussions with the family this year about simplifying Christmas and I feel that the small things we are doing to take some of the stress out of our December will be good.  Here is a great article from Power of Moms that I recently read about transforming Christmas — one family’s experiment with giving experiences.

With 4 grandchildren and another on the way, I am hoping we can make a difference in our family’s Christmas experience.  We want them to know what the true meaning of the Christmas season is–celebrating the birth of our Savior, Jesus Christ–and how important it is to savor family over stuff.

The Christmas season is also the perfect time to serve others as Christ did. Here is a great little video about that.  Fit some of this into your Christmas List this year.  And you don’t have to do it just at Christmas, you kn0w.


Holiday Swirled Sugar Cookies


These cookies look pretty similar to the ones I saw on the Food Network site, and were a big hit at a Cookie Swap I attended last week. In typical ME fashion, I tried a new recipe to make cookies for the swap and this was also my first time working with Royal frosting.

But it’s all good.  Everyone asked how I did the cool swirl and we all thought they were quite tasty.  I squirreled away more of the cookies that I brought than any other cookie on the table.  I can be selfish, right?  Everyone was so full from the dinner we had that I don’t think they noticed.  LOL!!

One of the reasons the cookies were so good was that I used  Thrive Foods Vanilla Sugar Cookie Mix . What a time saver!

Still experiencing technical difficulties with the recipe format, so enjoy the old school way!


Ingredients:

COOKIES:

Thrive Vanilla Sugar Cookie Mix, pantry can

2 T. flour

3/4 c. butter

1 egg

2 T. water


ROYAL ICING:

1 lb. powdered sugar

2 T. meringue powder

Red and Green gel food coloring

White sugar sprinkles


Instructions:

  1. Follow the directions on the can of cookie mix, adding the 2 T. of flour to the dry cookie mix (for rolled and cut cookies).
  2. Shape the dough into a disk, wrap and refrigerate until firm, about 1 hour*.
  3. Line 2 baking sheets with parchment paper.
  4. Generously dust your work surface with powdered sugar and roll out the dough to 1/2 inch thick.
  5. Cut cookie dough with a 2-inch round cookie cutter, re-rolling scraps and cutting more cookies.
  6. Place cookies about 2 inches apart on the prepared baking sheets.
  7. Refrigerate cookies until firm, about 1 hour.
  8. Place oven racks in the upper and lower thirds of the oven and preheat to 325 degrees F. on Convection bake (350 degrees for regular oven).
  9. Bake the cookies, rotating the pans halfway through, until lightly browned around the edges, 9-11 minutes.  Cool completely on cookie sheets.
  10. For the Royal Icing: combine the powdered sugar and meringue powder in a large bowl.  Add 7 T. water and beat with an electric mixer on medium-high speed until soft glossy peaks form, adding up to 8 T. of water  if necessary to make a smooth icing that thickly coats the back of a spoon.
  11. Line a baking sheet with parchment and set a cooling rack on top.
  12. Put 1/4 c. icing into each of 2 small bowls.  Add 9 drops red food coloring to one bowl, stirring until evenly combined. Add 2 drops of green food coloring to the second bowl and stir until evenly combined.
  13. Pour the remaining white icing into a clean, rimmed baking sheet and spread or shake evenly to coat it.  Drizzle the red icing over the white, then the green icing.
  14. One at a time, put the cookies face-down into the icing, taking the cookies out one at a time, shaking gently to let excess icing drip off.
  15. Place cookies right side up on the prepared cooling rack. Decorate with sprinkles, if desired.
  16. Let icing harden completely before serving, about an hour.


Note: you can place the dough in the freezer if you are short on time.  That’s what I had to do!

Source: adapted from Food Network.