
Thinking back on my life, the happiest times have been spent with family. Those people whom I love the most! The people that matter the most. Letting them know how much I love them is important to me. And really, its never been hard for me to share those feelings. But, I know from experience that when I do tell them I love them or appreciate them, it makes a difference in their lives. That is why we are family, to love and support each other. To help each other find the way to Heavenly Father. Love them, and tell them so.
Author: Julie
Banana Pops

When I was a kid my mom used to make a version of these as an occasional treat for me. I make them now with just a couple of slight changes, but they are still just as tasty.
Ingredients:
bananas
creamy peanut butter
Nutella
wheat germ
popsicle sticks
1. Peel bananas, then slice in the middle to make 2 equal sections. Carefully insert a popsicle stick into the cut end of each banana half. Place on cookie sheet lined with wax paper and place in freezer for 30 minutes.
2. While bananas are freezing, melt peanut butter for about 15-20 seconds in a microwave-safe bowl. Add Nutella and stir well to combine; set aside. Pour wheat germ onto a small plate and set aside.
3. Remove bananas from freezer. “Frost” each banana with the PB/Nutella mixture. Roll the frosted banana gently in the wheat germ and place back on wax paper. Repeat with each banana pop. Return pops to freezer until ready to serve.
4. Remove from freezer for 10-15 minutes before eating (to allow bananas to soften a bit).
Notes:
- Amounts: I end up using about 1 Tbsp. peanut butter, 1/2 Tbsp. Nutella, and 1/2 Tbsp. wheat germ per banana pop.
- You can use just peanut butter or just Nutella. You could also try different nut butters like almond or cashew.
- You can roll the frosted banana in nuts, coconut, sprinkles, anything you want.
- It may not necessarily be a “lite” recipe, but it’s better for you than an ice cream binge!
Source: adapted from my mom
Pretzel Dogs
Happy Memorial Day to all my fellow Americans!
Years ago, when my husband and I were newly married and still attending Brigham Young University, we had some great friends who shared a great pretzel recipe with us. We’ve made it countless times in the last twenty years…sometimes plain, sometimes cheese-stuffed, always good. But a couple of years ago we decided to try using our favorite Nathan’s Hot Dogs as a filler. It was a tasty experiment and has turned out to be one of my favorite ways to eat pretzels!

Ingredients:
1 1/2 cups warm water
1 Tbsp. yeast
1/3 cup brown sugar
4-5 cups all-purpose flour
coarse kosher salt
1 egg white, beaten
Nathan’s Hot Dogs (8)
2 cups water
2 Tbsp. baking soda
1. Mix water and yeast until dissolved. Stir in brown sugar. Slowly add flour, stirring constantly.
2. Knead dough till stretchy and smooth.

3. Divide dough into 8 equal pieces. Shape each piece into a log 1″ longer than the hot dog (the dough will stretch as you pull it over the ends). Flatten the log and place the hot dog on the dough. Fold in the ends, then fold one long side over tightly. Roll the whole thing over onto the remaining flap. Pinch edges to seal, getting out as much air as possible.

4. Fill a pan with the water and baking soda and bring to a simmer/gentle boil. The pot should be wide enough to allow for the pretzel dog to sit “comfortably” inside. (They get cranky if they’re not comfortable.) Carefully lower one pretzel dog at a time into the water, making sure to gently move it around a bit at first so it doesn’t stick to the bottom. Allow it to bathe for 30 seconds, then carefully lift it out of the pan and onto a cooling rack. Continue until all 8 have taken their baths.

5. Brush each pretzel dog with the beaten egg white and sprinkle with the coarse salt. Grease a cookie sheet and sprinkle it with the salt also. Place the pretzel dogs on the cookie sheet and bake in a 475 degree oven for 8-12 minutes.

Makes 8 pretzel dogs
Source: Kari Hafen
Incidentally, if any of you know Kari Hafen from Alaska, PLEASE let her know I’m looking for her. We lost touch after BYU.
God Doesn’t Grade On The Curve

God does not grade
On the curve,
I’m sure of it.
But we sit around
Like high school students
In an important class,
Whose teacher has drawn
On the blackboard
The tiny wedges
For the A’s and E’s.
And the great bulge
For the C’s.
We sigh in veiled relief
As the person down the row
Messes up,
Because it makes us
Look better
And probably means an E
For him, which is good,
Because while we have
Nothing against him personally
It means an A is more
Available to us.
And we secretly sorrow
When the person in front of us
Does really well,
Although we like her okay,
Because there goes another good grade,
Darn it and we’re looking
Worse and worse
And slipping further down the curve.
And God, I think,
Sits at the front of the class
Holding A’s enough for all,
Watching us
Working out our salvation
In fear and competition.
-Carol Lynn Pearson
That last stanza really gets you doesn’t it? I’ve read this poem a hundred times and it still hits me just as hard as the first time I read it nearly 30 years ago. I’m still learning how meaningful AND powerful AND so very individual that the atonement really is. Let’s try to visualize Him at the front of the class holding A’s enough for ALL and see if we can’t let some of the competition fall by the wayside.
What’s Your “Something?”

“You can do something for another person that no one else ever born can do.”
—President James E. Faust, former counselor in the First Presidency of the Church of Jesus Christ of Latter-Day Saints, October 2005 Talk.
Pretty bold statement, don’t you think? I mean, think about all the billions of people who have ever lived and do live on the earth. No one else can do something that little old me can do? It’s hard to believe, isn’t it?
But a prophet of the Lord, Jesus Christ said it.
And I believe him.
So, why the random picture to go with this topic? Well, it’s random to you. It’s not random to me, however, and I am the writer so I get to choose the picture.
This is the Greenville 2nd Ward Primary as of Oct. 2011. Every man, woman, and child in this picture has effected me in a positive way. By their kindness, their examples, their words of wisdom (even the kids!), their random acts of service. They have touched me in ways no one else ever could!
The question now stands: What is the something that I was born to do? Have I done it yet? Is it still to come? And is it just one something, or is it many somethings?
I’m not sure the answer to that question. But the thought that my work here is undone, that I still have someone left to help in a way that no one else can, makes me want to BE better and to DO better, every day. It makes me want to be the kind of child that my Heavenly Father would be proud of.
What about you?
Mexicali Pork Chops
Want an easy, quick, tasty pork recipe? You got it.

Ingredients:
pork chops
taco seasoning mix (or make your own)
canola oil (for the skillet)
1. Coat the pork chops on both sides with taco seasoning mix (I pour mine into a shallow bowl wide enough for the chop).

2. Cook the chops on medium-low heat for 5-7 minutes per side, or until cooked through.
I told you it was easy.

Source: no clue where I got this, but I do know it was NOT my idea!
Notes:
- Use any cut of pork chops you like. I usually use the small boneless ones, but I try to get whatever is on sale.
- One packet of taco seasoning is enough for about 6 chops, but again, make the seasoning yourself like Maven Mica does!
Parenting God’s Child
Recently I have been blessed with another son. 🙂 He is wonderful. Prior to his coming, I was pondering the responsibilities of parents in raising and teaching their children. It’s no coincidence that I came upon this scripture in one of those times when you just open them up to some “random” page:
And again, inasmuch as parents have children in Zion, or in any of her stakes which are organized, that teach them not to understand the doctrine of repentance, faith in Christ the Son of the living God, and of baptism and the gift of the Holy Ghost by the laying on of the hands, when eight years old, the sin be upon the heads of the parents.
For this shall be a law unto the inhabitants of Zion, or in any of her stakes which are organized.
And their children shall be baptized for the remission of their sins when eight years old, and receive the laying on of the hands.
And they shall also teach their children to pray, and to walk uprightly before the Lord.
(Doctrine and Covenants 68:25-28)
What a wonderful blessing it is to have so many resources available to us, including the scriptures, that teach how to be good parents. Elder Jeffrey R. Holland has said, “If you try your best to be the best parent you can be, you will have done all that a human being can do and all that God expects you to do.”
Of course, not everyone becomes a parent in this life. I really like Elder Neil L. Andersen’s conference talk “Children” in which he says, “As the Lord’s servant, I assure you that this promise is certain: ‘Faithful members whose circumstances do not allow them to receive the blessings of eternal marriage and parenthood in this life will receive all promised blessings in the eternities, [as] {sic} they keep the covenants they have made with God.'”
I encourage all of us who currently enjoy the blessing of being a mother or father to raise up our children in righteousness, to “bring them up in the nurture and admonition of the Lord” (Ephesians 6:4).
I believe one of the ways we can be our best selves is to remember that we are each a child of our Heavenly Father. When we treat our children as such, we recognize where they came from and better honor their divine heritage.
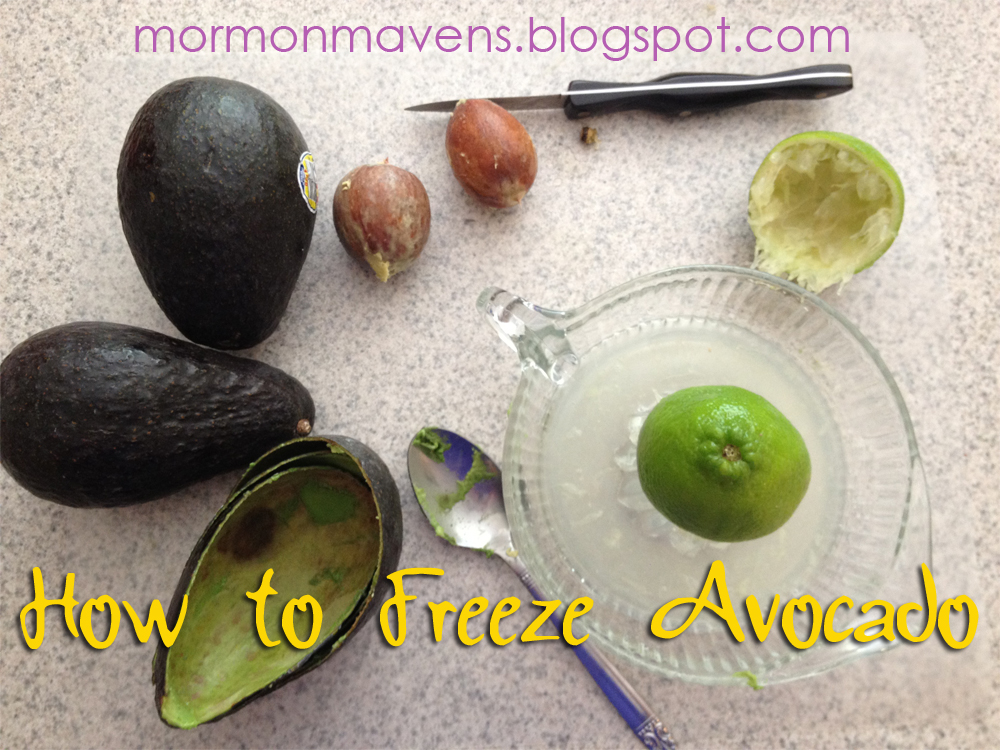
How To: Freeze Avocado
I love, love, love avocado and guacamole. But most of my kids haven’t quite come to appreciate this green miracle yet. So I’m always stuck with too much and it always goes bad too quickly.
Enter: Pinterest.
How many times has Pinterest come to the rescue?
Well, at least this once.
I found instructions on how to freeze avocado and I knew I had to try it. Worked like a charm. If you are a chunky guac fan, you may be disappointed in the puree texture; but it’s still a great way to preserve this luscious goody and I’ll suffer through using it to make smooth guac if it means no more throwing away avocado halves and leftover guac!
Ingredients/Supplies:
ripe avocado
fresh lime juice (1 Tbsp. per avocado)
blender
zip top sandwich bags
wide, short glass
chopstick or pencils
cookie sheet
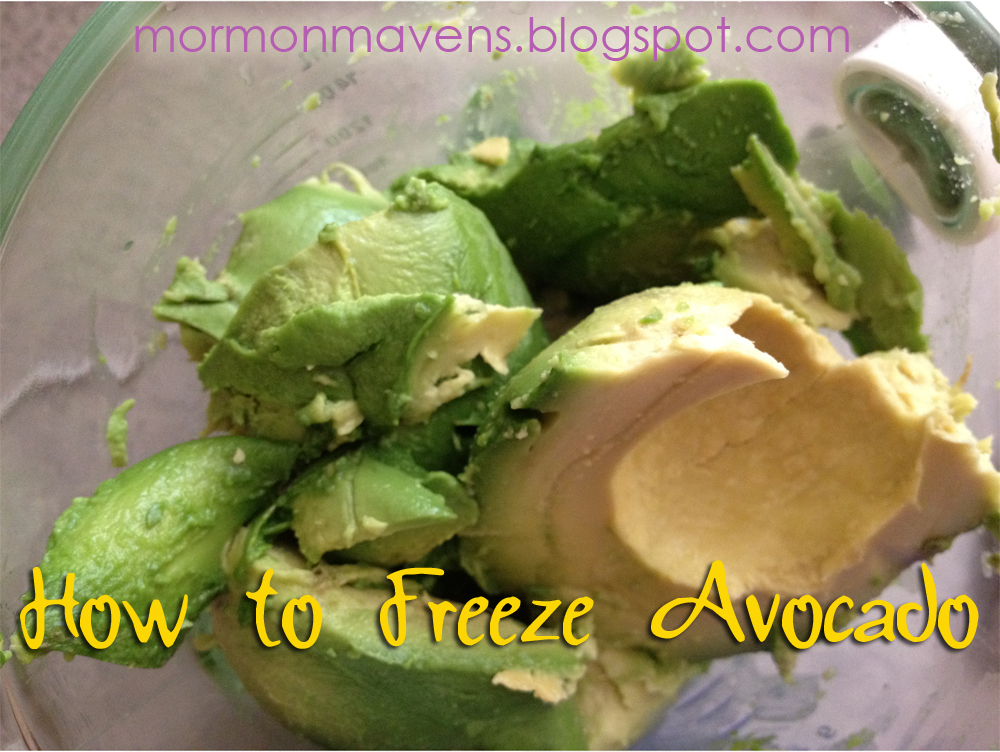
1. Scoop avocado flesh into the blender. To do this, I cut the avocado in half length-wise, around the pit. Then I twist the two halves in opposite directions to separate them. I cradle the pit half in my left hand and with my right hand I CAREFULLY chop down once into the pit to “grab it”…I use a small knife in case my insane klutziness gene decides to take over and dismember me. With the knife embedded in the pit, I give it a slight twist and out pops the pit. Usually. Then I just scoop the flesh out with a spoon.
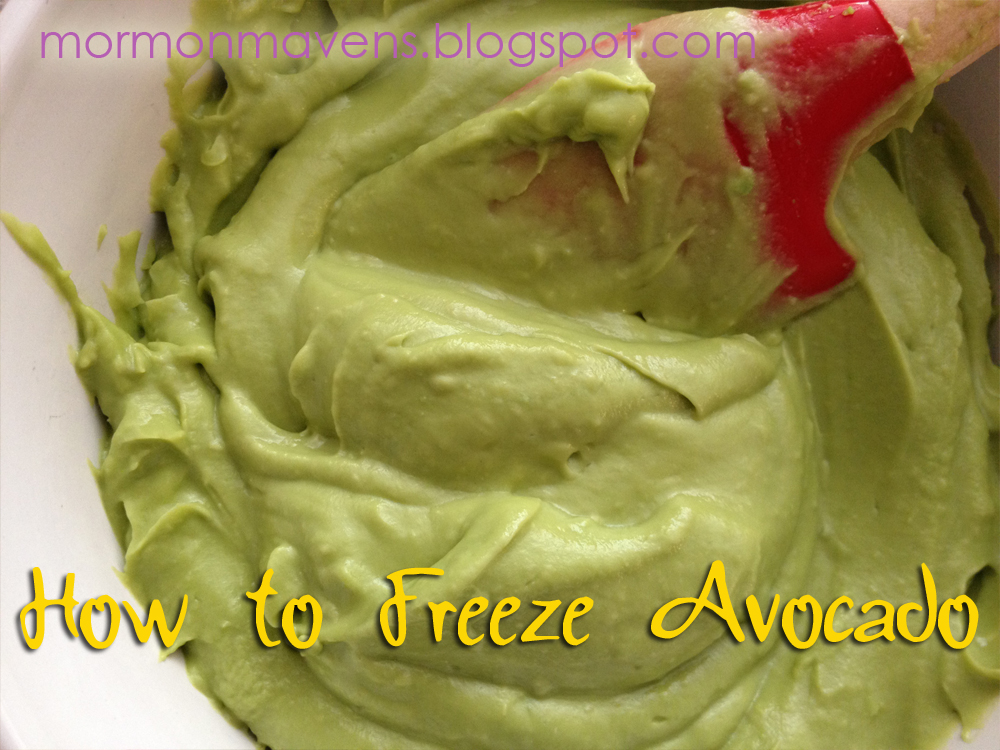
2. Add the freshly-squeezed lime juice. Puree until smooth. Drool. But not into the blender. That’s gross.
3. Take the wide but short glass and place the zip top bag into it, then fold the zippy edges of said bag out over the edge of the glass. Spoon some of the puree into the bag (just eyeball it being half to three quarters full). Fold the edges back up, carefully squeeze out as much air as you can, and seal the bag.
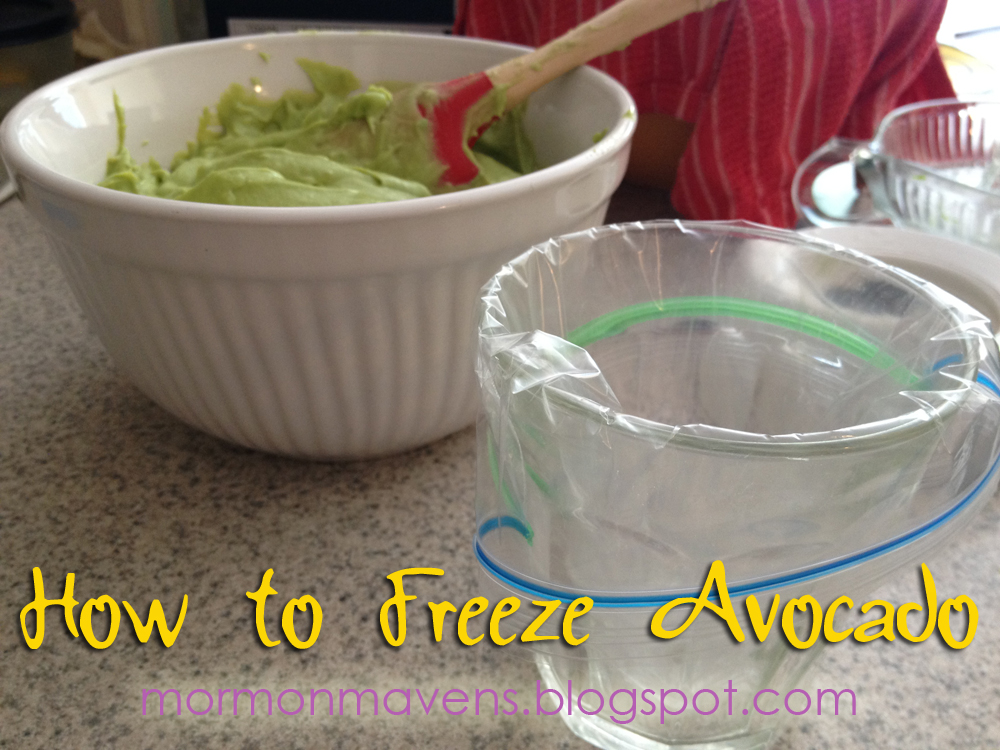

4. Lay the bag flat on a cookie sheet, opening the bag a tad if you see anymore air trapped inside. Using the chopsticks or pencils, make a tic tac toe board on the bag….two sets of parallel lines. Is that too math-y? Okay, just do like this:
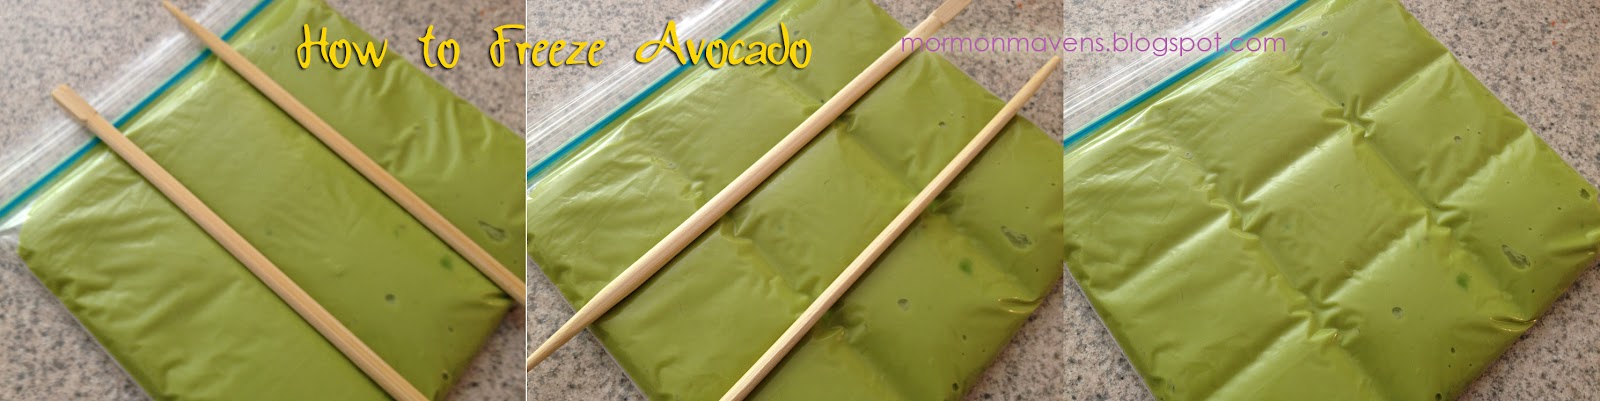
5. Place in freezer until totally firm. Then you can take it out and store it vertically so it takes up less space. (Incidentally, this is a great way to freeze and store soups, sauces, etc…..flat first, then vertically like files. Not that I actually get around to doing that. But I’ve thought of doing that. And I think I should get credit for that.)
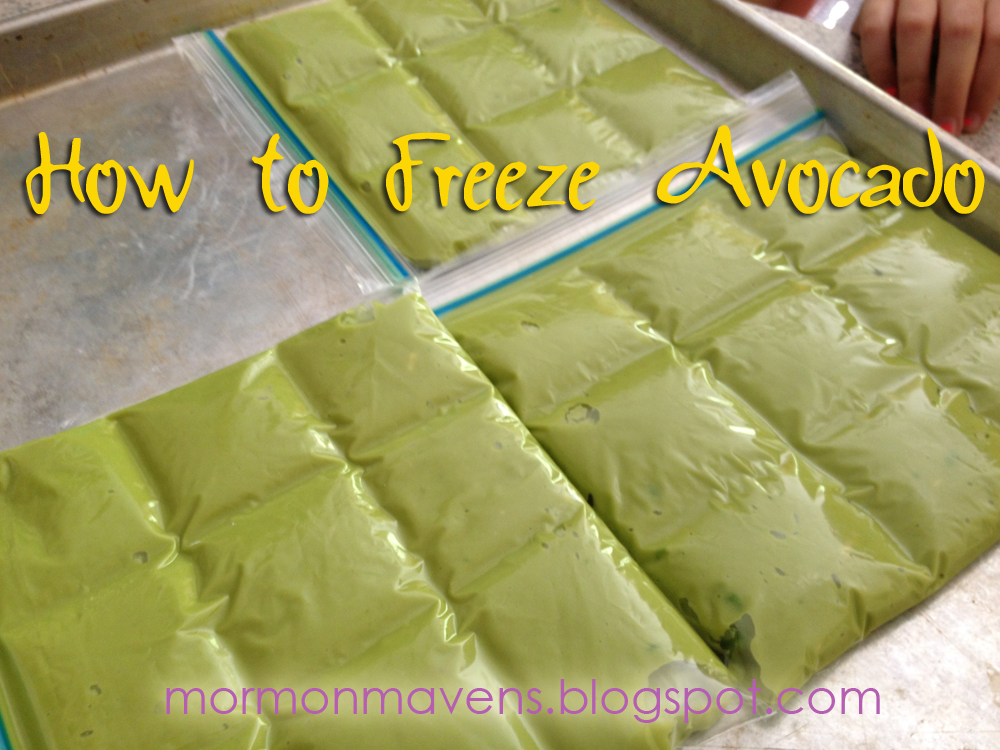
When ready to use, take out a bag and snap off as many squares as you think you’ll need (I used the edge of the counter as a fulcrum. HA! Fulcrum…that’s all science-y. Did I just blind you with science?). I ended up sacrificing the original bag this way, but that’s okay. I just put the remaining squares into a new bag and placed them back in the freezer.
Source: Traveling Spoon Blog via Pinterest
Hot Dog Buns
I’d been wanting to try this recipe for a while, since first seeing it on Annie’s Eats (one of my favorite cooking blogs). When I saw an idea for Mexican-inspired hot dogs on Pinterest, I figured now was as good a time as any to give it a shot! (Incidentally, those Mexi-Dogs are coming in a recipe post soon.)

Ingredients:
1 Tbsp. sugar
2 1/4 tsp. instant yeast
1/4 cup warm water (105-110 degrees F)
1 cup warm milk
1 Tbsp. vegetable or canola oil
1 tsp. salt
3-4 cups all-purpose flour
1 beaten egg with 1Tbsp. water
sesame seeds, optional
Directions:
- In the bowl of a stand mixer, combine the sugar, yeast, and warm water. Stir in the milk, oil, salt, and 3 cups of the flour. Using the dough hook, mix until well combined.
- One tablespoon at a time, add in more flour (up to one cup) until dough pulls away from the side of the bowl or until it is no longer wet/sticky. The full cup may not be needed. I used about 7 tablespoons this time. Machine-knead on low for 5-7 minutes; the dough should be smooth and elastic at this point.
- Turn the dough into a lightly-oiled bowl, turning over to coat the entire surface. Cover the bowl and let the dough rise until doubled, about an hour.
- Line your baking sheet with parchment paper. Turn the dough out onto a work surface sprayed with nonstick cooking spray (I used a flexible cutting mat). Use your kitchen scale (I used mine on “grams” for easier math!) to divide the dough into 9 equal portions. Shape each portion into a ball, and then into a cylinder about 4 1/2″ long. Place on the parchment paper, flattening each bun just slightly. Place the buns next to each other to where they almost touch. (They’ll kind of morph into each other as they sit there.) Cover with a clean kitchen towel and allow to rise until almost doubled, about 45 minutes.
- Preheat oven to 400 degrees. Brush bun tops with the egg wash; then sprinkle with sesame seeds, if desired. Bake for 18-20 minutes or until golden brown. Place the buns on a wire rack to cool.

Notes:
- Upon sampling the buns plain, we all thought they needed a bit more salt. But eaten with the actual hot dog and fixin’s, we didn’t even notice. Still I may try a little more salt next time.
- If you don’t have a kitchen scale, you really should get one. I used to scoff at celebrity chefs who used them, but I’m a believer now. I got an inexpensive one at Target that can be read with either grams or ounces/pounds. I use both, depending on what I’m doing.
- Parchment paper, too, seemed unnecessary to me at one time; but after trying it, I have to admit that I love it. Clean up is a breeze. No more scraping things off the cookie sheet!
- You can either cut the tops or the sides of these buns, but I prefer top-cut.
 Source: Annie’s Eats
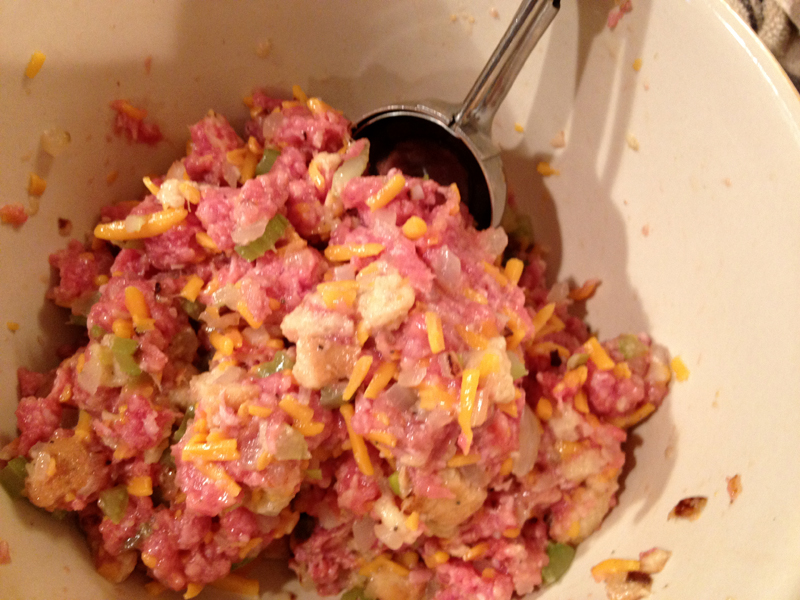
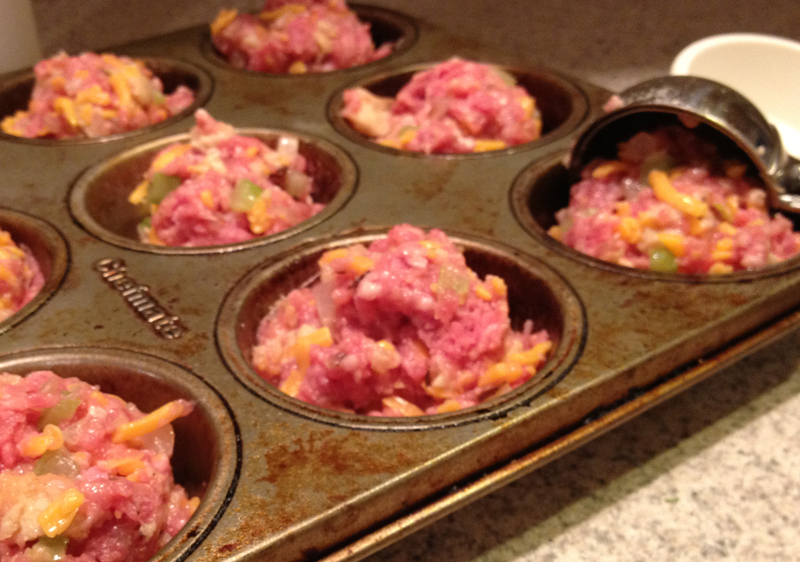
Meatloaf Cupcakes
I recently found the ultimate meatloaf recipe (at least to our family). Certain people in the family love it so much that, just today, it was requested for dinner today over pizza. Pizza! Yes, it’s that good.
But I have no patience to wait for meatloaf to be ready for slicing and serving when it comes out of the oven. I always end up with a mess because of that impatience. So when I saw the idea of making meatloaf in a muffin tin (thanks again, Pinterest!), I knew this was the answer.
Kids seem to love the idea of a dinner cupcake; and because it’s a healthier version of a traditional meatloaf and because it is preportioned, it’s a win-win!

Paired with mashed potato “frosting” this dinner cupcake is sure to please. And if you do half potatoes, half cauliflower for your mashed potatoes (like I do) you can even sneak in some extra veggies!
Ingredients:
1/2 Tbsp. olive oil
1/2 cup finely diced onion
1 stalk celery, finely diced
1 egg, beaten
1/3 cup skim milk
1 tsp. salt
1/8 tsp. ground black pepper
1/4 tsp. sage
1 slice bread, diced very small (I always use sourdough)
3/4 cup shredded cheddar cheese
1 pound ground beef
Sauce:
1/3 cup ketchup
2 Tbsp. Agave nectar*
1 Tbsp. molasses
1 tsp. prepared yellow mustard
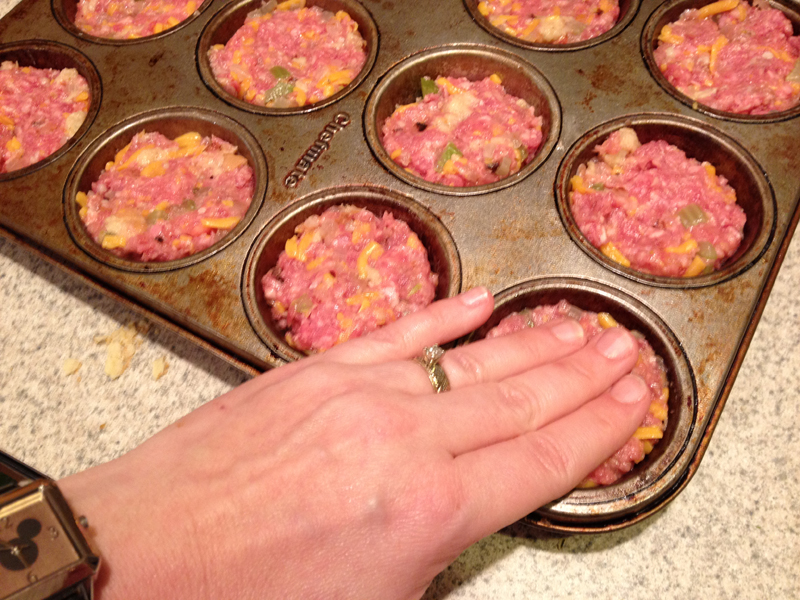
1. Preheat oven to 350 degrees. Spray muffin tin with cooking spray and set aside.
2. In saute pan, cook onion and celery in olive oil over medium heat for about 10-15 minutes, or until the veggies are soft. Set aside to cool some.
3. In large bowl, whisk together the egg, milk, salt, pepper, and sage. Add the bread and gently stir together until all the bread has been moistened. Stir in the cheese and the onion mixture. Crumble in the ground beef and combine with your hands until well mixed (DO NOT SQUEEZE to mix it together). Divide equally into the muffin tin compartments and lightly pack down.
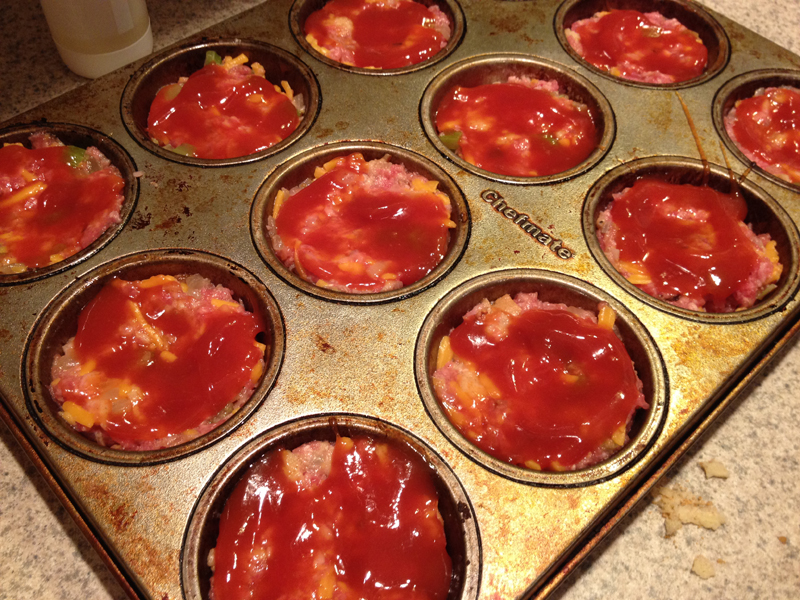
4. In a small bowl, mix together the sauce ingredients. Spoon over the “cupcakes”. Bake for about 20 minutes or until an instant read thermometer reads 165 degrees when inserted into one of the cupcakes. Allow to rest about 5 minutes before serving.
5. Serve plain or top with your favorite mashed potatoes.
*Agave nectar is a natural sweetener made from the agave plant. I use it for health reasons because of its lower glycemic qualities. You can usually find it with the sugar substitutes in the grocery store. For more information on agave nectar, visit this helpful site.
Source: cupcake idea from Pinterest, recipe slightly adapted from Eating Well, Living Thin