Angel Biscuits

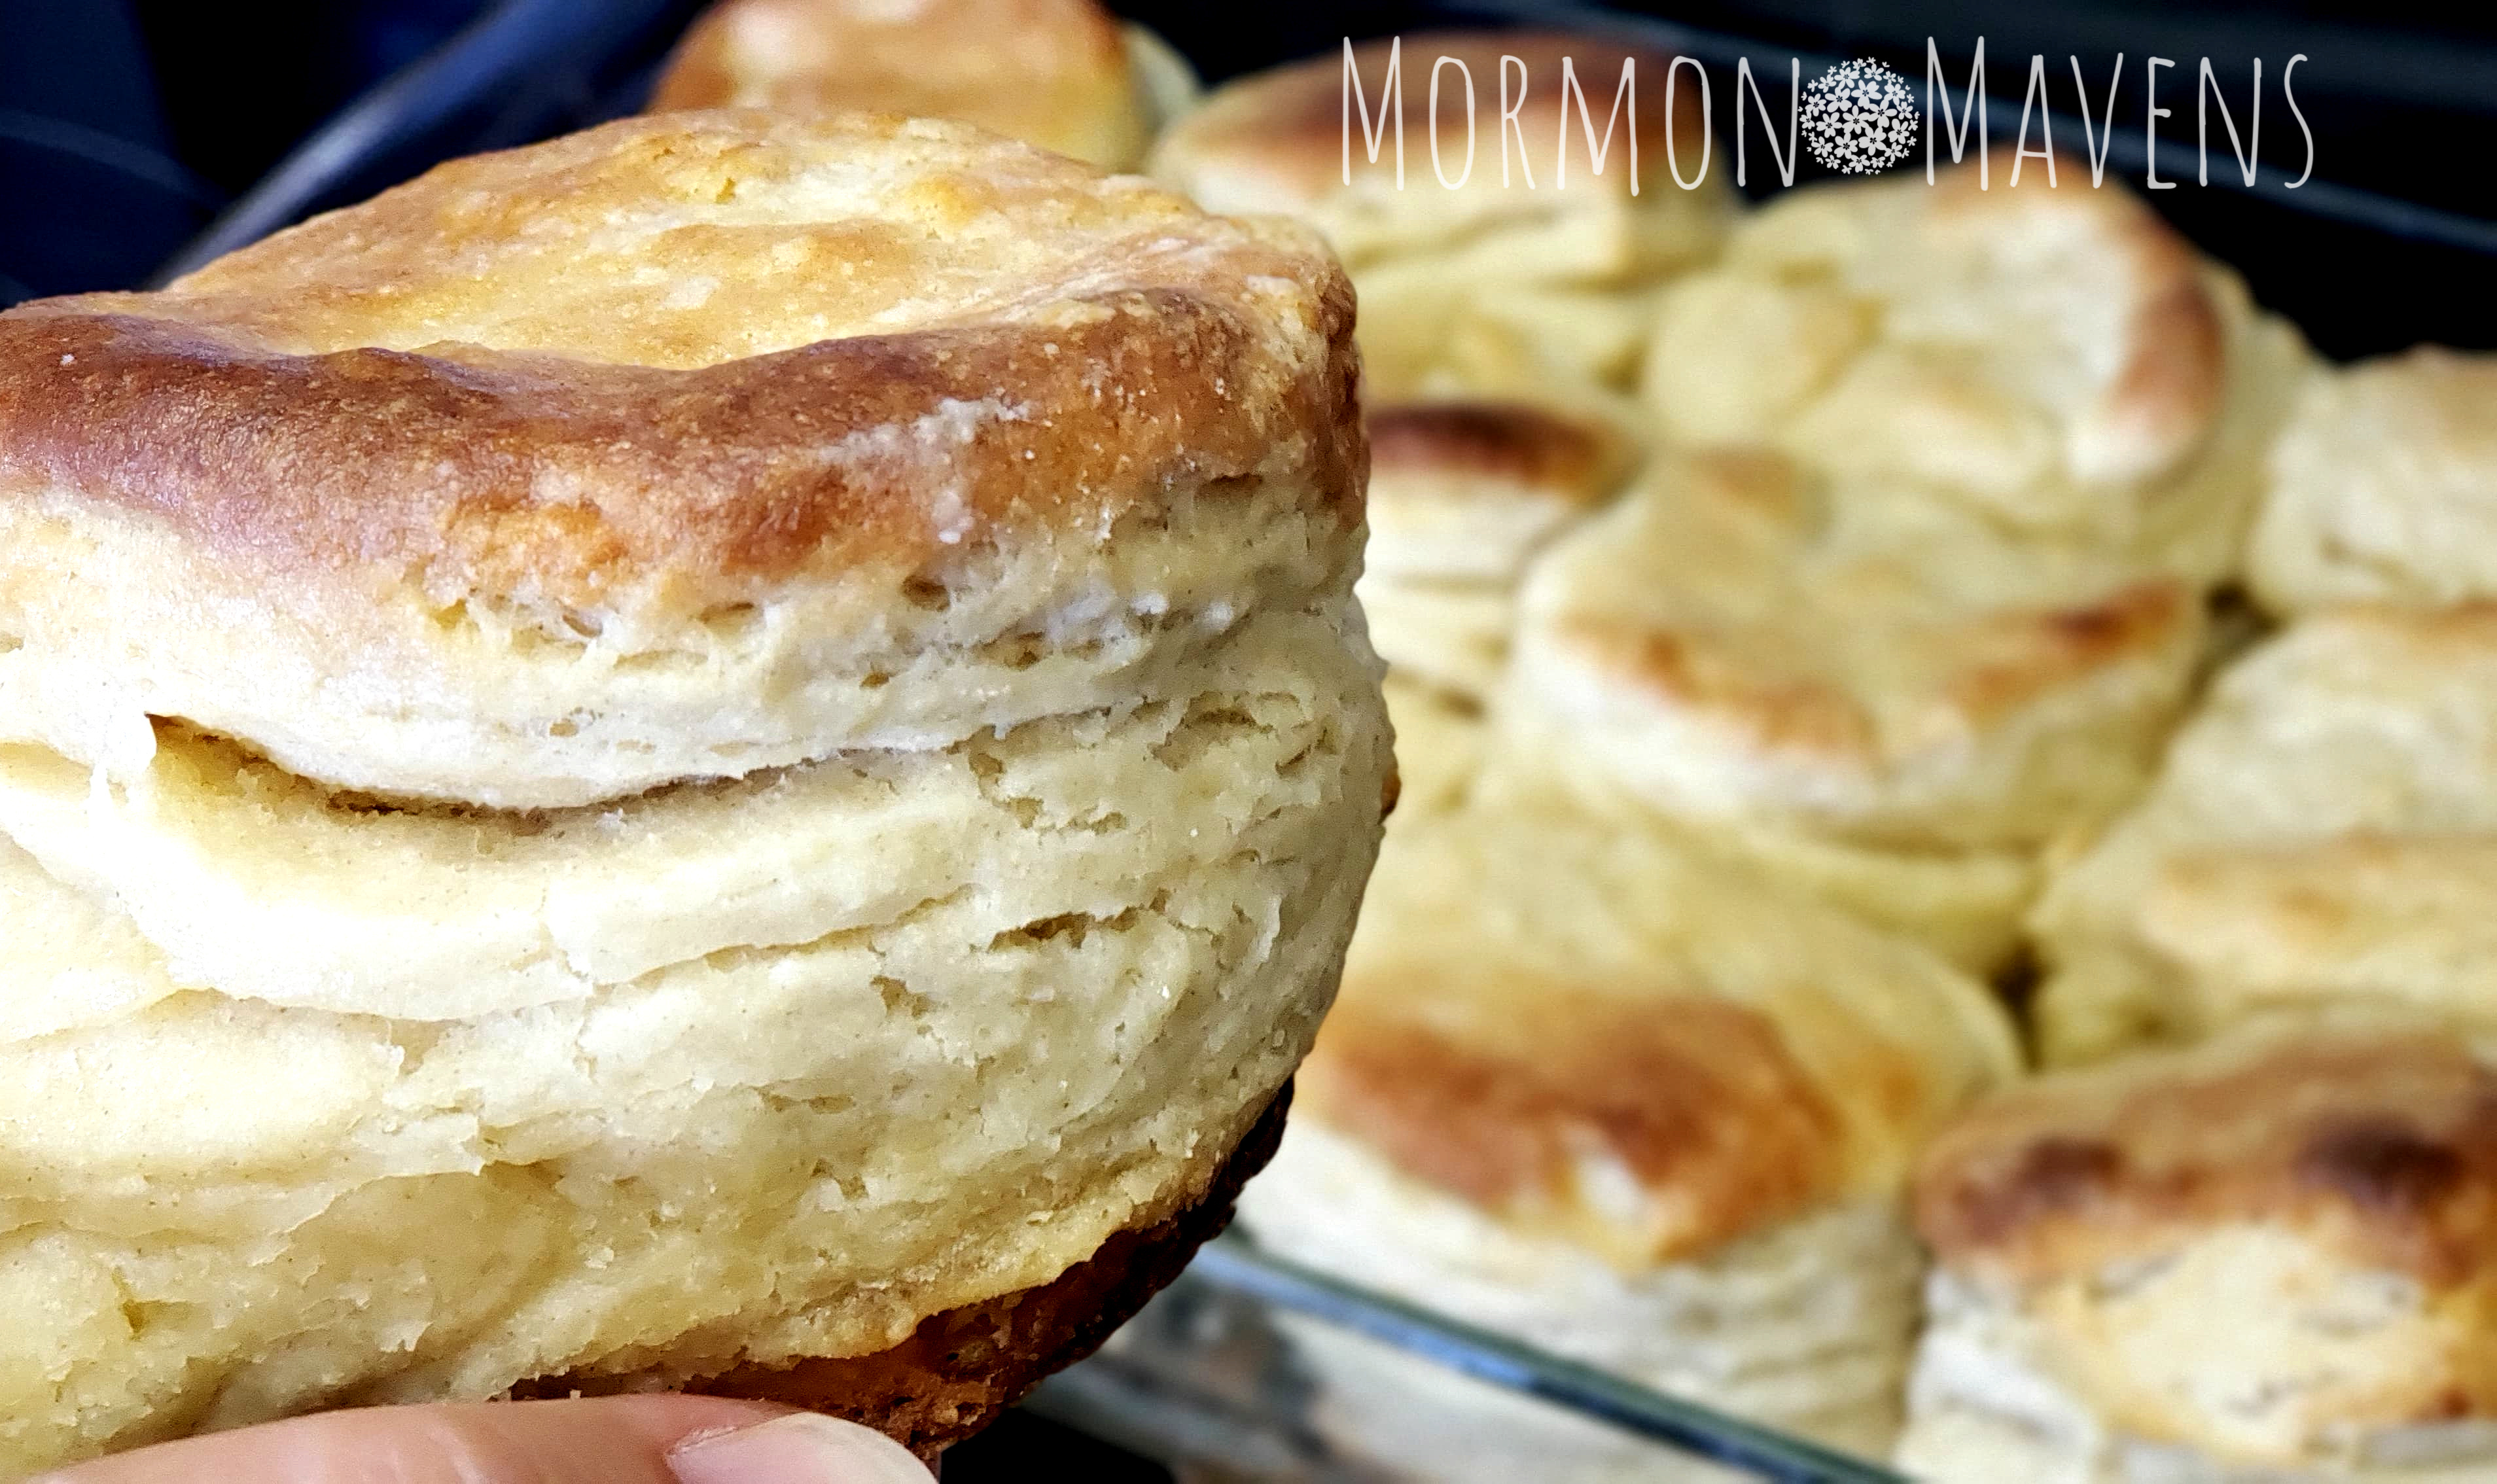
In search of…..the perfect biscuit.

I found recipes.  I tested them.  I made notes on each version of what to tweak next time.  Then I realized that I had no time to keep testing before I posted for today.  I knew I wanted to post a biscuit recipe since it’s National Biscuit Month in September, but how to do that when I was out of time?

And then I thought, “Hey, what about Angel Biscuits like the ones I used to make when Rick and I first got married?”

But crud…..I’m on vacation and my recipe is at home in a recipe box.  Well, let’s go ask the Google.

And, y’all, I literally just clicked on the first recipe that came up.

Trisha Yearwood’s Angel Biscuits.

Sure….okay…let’s try this one.  Bit different than what I remember, but whatever.

(Keep in mind that, at this point, I’m just thinking this recipe will “have to do” for National Biscuit Month until I can find the ultimate recipe through more testing.)

So I make this recipe for my family (and some visiting family) and hope for the best.

And that’s exactly what I got.  THE BEST.

Responses from family members…and I quote:

     Amazing!

     Bojangles has nothing on this biscuit!

     This is the best biscuit I’ve ever had!

     I just found my new happy place!

How serendipitous!  I find the ultimate recipe while thinking I’m just going to “make do” with plain old Angel Biscuits.

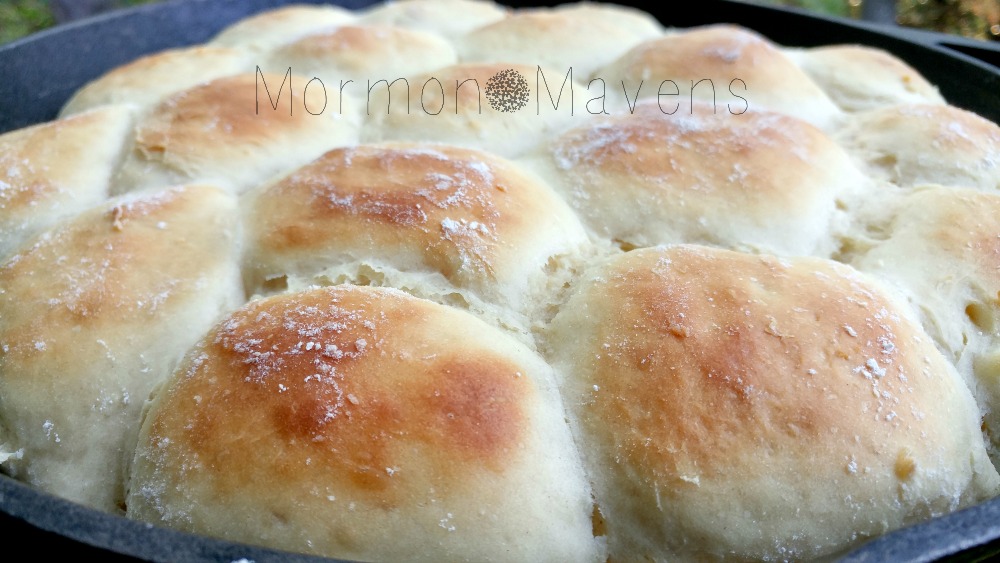
Well, these are not like the ones I used to make (although those were mighty good).  These are, well, incredible.  They took a little longer with rise time, but they are SOOOOO worth it!

Try ’em out and let me know what you think.

Angel Biscuits
Serves 12
Delicious, layery, buttery Southern goodness.
Write a review
Print
Total Time
2 hr
Total Time
2 hr
Ingredients
  1. 5 cups flour
  2. 1 1/2 tsp. baking powder
  3. 1 tsp. baking soda
  4. 1 tsp. salt
  5. 5 Tbsp. sugar (divided)
  6. 1/4 cup warm water (90-100 degrees F)
  7. 1/2 ounce active dry yeast (2 pkg)
  8. 1 cup salted cold butter, diced (2 sticks)
  9. 2 cups buttermilk
  10. 4 Tbsp. melted butter
Instructions
  1. In a large bowl, whisk together the flour, baking powder, baking soda, salt, and 3 Tbsp of the sugar.
  2. In a small bowl combine the yeast, sugar, and water. Stir this until the yeast dissolves and set it aside. Let stand for a few minutes until bubbles appear.
  3. Add the cold diced butter to the flour mixture and toss with hands. Use a pastry cutter to break up the butter and cut it into the flour. Stop when you have pea-sized chunks of butter mixed in with the flour.
  4. Add the buttermilk and the yeast mixture to the flour/butter mixture. Stir with a wooden spoon until it’s mostly combined. It will probably be pretty crumbly looking.
  5. Turn out onto a very lightly floured surface and knead until the dough comes together (no more than about 15 times). Place back in bowl, cover with plastic wrap or a clean dish towel, and allow to sit and rise for about an hour.
  6. When you’re ready to cut the biscuits, preheat your oven to 425 degrees F.
  7. Dump the dough onto a lightly floured surface again. Press the dough out to about 1-1.5″ thick. Fold over onto itself and press out again. Repeat this technique 3 times. Then press out to desired thickness (I like 1-1.5″).
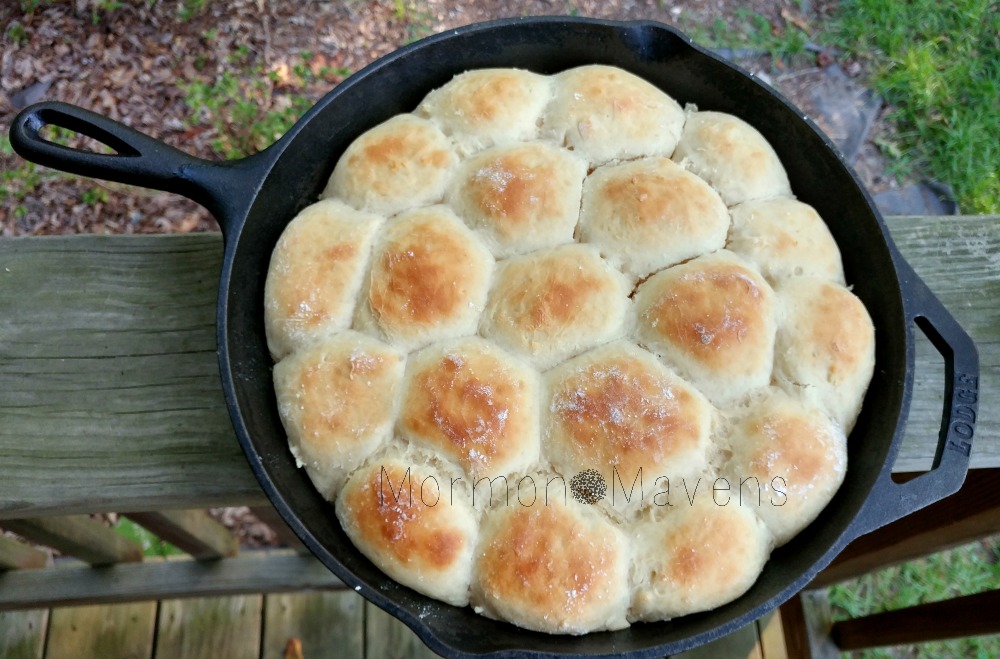
  8. Using a floured biscuit cutter, cut out your biscuits making sure NOT TO TWIST the cutter. Just go straight down and back up again. Place cut biscuits in a 9×13-inch pan or large cast iron skillet that has been brushed with some of the melted butter.
  9. Do not just smush together the leftover biscuit dough for cutting more biscuits. Repeat the whole press/fold technique each time you need to recut.
  10. Brush the tops of the melted butter (save some for when they come out of the oven).
  11. Bake for 18-22 minutes or until the tops are a golden brown. Brush with melted butter and enjoy!
Mormon Mavens https://www.mormonmavens.com/

Pizza Bowls


Hey, the kids are home for the summer !  Here’s a recipe–originally posted by Julie on November 21, 2016–that you can do together and it’s sure to please everyone at your house.  I’m thinking I might need to try this one soon…


You know those videos you see on Facebook?  The ones where they show amazing food?  Well, I save those.  And sometimes I actually make the recipes!  But this one…this one was different.

A Food Network dude was talking about one of his favorite places and that they served these Pizza Pot Pies.  I was drooling!  I mean, they looked amazing.  But hey, this place had some kind of Sicilian crust thing going on and, of course, a fancy restaurant oven.  I can’t make that at home, can I?

Challenge accepted.

I had to work with what I had.  So I took some poetic license with their concept.  With the crust.  With the oven.  With the name, even.

But the result was, well…..UH-MAZING!!!

These things are the bomb at my house–every single person in my family loves them.  And, they are so customizable!  Plus, they are fun to experiment with.

pizza-bowl-varieties

Adjust your cheese, sauce, and toppings to fit your mood, taste, or leftovers in the fridge!  here’s what I used to make the above 3 experiments:

  • Philly Cheesesteak:  leftover flank steak, provolone cheese, Thrive Bechamel sauce, Thrive red peppers, Thrive green peppers, Thrive onion slices
  • Chicken & Broccoli Alfredo:  mozzarella cheese, grated Parmesan, Thrive Seasoned Chicken Slices, Thrive Broccoli, Thrive Onion Slices
  • Meat Lovers:  mozzarella cheese, bacon, diced pepperoni, Thrive Sausage Crumbles, Thrive Ground Beef

I can see my oldest daughter wanting an experiment with pineapple and ham.  And I’d love to give a dessert pizza a try maybe with some ricotta and cream cheese, Nutella, and strawberries!

Pizza Bowls
Serves 4
Upside down pizza pot pie goodness baked in a bowl!
Write a review
Print
Prep Time
1 hr 20 min
Cook Time
15 min
Prep Time
1 hr 20 min
Cook Time
15 min
Ingredients
  1. 2 1/4 tsp. active dry yeast
  2. 1 cup plus 2 Tbsp. very warm water
  3. 3 3/4 cup Thrive Country White Dough Mix
  4. cheese of your choice (mozzarella, provolone, cheddar, etc.)
  5. sauce of your choice (spaghetti, pizza, Alfredo, Bechamel, etc.)
  6. toppings of your choice (pizza meats, veggies, etc.)
Instructions
  1. In the bowl of a stand mixer, combine the yeast and the 1 cup + 2 Tbsp. very warm water. With the dough hook on the mixer, slowly add in the dough mix until well-combined, then let the machine knead for 5 minutes.
  2. Remove the dough to an oiled bowl, turning dough over to coat. Cover bowl with a clean towel and allow to rest and rise for about 40 minutes or until doubled in bulk. Punch down and allow to rise again.
  3. Punch down and separate into 4 equal chunks. On a counter or floured board, roll or press out each chunk into a circle wide enough to cover the bowl and come down the sides of the bowl by at least an inch.
  4. Spray each bowl with nonstick cooking spray thoroughly. Also spray the outside rims a little. Layer 4-6 cheese slices in the bottom of each bowl.
  5. Mix the Tomato Sauce with the water until smooth. Pour 1/2 cup of sauce into each bowl.
  6. Add pizza toppings of your choice. It's okay to fill up the bowl to the top or even have it be mounded a little.
  7. (Note: you can use Thrive veggies and meats for toppings. Just refresh them first!)
  8. Take a circle of dough and carefully cover each filled bowl so that the dough goes over the edge and down the sides of the bowl by at least an inch.
  9. Place bowls on a large baking sheet making sure to leave space between them. Bake at 425 degrees for 15 minutes or until deep golden brown on top.
  10. Remove from oven and brush the crusts with melted butter.
  11. Remove a bowl from the baking sheet and place it on a dinner plate. Take another dinner plate and place it upside down over the pizza bowl. Using both hands--thumbs on top plate and fingers under bottom plate--firmly and carefully turn the plates over. Remove the top plate.
  12. Using a couple of spoons, carefully release the bowl from the crust/filling by lifting up on one side. If cheese has stuck to the bottom of the bowl, use the other spoon to scrape it out. Carefully remove the hot bowl and set aside.
  13. Enjoy! You'll want to eat this with a fork and knife!
Notes
  1. Because I sell Thrive, I have a LOT of Thrive. So I used our bread mix. But you can use your favorite bread dough mix or bread recipe. Just use what you'd use for 1 loaf.
  2. I made this using our family's cereal bowls, which are OVEN SAFE*****. But you can use any oven safe bowl/ramekin. I've even used kid sized real baking tins. I like using the ramekins we have because it makes a smaller portion which is just right for me.
Mormon Mavens https://www.mormonmavens.com/

Grandma’s Biscuits


I really love these biscuits….they’re great with butter and jam, butter and honey, or just butter!  (Can you tell I like butter?)  And they remind my of my Grandma.


Ingredients:
2 1/4 tsp. dry active yeast
1 cup warm water
2 cups buttermilk
3/4 cup vegetable oil
1/4 cup sugar
2 Tbsp. baking powder
1/4 tsp. baking soda
1 1/2 tsp. salt
7 cups all-purpose flour

1.  Heat oven to 450 degrees.  Combine yeast and water and stir till dissolved.
2.  Add remaining ingredients and stir until well blended.
3.  Pat/roll out 3/4″ thick and cut with biscuit cutter OR place in greased bowl and place in fridge until needed (will keep a week in the fridge).
4.  Bake for 15-20 minutes.

Makes about 30, depending on your cutter

Notes:

  • If you buy yeast in the little envelopes, then use one envelope for this recipe.
  • If you don’t have buttermilk, put 2 Tbsp. apple cider vinegar in a 2-cup measure.  Fill to the 2-cup line with milk and allow to sit for 5 minutes.  
  • I like my biscuits tall and thick.  If you like yours thinner, roll or pat them out to the thickness you like.

Source:  my Grandma Davis

Originally posted on May 27, 2013.

Brenda’s Rolls


Who doesn’t love the smell of homemade bread or rolls in their home?  Even better is that first warm bite that just fills your soul.

About 18 years ago, or so, I was introduced to the best bread/roll recipe that I have ever had the pleasure of tasting.  

Two sister missionaries–whose apartment had a gas leak–were given permission to sleep over at our house one Sunday evening.  Monday was their P-Day, which stands for preparation day–missionaries use the first portion of this day to clean, shop for groceries, run errands, do laundry, etc.  I was lucky to have these girls in my home on P-Day because one of them asked permission to do some baking.  Um, yeah.  You sure can!

I took off for errands and picking the girls up from school and came home to a house that was oozing with the wonderful aroma of homemade bread and cinnamon rolls.  I was into my second piece of amazing before I even knew it.  Melt-in-your-mouth cinnamon rolls that would rock your world.  They sure rocked mine.

I was able to get the recipe and wrote it inside my family cookbook.  I have only used it once.  I don’t know why!  Maybe because I would eat the whole batch.

I decided it was time to pull that recipe out and make rolls for Christmas Eve dinner.  It makes a lot so I divided it and used the other half for some delicious orange rolls.

You’re welcome!!!!

We are still having Recipe Card format issues, so I am going to copy this straight from how I wrote it in my cookbook. Read through the recipe to make sure you have all of your ingredients, which I have written in BOLD.


  1. Combine 4 T. yeast, 2 t. sugar, 1 cup warm  water (110 degrees F.) and set aside.
  2. Mix 4 c. flour, 1/2 c. instant powdered milk, 4 c. water, 1 and 1/3 c. sugar, 3 beaten eggs,  and 4 t. salt.
  3. Add 2 sticks of melted butter (1 cup).
  4. Add yeast mixture and mix well, stirring in 10 cups of flour.
  5. Turn dough onto a floured surface and knead for 5 minutes.
  6. Grease a large bowl and place the dough in that. Cover with plastic wrap and let rise until doubled.

I divided my dough into two bowls since I was doing a batch of rolls and a batch of orange rolls.

Once the dough has doubled, take it out of the bowl and place it on a floured surface.  Roll out and cut for rolls, place in a greased or buttered pan and bake at 350 degrees F for about 15 minutes.

If you are baking bread, form loaves and place in greased loaf pans and bake at 350 degrees F for about 30 minutes.


If you want delicious orange rolls, do the following:  a regular size navel orange will yield the orange zest and juice you will need.

  1.  Preheat oven to 400 degrees F.  
  2.  Stir together 1/2 t. cinnamon, 1 T. orange zest and 1/3 c. of sugar in a small bowl and set aside.
  3.  Spray counter top with non-stick cooking spray and roll dough out into a large rectangle about 1/4 inch thick.  Brush dough with 3 T. melted  butter, then spread with cinnamon/sugar/orange zest mixture.
  4.  Starting with one of the long sides of the rectangle, roll dough up tightly, working from one end to the other end horizontally, then back again.  pinch the seams closed at the end.  Use a sharp, thin knife (I like to used non-waxed/unflavored dental floss) to cut the roll in half, then each half in half.  You will have 4 sections. cut each section  into thirds.
  5. Set rolls in a greased or buttered  9 x 13 pan and bake for 12-14 minutes.
  6. Whisk together 2 c. powdered sugar, 2 T. melted butter and 3 T. orange juice. Spread over warm rolls.


Roll Recipe Source:  Sis. Stanger of the Arizona Tucson Mission of the Church of Jesus Christ of Latter-day Saints, ca. 1996-2002.

Orange Rolls Variation Recipe:  Butter with a Side of Bread.

Sticky-Buns in Cast Iron

sticky buns in cast iron

Buns of Iron?

Okay, that was pretty lame.  But I couldn’t help it.

I’ve never made sticky buns before but when I saw a recipe making them in a cast iron skillet I knew I had to try it.  I love my cast iron cookware and use it all the time.  I especially love finding recipes where I can bake with it.

I followed the original recipe directions and made 9 large buns, but next time I will make smaller ones.  I think the sticky-to-bun ratio is better that way.  I also used my Thrive Life Country White Dough Mix for the bread.  Use any basic bread dough recipe you like.  Or maybe you love the frozen roll dough!  That’s even easier than using a mix.  Whatever works for you!  My dough mix recipe is for one loaf’s worth of dough.

I used a 9″ square cast iron skillet (my grandmother’s).  So to make it mathematically easy, I’ll divide the dough into 16 equal pieces and do a 4×4 arrangement.

Do you like cast iron?  If so, what’s your favorite piece?

Sticky Buns in Cast Iron
Bread, butter, sugar.....like seriously....do I need to say more?
Write a review
Print
Prep Time
1 hr 20 min
Cook Time
25 min
Prep Time
1 hr 20 min
Cook Time
25 min
Ingredients
  1. The Bun Dough
  2. 1 c. warm water
  3. 2 tbsp. warm water
  4. 2 1/4 tsp. Active Dry Baker's Yeast
  5. 2 tbsp. honey
  6. 3 3/4 c. THRIVE Country White Dough Mix
  7. The Sticky Stuff
  8. 1/2 c. butter, softened
  9. 1/2 c. brown sugar
  10. 1 tsp. Ground Cinnamon
  11. 3 tbsp. honey
  12. 1 pn. salt
  13. 1/4 c. pecan halves
Instructions
  1. Prep the Dough
  2. Add the water, yeast, and honey to the bowl of a stand mixer equipped with the dough hook. Slowly add in the dough mix. Once it's all incorporated, knead in mixer for about 5 minutes.
  3. Spray a medium bowl with cooking spray. Form the dough into a ball and place in the bowl, turning to coat it with the cooking spray. Cover and allow to rise for about 40 minutes.
  4. When dough has doubled in size, punch it down and divide it into 9 pieces (or 16 as mentioned in the description). Set aside while you prep the sticky stuff.
  5. Prep the Sticky Stuff
  6. Combine all but the pecans in a medium bowl and stir well to combine everything.
  7. Spread this onto the bottom and up the sides of the cast iron skillet.
  8. Place the pecan halves evenly over the sticky stuff. (If you want it to be pretty, make sure you have the flatter side of the pecan facing up.)
  9. Dough + Sticky Stuff
  10. Take the dough pieces and roll into balls. Place these evenly over the sticky stuff. Cover and allow to rise about 30 minutes.
  11. Preheat oven to 375 degrees.
  12. Bake the skillet, uncovered, for 20-30 minutes or until rolls are golden and dough is cooked through. Allow to sit for 15 minutes once you remove it from the oven.
  13. Place a large plate upside-down over the skillet and carefully flip so that the rolls release onto the plate. Enjoy!
Notes
  1. Makes 9 large rolls, but you could make smaller rolls. I would make 16 for my square skillet.
Adapted from Rie McClenny
Mormon Mavens https://www.mormonmavens.com/

Quick Skillet Rolls

skillet-rolls-4

I love my cast iron skillet.  Love.  Love.  Love.  

So finding a recipe sized down for quick 30-minute rolls was so exciting for me.  I don’t make rolls often because I’m really not supposed to have wheat, and these are so good that I can’t stop eating them.  This size recipe is perfect for my family and means that, even if I do indulge, I don’t have too many to tempt me!

skillet-rolls-3

My cast iron skillet is 12″ across and I got 19 rolls out of this recipe.  It’s great for a family meal!  Brush the rolls with melted butter when they come out of the oven and they will be absolutely delicious!

Quick Skillet Rolls
Yields 1
Delicious dinner rolls baked in a cast iron skillet.
Write a review
Print
Prep Time
25 min
Prep Time
25 min
Ingredients
  1. 1 cup plus 2 Tbsp. of warm water
  2. 1/3 cup vegetable oil
  3. 2 Tbsp. active dry yeast
  4. 1/4 cup sugar
  5. 1/2 tsp. salt
  6. 1 egg
  7. 3 1/2 to 4 1/2 cups all-purpose flour
Instructions
  1. Preheat your oven to 400 degrees.
  2. In the bowl of a stand mixer, combine the water, oil, yeast, and sugar. Whisk together, then set aside to rest for 15 minutes.
  3. Add 2 cups of the flour, salt, and egg to the yeast mixture. Use the dough hook on the mixer to begin mixing/kneading the dough. Add in the remaining flour until the dough is in a workable state (not too wet to work with).
  4. Shape the dough into golf ball sized balls, tucking under to make smooth tops. Place in a cast iron skillet and allow the rolls to rest for 10 minutes.
  5. Bake for 10-12 minutes, or until the tops are a golden brown.
Notes
  1. Try to use the least amount of flour that you can when adding in the remaining flour. You don't want the dough to be totally dried out. Just make sure that it's got enough body to it that you can form rolls--your fingers will still get a little messy with dough.
Mormon Mavens https://www.mormonmavens.com/

Shawarma-jo Tacos

 shawarmajo tacos labeled


Thank you, Disney Cruise Line!

Why?  Well, it was there–by the pool deck–that I had my first taste of shawarma.  I thoroughly enjoyed the shaved, slow-roasted chicken with its unusual spice set.  The fresh fixins and delicious garlic aioli made it a special treat.

I’ve been wanting to figure out how to recreate it but, doggone it, I don’t have a roasting spit or the patience for all-day roasting!  And ever since I started using Thrive Life foods, I’m been a little spoiled in the quick meal prep department.  I want it.  And I want it now.  

So I combed the internet, looking for just the right recipe to “Thrive-alize”.  After a less than stellar attempt, I found a recipe that fit just right.  Thrive’s Seasoned Chicken Slices make it super fast.  They are freeze dried and reconstistute quickly.  Once the spices have been added to them, they really only need to heat through!  

Why the funky name?  Well, I thought I’d use my Thrive dough mix to try and simulate naan bread.  Didn’t work.  But what happened was a scone-like bread circle that my family has previously used for Navajo Tacos.  So I thought, well…..let’s mix the two.  Add a little garlic sauce, and there you go!

If you don’t want to try this recipe with Thrive foods (why wouldn’t you, though?  It’s so super fast!) then I encourage you to visit the recipe site that I used as a springboard for my Thrive-alized version, Jo Cooks.  And if you don’t have time to do the bread, pick up some naan bread in your grocery store.

Give shawarma a try.  Your hunger will be AVENGED!  

Shawarma-jo Tacos
Serves 8
Deliciously unusual spiced chicken piled with fresh fixins and garlic sauce atop a circle of bread.
Write a review
Print
Prep Time
1 hr 10 min
Cook Time
20 min
Total Time
1 hr 30 min
Prep Time
1 hr 10 min
Cook Time
20 min
Total Time
1 hr 30 min
Taco Bread
  1. 2 1/4 tsp. THRIVE Instant Dry Yeast
  2. 1 tsp. THRIVE Iodized Salt
  3. 4 c. THRIVE Honey Whole Wheat Dough Mix
Chicken Shawarma
  1. 4 c. THRIVE Seasoned Chicken Slices - Freeze Dried
  2. 2 c. hot water
  3. 1/4 c. fresh lemon juice
  4. 1/2 c. Olive Oil
  5. 2 tsp. Paprika
  6. 1/2 tsp. Ground Turmeric
  7. 2 tsp. cumin
  8. 1/2 tsp. Ground Cinnamon
  9. 2 tsp. ground black pepper
  10. 1 tsp. THRIVE Iodized Salt
  11. 4 clv. Garlic, minced
Garlic Yogurt Sauce
  1. 1/3 c. fresh lemon juice
  2. 1 c. Vegetable Oil
  3. 1/4 c. plain Greek yogurt
  4. 6 clv. Garlic, peeled
  5. 1 tsp. THRIVE Iodized Salt
  6. 1 tbsp. THRIVE Parsley
Toppings
  1. diced hothouse cucumbers
  2. halved grape tomatoes
  3. iceberg lettuce, sliced thinly
Taco Bread
  1. Dissolve yeast in hot water (hot from the tap). Add salt. Whisk. Stir in Thrive dough mix.
  2. Knead for 5 minutes. Lightly cover dough with a little vegetable oil, place in bowl, cover with towel, and allow to rise until dough has doubled in size.
  3. Punch dough down. Divide into 8 equal pieces.
  4. Place nonstick or cast iron skillet on stove on medium heat.
  5. Take one piece of dough, roll into ball, then flatten as thin as possible with your hands. Place on skillet and cook on each side until golden brown and cooked through.
  6. Repeat with remaining dough pieces. Set aside and cover to keep warm.
Chicken Shawarma
  1. Put the chicken into a bowl and add the 2 cups of water. Toss with a spoon every few minutes while you let it reconstitute (about 15 minutes).
  2. Put remaining shawarma ingredients into a small bowl, whisk well, and pour over the chicken (after the chicken has sat for 15 minutes). Toss to coat the chicken well.
  3. Drizzle a little vegetable or olive oil in a large skillet and heat to medium high on the stove. Pour in the chicken and allow it to heat through for about 5 minutes.
Garlic Yogurt Sauce
  1. Place all sauce ingredients in a blender and process for 1-2 minutes. Allow to rest while you prepare the toppings.
Assembling the Taco
  1. Place a bread circle on a plate and top with some chicken.
  2. Add toppings and drizzle with sauce.
Notes
  1. This recipe is highly customizable; reduce or increase the shawarma spices as you see fit.
  2. Too much garlic? Simply reduce.
  3. Want a creamier sauce? Increase yogurt and decrease oil.
  4. Play around with it and make it your own!
Adapted from Jo Cooks
Mormon Mavens https://www.mormonmavens.com/

Rosemary Olive Oil Bread

Sometimes I just forget about Pinterest.  Can you even fathom that?  And really, that is not a bad thing.  But once in a while I will go to my boards and find something that I really want to try.  This week it is this yummy bread–reminiscent of the bread at Macaroni Grill.  Just sayin’.  When I made this tonight, I put together a little “Italian Salsa” to dip the bread in, just like in a restaurant.  When we lived El Paso, Texas,  we went to another Italian place called Johnny Carino’s–best Chicken Scaloppini on the planet, by the way–and when the waiter brought out the bread, he poured some olive oil in a little plate, added a little balsamic vinegar and some herbs and BAM!  He called it Italian Salsa.  You know because we were in Mexican salsa territory.  Get it?
Ingredients:
1 cup warm water (100-110 degrees F)
1 T. sugar
2 t. active dry yeast
1 t. salt
2 T. fresh rosemary, chopped (you can use 2 t. dried, instead)
1/4 t. Italian seasoning
1/4 t. black pepper
2 T. extra virgin olive oil
1 1/2 cups white whole wheat flour 
1/2 cup bread flour, plus extra for kneading
1 egg, whisked with 1 T. water, for egg wash
dried rosemary for sprinkling on top

Directions:
1.  In a large bowl, combine the warm water, sugar and yeast.  Let sit 10 minutes to proof.
2.  Stir in the salt, fresh rosemary, seasonings, olive oil, and whole wheat flour.  Add the bread flour and stir until the dough forms a ball.  Knead on a lightly floured surface for about 5 minutes, adding in more flour to prevent sticking and for a smooth dough.
3.  Place the dough in a lightly greased bowl; cover and let rise until doubled in size, about 1 hour.
4.  Punch down the dough and form into a round loaf.  Place on a cornmeal dusted pizza peel or parchment paper (I used this), cover and let rise until doubled in size, about 45 minutes.
5.  Meanwhile, preheat oven and a pizza stone to 400 degrees F.  When the dough has risen, gently brush top with egg wash and sprinkle with some dried rosemary.
6.  Bake  for 20-25 minutes or until the top is golden brown and sounds hollow when you tap on it.
SOURCE:  A Hint of Honey via Pinterest

Bistro Chicken Twist

This recipe comes from a good ol’ Pampered Chef recipe book. I have been making it for years and used to make it for my family on Christmas Eve before we decorated Christmas cookies.

1 C. Chopped cooked chicken
1/2 C. diced red bell pepper
1/4 C. snipped fresh basil leaves
1/4 C. grated fresh Parmesan cheese
1/2 C. shredded mozzarella cheese
1/4 C. mayonnaise
1 garlic clove, pressed
2 packages (11 ounces each) refrigerated French bread dough-I use frozen bread dough, thawed.

1 egg white, lightly beaten
1 tsp. Italian seasoning
2 Tbsp Parmesan

Preheat oven to 375 degrees.
In a bowl, combine chicken, bell pepper, basil, 1/4 c. Parmesan cheese, mozzarella cheese, mayonnaise and garlic. Mix well.

Place bread dough on a greased cookie sheet. With a knife, cut each loaf length wise, end to end, halfway through. Then, use your hands to spread the dough about a bit.

Spoon half the chicken mixture into each of the two loaves. Gather up the edges over the filling, pinching to seal. Turn the two loaves over so the seam sides are down.

With the two loaves next to one another, crisscross them together. Leave a 1 1/2 inch space between the two loaves in the centers of the figure eights that you created.

Combine the egg white and the Italian seasoning. Brush over the top of the twist. Cut a small slit in the tops of the twist to expose the filling. Sprinkle with 2 Tbsp. Parmesan cheese.

Bake for 30-35 minutes or until deep golden brown. Remove from oven, let cool for 10 minutes.
Slice and serve.

Whole Wheat Sandwich Bread

This recipe comes from my friend’s sister of The Perfect Chocolate Chip Cookie
She basically has it down to a science and it always turns out wonderfully!

Ingredients:
4 c water (room temperature)
8-10 C. (2 lbs 10 oz) whole wheat flour
2 T instant yeast
1/2 c (2 oz) gluten
1/2 c brown sugar
4 t salt
1/4 c vegetable oil

In a large mixer combine the water and whole wheat flour. Blend for 3-4 minutes. It will be sticky. Cover and let sit for at least 30 minutes or up to 12 hours. I often mix the flour and water the night before and finish the bread in the morning.

Add the remaining ingredients and knead 2-3 minutes.  It should be cleaning the sides of the bowl by this point.  If it isn’t, add 2 T wheat flour at a time until it does.
Knead another five minutes and touch test the dough.  Squeeze the top quickly with a few finger tips. The dough should not stick to them. Add flour or water 1-2 tablespoons at a time to get the correct look and feel. Knead an additional 5 minutes.

Cover tightly with plastic wrap and let rise in a warm place for 30 minutes. Punch down dough, knead for a minute or so and then cover tightly again and let rise an additional 45-60 minutes until dough triples in size. 

Grease 3 loaf pans with cooking spray. Punch down dough and separate into 3 equal pieces. Roll each piece into a long, skinny rectangle, making sure to remove any air pockets, roll each rectangle tightly and pinch bottom and side seams to create a loaf shape. Place in greased loaf pans. Cover loosely with plastic wrap and let rise 30-45 minutes. Pre heat oven to 350 degrees F. Uncover loaves and let rise 15 mins more, or until the oven is preheated. Bake 40 minutes. 

Remove immediately from pans and place on a cooling rack. You can eat it warm or cool down to slice and freeze it.