Boiled Cookies

I had a friend once who thought this was a disgusting name for a cookie.  She said in her family they called them Gorilla Poops.  Not sure why my family’s title won the gross-out award over hers.  Anyhow, it’s a tried and true recipe that brings back lots of memories for me.  Sunday afternoons were the traditional occasions for these quick treats when I was growing up, and it’s a tradition I’ve kept going in my own family.

Ingredients:
1/4 c. butter
1/2 c. milk
3 Tbsp. cocoa
1/4 tsp. salt
2 c. sugar
1 tsp. vanilla
1/2 c. peanut butter
2 1/2 c. oats (quick or old-fashioned)

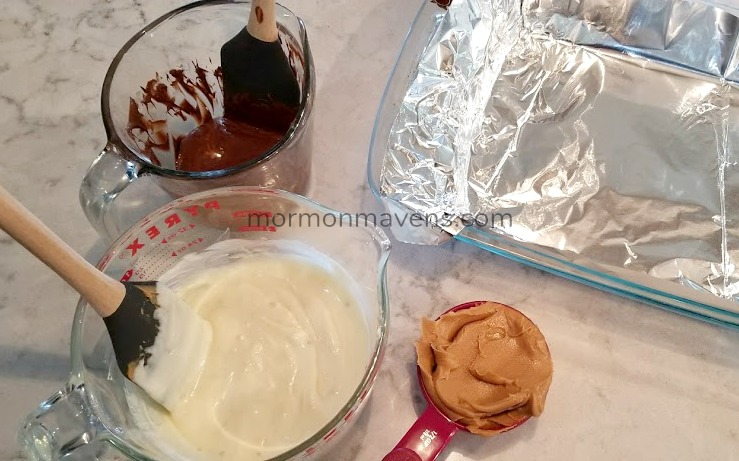
1.  Combine the butter, milk, cocoa, salt, and sugar in a large saucepan and bring to a boil.  Cook for 1-2 minutes more and then remove from heat.
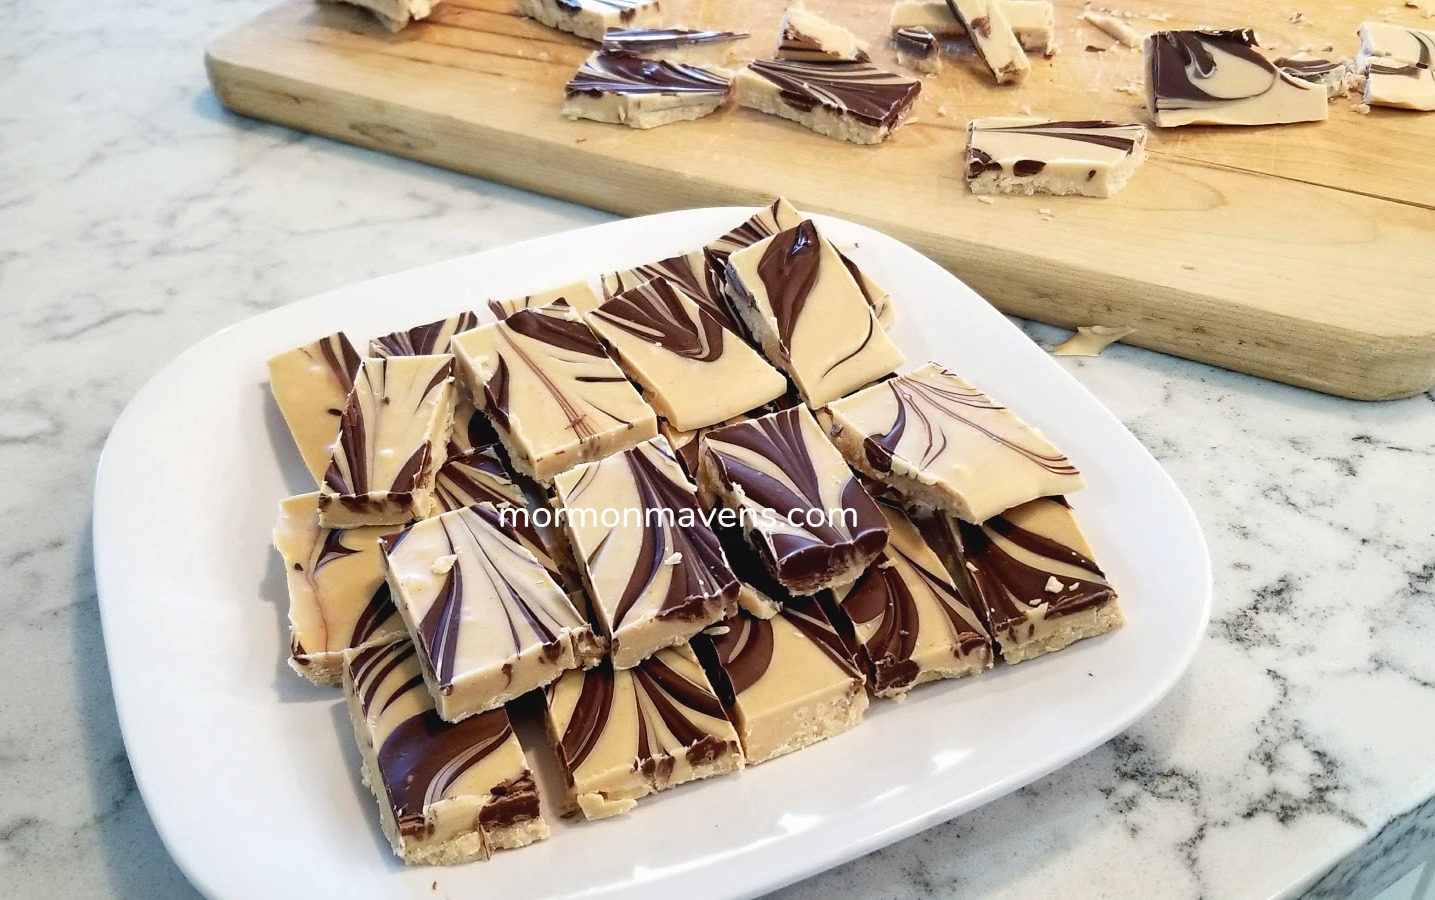
2.  Stir in vanilla, peanut butter, and oats.  Drop by spoonfuls onto waxed paper and allow to set.

Makes about 3 dozen

Notes:

  • My personal favorite way to make these is to omit the cocoa from the boiling mixture, and then add in 1/2 cup or so of coconut after the boil.  Yum!
  • I used to always use quick oats until I experimented with old-fashioned, which I use more often.  Quick oats give a bit softer texture, but I like them with the old-fashioned oats better.
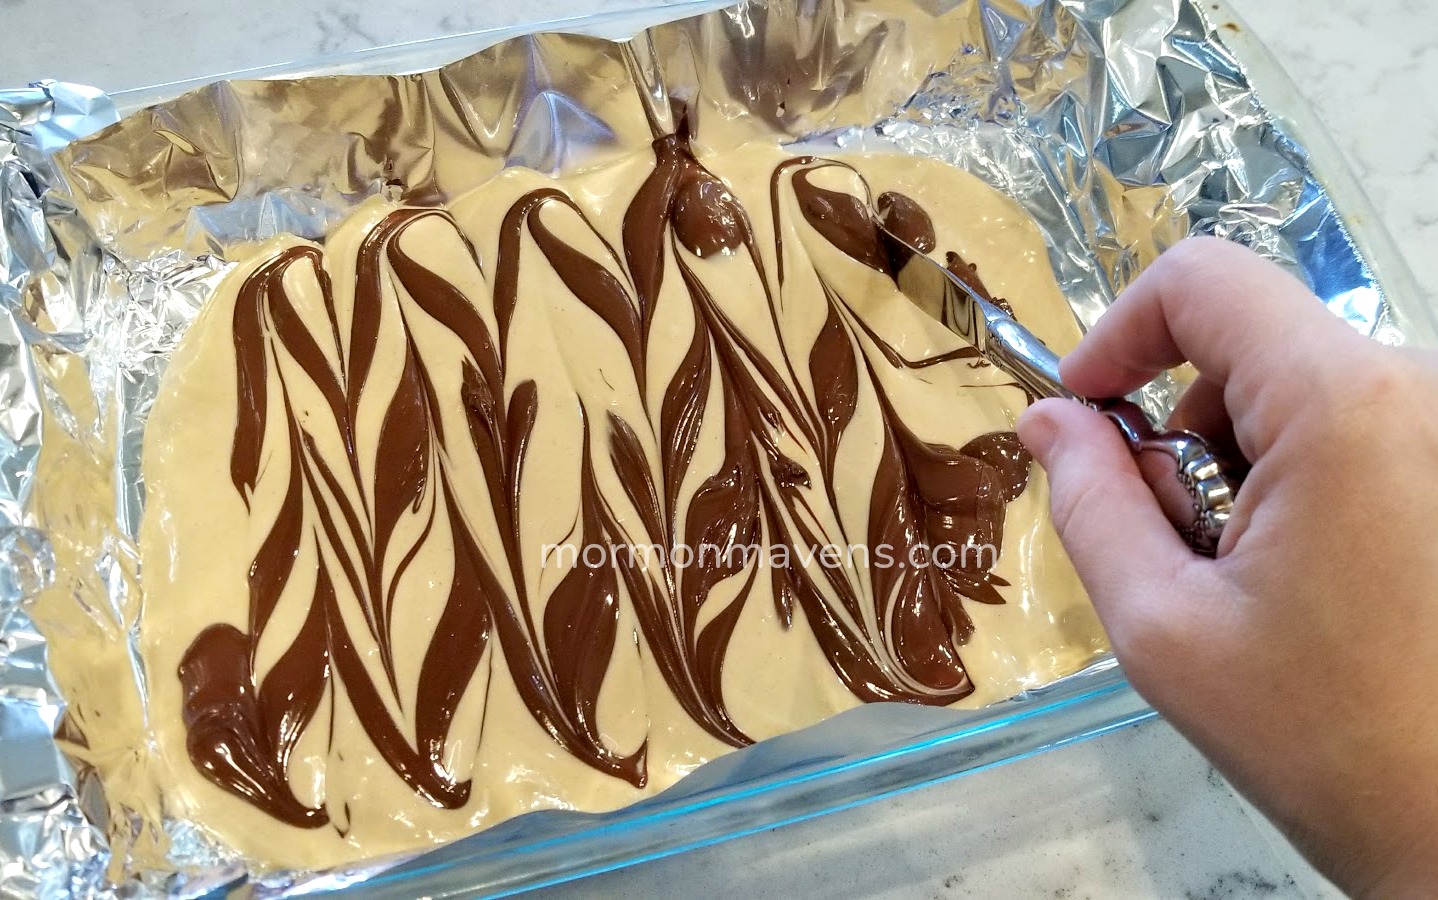
  • You can pour the mixture into an 8″x 8″ pan, sprayed with cooking spray, but it takes a lot longer to set before you can cut it into bars.
  • My ten-year-old made this batch and has become quite an expert at the process!
  • We like to use a cookie scoop for easy portioning onto the waxed paper.
 
Source:  my mom, but this recipe has been around forever!
Originally posted on February 4, 2013.

Bagel Quiches

bagel quicheIt’s a new look for bagels…and quiches!

If you’re bored with the same-old, same-old for breakfast, give this a shot.  We’re always using Thrive Life ingredients in our home, but you could easily sub your own ingredients; Thrive Life just makes prep easier. 

Try some different combinations of flavors!  I think a Caprese combo would be great, and it’s next on my list to try:  basil, tomato dices, and mozzarella!


Bagel Quiches
Serves 1
Quiche in a bagel!
Write a review
Print
Prep Time
10 min
Cook Time
25 min
Prep Time
10 min
Cook Time
25 min
Ingredients
  1. 1 bagel, sliced in half
  2. 2 eggs
  3. 1 pn. salt and pepper to taste
  4. 2 tbsp. THRIVE Red Bell Peppers - Freeze Dried
  5. 2 tbsp. THRIVE Mushroom Pieces - Freeze Dried
  6. 2 tbsp. THRIVE Shredded Cheddar Cheese - Freeze Dried
Instructions
  1. Preheat oven to 375 degrees.
  2. Measure out your Thrive Life veggies/cheeses/meats and place them in a small container with a tight-fitting lid. Add in about a Tablespoon of water and close the lid. Toss every couple of minutes to refresh the ingredients while you prep the other items. (If using non-freeze dried, prep and chop ingredients and set aside.)
  3. Cut a trench into each bagel half by cutting about 1/4" away from the outside edge and the inside hole. Use your fingers to carefully remove the bagel bread from between the cuts; again, being careful not to tear all the way through the bottom.
  4. Cradle each bagel half in foil and place on a baking sheet.
  5. Whisk the eggs in a small bowl or glass measuring cup. Add in the salt and pepper while whisking. Pour enough of the egg into each bagel half to cover the bottom of the trench.
  6. Drain the container with the Thrive Life veggies/cheeses/meats if needed. Using your fingers, sprinkle these ingredients over the egg in your bagel halves. Add more whisked egg over top but do not overfill the bagel (just fill to the top).
  7. Bake for 20-30 minutes or until egg is set (25 minutes in my oven at home). Serve!
Notes
  1. Depending on the size of your bagel, you will use anywhere from 4-8 Tablespoons of Thrive Life ingredients (or your non-freeze dried ingredients).
  2. Try adding Thrive Life's Chef Choice Seasoning or our delicious freeze dried herbs (or whatever herbs you have on hand)!
  3. Use any combo of ingredients you like.
  4. Could be a great way to use up those leftover veggies from dinner!
  5. I used presliced bagels, but would have preferred bakery bagels that are unsliced. Too often, presliced bagels are uneven--the top is thinner than the bottom. Still, it worked. 🙂
  6. You can also use our Thrive's Scrambled Egg Mix! It comes in handy if you're out of eggs, and I promise it is delicious. Even my pickiest eater eats it!
Adapted from Recipe Girl
Mormon Mavens https://www.mormonmavens.com/

Tiger Butter Fudge

Ever need to make a treat to take to an event but don’t really want to go to the trouble?  Or maybe you just want a treat for yourself?

With only three ingredients, this recipe is a winner and you’ll be toting/indulging in this treat in no time!

tiger butter fudge

tiger butter fudge prep

Chocolates are melted, peanut butter is about to go into the white chocolate, and the pan is ready.

This is the fun part!

tiger butter fudge

Easy recipe…..peanut butter and chocolate….pretty…..WIN!

Tiger Butter Fudge
With only three ingredients, this recipe is one you can whip up in no time.
Write a review
Print
Prep Time
5 min
Prep Time
5 min
Ingredients
  1. 1 (12 oz) bag of white chocolate chips
  2. 1/2 cup creamy peanut butter
  3. 1/2 cup semisweet chocolate chips
Instructions
  1. Line a 9x13 pan with aluminum foil so that when you are ready to cut and serve, you can easily lift out the fudge.
  2. Place the semisweet chips into a microwave-safe bowl and microwave for 1 minute. Remove and stir. Continue to melt in microwave in 30 second increments until the chips are melted. Set aside.
  3. Repeat this process in a different bowl with the white chocolate chips. Stir peanut butter into the melted white chocolate.
  4. Pour the white chocolate/peanut butter mixture into the pan. Don't worry about spreading it to the edge, just let it spread as far as it will on its own.
  5. Use a spoon or spatula to drop the semisweet chocolate onto the white chocolate mixture in rough lines.
  6. Using a butter knife, run through the fudge in the opposite direction of the semisweet lines, making a marbled pattern. Do this until you get the look you like!
  7. Allow to set at room temperature, or place it in the fridge to set quickly. Lift out the foil and place on a cutting board; cut in pieces.
Mormon Mavens https://www.mormonmavens.com/

Ham & Egg Cups

ham-egg-cups


I am sure that you have probably seen a gazillion recipes for this one.  I have seen a few myself–like back in the 70’s–and I had not even tried one yet. So I was going through that stack of Paleo recipes I was telling you about a couple of weeks ago and came across this super simple egg cup recipe and thought it was high flippin’ time I tried one.  This was so easy, you won’t believe it.  As a matter of fact, the original recipe title is Kid Simple Ham and Egg Cups.  There you go.  Your kids could totally make this for breakfast.  And who doesn’t love that little tidbit of something that will help you out, Busy Mama!  Two ingredients, a muffin tin and some cooking spray–BAM!!

Ham & Egg Cups
Write a review
Print
Ingredients
  1. Thin-sliced ham (2 per cup)
  2. 1 egg for each cup
  3. Spices like salt & pepper, ground mustard, etc.
Instructions
  1. Preheat oven to 375 degrees F.
  2. Spray muffin tins with cooking spray.
  3. Place 2 slices of ham in each cup.
  4. Crack an egg into each cup.
  5. Sprinkle with your chosen spices or you can do it later if you forget to.
  6. Bake for 20 minutes.
  7. You're done.
Notes
  1. These egg cups don't even require utensils. You can just pick them up and eat them on the go, if needed. And don't you just love the curly edges of the ham? It's all about the presentation, you know.
Adapted from PaleoBurn Fat Burning Cookbook
Mormon Mavens https://www.mormonmavens.com/

Traditions & Popcorn Balls

traditions-popcorn-balls


Traditions have meant a lot to me for as long as I can remember, but I haven’t always been that great at starting continuing them.  I can sure start one, but it’s the hardest thing for me to continue.  I remember a few from my childhood–oyster stew for Christmas Eve (for years we did this in our family until one day we realized that only one or two of us even liked it that much), opening gifts on Christmas Eve (still do that one!)—Trick or Treating at Halloween in the neighborhood with costumes from Mom’s Costume Box, etc.   This time of year really gets my mind spinning on what traditions my family expects on Christmas Eve–full from scratch Mexican meal, opening gifts. doing stockings, EVEN FOR THE ADULTS–and other things like decorating for Fall (my favorite season).  Hmmm….that’s not very many traditions.  I need some more.  

So a couple of days ago I was at the store picking up some things for dinner and I realized that my grandsons would be at the house that day and I needed to give them their Halloween treats!  I am trying to start that tradition with them, since I am not with them for the Trick or Treating.  So I grabbed a couple of different small bags of candy and I was trying to think of something else I could do that would be slightly healthy and I remembered something my Mom did for us when we were younger–homemade popcorn balls!  I loved those and did them a few times when my girls were little.  I knew it was time for me to start that tradition with my grandkids, so I picked up some microwave popcorn, some orange and green Jell-O and some tiny marshmallows, some Halloween goodie bags and pencils.

It was so much fun to share those popcorn balls with my boys!

Traditions are fun and bonding and build great relationships in your family.  So today, think about some traditions that you are already doing and some new ones that you can add.  And they don’t have to be built around holidays.  Some of the best are things you do together randomly that the kids consider as traditions, because they will certainly remind you to do them again!

I know it’s Mormon Morsel Sunday, but how about I share my Marshmallow Popcorn Ball recipe with you today?  Maybe you can make some for your Trick or Treaters…

Marshmallow Popcorn Balls
Yields 12
Write a review
Print
Ingredients
  1. 6 T. butter
  2. 3 cups tiny marshmallows
  3. 1/2 of a 3-oz. pkg of Jell-O, in flavor of choice (3 T.)
  4. 3 quarts unsalted popped corn
Instructions
  1. Place popped corn in a large bowl and set aside.
  2. In medium pan, melt butter over medium heat. Add marshmallow, stirring until melted.
  3. Blend in Jell-O, and pour over popcorn, mixing well.
  4. With buttered hands, form popcorn into balls.
Notes
  1. Have fun with different colors of Jell-O, depending on the occasion. Hey, let the kids help make the popcorn balls--you shouldn't have ALL the fun!
Mormon Mavens https://www.mormonmavens.com/

Reese’s Peanut Butter Cookie Dough Dip

Love cookie dough?  Love peanut butter?  Love mini chocolate chips and Reese’s cups?  Look no further!  You have the exact recipe you need!  This sweet dip is so yummy, it can be eaten as a finger-food appetizer, or as a dessert.

Ingredients List:

1/2 c. unsalted butter
1/2 c. light brown sugar
1/4 c. creamy peanut butter
8 oz. cream cheese, softened
3/4 c. powdered sugar
1 tsp. vanilla
1/2 c. mini semisweet chocolate chips
8 oz. package Reese’s mini peanut butter cups (chopped or whole, 1 1/2 cups)

Directions:

1. In a small saucepan over medium heat, melt butter.  Whisk in the brown sugar and heat until sugar dissolves.  Remove from heat; add vanilla.  Allow to cool to room temperature.

2. In a large mixing bowl, beat cream cheese with powdered sugar and peanut butter until creamy.  On low, add in brown sugar mixture.  Mix until combined.

3. By hand, fold in chocolate chips and Reese’s cups.  Serve immediately or store in the fridge until ready to serve.  Best if chilled overnight.

4. Serve with pretzels, animal crackers, graham crackers, apples, etc.  I like to serve them with these pretzels, in Everything flavor!   The sweet and salty combination is delicious!  Yum!

Servings: about 3 cups

Source: all over Pinterest, but I found it here: Shugary Sweets

Play Dough

Ingredients:
2 C. Flour
1 C. Table Salt
2 Tbsp. Cream of Tartar
2 Tbsp. oil
2 C. water

Combine all ingredients in a sauce pot. Cook and stir over medium heat til it comes together and clears the sides of the pot. It will get tough to stir. Remove from heat, knead the play dough and add food coloring or essential oils for colored/scented dough. Mix til smooth.

Store cooled play dough in a ziploc bag. It should last for several weeks or a couple months.

How to Cook Spaghetti Squash

Okay, I admit it.  I’ve never tried spaghetti squash before this.  But I’ve always wanted to.  It always looks so cool….all those little curly fibers.  But I never had motivation to try it until I had to go wheat-free.  You know, rice pasta is nice and all, but it’s a little bland.  So I was really hoping for something interesting here.  I got it, and it’s pretty versatile to boot.  You can serve it with a sauce like you would pasta or just top it with Parmesan cheese and chopped basil, or serve it as a side with salt, pepper, and butter or ghee.

And it’s just so stinkin’ fun to scrape all those little fibers!!!  Seriously, I giggled.

How to Cook Spaghetti Squash

Preheat oven to 350 degrees.  Cut a spaghetti squash in half lengthwise.  Scoop out seeds and loose flesh and discard.  Place cut-side down on a foil-lined baking sheet.  Bake for one hour.

Remove from oven and carefully turn the squash halves over to cool.

When it has cooled enough for you to handle it, take a fork and scrape the squash flesh towards the middle.  (This would be so fun for kids to help with!)

You just made spaghetti!!  Now wasn’t that fun?!

Pesto Chicken Pizza

 
Not an original recipe (see source below) but we all get to tweak away at someone else’s in this recipe blog world, don’t we?  This is a great quickie dinner that you can throw together in about 30 minutes or so if you have the ingredients on hand.  Or you can just send your daughter and her fiancé out to the grocery store to get the stuff for you while you clean off the kitchen island so that there is room to actually EAT there.
 
Ingredients:
Pizza Dough (home- or ready-made)
Basil Pesto
Cooked Chicken (I used a rotisserie chicken from my local grocery store)
Shredded mozzarella cheese
 
1.  Preheat oven to temperature for your pizza dough.
 
2.  Spread dough onto pan or pizza stone; sprinkle corn meal on pan first so your pizza doesn’t stick.
 
3.  An extra step if you are using the refrigerated dough, is to pre-bake it for 6-8 minutes before adding your toppings.
 
4.  Spread pesto, chicken and cheese over the crust.
 
5.  Bake for suggested time for dough, about 8-10 minutes.
 
Adding a salad would be a great idea.
 
 
Source:  Shawni Pothier, 71 Toes Blog.