Berry Cherry On A Cloud

 
    The name of this dessert describes it perfectly. Smooth berry sauce on a cloud of meringue and cream cheesiness. My Mother-In-Law is the source for this (and many more) of my recipes. It is a crowd-pleaser and it feels rich and highbrow. Of course, if you have someone who doesn’t like meringue, cheesecake, or berries, they may not go for it, but that is probably not the type of person you would be inviting over for dessert in the first place, is it?

Berry Cherry On A Cloud

Meringue:
6 egg whites
1 3/4 cup sugar
1 Tbs. cream of tartar
pinch salt
1 tsp. vanilla

Filling:
2 C. heavy cream
6 oz. cream cheese
1 C. sugar
1 Tbsp vanilla
2 C. miniature marshmallows (for extra cloudiness!)

Topping:
1 Large Can Wilderness pie cherries
1 pkg frozen strawberries or raspberries, thawed (I prefer raspberries, or mixed berries)
1 Tbsp. lemon juice

Meringue: Beat egg whites until fluffy. Very slowly add sugar, cream of tartar, and salt. Fold in vanilla and spread on the bottom and sides of a greased 9×13 pan. Bake at 275 degrees for 60 minutes.
Filling: Beat together cream cheese, cream, sugar and vanilla. Fold in marshmallows. Spread on cooled meringue and chill at least 12 hours.
Mix all topping ingredients together and serve over slices of dessert.

Source: LuAnne Brown

Two Minute Smores

Everyone has that one snack that you can’t get enough of. Mine, smores. LOVE them. Every time I turn on the grill you better believe that make up a few. I’ve also made them in the microwave, but the marshmallows tend to get rubbery. Not good. The other day it hit me, the broiler! Great discovery. Now you can get tasty browned smores in under two minutes. 

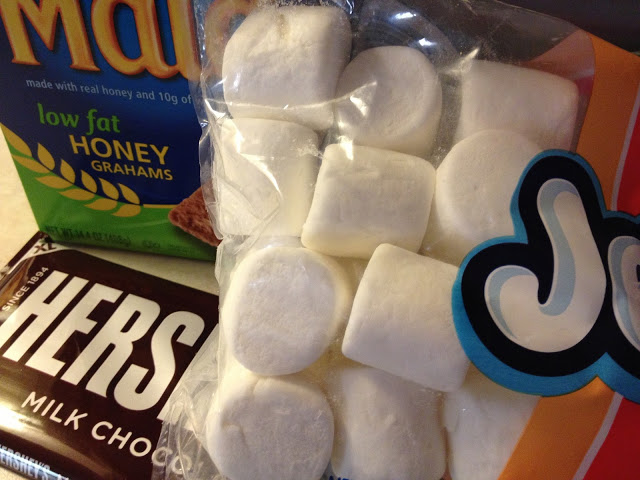
You know the drill, gather up your graham crackers, marshmallows and chocolate.

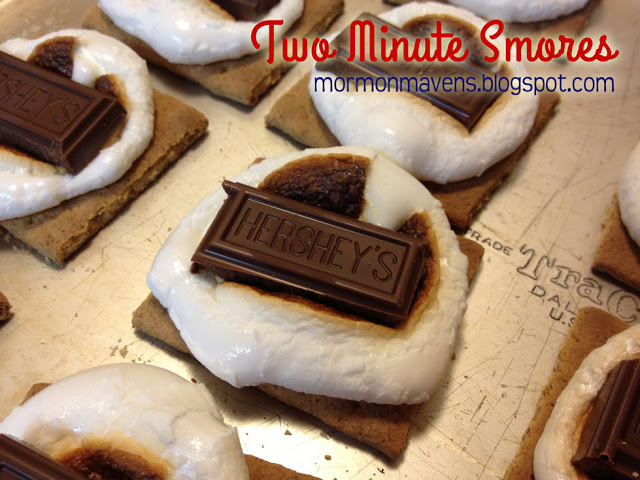
Place the marshmallows on top, stick them in the broiler until they start to brown. Pull them out and top with chocolate. 

 Two Minute Smores

Ingredients:
Graham Crackers
Hershey Bars
Marshmallows

Directions:
1. Place graham crackers and marshmallows on a baking sheet.
2. Place in a preheated broiler for one to two minutes, until they are browned to your liking.
3. Pull them out and top with chocolate.

Yum!

Grandma’s Brownies

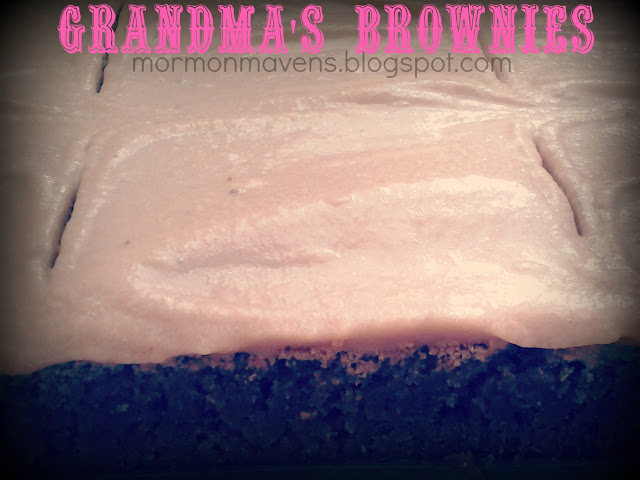
Brownie’s 2 day’s in a row!  These are my Grandma’s brownies. I love them!

1 tsp. vanilla
4 eggs
2 c. flour
2 c. sugar
2 heaping Tblsp. Cocoa
2 cubes melted butter (be careful pouring this in so as not to cook the eggs)
1/2 c. chopped nuts if desired.

Pre-heat oven to 325 degrees.
Mix all ingredients together and place in greased 9×13 cake pan.  Bake for 40-45 Min.  Top with frosting (I usually make my frosting to taste using butter, powdered sugar, cocoa, and milk)

Source: Grandma Larson

Lemon Curd Cheesecake

We served this cheesecake on Easter. It was unbelievably good! The lemon curd was so fresh. Homemade tastes so much better than jarred. It’ll be worth your time to make it. It is the perfect Spring or Summer time dessert. Enjoy!
Lemon Curd Cheesecake
Ingredients:

Crust
2 1/2 cups graham cracker crumbs
1/4 cup sugar
2/3 cup butter, melted

Filling
3 packages (8 ounces each) cream cheese, softened
1 1/4 cups sugar
3 eggs, beaten
3 tablespoons fresh lemon juice
1 tablespoon grated lemon peel
1 teaspoon vanilla extract

Glaze
2 eggs
1 cup sugar
1/4 cup lemon juice
2 tablespoons grated lemon peel
6 tablespoons butter, melted

Directions
1. Combine the cracker crumbs, sugar and butter. Press onto the bottom and 2 in. up the sides of a 9-in. spring form pan. Place on a baking sheet. Bake at 350 degrees for 10 minutes or until set.
2. Place pan on a wire rack (leave oven on).
3. For filling, in a large bowl, beat cream cheese and sugar until smooth.
4. Add eggs; beat on low speed until combined. Stir in the lemon juice, lemon peel and vanilla just until blended. Pour into crust.
5. Return pan to baking sheet. Bake for 40-45 minutes or until center is almost set. Cool on a wire rack for 10 minutes.
6. Carefully run a knife around edge of pan to loosen, but do not remove ring; refrigerate overnight.
7. Remove the ring when you are ready to glaze.
8. For glaze, in a small heavy saucepan, whisk the eggs, sugar, lemon juice and peel until blended.
9. Add butter; cook, whisking constantly, until mixture is thickened and coats the back of a metal spoon. Transfer to small bowl; cool for 10 minutes.
10. Cover and refrigerate until chilled. Spread glaze over cheesecake.

Refrigerate leftovers or freeze individual slices.

Source

Cookie Dough Brownies

If you love brownies and sneaking bites of chocolate chip cookie dough….yadda, yadda, yadda…..

Brownie Layer
Ingredients:
4 ounces unsweetened chocolate
1 cup butter, melted
2 cups packed light brown sugar
4 eggs
2 tsp. vanilla
1 cup all-purpose flour
1/2 cup mini semisweet chocolate chips

1.  Preheat oven to 325 degrees.  Spray a 9×13-inch pan with cooking spray.  In a microwaveable bowl, melt the chocolate for 30 seconds at a time, stirring in between, until chocolate is melted and smooth (if you use block chocolate you should chop it finely first….mine is in flat disk form so it doesn’t need chopping).  Set aside to cool while you prep the rest of the brownie mixture.
2.  In a large mixing bowl, combine the butter and brown sugar and whisk well.  Whisk in the eggs and vanilla, then add in the melted chocolate and continue to whisk well to thoroughly combine.  Add the flour and stir together just until the flour is incorporated.  In fact, it’s better to leave a little flour “showing”.  Add in the chocolate chips and stir just until the chips are evenly distributed into the batter.
3.  Spread evenly into the prepared pan and bake for 30-45 minutes (yeah, i know that’s quite a spread…but the original recipe said 25-35 and it took mine 45 to be done in the middle).  Test with a toothpick in the center and if it comes out with a couple of tiny crumbs it’s probably done enough.  Set aside to cool completely.

Cookie Dough Layer
Ingredients:
3/4 cup butter, softened
3/4 cup packed light brown sugar
3/4 cup white sugar
1 Tbsp. milk
1/2 cup peanut butter
1 1/2 tsp. vanilla
1 1/2 cups mini semisweet chocolate chips
Drizzle:
1/2 cup semisweet chocolate + 1 tsp. shortening

1.  In a mixing bowl, cream together the butter and sugars.  Stir in the milk, peanut butter, and vanilla until well combined.  Stir in the chocolate chips.
2.  Spread evenly over the cooled brownies.
3.  Melt the semisweet chocolate and shortening together in a microwaveable bowl and stir until smooth.  Drizzle over the cookie dough layer.  (I did this by pouring the mixture into a ziploc bag, sealing the bag, and then cutting off one corner to make a piping bag for drizzling.)
4.  Refrigerate until drizzle is set and dough layer is firm enough to cut.

I think next time I would cut the amounts on the cookie dough layer by 1/3 because it was just a bit too rich.  In a house full of brownie lovers, it’s pretty unusual for us to not be able to finish off a second brownie!

Source:  Recipe Girl

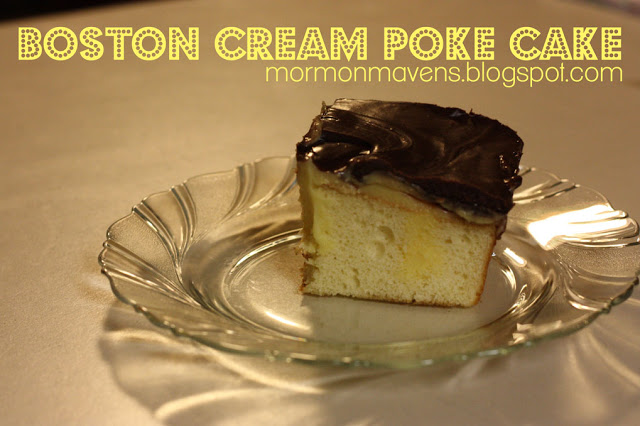
Boston Cream Poke Cake

 I love easy desserts that taste great. I also loooove Boston Cream Pies. (and Boston Cream donuts, who am kidding?!) This is one that is sure to impress, but is super easy to make.

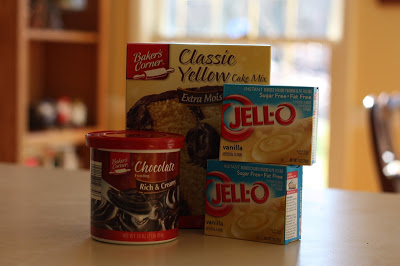
How simple are these ingredients? I’m sure you have these in your pantry…

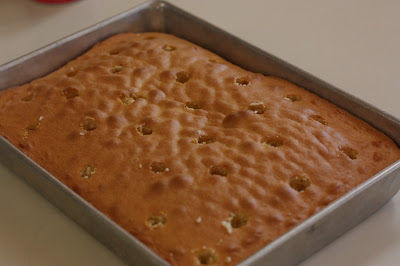
Simply make the yellow cake according to the directions. Once cool, take one of your wooden spoons (since I’m a southerner – I have a few!!) and take the handle and poke the cake, make sure there are plenty of pokes – so that each piece will have some pudding goodness.
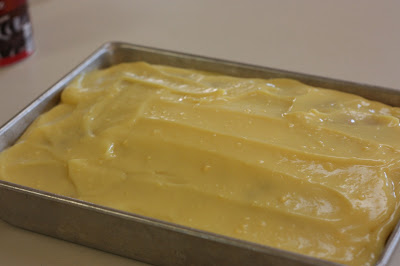
Take the pudding (that you prepared and chilled while the cake was baking) and pour onto cake, making sure that it gets into the pokes. Spread evenly. 
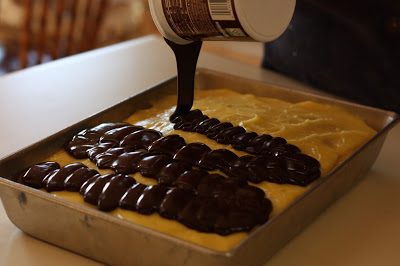
Then, warm up your tub icing in the microwave until pour-able. Then pour that yummy goodness over the cake. 
Spread the icing evenly over the cake… then enjoy!

Boston Cream Poke Cake

Ingredients:
1 box yellow cake mix
2 small boxes of vanilla pudding
1 tub chocolate icing

Directions:
1. Prepare yellow cake according to the directions on the box. Allow to cool. Poke cake with the end of the wooden spoon.
2. While cake is baking, prepare pudding and allow to chill in the refrigerator.
3. After cake is cool, spread pudding over cake, making sure it gets into the pokes.
4. Microwave the icing in 30 second increments until it is soft and pour-able. Pour over cake and smooth out.
5. Serve and enjoy!

Because this cake has pudding, make sure to refrigerate any leftovers.

**Also, if you are trying to watch your calorie, carb, or sugar intake, I’ve made this with all sugar-free ingredients (cake mix, pudding, icing) and it tasted great!

Source: My mom!!

Emergency Brownie!

Have you ever had an overwhelming craving for a brownie but didn’t want the temptation of a whole pan of them?  Yes?  Then you have to try this microwave mug brownie.  Recipes for these are popping up on blogs all over the place.  This particular recipe is one of my 14-year-old son’s stand-by recipes.  He tells me that it’s gooey-er than a regular baked brownie but that it still hits the spot.  I can always tell when he’s been in the kitchen from the tell-tale brownie dregs in the mug on the counter.

If this particular mug brownie recipe doesn’t tickle your fancy you are sure to find a plethora of them online.  It took some trial and error before we found the ones that appealed to us the most.

Ingredients:
1/4 cup flour
1/4 cup sugar
2 Tbsp. unsweetened cocoa powder
pinch salt
2 Tbsp. canola oil
2 Tbsp. milk

1.  In a microwaveable mug (or glass canning jar), stir the dry ingredients together.  Try to get out all the lumps.  Add the milk and oil and stir until well-combined.
2.  Microwave on HIGH for one minute.  After that, microwave for 10-15 seconds at a time until it springs back a bit but still has some gooey-ness on top.  My son says it typically won’t look done when it really is, and it easily burns if you cook it too long.  It took him a while to get the right time in our microwave…this time it took one minute and thirty seconds.

We love our brownies drizzled with a little warmed up peanut butter and a little ice cream or whipped topping.

Source:  Babble’s Family Kitchen

Snow Cream

 This my friends, is snow cream.  I can’t tell you how much of a delicacy this is in the south. Whenever it begins to snow, which isn’t too often in the south, you wait and hope it snows for a couple of hours. Because you can’t collect the “first snow”! (I don’t know why, some older people have always said it wasn’t clean.  -smile-)  But, after its been snowing for a while you place really big bowls outside to collect the snow while it falls.  Then you bring it in and add the yummy stuff to it to make it into snow cream!  It is soo good!  We will actually take the risk of driving through terrible weather to get the ingredients needed to make this, because we love this stuff so much.  Everybody has a different recipe. Some people add eggs. (yuck) But, I tend to go with simple recipes and it doesn’t get any simpler than this.  If it snows this winter where you live, give this a try. I promise it will make you like the snowy weather much more!

Ingredients:
Lots of Snow, (about 16-20 cups per bowl = 36-40 cups of snow for 2 cans of condensed milk)
Condensed Milk, 2-4 cans
Vanilla flavoring, 1/8 – 1/4 cup ( for 36 cups of snow.) 

   You begin this with a lot of snow!  A lot of snow! The picture below is the beginnings of our second batch.  The biggest tupperware bowls we owned were needed for this.  LOL!  This picture actually shows you there wasn’t enough collected  in the bowls to use both cans of condensed milk.  The bowls have to be packed full and heaping! 
  

Then add one whole can of condensed milk and about 1/4 cup of vanilla. (I know that sounds like a lot, but trust me.)  Then stir and mash.  Stir and mash.  You are going for a creamy texture.  Add snow as you go. You will use both bowls of snow.   The bowls are equivalent to a big stock pot. The biggest one in your set. 
Add the other can of condensed milk. But not the whole thing.  Then add a Tbsp or two of the vanilla flavoring.  Stir and mash. It takes a little while to mash out the snow balls in the mixture and get it all creamy. When it looks like the picture below you are finished.  Enjoy! – and put it in the freezer to keep until its all eaten.  😉

 
Yummy, yummy!
 
 
recipe by Niki Lewis
 

Sticky Gooey Caramel Corn

We just got an air popcorn popper. You remember those? I hadn’t seen one since I was a kid. We received one for Christmas and IT IS SO FUN! Delightful! It’s the little things in life, you know?

I digress. The recipe, Kara. The recipe.

The name of this recipe is EASY. Quick and easy. Ignore the header. That’s what it’s name *should* be. And kiddos of all ages (even those of “Mature Years”) will love it.

Ingredients:
2 bowls of popped popcorn (I use one scoop full of kernels)
1 C butter
2 C Brown Sugar
3/4 – 1 C Light Karo Syrup
Nuts (opt)

1. Melt the butter in a medium saucepan over medium heat.
2. Add the sugar and syrup. Stir constantly until it begins to bubble.
3. Boil for 1 min. (Continue stirring. You’d hate to burn it!)
4. Remove from heat and pour over the bowls of popcorn.
5. Stir carefully with a wooden spoon until all the popcorn is covered a fair amount. Add the nuts if you are using them.

Serve immediately–that’s the way we like it! You can put it into balls if you wish. Just lay them on wax paper and let them cool.

Source: My long lost friend, Erika Johanson.

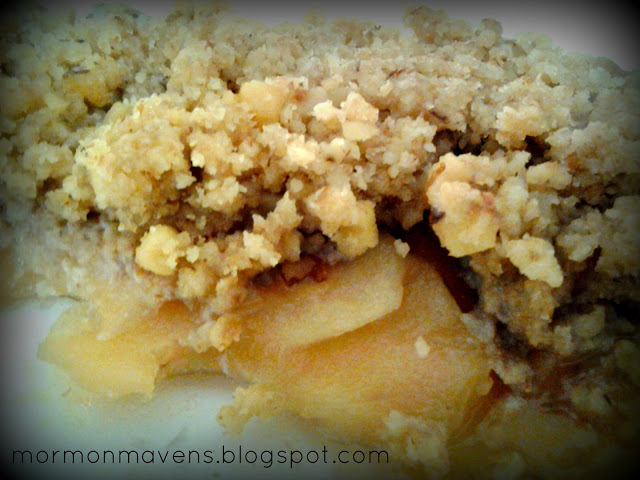
Apple Crisp

My cousin’s nanny made this Apple Crisp for us last conference weekend.  It is truly the best Apple Crisp I have ever had!!!

Apple Crisp
For the filling:
5 large apples, peeled and sliced thin
1 lemon, zested and juiced
3 tablespoons all-purpose flour
1/4 cup tightly packed brown sugar
2 tablespoons sugar
1/2 tsp vanilla extract
Pinch kosher salt
For the topping:
1 1/4 cups all-purpose flour
1/2 cup rolled oats (I like quick-oats best, but old-fashioned rolled oats are fine too)
1/2 cup brown sugar
1/2 cup sugar
1 1/4 stick cold unsalted butter, cut into pea sized pieces
1/2 cup chopped pecans
Pinch kosher salt
1 to 2 tablespoons cold water
Special equipment: 6 (6-ounce) ramekins OR large casserole dish
Preheat the oven to 350 degrees F.
For the filling:
Toss the peaches in a large bowl with the zest and lemon juice. Add the rest of the ingredients and stir to combine. Divide the filling evenly between the ramekins.
For the topping:
Combine flour, oats, sugar, and brown sugar. Add butter; use your hands or a pastry blender to incorporate the butter. The mixture should be crumbly. Stir in pecans and salt. Add water, 1 tablespoon at a time until mixture is clumpy but crumbly.
Top each ramekin with the topping. Be sure to loosely sprinkle the topping and not pack it down. The idea is to look very crumbly and craggy. Place the ramekins on a sheet tray and bake in the preheated oven for 20 to 25 minutes, or until the filling is hot and bubbly and the topping, brown and crispy.

Source: Jenny Stewart