Create.

This is one of my favorite talks by Elder Uchtdorf. I’ve been thinking about this talk even more lately since I’m pregnant. I get these weekly emails that update me on the development of the baby, and it never ceases to amaze me. Just think, with the help of our loving Heavenly Father…. I’m creating a person! Someone who can change the world.

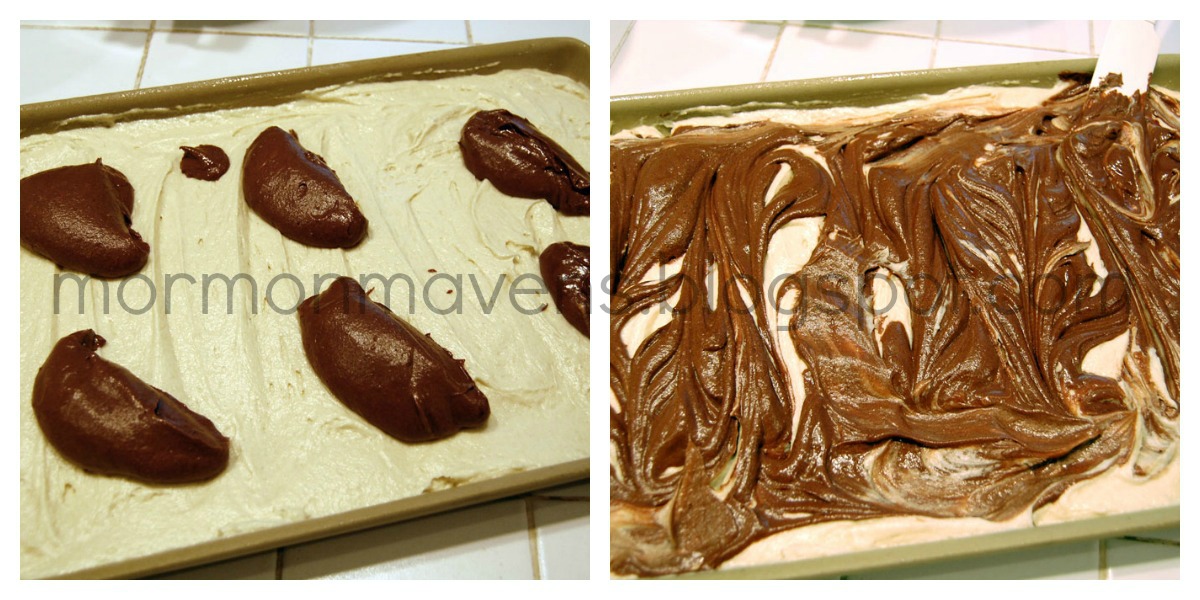
I think that all of us have that innate desire to create something. I love being crafty, I love using my hands to make something. That’s one of the reasons I love this blog! It’s a chance for me to share something that I’ve created.

I want to share one quote from this talk that wasn’t shared.  “What you create doesn’t have to be perfect. So what if the eggs are greasy or the toast is burned? Don’t let fear of failure discourage you.” I think so many of us can easily get caught up in the fear of failure. I know I do! It’s important for us to try to get past that so we can take a chance. Who knows, maybe you’ll be better than you think.

Scrumptious Apple Pie

If an apple pie and an apple crisp got married, this would be their baby.  A delicious, mouth-watering “pie” baby!

Ingredients:
1 whole pie crust (from scratch or store-bought)

Filling:
6-7 cups peeled and sliced Granny Smith apples (I used 5 large apples)
Juice from half a lemon
1/2 cup white sugar
4 tablespoons flour
1/4 teaspoon salt

Crumb topping:
1 1/2 sticks butter
1/2 cup flour
1 cup brown sugar
1/2 cup quick oats (I used rolled oats because that’s all I had)
1/4 teaspoon salt
1/2 cup chopped pecans
1/2 jar caramel topping (or homemade caramel sauce)

1.  Preheat oven to 375 degrees.

2.  Peel and slice your apples into a large bowl.  Squeeze juice of lemon over apples and stir to coat.  Add your white sugar, flour, and salt.  Mix.

3.  For the crumb topping, cut the butter into the flour with a pastry cutter.  If you have a food processor, that would work too.  Add your brown sugar, oats, and salt.

4.  Pour apples into prepared pie crust.  Spread your crumb topping over apples.

5.  Cover edges of pie crust with aluminum foil and bake for 25 minutes.  When time is up, remove foil and bake for another 30 minutes.  Before last 5 minutes is up, remove pie from oven and sprinkle top with chopped pecans.  Return to oven and finish baking.

6.  When pie is done, remove from oven and pour caramel sauce over topping.  Or wait and pour sauce over individual slices.

*Some of the juices started to bubble out towards the end of baking.  I would recommend placing a cookie sheet lined with foil on the rack below your pie. 

*There is A LOT of butter in this pie!  I think I’ll try using only 1 1/4 sticks next time I make this.

Source:  The fabulous Pioneer Woman

Pizza Sauce

During our first Christmas in NC we decided to change some of the “food traditions” a bit and start a “make your own shape pizza for Christmas Eve Dinner” tradition. Thus began the quest for a good pizza sauce.

After trying different commercially produced sauces and not finding anything that we really liked, I began to experiment. As they say… one of the “true secrets” to good pizza is in the sauce. This is our current favorite Pizza Sauce and is also a great dipping sauce for Pita and Bread Sticks.

I have included the “fresh” version and the “shelf stable” version – Enjoy!

Ingredients – fresh:
1 15oz can stewed or diced Italian Tomatoes
2 Roma Tomatoes chopped
1/2 cup chopped onion
6-10 fresh Basil leaves – chopped
10 fresh Oregano leaves – chopped
1 clove garlic chopped
1 tsp sugar or 1/2 tsp honey

Ingredients – shelf stable:
1 15oz can stewed or diced Italian tomatoes
1/4 cup dried Onion
2 tsp dried Basil
3/4 tsp dried Oregano
2 tsp garlic powder
1 tsp sugar or 1/2 tsp honey

1. Place all ingredients into a blender and Puree for 30 seconds to 1 minute
2. Spread on desired pizza crust

Source: A Jennie Original

Marble Sheet Cake with Frosting

Why clean the kitchen, even if you did mess it up?  Why not just make a deal with your 12-year-old son that if he’ll clean it all up, you’ll make a treat?  Then, while he’s cleaning, go rummage through your stash of clipped recipes in search of a new chocolate adventure.  Not that I’m saying that’s what I did, but, yeah….that’s what I did.  The result?  This yummy cake.

Ingredients:
Cake
2 sticks butter, softened
1 3/4 cups sugar (DIVIDED)
2 large eggs
2 tsp. vanilla
2 1/2 cups flour
1 Tbsp. baking powder
1/2 tsp. salt
1 cup half-and-half
1/4 cup unsweetened cocoa
3 Tbsp. hot water

Frosting
1 stick butter, softened
3 cups powdered sugar
2/3 cups unsweetened cocoa
3 Tbsp. hot water
2 tsp. vanilla
3 to 4 Tbsp. half-and-half

1.  Preheat oven to 325 degrees.  Beat butter and 1 1/2 cups sugar at medium speed for 4 to 5 minutes or until creamy.  Add eggs, one at a time, beating just until combined after each addition.  Beat in vanilla extract.
2.  Sift together flour, baking powder, and salt.  Add to butter mixture alternately with half-and-half, beginning and ending with flour mixture.  Beat at low speed just until blended after each addition, stopping to scrape bowl as needed.
3.  Spoon 1 1/4 cups batter into a 2-qt. bowl, and stir in cocoa, 3 Tbsp. hot water, and remaining 1/4 cup sugar until well blended.
4.  Spread remaining vanilla batter into a greased and floured 15×10 inch jelly roll pan.  Spoon chocolate batter onto vanilla batter in pan; gently swirl with a knife or small spatula.

5.  Bake at 325 degrees for 25-30 minutes or until a wooden pick inserted in center comes out clean (be careful NOT to overbake!).  Cool completely in pan on a wire rack (about an hour).
For Frosting:
1.  Cream butter in a mixer.
2.  Whisk together sugar and cocoa in a medium bowl.  Combine hot water and vanilla.
3.  With mixer going, add sugar mixture alternately with water mixture until well combined.
4.  Add half-and-half a tablespoon at a time until frosting reaches desired consistency.  Frost cake and enjoy!
NOTE:  If you see cake as a delivery system for frosting, you may want to double the frosting.

Source:  Southern Living magazine

Come, Listen to a Prophet’s Voice

As we listen to general conference and internalize the messages given while we study them through the coming months, let us remember the hymn, “Come, Listen to a Prophet’s Voice”:

Come, listen to a prophet’s voice, And hear the word of God,
And in the way of truth rejoice, And sing for joy aloud.
We’ve found the way the prophets went Who lived in days of yore.
Another prophet now is sent This knowledge to restore.
The gloom of sullen darkness spread Thru earth’s extended space
Is banished by our living Head, And God has shown His face.
Thru erring schemes in days now past The world has gone astray;
Yet Saints of God have found at last The straight and narrow way.
‘Tis not in man they put their trust Nor on his arm rely.
Full well assured, all are accursed Who Jesus Christ deny.
The Savior to his people saith, “Let all my words obey,
And signs shall follow living faith, Down to the latest day.”
Then heed the words of truth and light That flow from fountains pure.
Yea, keep His law with all thy might Till thine election’s sure,
Till though shalt hear the holy voice Assure eternal reign.
While joy and cheer attend they choice, As one who shall obtain.
We are truly blessed to receive latter-day revelation and instruction from men and women inspired of God through His holy Spirit. We have comfort and guidance in a world that, as President Monson said, “is increasingly less spiritual.” May we fully receive this blessing and allow it to guide us and strengthen us as we strive to keep His commandments and live His word.

Cheesy Vegetable Chowder

This is one of our favorites soups and taste great any time of year. It is especially delicious on those cool fall and winter days. I serve this with homemade bread and a crisp green salad – Yum!

Ingredients:

1/4 cup butter
1 medium-large onion diced
3 cups finely chopped cabbage
5 stalks celery chopped
1 tsp black pepper
1 TBLS garlic powder
2 cups water
1# carrots chopped
3 TBLS Chicken Soup Base
8 cups water
2 cups diced potatoes
3 cups milk
1/2 cup flour or cornstarch mixed in with 1 1/2 cups water
2 cups chopped cauliflower
2 cups chopped broccoli
1 1/2 cups shredded Sharp Cheddar Cheese
4 oz Velveeta Cheese cut into cubes

1. In large soup pot place butter and onions – stir until butter is part way melted.
2. Add cabbage, celery, black pepper and garlic powder – stirring occasionally until onions and cabbage are browning
3. Add 2 cups water, soup base, and carrots boil for about 5 minutes or until water is almost gone
4. Add 8 cups water and boil for 10 min – stirring occasionally
5. Add diced potatoes and milk – bring back to a boil and let boil for 5 min. Watch pot carefully as milk tends to boil over
5. Add flour and water mixture stirring constantly while adding to prevent lumps. Boil for 5 min
6. Add cauliflower and broccoli – boil for 5 min
7. Add cheeses and taste for seasoning adjustments (more soup base, pepper, cheese etc. There is enough salt in the cheese and soup base that usually none is needed.)
8. Let stand for 5 min to slightly thicken before serving.

Source: A Jennie original

Carrot Cake Cinnamon Rolls

I love cinnamon rolls.  Like, REALLY love them.  When I saw the idea to use a cake mix as a base for a cinnamon roll, the wheels started turning.  I decided to experiment with a carrot cake mix I had in the pantry.  The results were better than I expected so I think I see some more experimentation going on in the near future….orange cake mix with orange cream cheese frosting, chocolate cake mix with cookies and cream frosting or chocolate frosting with a mint drizzle.  Hmmmm….probably didn’t pick the best time to go on a diet.  Oh well, enjoy these yummy spirals of gooey goodness!!

Ingredients:
1 carrot cake mix (I used Betty Crocker)
2 1/2 cups warm water
4 1/2 tsp. yeast
1 tsp. salt
5-6 cups all-purpose flour
melted butter
cinnamon
sugar
raisins

1.  Combine cake mix, water, yeast, salt, and 2 cups of the flour.  Whisk until well blended.  Mix in remaining flour with wooden spoon until well combined.  The dough should not be super sticky, just a little bit sticky.  Let rise until doubled.
2.  Push the dough down and roll out into a large rectangle on a well-flour surface.  Spread melted butter evenly over the surface to within 1/2″ of the edges.  Sprinkle with sugar, cinnamon, and raisins.
3.  Roll up dough.  Cut into 16 slices.  Place on greased sheet, cover, and let rise until doubled.
4.  Bake at 350 degrees for 20-23 minutes.  Frost while still warm.

Frosting Ingredients:
8 ounces cream cheese, softened
any leftover melted butter
1/2 tsp. vanilla
pinch of salt
pinch of cinnamon
about 4 cups powdered sugar
milk

1.  Cream the butter (if you have any left) and cream cheese until smooth.  Mix in vanilla, salt, and cinnamon.
2.  Add powdered sugar a cup at a time, thinning as you go with a few teaspons of milk until the frosting reaches the proper consistency.
3.  Scoop spoonfuls of frosting onto the pan of rolls and spread with an offset spatula.

Notes:

  • I eyeball the butter, sugar, cinnamon, and raisin amounts inside the rolls.  I spread the melted butter out a few tablespoons at a time and sprinkle enough sugar on top of that to kind of soak in the butter.
  • Cutting Tip:  Buy a container of plain ol’ dental floss to cut the cinnamon rolls.  After you have rolled the dough up, take a long thread of the floss and scoot it under the roll at the halfway point. The floss will be perpendicular to the dough.  Take the ends, cross them, and pull.  Easy, and no more smushed rolls!
  • I like to add a touch of cinnamon to my frosting to tie in the flavors.
Source:  a Julie original 

The Temple

Organize yourselves; prepare every needful thing; and establish a house, even a house of prayer, a house of fasting, a house of faith, a house of learning, a house of glory, a house of order, a house of God;
~Doctrine & Covenants 88:119

Each and every time I read this passage of scripture, the first picture and/or thought that comes to my mind is of the temple. There isn’t a more perfect example of how we should organize our own homes and lives than by the standards of the temple.

I can often think of several excuses not to attend, but what I should be tinking about are all of the blessings that come from worthily entering the temple. Lds.org defines the temple as “a place of learning.” There isn’t a more perfect envirnoment than being in the atmosphere of the temple to learn the ordinaces that will allow us to return to live with our Heavenly Father. I can’t think of a better opportunity that allows me ponder and pray about any stuggles in my life. In the temple, I can give thanks for my endless blessings and receive personal revelation.

I know that the promised blessings that come from attending temple are real. There isn’t a more sacred place for learning and receiving strength.

Bottoms-Up Cake

This is a fun and easy dessert to make.  It seems to defy reason!  But it’s not just fun; it’s seriously delicious too.

Ingredients:
1 cup flour
1/2 cup sugar
2 Tbsp. unsweetened cocoa
1 1/2 tsp. baking powder
1/2 tsp. salt
—-
1/2 cup milk
1/4 cup vegetable oil
2 tsp. vanilla
—-
1 cup sugar
1/4 cup unsweetened cocoa
1 1/2 cup boiling water

1.  Preheat oven to 350 degrees.  Mix first five ingredients together in medium bowl.
2.  Add in milk, oil, and vanilla and mix well.  Pour into UNgreased, flat 2-quart baking dish.
3.  Combine last three ingredients in small bowl.  Pour evenly over batter in the pan.
4.  Bake for 25-30 minutes.  Test only as deep as the cake with a toothpick.  The whole thing will wiggle since the cake is basically sitting on a bed of yummy chocolate sauce now.  Cool for 30 minutes.  Serve with whipped cream.

Source:  my recipe box

Homemade Butterfingers

It’s not my normal recipe posting day, but I just had to go ahead and share this for two reasons.  One, it involves an ingredient that is going to be more prevalent right now and will, after Halloween, be on super sale.  Two, I seem to have an obsession with peanut butter and chocolate.  Butterfinger is one of my favorite candy bars, so when I saw this recipe floating around Pinterest, I had to give it a try.  I was skeptical because, really…three ingredients?  But one bite and I was forced to exclaim (exclaim, people!) “Oh my gosh, it tastes just like it!”  I hope you enjoy it.  I’ll be stocking up on some cheap candy corn this season!


Ingredients:
1 lb. candy corn*
1 lb. creamy peanut butter
1 lb. chocolate candy coating**
 
1.  Prepare an 8″x8″ pan with a light coat of cooking spray.  Lay parchment paper or wax paper in the pan so that it covers the bottom of the pan, leaving the ends hanging over two edges.  (You will use these “handles” to lift out the bars, making it easier to cut them and set them out for chocolate coating.)  
2.  Lightly coat a glass mixing bowl with cooking spray.   Place the candy corn in the bowl and microwave in 30 second increments, stirring in between, until the candy corn is melted.  Stir in the peanut butter and continue to stir until the mixture is smooth.  Pour this mixture into your prepared pan and spread evenly.  Chill until set.
3.  Remove the bars by lifting the parchment paper “handles” and place on a cutting board.  Cut into bars.  Place a piece of wax paper on a cookie sheet and set a wire rack over it.  Set bars one inch apart onto the wire rack.
4.  Melt the chocolate candy coating according to the directions.  Using a small spoon, pour chocolate on top of a bar along its length; then using an small offset spatula or a butter knife and spread the chocolate flat along the top.  The chocolate will ooze down the sides, so use the knife to spread the chocolate along the sides of the bars.  Allow to set, or place in fridge to set.


Note:
*The first time I made these I used the only candy corn I could find at Walmart, but it’s technically Indian Corn.  It’s the one with brown instead of yellow, and it DOES have a different flavor.  The final product was good but did not taste very much like Butterfinger and did not have that bright orange color.  So DON’T use anything but the traditional candy corn.  Also, the recipe calls for a pound, but I found it in 14 ounce bags.  That worked fine.
**You can find this in the baking aisle at the grocery store.  It usually comes in a flat package that has a tray inside that can be used as its own microwave container.  I was able to use it for 2 batches because I didn’t dip the entire bar in it, like the original recipe stated.


Source:  It’s on multiple sites and blogs, but I got it from Plain Chicken