S’mores Treats

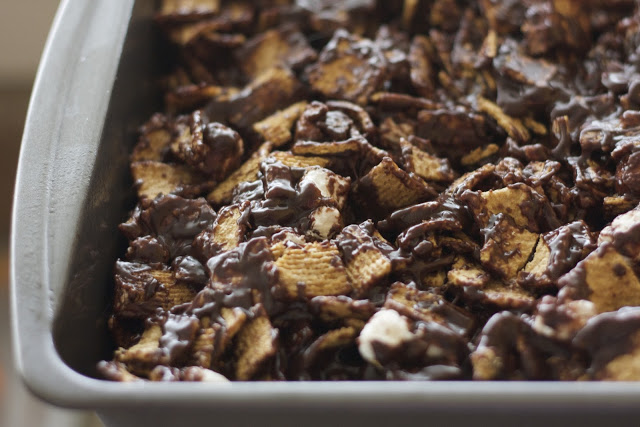
I remember coming home from school to these. I LOVE S’mores and these are perfect for an after-school snack without getting all smokey.

Ingredients:
2/3 Cup Corn Syrup (I use white)
1 (12 oz) package Chocolate Chips (your favorite–I used Semi-Sweet)
1 tsp Vanilla
6 – 8 Cups Golden Grahams Cereal (I use closer to 6 Cups because I like them well coated)
3 Cups Mini Marshmallows

1. In a Large mixing bowl, pour your Graham Cereal and Mallows in. You don’t need to mix them yet.
2. In a Medium saucepan, bring just to a boil (not quite!) corn syrup. Remove from heat and immediately add the chocolate chips. Stir until smooth.
3. Add vanilla and stir until smooth, again.
4. Pour over the mallows and graham cereal. Stir until will incorporated. The chocolate may seem a bit thick, but persevere! Also, don’t worry if the mallows melt a little. That’s the best part!
5. Press into a greased 9×13 pan and cut into squares when cool.

Source: My mama, Karri H.

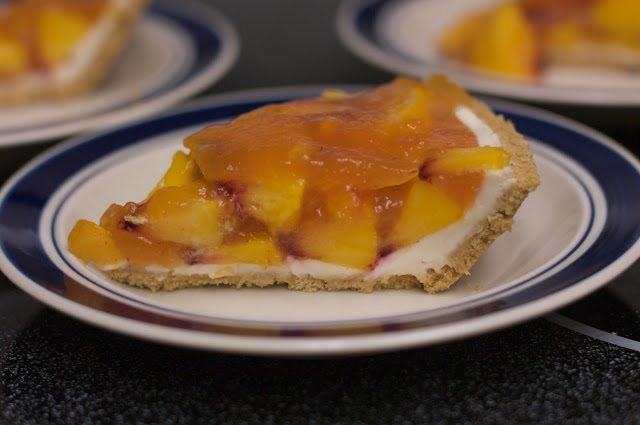
Cream Cheese Peach Pie

We are in the throws of peach season here and this is my favorite time of year because of it! 🙂 This pie is so light and fresh. It’s hard to go wrong with Cream Cheese AND Peaches. I hope you enjoy it as much as I do! I have to give a big shout-out to our friend, Audrey, for giving us the recipe. It’s quickly becoming a fav!

Ingredients:
2-3 Graham Cracker Crusts (I use 3–and I cheated and used store bought. *gasp!*)
12 – 15 Peaches, Peeled
1.5 Cups Granulated Sugar
1/4 Cup Cornstarch
1/2 Cup Water
1 (3 oz) package Lemon Jello
8 oz Cream Cheese
1/2 Cup Powdered Sugar
1 Cup Whipped Cream (or Cool Whip–I use Whipped Cream)

1. Puree 4 – 5 peaches–enough to make 1.5 Cups. I don’t have a food processor, so I cut them up and sloshed them around in my KitchenAid (be sure to use the splash guard!) until they were good and juicy. It was a little chunky, but I actually like it that way!
2. Dissolve the cornstarch into the water and set aside.
3. In a medium saucepan, bring the puree and granulated sugar to a boil.
4. Add the cornstarch (you may need to shake it up a bit again) and cook until thickened.
5. Remove from heat and stir in the dry jello. Put in the fridge to cool.

6. Cream together the cream cheese, powdered sugar, and fold in the whipped cream.
7. Divide evenly between the pie crusts. Smooth along the bottom and sides. Be careful not to pull the sides away from the pan. It will still taste good, but it won’t look it! 🙂
8. Slice the remaining peaches and distribute them evenly among the pie crusts. I use around three peaches per pie.
9. Pour the cooled mixture over the sliced fruit and put each pie in the fridge to set (about 3 hours).

Source: Audrey Miller, who says she got it from her aunt

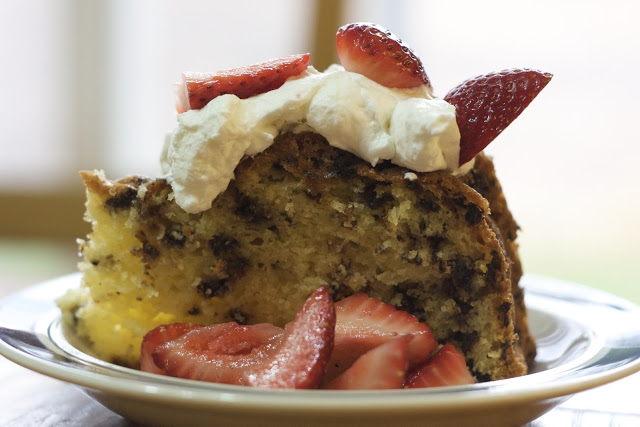
Chocolate Chip Strawberry Shortcake

I’ll start with the disclaimer: this isn’t really shortcake. It’s a gussied-up white cake. BUT…

…It’s MOIST. It’s easy. And it will tantalize your taste buds. Oh, yes, my friends. It will.

I usually make this cake using Devil’s Food Cake mix and chocolate pudding, but today I couldn’t decide between Strawberry Shortcake or chocolate cake. So I mixed it up a little and it turned out so fabulously I thought I’d share it with you! The chocolate chips are the perfect complements to the strawberries.

You’re Welcome. 🙂

Ingredients:
1 White (not yellow) Cake Mix (I use Betty Crocker)
1 (5.1 oz) Vanilla Instant Pudding mix
1 Cup Sour Cream
1 Cup Vegetable Oil
4 eggs
1/2 C Warm Water
1.5 C Mini-Chocolate Chips (I suppose you could use regular, but in my experience the bigger chips sink to the bottom while cooking)

1. Preheat the oven to 350 degrees F.

2. In a large bowl, sift together the cake and pudding mixes. Add the wet ingredients, one at a time, ending with the chocolate chips.

3. Pour into a well-greased 12 Cup bundt pan.

4. *Bake for 50 – 55 mins, or until the top is springy to the touch and a toothpick inserted in the middle comes out clean. Cool cake thoroughly in the pan, at least an hour and a half, and invert onto a plate if desired.

5. Top with whipped cream and strawberries.

*I use a 10 Cup Sunflower-shaped Cake Pan with no fluting and it fits, but just barely. I bake this in a preheated 335 degree oven for 80 mins.

You can also bake this in a 9×13″ pan, at 350 for 25 – 30 mins.

Source: My own variations on Too Much Chocolate Cake from allrecipes.com

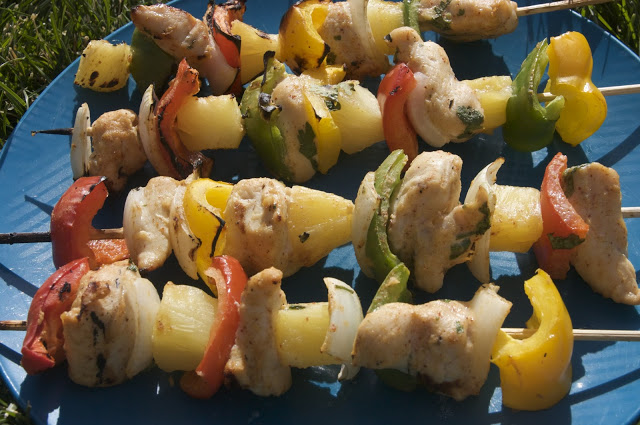
Chicken and Pineapple Kebabs

I love to grill in the summer time! Who wants to bake in a kitchen when you can cook in the open air?? AND when you’re in the heat of summer, who wants a heavy meal? Not me, friend!

These hit the spot with their fresh, light mix of fruit, vegetables, and meat.

Ingredients:

20 oz can of Pineapple Chunks in juice (fresh pineapple is awesome if you can get it)
1 teaspoon ground Cumin
1 teaspoon ground Coriander
1 garlic clove, crushed
1 teaspoon chili powder
1 teaspoon salt
2 Tbsp plain yogurt*
1 Tbsp chopped fresh Cilantro
few drops of orange food coloring (opt) –I didn’t use it.

1.5 lbs skinless, boneless Chicken Breasts (or tenderloins) — about 2 cups
1 Red Bell Pepper**
1 yellow Bell Pepper
1 green Bell Pepper
1 Onion
Cherry Tomatoes
1 Tablespoon Vegetable Oil

12 Kebab Skewers

1. Drain the canned pineapple into a large bowl and reserve the chunks, covered, in the fridge. If you use fresh, you should juice enough to get about 1 Cup and chunk the rest.

2. In pineapple juice, blend together the cumin, coriander, garlic, chili powder, salt, yogurt, and food coloring (if you use it, I really don’t know why you would, but hey. To each his own, right?) The actual recipe says that you should mix all the spices together separately and then add them to the pineapple juice, but I really hate doing dishes and mixed them all together in one bowl. It worked just fine.

3. Cut the chicken into cubes and add to the yogurt spice mixture. Marinate it in the fridge for 1.5 hours.

4. Cut your veggies into chunks.

5. Arrange the chicken, peppers, onion, tomatoes, and pineapple on your kebabs.

6. Brush the kebabs with oil and cook on a preheated, Medium heat, grill, turning every 4 minutes or so,  until the chicken is cooked through and the veggies are tenderish. I like mine a little crispy and it took around 10 – 15 minutes.

Serve with rice and salad.

*I don’t cook with plain yogurt regularly and wasn’t about to go buy some for 2 Tbsp worth, so I used sour cream and they tasted fabulous! I like sour cream anyway!

**I imagine that since this is squash season, this would taste GREAT with a variety of squashes on the kebab. Mix it up and let me know how it turns out!

Source: The Ultimate Barbecue Cookbook, Barnes and Noble

Baked Buffalo Wings

One of my favorite appetizers to order at a restaurant is Buffalo Wings.  A good plate of Buffalo Wings makes me a happy girl.  But I usually ONLY have them on a night out because they are kind of indulgent.  Baking instead of frying makes these wings a dish you can eat a little more often.  Without the side order of guilt.

Ingredients:
cooking spray
3/4 cup all-purpose flour
1/2 tsp. cayenne powder
1/2 tsp. garlic powder
1 tsp. salt (divided)
about 20 chicken wings (you know, appetizer size)
1/2 cup butter, melted
1/2 cup Frank’s Red Hot Wing Sauce (or Texas Pete or Texas Pete Wing Sauce)
2 Tbsp. honey
2 Tbsp. soy sauce

1.  Line a baking sheet with foil.  Then set a cooling rack in the baking sheet.  Spray this with cooking spray and set aside.  Rinse the wings and then dry them well with paper towels.
2.  Combine the flour, cayenne, garlic powder, and 1/2 tsp. of the salt in a gallon-size zip-top bag and shake well to combine.  Drop the wings into the bag, zip closed, and shake to coat.  Remove wings one at a time, shake off any extra flour, and place on the sprayed cooling rack.
3.  Place the wings in the fridge, uncovered, for one hour at least.  Preheat your oven to 400 degrees.  Remove the wings from the fridge and bake for 25 minutes.  Remove sheet from the oven, turn each wing over, and return to the oven for another 25 minutes.
4.  Combine the butter, wing sauce, honey, soy sauce, and remaining 1/2 tsp. salt in a bowl.  Whisk until well blended.  When wings have finished their second trip to the oven, dip 3 or 4 at a time into the sauce mixture, making sure the wings are completely coated.  Return wings to baking sheet/rack and bake  for 7-9 minutes.
5.  Remove wings from oven, place on a serving platter, and pour any remaining sauce over them.  Serve with the traditional celery sticks and blue cheese dressing.

Yum!

Source:  Lana’s Cooking via Pinterest

Family Favorite Chicken Salad

When it comes to chicken salad, my family can’t get enough! That includes my extended family. It’s a go to meal for all of us. An entertain the company meal, even!  So, several years ago one of my girls had a preschool teacher that introduced us to her chicken salad. And this is the chicken salad that I always make. But, I will warn you, if you have a hard time taste testing your recipes, or playing around with them, this probably isn’t for you. It always tastes the same to me. But, its one of those recipes that I just make up as I go. So, I will try to give you a general idea  and then you have to experiment!  It will be fun! And your family will love this!

5 or more chicken breasts, boiled, and chopped into bite sized pieces.
3-4 big stalks of celery, chopped
1 med. sized onion, chopped
Note: But, be careful not to add all of the onion at first.  you don’t want to over power the celery!
2-3 big red delicious apples, chopped
2-3 big granny smith apples
Note: You use the apples to stretch the salad. If you have a lot of people to feed up the apples! Up the veggies even!
2 cups Red seedless grapes, halved (obviously you can add more)
1 cup walnuts, or pecans, optional
Duke’s Mayo
Kraft Creamy Poppy seed Dressing (this is the secret ingredient)
Crescent rolls, crackers, yeast rolls, lettuce, etc. Anything and everything you would like to serve with this!

After you have boiled and chopped the chicken add all ingredients to a super large bowl and mix. In a separate bowl pour in the entire bottle of the poppy seed dressing and add about 3/4 c of mayo and stir until mixed well and the dressing has thickened up.  You made need to add more mayo. But, be careful not to over do the mayo, you will lose the poppy seed flavor if you add too much. Chill and serve!  Delicious!

Sometimes I find myself without poppy seed dressing and so I will make up a mixture of mayo and sugar and vinegar. This will taste yummy too!

Recipe adapted from Sherene Winkle.

Cherry Cheese Pie

This is so yummy! Have you ever had a serving of cheesecake with cherry topping and wished there were more cherries!?  Well, this is the pie for you! Most of the time the cheesecake is too much for me, but this has just the right amount.  AND, its way healthier than a regular cheesecake. (At least that’s what I told myself while eating practically the whole thing. Shh…don’t judge.) By the way, the crust on this pie is delicious!

3/4 c a.p. flour
3 TBSP. sugar
1/4 tsp. salt
1/4 c. butter, softened
1 can (21 oz) cherry pie filling
1 pkg. (8 oz) cream cheese, softened
1/3 c. sugar
1 egg
1 tsp vanilla extract

The CRUST!
Combine the first three ingredients into a bowl and add in the softened butter. Stir until combined well.  Press onto the bottom of a 9″ pie plate…also, go up the sides of the pie plate with the crust.  You will have to press it pretty thin to have enough to spread up the sides, but don’t worry, it will be great! Bake the pie crust at 350 degrees for 10-12 min. or until lightly browned. (I baked mine for about 15 min. But, don’t brown too much, you still have more baking to do.) After removing the crust from the oven, pour in the pie filling and set aside.

The Cheesecake part!
In a mixing bowl, beat the cream cheese, sugar, egg and vanilla until smooth. Pour the mixture over the cherries and spread carefully. Bake for 30-35 min. or until its beginning to brown around the edges. Cool on a wire rack. Refrigerate for several hours before serving!

Recipe  adapted from Taste of Home

Strawberry Lemonade Cupcakes

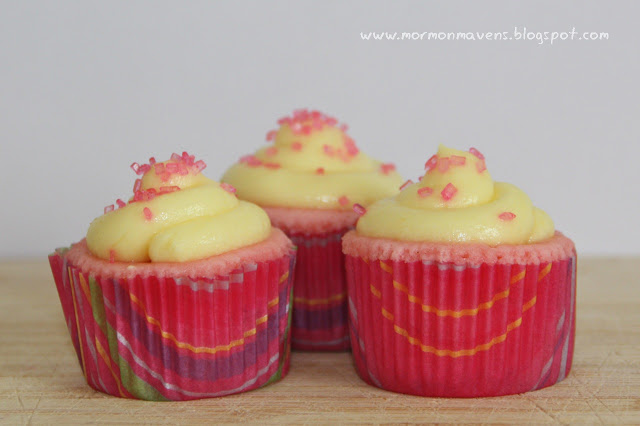
These little babies will add a kick to any party this summer! They are tangy, sweet, and (let’s just face it) SUPER cute! The best part is, they really do taste like strawberry lemonade! I frosted them with a lemon mousse buttercream, but you could also change it up a bit and try a strawberry frosting.

Strawberry Lemonade Cupcakes

4 T. unsalted butter, at room temperature
1 C. all-purpose flour
1/2 C. buttermilk
1/4 tsp. baking soda
2 egg yolks, at room temperature
1 tsp. pure vanilla extract
3/4 C. plus 1 T. sugar
1/4 tsp. salt
1 tsp. Instant Pink Lemonade Mix (like Crystal Lite or Country Time)
3 or 4 large, fresh strawberries, diced to 1/4″ pieces

1-Preheat the oven to 350 degrees F and line 10 muffin cups with baking liners and set aside.

2-Cream butter, sugar, and lemonade mix together. Add vanilla, soda, salt, and egg yolks. Mix in buttermilk. Gradually add the flour.

3-Clean berries, remove stem. With a sharp knife, slice dice the berries into 1/4″ pieces, being careful not to crush the berries. If the berries are crushed or mushy there will be too much moisture and your cupcakes will not bake properly.

4-Fill each cup with about a Tablespoon of batter. Then place 4 or 5 pieces of fresh strawberry in the middle of the batter (try to to get them on the edges, it will leave a gap in your cupcake when baked). Then add more batter per cup filling each to about 2/3 full.

5-Bake at 350 degrees F. for about 20 minutes or until a toothpick comes out clean.

*If baking mini-cupcakes (as shown in the photo) line 24 mini-muffin cups with liners. Use only 2 or 3 strawberry pieces in the middle, and bake for about 15 minutes.

Source: Thanks to Michelle from www.bigblackdogs.net for creating this awesome cupcake!!!!

Lemon Mousse Buttercream


First, you need to make a lemon curd:

1/3 C. granulated sugar
1 egg
1/3 C. fresh lemon juice
zest of 1 lemon
2 T. plus 2 tsp. butter, melted

1-In a microwave-safe bowl, whisk together the sugar and eggs until smooth. Stir in lemon juice, zest, and butter.

2- Cook for 1 minute intervals on high, stirring after each minute until the mixture is thick enough to coat the back of a metal spoon. (it usually takes about 3 minutes for me)

3- Cover the curd with cling wrap placed directly on the surface of the curd and refrigerate until set. (When I need it fast I put it in the freezer for like 15 or 20 min).

Buttercream Frosting:

1 pound bag of powdered sugar
1/2 C. milk
1/8 to 1/4 tsp. salt
1/2 tsp. pure vanilla extract
2 sticks butter, cut into 1/2 in. slices
1/2 C. shortening

1-using a whisk attachment on your electric mixer, mix the pwd. sugar, salt, vanilla and milk a low speed until smooth.  Add butter, one slice at a time, until incorporated.

2-Add shortening and whip at highest speed about 10 minutes or until volume increases by 50%.

When the curd is set and buttercream mixed, fold the lemon curd into the buttercream with a spatula until incorporated.

Zucchini Bake

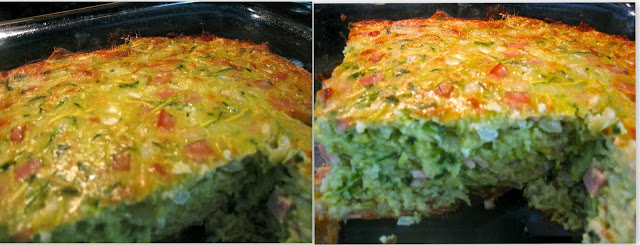
I know we JUST had a zucchini bake posted here but, sometimes options are good, no?  I tried this recipe for the first time today and thought it was delicious and comforting.  Hope you enjoy!

Ingredients:
4-5 small zucchinis (up to 15 oz) unpeeled and coarsely grated*
1 large onion, finely chopped
1 packet Canadian bacon (6 oz or to taste) finely chopped**
1 cup grated cheddar cheese, packed
1 heaping cup self rising flour***
1/3-1/2 cup oil
5 eggs lightly beaten
salt and pepper to taste

1.  Preheat oven to 350 degrees.  Grease a small or medium size baking dish (size will determine baking time).
2.  Mix all ingredients in a large bowl.  Pour into greased baking dish.
3.  Bake 30-40 minutes for a medium or shallow dish.  Today we used a small deep dish and it took 1 hour.  Zucchini bake is done when brown on top and skewer inserted comes out clean.  Can be served hot or cold.

Entertaining?  Garnish with tomato slices or fresh chopped parsley!

*The smaller zucchinis will make the dish greener due to more skin.
**You can use ham or bacon as well.  If you use bacon you may need to adjust the oil.
*** If you don’t have self rising flour use 1 cup flour, 1 tsp. baking powder and 1/4 tsp. salt

Source:  My Australian friend

Banana Cake with Vanilla Icing

Oh. My. Gosh!  This is delicious!  The icing is what makes it taste sooo good.  The cake itself tastes almost like a banana bread, but much sweeter and smoother. It would be yummy by itself, but with the icing…yum!  The icing is just addicting! I found this recipe on pinterest and changed a few things that worked better for me.  You’ve gotta try this!

Cake:
2/3 c. white granulated sugar
1/2 c. sour cream (use the good stuff!)
1 egg
2 TBSP. butter, softened (use the good stuff)
2 mashed ripe bananas
1 tsp. vanilla extract
1 c. a/p flour
1/4 tsp. salt
1/2 tsp. baking soda
Icing:
2 TBSP butter, softened
1/4 c. heavy cream
1/2 tsp. vanilla
1-1/4 c. confectioner’s sugar

Preheat oven to 375 degrees. (glass pans heat to 350)
Cream together the first 4 ingredients. Add the mashed bananas and the vanilla. Add in the last 3 cake ingredients and mix slowly. No lumps from flour…banana lump is okay, but you really should mash those well before you incorporate them into the mix. Pour into a greased 8×8 pan. Bake at 375 degrees for 20-25 minutes or until golden brown and a toothpick comes out clean! Cool completely before icing this. 
To make the icing: Cream together the butter and the confectioner sugar until smooth. Slowly add the cream in…(this is what makes it so good!)  Add in the vanilla extract and mix until smooth.  Put in the fridge if your waiting for the cake to cool because this has cream in it.  But if your cake is cooled, then ice away!
No joke…this is soo good!

*I doubled this the very first time I made it! Cooked it in a 9×13 pan and it worked well.