Slow Cooker Roast Beef

I could not tell you how many times I have prepared a roast this way.  I learned it from a roommate in college, and have used it ever since.  Everyone loves it and I rarely fix it any other way.  So easy, so delish.  This is my favorite roast beef dish.  It’s actually cooking in my CrockPot, as we speak.

Ingredients:
3-4 lb. chuck roast (cheaper cuts are fine, because the slow cooker tenderizes everything)
1 pkg. dry onion soup mix
1 10-oz can condensed cream of mushroom soup (Golden Mushroom is great, as well)

1.  Place roast in slow cooker.
2. Sprinkle onion soup mix over roast.
3.  Spread condensed soup over top of roast.
4.  Cook on HIGH 4-6 hours (you can cook this on low; just make the time adjustment.  I usually only have time to cook on HIGH!)

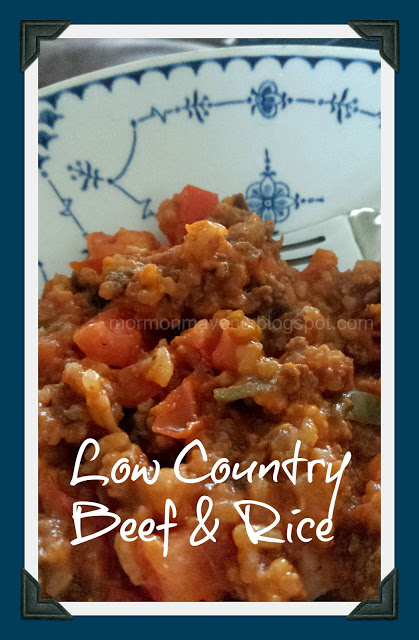
Low Country Beef & Rice

Have I ever told you how much I love one dish meals?  Seriously.  They just find me and I love to make them.  I found this one in a great cookbook that I have already shared.  It’s called Saving Dinner.  So Sunday was a good day to throw this one together since I had been on church assignment 1 1/2 hours away for half the day.  And just a little note, I left out the fresh, chopped tomatoes when I first made this.  They were right there in the dish drain but we were in such a hurry to eat, I forgot about them.  I added them in the next day and reheated the dish for my supper and believe me it was even better!
Ingredients:
3/4 lb. extra-lean ground beef (I used a whole pound and it was fine.)
1 stalk celery, chopped fine (used my re-hydrated Thrive celery, already chopped.)
1 large onion, chopped (or re-hydrate some Thrive chopped onion, no tears.)
1 small green pepper, chopped (what do you think?  Yep, freeze-dried green peppers)
1 t. Cajun seasoning
1 cup oats (recipe did not specify, so I used quick oats)
3 cups brown rice (I had some Sushi rice to use up)
3 medium tomatoes, chopped–don’t forget!!
2 11.5-oz. cans V-8 juice


1.  In a skillet, over medium-high heat, cook beef, celery, onion, bell pepper, and Cajun seasoning about 4 minutes, stirring frequently, until beef is brown and vegetables are tender.
2.  Blot any excess grease with a paper towel.  I didn’t have any grease.
3.  Stir in oats and mix well.  Add remaining ingredients.
4.  Reduce heat to medium-low and continue to simmer, uncovered, for about 5 minutes.
Source:  Leanne Ely, “Saving Dinner: The Menus, Recipes, and Shopping Lists to Bring Your Family Back to the Table,” p. 148.

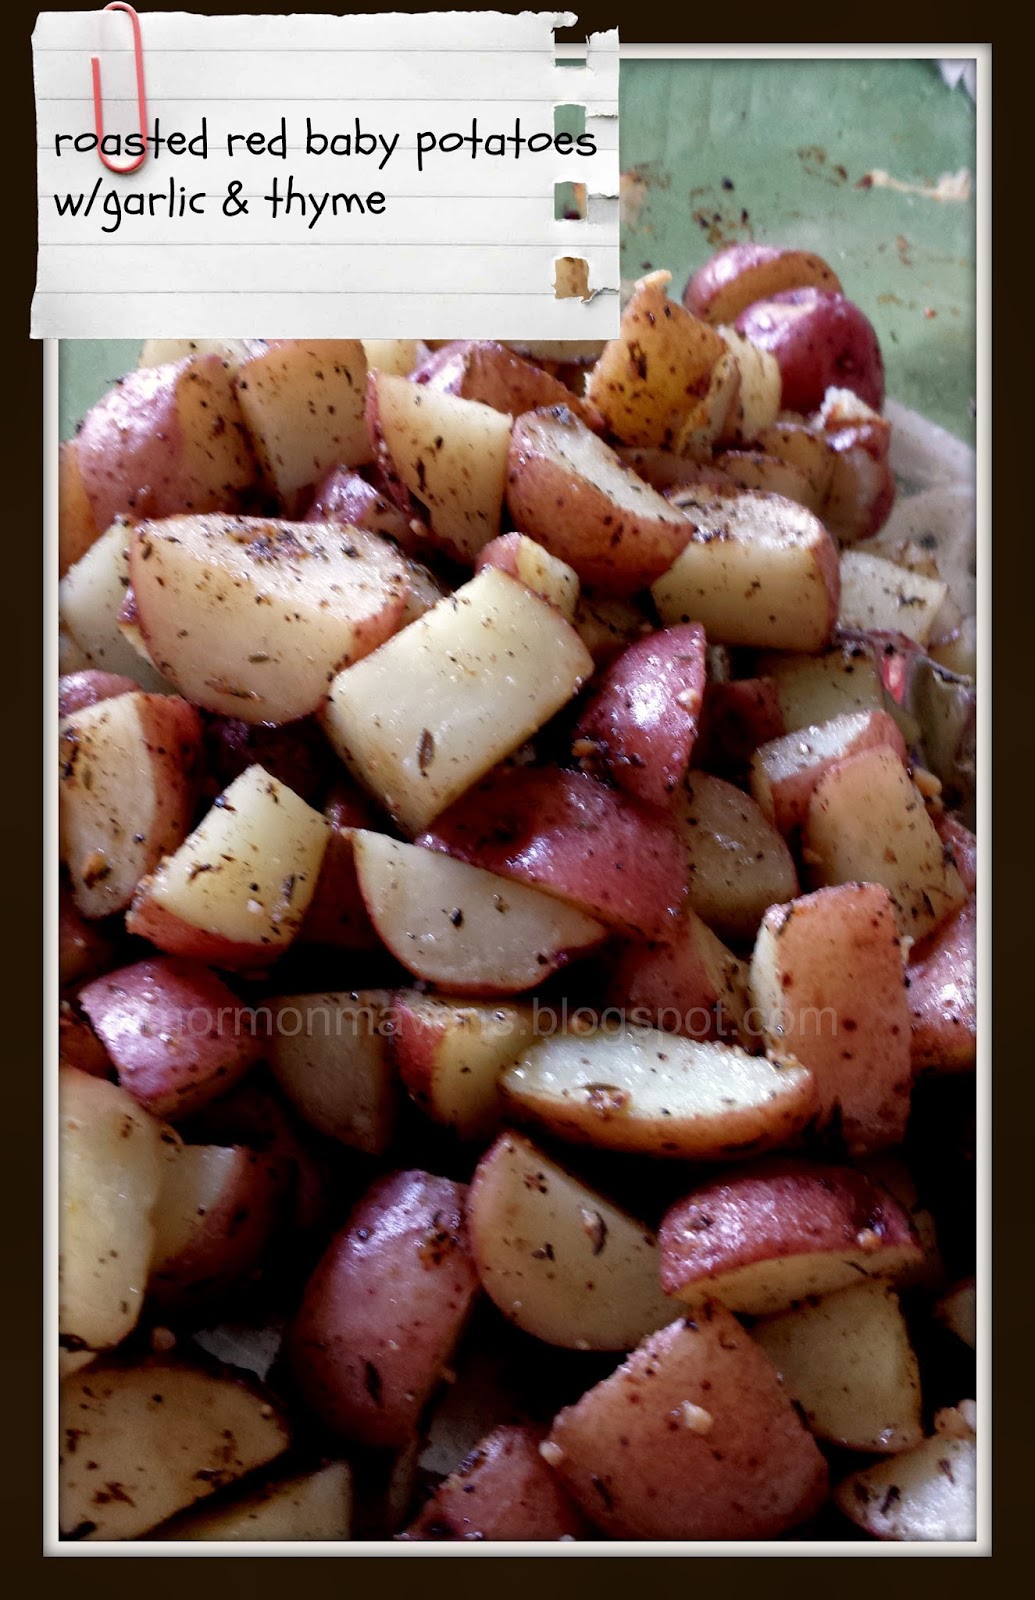
Roasted Baby Red Potatoes with Garlic & Thyme

So how many great recipes have you gotten off of a food package?  Yeah, me too!  This one came in really handy.  I had to come up with a meal on the fly while in the meat section of Walmart.  I decided to get small red potatoes because they would cook fast and I did not have a lot of time after work to put this meal together.  As I was preparing to boil the potatoes–and I hate waiting for the water to boil–I saw this recipe on the bag and thought that roasting would be so much quicker.  And there you go–a tasty side dish that was not a lot of work.

Ingredients:
1.5 lbs. baby red potatoes, cut into bite-size pieces
2 T. extra virgin olive oil
1 t. freshly ground black pepper
8 cloves garlic, chopped (I just used whatever minced garlic I had in the fridge.  I need to buy some more)
6 sprigs fresh thyme, or you can use dried thyme.

  1. Preheat oven to 425 degrees F.  
  2. Combine all ingredients in baking dish and mix well.
  3. Bake, uncovered, for 15 minutes or until potatoes are tender and browned.
  4. Stir gently a couple of times during cooking time.
  5. Remove from oven and serve warm.
NOTE:  I am going to add some chopped onion next time.  I think that would be really yummy.


SOURCE:  Melissa’s Baby Red Potatoes, package recipe. Check out their site HERE.

Lemon Mashed Potatoes

When I was a kid, my mom used to make lemon potatoes. She would cut and par-boil her potatoes and then pour lemon juice over them and add some dried parsley. I decided to alter the recipe a bit and came up with this yummy version of lemon mashed potatoes. It is a great side dish to go along with fish and I like to make them with my halibut cakes. They have a lot of lemon flavor without being too sour.

Lemon Mashed Potatoes

2 lbs. Yukon gold potatoes
1 C. Milk
1/4 C. Butter
1/3-1/2 C. Lemon juice
2 tsp. Lemon zest
1 tsp. Salt
2 tsp. Chopped fresh parsley (or a little bit of dried parsley)
Pepper to taste 

Directions:
1. Scrub the potatoes and cut them into chunks. Place in a pot and cover with water. Bring to a boil and continue boiling until tender. 10-20 minutes.
2. Drain the potatoes, add in the butter and milk and mash with a masher until you reach your desired consistency.
3. Stir in the lemon juice, lemon zest, parsley, salt and pepper.

Enjoy!

Serves about 6-8

Succotash Soup

This is a tasty, healthy soup but it does require some planning ahead.  If you are using fresh veggies, then I would prep them earlier in the day or the day before.  I used freeze-dried foods and just had to re-hydrate them during some of the cooking time.  I found this in a really cool cookbook called Saving Dinner by Leanne Ely.  You should check it out.  Lot’s of good stuff, besides recipes.  I like the way the book is organized by season, so that you are eating foods that are available and better for you during certain times of the year.

Ingredients:
1 10-oz. bag frozen lima beans
1 cup water
2 14.5-oz. cans of chicken broth*
1 T. vegetable oil (I used olive oil)
1 cup chopped onion*
3/4 cup chopped red bell pepper*
1/2 cup chopped celery*
3/4 cup chopped green onions*
2 1/2 t. dried whole thyme
Salt and pepper to taste
Dash cayenne pepper
1 14.5-oz. can whole tomatoes, drained and chopped (or already diced)
1 11-oz. can whole kernel corn*

1. Place lima beans in a large Dutch oven. Cover with water to 2 inches above the beans.  Bring to a boil, and cook for 2 minutes.  Remove from heat, cover, and let stand 1 hour.

2.  Drain beans; add 1 cup water and broth.  Bring to a boil; cover, reduce heat, and simmer for 40 minutes or until beans are tender.

3.  Heat oil in a large skillet over medium-high heat.  Add onion; saute 2 minutes.  Add bell pepper and celery; saute 2 minutes.  Add green onions; saute 1 minute.

4.  Add onion mixture, thyme, and remaining ingredients to bean mixture and bring to a boil.  Cover, reduce heat and simmer for 20 minutes.

*This is where I substituted freeze-dried veggies or other items from my Home Store.

Serves 10.  Freezes well.  Leanne suggests serving with a big green salad and whole grain rolls. Sounds like a good plan to me!

Source:  Saving Dinner, Leanne Ely, p. 133.  

Fluffy Yogurt Frosting

This is a recipe that my mom used to make. It is just whipped cream with yogurt folded in. It is a light alternative to heavy frosting recipes. However, it is a pretty soft consistency and is best suited for sheet cakes or 9×13 baked cakes. You can change the flavor of the frosting by using different yogurt flavors and I like to garnish the cake with fresh fruit that corresponds with the yogurt I use.

Ingredients:
1 pint of heavy whipping cream (2 Cups)
1/4-1/2 C. powdered sugar (depending on how sweet you want it)
1 or 2 containers (6-12oz.) of yogurt (flavor of your choice)

In a stand mixer of with a hand mixer, whip the heavy cream with the powdered sugar until stiff peaks form.
Fold in the yogurt.
Spread on your cake and garnish with fresh fruit. (refrigerate the leftovers-including the frosted cake)

Tres Leches Cake

Has anyone out there noticed that I post a lot of recipes for Hispanic foods?  We lived in El Paso, Texas for 6 1/2 years–right there on the US/Mexico border. Oh my yum!  Last night we had the sister missionaries over for dinner.  One of them had completed her mission and was heading back home to Arizona this week. She wanted her last dinner appointment in her mission to be at our house and she wanted a fiesta!  So cool that both missionaries are Hispanic.  They know how much we love Mexican food so I was happy to oblige. Chile Rellenos, Spanish Rice, Frijoles Charros and Tres Leches Cake.  The rellenos were homemade, but I bought my favorite rice and someday I will learn to make the beans, but for now canned is great.
For those who have never had Tres Leches (3 milks), this cake is meant to be soggy.  If yours turns out dry, you didn’t make it right.  Just sayin’.

Ingredients:

3/4 cup butter, softened

1 1/2 cups sugar, divided (or not.  I forgot to divide, so my cake was a little sweeter.  Who cares?)
1 1/2 t. vanilla extract, divided
5 eggs
1 1/2 cups all-purpose flour
1 1/2 t. baking powder
1 t. cream of tartar
1 cup whole milk (I had 2% and it was fine)
1 12-oz can evaporated  milk
1 14-oz can sweetened condensed milk
2 cups heavy cream
1 T. rum (we don’t drink so I used 2 T. rum flavoring–I Googled this)
Fresh fruit for garnish–I recommend mango, blueberries, strawberries, kiwi combined.
I cut them up a little bigger than a dice.  Leave the blueberries whole.


1.  Preheat oven to 350 F.  Grease and flour a 13 x 9 baking dish.  I like using glass for this, so I adjusted the oven temp to 325.
2.  Combine butter and 1 cup sugar in a large bowl.  Beat with a mixer at medium speed until fluffy.  Add 1 t. vanilla.  Beat in eggs one at a time, mixing well.
3.  Combine four, baking powder and cream of tartar.  Add to slowly to butter mixture and beat well. Spread batter in pan.  Bake 25-30 minutes, until a wooden pick inserted in the center comes out clean.  Set aside to cool.
4.  Stir together milk, evaporated milk and condensed milk.  Pour 3 cups over cake*.  Reserve remaining milk mixture to serve with cake.  Refrigerate cake.
5.  Combine heavy cream, remaining 1/2 cup sugar, remaining 1/2 t. of vanilla and rum or rum flavoring. Beat until thick and spread over cake.  Refrigerate until ready to serve.
6.  Pour leftover milk mixture onto dessert plates.  Slice chilled cake into squares and place on plates. Garnish with fresh fruit, if desired.  Serves 16.
Source:  I clipped this from a magazine, so I am guessing Better Homes & Gardens.

*no need to poke holes in the cake before you pour your milk mixture over it.  The cake does absorb the liquid very easily.

Play Dough

Ingredients:
2 C. Flour
1 C. Table Salt
2 Tbsp. Cream of Tartar
2 Tbsp. oil
2 C. water

Combine all ingredients in a sauce pot. Cook and stir over medium heat til it comes together and clears the sides of the pot. It will get tough to stir. Remove from heat, knead the play dough and add food coloring or essential oils for colored/scented dough. Mix til smooth.

Store cooled play dough in a ziploc bag. It should last for several weeks or a couple months.

Almond Butter Quinoa Brownies


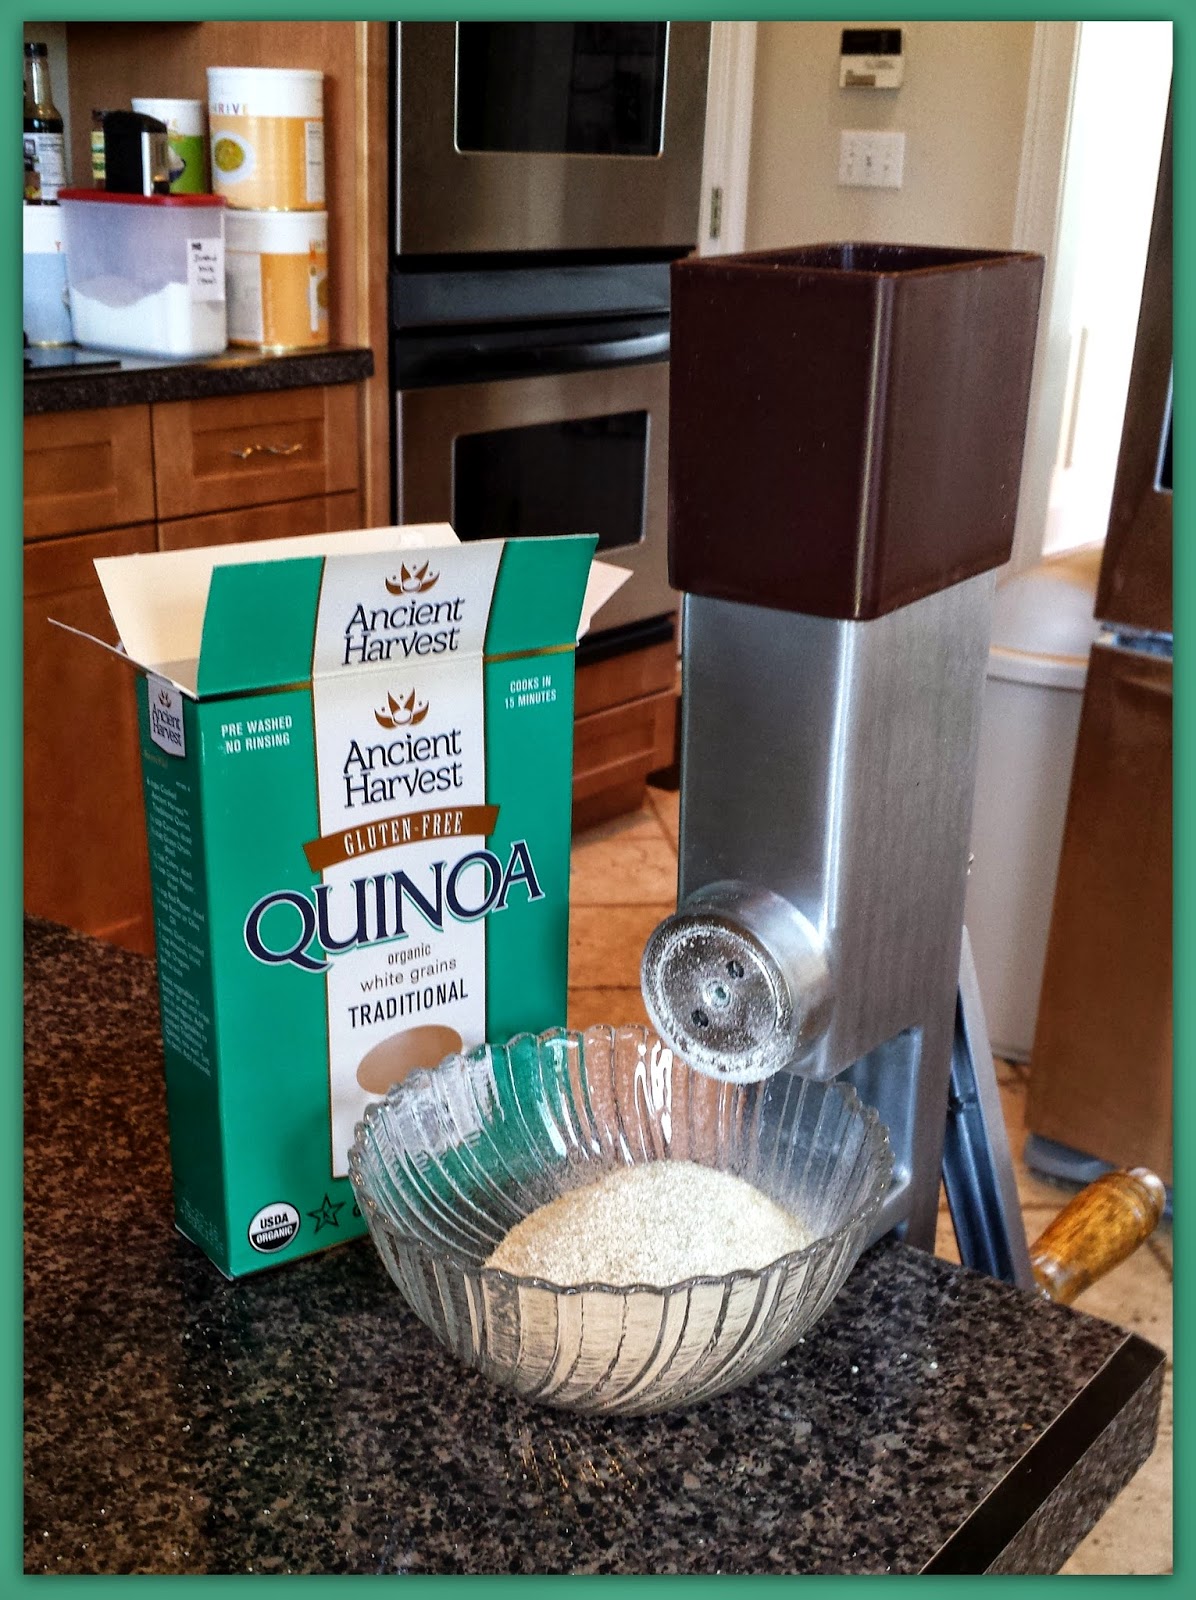
I am not saying that I have jumped on the quinoa bandwagon, but I got a free “Eating Well” magazine in the mail this past week and was just flipping through it and left it open on the kitchen island.  Next thing you know I have a request to make these lovelies.  Okay, I was game.  These are actually pretty good.  And I had all of the ingredients on-hand, including a hand-crank grinder that I haven’t used in forever*.  Pretty handy little tool, really.  Mental note to use this more often.  
 
Ingredients:
1/4 cup unsalted butter, softened (I used salted because that is what I had.  Paula Deen says that’s okay.)
3/4 cup smooth or crunchy natural almond butter
2 large eggs
3/4 cup packed light brown sugar
1 t. vanilla extract
3/4 cup quinoa flour (I used my hand-crank grinder to make this)
1 t. baking powder
1/4 t. salt
1 cup semi-sweet chocolate chips


1.  Preheat oven to 350 degrees F.  Line an 8-inch square baking pan with foil allowing it to slightly overhang on opposite ends so you have “handles” to lift the blondies out of the pan.  Coat the foil with cooking spray. Seriously. These things are a little sticky when you cut them and pull them off of the foil.


2.  Beat butter and almond butter in a mixing bowl with an electric mixer until creamy.  Beat in eggs, brown sugar and vanilla.  Whisk quinoa flour, baking powder and salt in a small bowl.
 
3.  Mix the flour mixture into the wet ingredients until just combined.  Stir in chocolate chips.
 
4.  Spread the batter evenly into the prepared pan and bake about 25 minutes–until a toothpick inserted in the center comes out with just a few moist crumbs on it.  DO NOT OVER BAKE.
 
5.  Remove from oven and let cool about 45 minutes in the pan.  Lift the blondies out of the pan with the foil  and transfer to a cutting board.  Let cool completely and cut into bars.
 
6.  Makes 24 blondies.
 
7.  These should keep up to 5 days in the fridge, in an air-tight container.
 
*Check out this cool grinder…


SOURCE:  Eating Well Magazine.