Corn & Black Bean Veggie Salad

I was craving some fresh veggies and remembered that I had this recipe I wanted to try. So,  I made this salad, took two kids to soccer practice, came home ready to dig into it and the two kiddos I left at home with their dad had finished off the salad! They all said they loved it and asked if I  could make some more! Well, if I expected to get any of the salad I needed to make some more! LOL!  This is delicious! We ate it as a side dish to pork chops, and we ate it with tortilla chips. All good!

Salad:
2 cans of black beans, drained and rinsed
2 cans of corn, drained and rinsed
1 large tomato, chopped
1 small onion, yellow or red, diced fine
1 large green bell pepper, seeded and chopped
1 -2 large cucumbers, peeled and chopped

Dressing:
2 garlic cloves, minced
4 TBSP. white granulated sugar
4 TBSP. apple cider vinegar
4 TBSP. canola oil
juice of 1 lime
1/2 tsp. salt
1/2 tsp. black pepper
3/4tsp. cumin powder

In a large bowl, add all of the Salad ingredients and stir well.
In a separate bowl, add all of the Dressing ingredients and whisk well until the sugar is mostly dissolved.
Pour the dressing over the salad and stir really well.
Cover and place in the refrigerator for 30 minutes at least. 
Serve as a side dish or with tortilla chips.

Adapted from a recipe in Taste of Home.

Hashbrown Breakfast Casserole

YUM! YUM!  Everyone likes this casserole.  It’s easy to make and easy to eat! LOL!

2- 12 ounce bags frozen, shredded hashbrowns, thawed (at least 30 minutes)
1/4 cup unsalted butter, melted
1 cup of diced deli ham
1/2 – 2 cups shredded cheddar cheese, or your favorite kind of cheese!
6 large eggs
1 cup evaporated milk
salt
pepper

     Preheat oven to 425 degrees. Squeeze moisture out of thawed potatoes then put them in a large bowl. Pour melted butter over potatoes and stir well until combined. Pour the potatoes into an ungreased 9×13 casserole dish, and press them to make a crust. I press them up the sides of the dish also.
     Bake until the potatoes start to brown around the edges, at least 10 minutes.
     Into a big bowl add the eggs, the milk, salt and pepper.
     Remove the potatoes from the oven. Sprinkle the diced ham over the  potatoes, then sprinkle the cheese over the ham. Pour the egg mixture over the cheese and ham.
     Bake for about 25-30 minutes, or until golden brown on top.

Cheddar Dill Scones

This was my first attempt at making scones and eating them! My impression of a scone is that its like a flat biscuit!  They are firmer of course, but the overall bite is similar to a biscuit.  I liked these, and surprisingly all of my kids and their friends did also. I served this with a ginormous pan of Broccoli Chicken Alfredo. The flavors were really great together. The best thing about this recipe is the DILL. I love some dill!

2-1/2 c. all-purpose flour
1 c. shredded cheddar cheese, use sharp
1/4 c. chopped fresh parsley
1 TBSP. baking powder
4 tsp. dill weed
1/2 tsp. salt
3/4 c. butter or margarine, room temperature
2 eggs, slightly beaten
1/2 c. milk

Heat oven to 400 degrees. Combine first 6 ingredients in a bowl. Cut in the butter until the mixture is crumbly. Stir in the eggs and milk just until the mixture is moistened. Turn out your dough onto a lightly flour surface and knead it until its smooth. Divide the dough in half; and roll each half into approx. an 8″ circle. Cut each circle into 8 wedges. Place on a cookie sheet about a 1″ apart. Bake for about 15-20 minutes or until lightly browned. Smear a little butter on top of them when they come out of the oven. Easy and delicious!

Adapted from a Land O Lakes recipe.

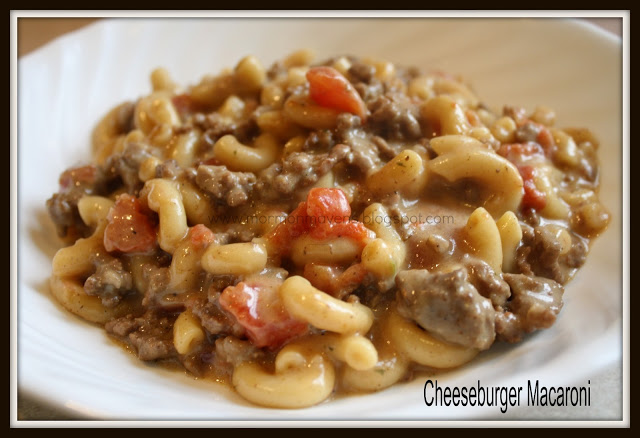
Cheeseburger Macaroni

I love recipes that I have all the ingredients to at all times, and this is one of those. This is definitely one of our family’s favorite meals. There is never any leftovers! It is an as “easy as it gets” recipe and so delicious!

2 lbs. lean ground beef
1 pkg. taco seasoning
1 -14.5 oz. can of petite diced tomatoes
3 cups beef broth
1 -3/4 cup water
1 box of elbow macaroni

Cheese Sauce:
4 TBSP. butter
4 TBSP. a.p. flour
1 -1/2 cups of milk
2 cups shredded cheddar cheese
1 tsp. salt
1 tsp. pepper

Brown the ground beef and then drain off the grease. Stir in taco seasoning, tomatoes, beef broth, water, macaroni and stir well. Cooking on medium high heat. Continue to stir until it starts to bubble.  Then reduce the heat to simmer and cover the dish, cooking for about 12 minutes or until the macaroni noodles are done to your liking. 

Just as soon as you cover the macaroni, start your cheese sauce. Melt the butter in a saucepan over medium heat and then just before its completely melted add in your flour. Stir for about 2-3 minutes and then add the milk. Bring this to a boil, continuing to whisk the whole time. Remove from the heat and add the cheese and stir until melted. Salt and pepper.

When the macaroni mixture is ready, pour in the cheese sauce and stir well to incorporate it.

adapted from Kevinandamanda.com 

Family Vacations to Church History Sites


In fall of 2010, and then again in 2011, we took a family vacation to Nauvoo, Illinois and had some of the most memorable times of our lives.  We toured by covered wagon and on foot the beautifully restored city of Nauvoo. We enjoyed the homes that had been restored. The Red Brick Store that was owned by Joseph Smith where the Relief Society was organized. We saw Brigham Young’s home, and others. We toured the Dance Hall/ Cultural Hall, where the original wood floors were still intact.  On that very floor Joseph Smith had taken a piece of chalk and drawn out map of the trail west to the Salt Lake Valley, which he had received in a vision, for Brigham Young to follow with the Saints. We dressed up in pioneer clothing, played pioneer games, learned how to make candles, and rope, and barrels. There were so many things to see and do, and it was wonderful! We did it all, and most importantly we felt the Holy Ghost testify to us of the truthfulness of the gospel of Jesus Christ.
 
We also visited Carthage Jail. Upstairs in the room where Joseph and Hyrum Smith were  held as prisoner, we felt very intensely the Holy Ghost. We listened to a soloist sing “A Poor Wayfaring Man of Grief”, which John Taylor sang to Joseph just before the mob rushed into the jail and killed Joseph and Hyrum Smith, and fatally wounding John Taylor and Willard Richards. To see the bullet hole in the door made by the bullet that killed Hyrum Smith, and how its been worn perfectly smooth over the years from saints who have touched it and inserted their finger into the hole to make real the story of Hyrum’s and Joseph’s deaths.
 
 
Maggie and Wyatt on the stairs of the Smith family cabin in Palmyra, New York, where Joseph Smith Jr. was visited by the Angel Moroni.
 
This summer we went north to Palmyra, New York. We visited the Joseph Smith Sr. family farm, their cabin, their barns, their other home, the “Alvin Tree”, the Sacred Grove; where Joseph Smith Jr. prayed to Heavenly Father and was then visited by Heavenly Father and Jesus Christ, the Hill Cumorah; where Joseph Smith Jr. was shown the Golden Plates by the Angel Moroni, and the Pageant; (which by the way is fantastic!), the Witmer Farm, where the Church of Jesus Christ was organized in 1830. We also visited the Grandon building where the Book of Mormon was first published.  We had a wonderful time!  We felt the Holy Ghost testify of the truthfulness of the Book of Mormon and also that Joseph Smith is truly a prophet of God.

Sophi and Abi with members if the cast of the Palmyra Pageant. Joseph Smith and a Nephite woman. (real life husband and wife)
 
I think as Latter Day Saints we sometimes think, “if I ever get to the sacred grove I am going to have a powerful witness of the truth.”  The truth is this, at peak tourist season quiet time in the grove can be hard to come by. But, I myself was able to have a couple of unexpected moments where I was reminded that my Heavenly Father is indeed mindful of me and that he loves me. I am thankful for my own special time there.
 
So, why go to these places? Why pick these places over other obvious vacation sites for our family?The answer is simple. We desire to impress upon our children that all of the stories we share and tell them about the coming forth of the Book of Mormon, Joseph Smith and the early pioneers are real! These are not fictional stories, these things really happened. There are so many wonderful opportunities at these Church History Sites where the Holy Ghost can teach truth and enlighten our minds and strengthen our testimonies.  We count ourselves very blessed to have been able to go to these places and have a sensory experience of the stories of our church’s history.
 
I hope you all will find and opportunity to visit these places or any of the Church’s Historical Sites! If you are interested in these sites you can go to www.lds.org and see actual pictures of the beautiful sites and lists of things you can do when visiting. All of these pageants and locations are completely free!  (which is a plus for a big family) 
 

Pepperoni Bites


This recipe was so easy to make! My 9 year old daughter actually made these one afternoon for everyone to have as a snack!  Delicious! We like deli pepperoni better than the ones you can get pre-packaged, but you can use whatever you want.  Enjoy!
 
1 cup AP Flour
1 teaspoon Baking Powder
1 cup Milk
1 egg
1 cup Cheddar Cheese, shredded
1-1/2 cup pepperoni, diced
Pam
Marina sauce
 
Preheat your oven to 350 degrees.
Into a big mixing bowl add the flour, baking powder and stir. Next add the milk and the egg and blend well with mixer. Then add the cheese and the pepperoni and blend well. Spray the mini muffin tin well and then spoon in the mixture. Be sure not to over fill the mini muffin tin cups.  Bake at 350 degrees for about 25- 30 minutes, or until they are golden brown.  This makes approximately 2 dozen pepperoni bites. 


adapted from a Goose Berry Patch recipe. 


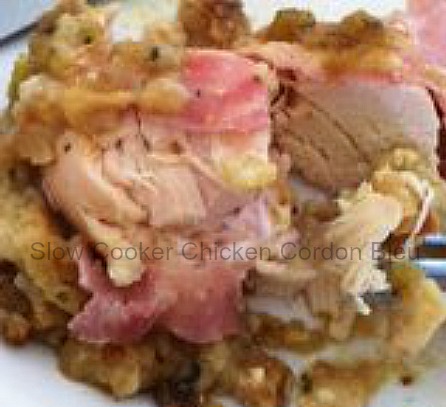
Slow Cooker Chicken Cordon Bleu

Oh my goodness, this is so yummy and definitely on my “comfort foods” list from now on.  The recipe was super easy to put together. We enjoyed it, and it looked a little on the fancy side to serve to our guest. Yet all I had to do was put it all in the slow cooker and wait for it. It was creamy and really satisfying. We served a really great spinach salad with it and some rolls and corn on the cobb. Enjoy!          
6 boneless skinless chicken breasts
(or one breast per person. I had 8.)
1 can condensed cream of chicken soup
1 cup of milk (I used 1-1/4c)
6 slices of deli ham
(OR 1 slice per breast…get some really good ham!)
6 slices of Swiss cheese (1 slice per chicken breast.)
1 (8 Oz) package of Stovetop Herb Stuffing mix 
1/4 cup melted butter
Mix the soup and milk in a bowl. Pour some of the soup onto the bottom of the slow cooker and spread it around so it coats the bottom of the cooker. Then layer the chicken breasts over the sauce.  Next layer the ham over the chicken and then layer the Swiss cheese over the ham. If you had more chicken breast, like I did, then you would do another layer of chicken breasts and ham and cheese.
 Sprinkle the stuffing over the top and then pour the remaining soup mixture over the stuffing. Try to cover the stuffing. Then pour the melted butter over the that.  I think it works best if you try to wet your stuffing. You don’t want it to be crunchy. Spread the soup mixture a bit over the stuffing or even try to poke a spoon or fork down and in between the layers. Cover the slow cooker and cook on med to high for 4-6 hours.
Adapted from recipe by Six Sister’s Stuff

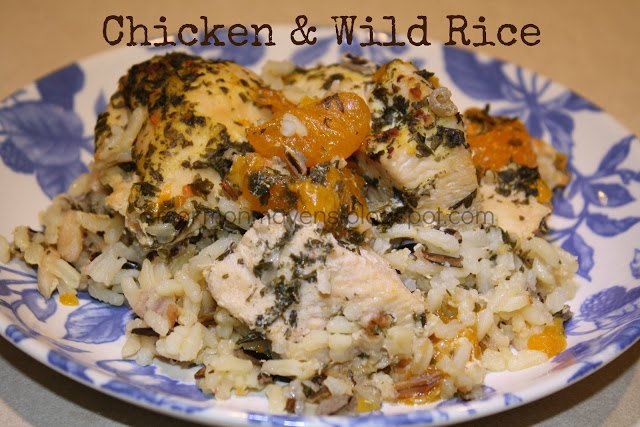
Chicken & Wild Rice

 
My family really liked this. Its a recipe I found in my 4 ingredient cookbook.  I changed it up a bit,
and voila! It was SUPER simple and cooked itself! The mandarin oranges add just a bit of sweetness to this dish that really makes it great! By-the -way, this is pretty healthy.
 
 
Ingredients:
1 bag of chicken, boneless & skinless
1 box of Uncle Ben’s Wild Rice, original flavor
1 box of Uncle Ben’sWild Rice, Herb Roasted Chicken Flavor
1 big can of Mandarin Oranges   
salt
pepper
2 1/2 cups of water, according to rice directions
 
Preheat your oven to 350 degrees. Using a roasting pan, layer the bottom with both boxes of rice.  Then sprinkle one of the seasoning packets over the rice.  Cut all the fatty parts off of the chicken and cut each breast into thirds. Layer the chicken over the rice. Sprinkle the second seasoning packet over the chicken and the rice. Lightly sprinkle salt and over the entire dish.  Pour the can of mandarin oranges over the chicken. Spread them out a bit so all of the sweetness goes everywhere instead of on  just one spot of the dish. Add the water carefully. Cover your roasting pan with tinfoil if you don’t have a lid. Then bake for 2 hours.  So, put this on just before you go to get the kiddos from school and it will be ready for dinner!
 
original recipe from 4 Ingredient Cookbook.

Snow Cream

 This my friends, is snow cream.  I can’t tell you how much of a delicacy this is in the south. Whenever it begins to snow, which isn’t too often in the south, you wait and hope it snows for a couple of hours. Because you can’t collect the “first snow”! (I don’t know why, some older people have always said it wasn’t clean.  -smile-)  But, after its been snowing for a while you place really big bowls outside to collect the snow while it falls.  Then you bring it in and add the yummy stuff to it to make it into snow cream!  It is soo good!  We will actually take the risk of driving through terrible weather to get the ingredients needed to make this, because we love this stuff so much.  Everybody has a different recipe. Some people add eggs. (yuck) But, I tend to go with simple recipes and it doesn’t get any simpler than this.  If it snows this winter where you live, give this a try. I promise it will make you like the snowy weather much more!

Ingredients:
Lots of Snow, (about 16-20 cups per bowl = 36-40 cups of snow for 2 cans of condensed milk)
Condensed Milk, 2-4 cans
Vanilla flavoring, 1/8 – 1/4 cup ( for 36 cups of snow.) 

   You begin this with a lot of snow!  A lot of snow! The picture below is the beginnings of our second batch.  The biggest tupperware bowls we owned were needed for this.  LOL!  This picture actually shows you there wasn’t enough collected  in the bowls to use both cans of condensed milk.  The bowls have to be packed full and heaping! 
  

Then add one whole can of condensed milk and about 1/4 cup of vanilla. (I know that sounds like a lot, but trust me.)  Then stir and mash.  Stir and mash.  You are going for a creamy texture.  Add snow as you go. You will use both bowls of snow.   The bowls are equivalent to a big stock pot. The biggest one in your set. 
Add the other can of condensed milk. But not the whole thing.  Then add a Tbsp or two of the vanilla flavoring.  Stir and mash. It takes a little while to mash out the snow balls in the mixture and get it all creamy. When it looks like the picture below you are finished.  Enjoy! – and put it in the freezer to keep until its all eaten.  😉

 
Yummy, yummy!
 
 
recipe by Niki Lewis
 

Sugary Peanut Butter Kisses

 
These are so yummy.  The kids enjoyed mixing the colors into the sugar, and then rolling the cookies in the different colored sugars.  So, this is a very kid friendly recipe and so good to eat!
 
Coloring sugar:
1-2 drops Wilton Gel Food Colors
1/2 c – 3/4 c Granulated sugar
 
Pour sugar into a ziploc bag and squeeze one drop of gel color into the sugar. Seal the bag and start squishing the color into the sugar unto all the sugar is colored.  You can darken the color  by adding more drops of the gel. You can lighten the color by adding more sugar.
 
 
Cookie Ingredients:
1/2 c. sugar
1/2 c. firmly packed brown sugar
1/2 c. real butter, softened
1/2 c. peanut butter
2 TBSP. milk
1 tsp. vanilla
1 egg
1- 3/4 c. self-rising flour
Hershey kisses, about 30 or more pieces, with the foil off
 
Preheat your oven to 375%. Cream together the white sugar, brown sugar and butter. Really give a few minutes to get nice and creamy. Scrape down the sides of your bowl and add the following peanut butter, milk, vanilla and egg. Mix well and scrape down the sides of your bowl. Whisk the flour and then scoop up the right amount needed.  Slowly add in the flour and continue to scrape down the sides of the mixing bowl.
 
Pour colored sugars onto paper plates. With a cookie scoop drop 1″ balls of the dough into the different colors of sugar and roll around. Place the cookies about 2″ apart on the cookie pan. Bake for 10 minutes for a soft chewy cookie, and 12 minutes for crunchy cookie.  (The cookie will flatten a bit as it bakes.)
 
Take cookies out of the oven and immediately press the hershey kiss into the cookie slightly! Move cookies to a rack to cool.  It takes a while for them to cool down because the hershey kiss melts a bit and then solidifies again.  So, give them time.  Then enjoy!