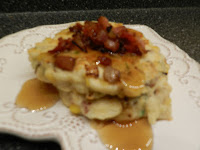
Bacon and Corn Griddle Cakes

Ingredients:

8 slices bacon, cut into 1/2 inch pieces
1/3 c. finely chopped sweet onion
1 c. flour
2 T. chopped fresh chives
1 t. baking powder
1/2 t. salt
1/8 t. cayenne pepper
2/3 c. milk
1 large egg, beaten
1 c. fresh, frozen or canned corn
1 T. oil
1/2 c. shredded Monterey Jack cheese
warm maple syrup, for serving

Directions:

1.  In a medium skillet, cook the bacon pieces until they begin to brown.  Add the onion and continue to cook until the bacon is crisp and the onion is softened.  Scoop out a heaping tablespoon of the bacon mixture for topping the griddle cakes upon serving and set it aside.

2.  While the bacon is cooking, combine the flour, chives, baking powder, salt and pepper in a medium bowl.  Stir in the milk, egg and oil, just until moistened.  Stir in the bacon mixture, corn and cheese.  The mixture will be thick.  If you’d like the griddle cakes to be slightly thinner, add a little more milk to thin out the batter.

3.  Heat and grease a griddle or large skillet.  Pour a heaping 1/4 c. of the batter onto the griddle and cook until it is golden brown, 3-4 minutes per side.  Repeat with the remaining batter.

4.  Serve stacks of griddle cakes topped with a sprinkle of the reserved bacon/onion and a good dose of warm maple syrup.

Source:  RecipeGirl.com

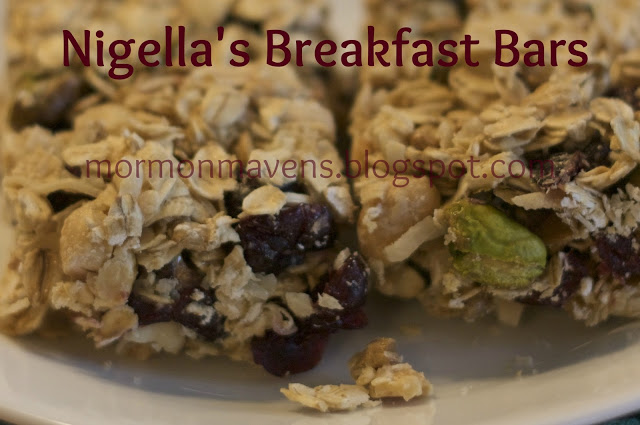
Nigella’s Breakfast Bars

Mr. Blue Eyes’ parents gave us a Nigella Lawson cookbook a few years ago and there are some fabulous recipes in it. I mean, c’mon. It’s Nigella we’re talking about. These granola bars are so easy and so good that we eat them morning, noon, and night!

Ingredients:

1 14 oz can Sweetened Condensed Milk
2.5 Cups of Rolled Oats (not instant!)
1 Cup Shredded Coconut
1 Cup Dried Cranberries
1 Cup Mixed seeds* (Nigella suggests pumpkin, sunflower, sesame)
1 Cup Natural Unsalted Peanuts

1. Preheat the oven 250 degrees F and spray a 9×13″ pan.
2. Warm the Sweetened Condensed Milk in a sauce pan. Ms. Lawson suggests a Large one; I used a small one. Tomato, Tah-mah-toe.
3. In a Large mixing bowl, mix all the other ingredients together. Pour the warmed milk over the top and fold it over until everything is looking gooey and good!
4. Press the mixture into your greased pan. At Nigella’s suggestion I used a latex (or non-latex for all you latex-sensitive people) glove. Make sure you press down fairly firmly and pack it well. We had trouble with crumbling. Not that that makes it taste any less delicious!
5. Bake for 1 hour. After it’s cooled about 10 minutes, cut 4×4 length to width and remove from pan to cool completely.

Store in an airtight container. Makes 16.

*Notes:
1. We have used Unsalted Cashews (1/3 Cup); Salted, shelled pistachios–pictured above (1/3+ Cup); Sunflower Seeds (1/3- Cup). They turned out great!
2. When she says natural, unsalted, she means it. Unsalted just seems to turn out better.

Source: Nigella Express:130 Recipes for Good Food, Fast

Cloud Bread

Though I found this recipe intriguing while browsing Pinterest, I never really felt a need to give it a try.  I mean, why should I try to make a nearly carb-less bread?  I’m perfectly happy with the carb-laden kind!  Well, it wasn’t long before I found out that I’m prediabetic and need to drop some weight and get my carb intake under control.  At present time, I’m still working on it.

I won’t say this recipe fulfilled any deep bread cravings, but it was nice to have SOMETHING to make a breakfast sandwich out of.  I’ve also toasted it and used it as a sort of tostada.  If you decide to give it a try, make sure to follow the directions very closely.

Ingredients:
3 eggs (separated)
3 Tbsp. cream cheese
1/4 tsp. cream of tartar
2 tsp. stevia

1.  Preheat the oven to 300 degrees.  Separate the whites of the eggs into a mixer bowl and the yolks into a small mixing bowl.
2.  Into the YOLKS, whisk in the stevia until smooth and well-combined.  Into the WHITES, add the cream of tartar and mix until you get stiff peaks.
3.  Add a little of the whites mixture (maybe 1/4 c.) into the yolks mixture and stir together until combined.  This will lighten up the yolks mixture a bit before folding it into the whites.  Carefully fold in the yolks mixture into the egg whites.  Fold only!  Do not stir or whisk as this will make the whites “deflate”.  Fold gently until the whites and yolks are combined.
4.  Place a sheet of parchment or waxed paper onto each of two cookie sheets.  With a large spoon or large cookie scoop, dollop the mixture in four or five piles on the paper/cookie sheet.  Use the back of the spoon to make these dollops into nice even circles.  You want these to be at least 1/2-3/4″ thick.
5.  Bake on the middle rack of the oven for about 30 minutes (you really have to watch these, only bake until they are golden).  Since I had two large cookie sheets I switched their positions halfway through and just baked each sheet until the “bread” was a nice golden color.
6.  Allow to cool COMPLETELY on a wire rack (I just transferred the papers straight onto a wire rack).  Once cool, they will become soft but just out of the oven they are a bit crispy.  Store in a ziploc bag.

Makes 8 to 10 pieces

Notes:

  • Another recipe that I saw said you could use the same amount of cottage cheese in place of the cream cheese.  Haven’t tried that yet.
  • The recipe I used called for 1 packet of stevia, but I only had it in a large bag.  A web search informed me that 1 packet = 2 tsp.
  • The recipe I used did not suggest lightening up the yolks mixture with the whites, but I’ve watched enough cooking shows to know that this is a great tip and helps with the folding process (plus, it’s always worked better for me personally).
  • These are fairly fragile.  They stood up okay to an egg/sausage load for breakfast, but just barely and only because I sort of cradled the sandwich carefully.  Toasting them makes them crispy but may also make them taste more egg-y.
  • One piece is about 38 calories and about .25g of carbs, by my calculations.
  • I’ve learned that this recipe is also known as Oopsies.
Source:  all over the internet, but I used the recipe from Mom, What’s for Dinner?

Belgian Waffles


These are my FAVORITE waffles!  The whipped egg yolks make them light and fluffy and the cornstarch keeps them wonderfully soft.  

Belgian Waffles
http://www.yammiesnoshery.com


Makes about 8 big waffles

3 egg yolks

2 cups milk
1/2 cup oil
1 teaspoon vanilla
3 1/3 cups flour
1/4 cup corn starch
1/2 cup sugar
2 tablespoons baking powder
1 teaspoon salt


4 egg whites
A pinch of cream of tartar  
2 tablespoons sugar

Mix together flour, corn starch, sugar, baking powder, and salt.  In separate bowl mix together egg yolks, milk, oil, and vanilla. Beat the egg whites with cream of tartar until soft peaks form. Add the two tablespoons of sugar and beat until stiff peaks form.   Mix together the dry ingredient and wet ingredients then fold egg whites in to the batter. Do not over mix  Bake in a greased waffle iron.


Source: http://www.yammiesnoshery.com

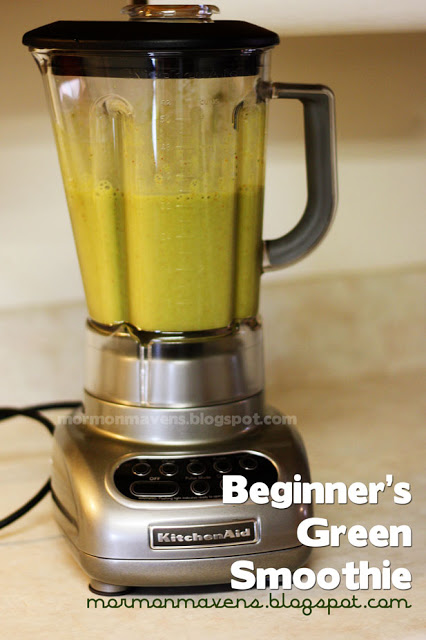
Green Smoothie [For Beginners]

So… have you fallen into the Green Smoothie craze yet? If not, you really should. My husband and  I have been doing green smoothies for about a year now. I can honestly say that it’s been the best “eating” decision we’ve made as a couple.

I know that if I have this smoothie for either breakfast or lunch, I instantly have 4 (1/2 cup) servings of fruit and 2 servings of veggies (if you use 2 cups of spinach).

Don’t let the ingredients or color of the drink shy you away. This is a GREAT beginners recipe. I PROMISE you won’t be able to taste the spinach! This makes a 32 ounce serving. It’ll be really filling, and really tasty!

Beginner’s Green Smoothie
Ingredients:

1 cup water (you could also use juice, I just don’t want the extra calories)
1 cup light vanilla yogurt
1/2 c. unsweetend natural apple sauce
1 frozen banana
1 heaping cup of frozen strawberries
1-2 cups of fresh baby spinach

Directions:
– Put the ingredients in the blender in the order they are listed.
– Blend!
– Enjoy!

If you are doing Weight Watchers (like I am!) this whole drink is 4 points. You may be able to find a yogurt with less points… if you notice the only points in this drink is from the yogurt.

Want more of my smoothie ideas?
Blueberry Banana Smoothie
Jamba Juice’s Strawberries Wild Knock Off

Our Favorites from 2012


Last year around this time we posted the most popular recipes of 2011.  This year we thought we’d do something different…..this time we are sharing OUR favorites!  Each of the Mavens has chosen their favorite personal recipe of 2012.  We hope you’ll give them a try if you haven’t already!

from Emily…..Balsamic Glazed Pork Loin
 
from Anna…..Mexican Street Corn
 
from Melissa…..Amazing Crockpot Grits
 
from Audrey…..Mom’s Rolls
from Niki…..Cheesy Vegetable Chowder
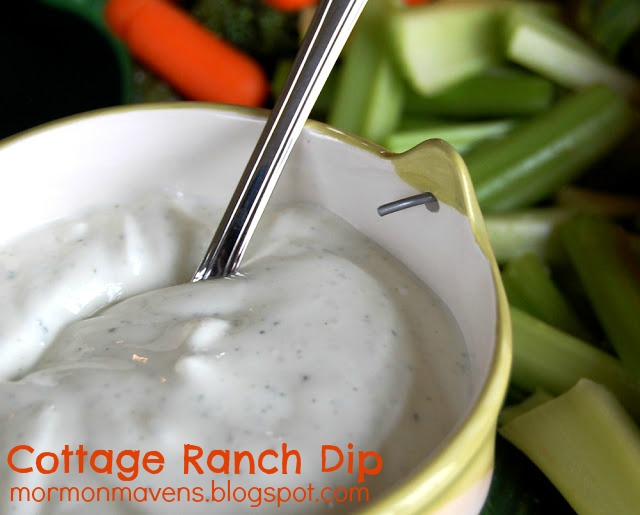
from Julie……Cottage Ranch Dip
 
 
from Amy…..Cobbler Custard Cups
from Kara…..Spinach Dip
 
Care to share what some of your favorite Maven recipes have been?  We’d love to hear from you!
 
image source: Microsoft Office Clipart (manipulated through Picmonkey)
 

Sour Cream Banana Bread

There’s a reason I don’t make this very often.  I can’t stop eating it!!!


Ingredients:
2 sticks butter, softened
1 1/2 cups plus 2 Tbsp. sugar
3 eggs
1 1/2 cup mashed ripe banana (about 3 bananas)
4 cups plus 2 Tbsp. flour
1 tsp. baking soda
1 1/2 tsp. baking powder
1 1/2 cups sour cream

1.  Preheat oven to 350 degrees.  Grease and flour bundt pan.
2.  In a mixer, cream together the butter and sugar until well combined.  Add the eggs in, one at a time, beating each egg in well.  Add mashed banana and beat in.
3.  Combine the dry ingredients into a separate bowl.  Add dry ingredients alternately with the sour cream, beginning and ending with the flour mixture.  Beat well after each addition.
4.  Pour into bundt pan and bake for 70 minutes, or until a toothpick inserted in the center of the bread comes out clean.  Allow to cool in the pan for 10-15 minutes.  Then invert onto a cooling rack and allow to cool further before slicing and serving.  If decorating, allow to cool completely.

Notes:

  • I didn’t mash my banana up beforehand this time.  I just threw the peeled suckers in whole and let the machine do the work for me.  Lazy?  No.  Efficient!
  • Of course, you can use other types of pans.  This time I used a decorative Hansel & Gretel pan from Nordicware, and had enough leftover to do a small loaf.  Just keep an eye on the bread and adjust your cooking times accordingly.
  • If you want to put a glaze on top of the bread, you can do that while it’s warm and/or cool.  While it’s warm the glaze will soak in to the top more.  While it’s cool it will just sit on the surface mostly.  If you do two “coats” (one while warm and one while cool) you’ll get the best of both worlds!  Or you can just do like I did and give it a powdered sugar snowfall.
Source:  Tasty Kitchen


source

Merry Christmas

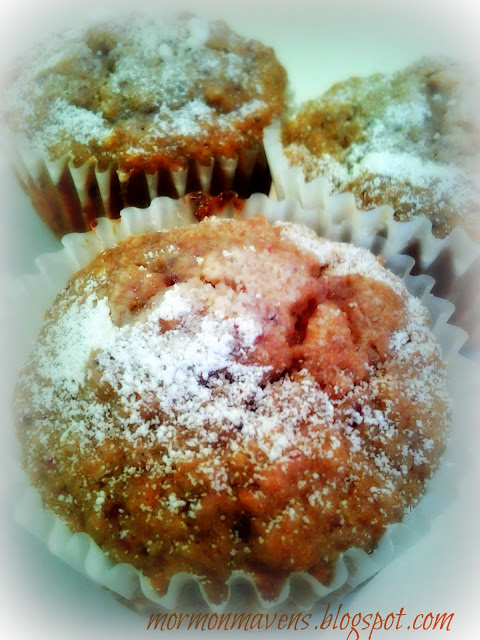
Cranberry Orange Muffins

These are some of our favorite Christmas eats! My sister-in-law Miriam Sellers passed the recipe onto me when I married into the family (she is a remarkable cook and can make healthy food taste sinful).  Enjoy!
1 3/4 c. Whole Wheat Flour
2 1/2 tsp. Baking Powder
1/4 tsp. Nutmeg
3/4 c. Sugar (or sweetener of choice)
1/4 tsp. Salt
1 tsp. Vanilla
1/3 c. Butter (melted)
1/2 c. Milk
1 Egg slightly beaten
1 tsp. Orange peel
1/2 c. chopped Cranberries
1/2 c. grated Apple
Preheat oven to 400 degrees.  Mix dry ingredients together.  Make a hole in the dry ingredients, add wet ingredients into the hole.  Mix until moistened, then add cranberries and apples.  Do not over mix   Place in lined or greased muffin tins.  Bake for 13-17 minutes, or until golden brown.  Lightly butter top and sprinkle with powdered sugar.  
Source: Miriam Sellers

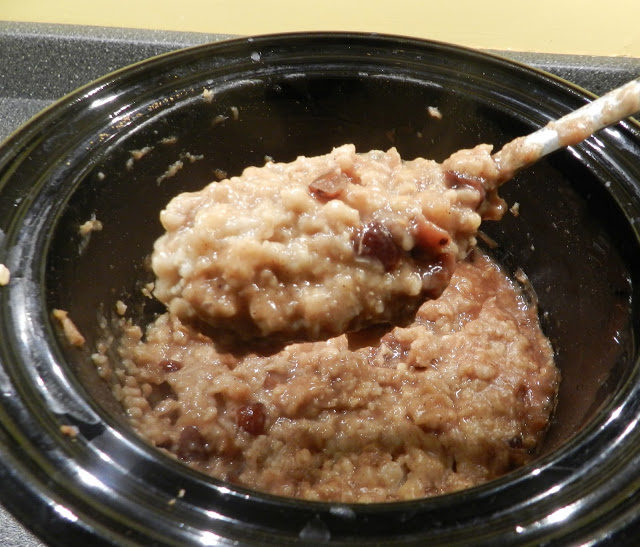
Crock Pot Christmas Morning Oatmeal

This oatmeal gives you a great holiday taste.  You can dig right into it as soon as the last ribbon is ripped off the last Christmas morning package.  In my opinion, the nuts should not be optional.

Ingredients:

1/2 c. brown sugar
1 T. ground cinnamon
1 1/2 t. ground nutmeg
3 Granny Smith apples – peeled, cored, and sliced 1/4 inch thick
1 c. and 2 T. dried cranberries
1/4 c. and 2 T. butter, cut into peices
3 c. regular rolled oats
3 c. water
1 1/2 c. apple juice
1 1/2 c. cranberry juice
1/2 t. salt
1 c. and 2 T. candied walnuts (optional)

Directions:

1.  Mix the brown sugar, cinnamon, and nutmeg together in a bowl.

2. Add the apples and cranberries, tossing to coat evenly with the sugar mixture.

3.  Transfer into crock pot.  Top with butter pieces.

4.  Mix the oatmeal together with the water, apple juice, cranberry juice, and salt in a bowl, and pour over the apple mixture in the crock pot.  DO NOT STIR.

5.  Cover.  Cook on Low for 8 hours.

6.  Stir before serving.  Spoon into bowls and top with candied walnuts, if desired.

Source:  Crock Pot Girl

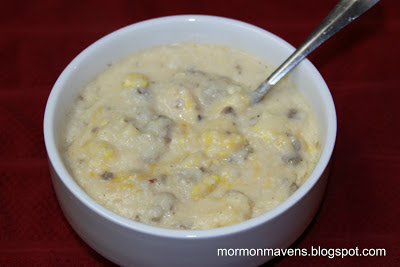
Amazing Country Crock Pot Grits

YUM, YUM and YUM!

Ok, this one is for all of you grits lovers! When I make this for church breakfasts or family events, people go crazy and eat every last spoonful and ask for the recipe. It’s sooooo easy and delicious! And it’s perfect for Christmas morning!

This recipe is for a huge batch that fits in a 6 quart crock pot. You can half the recipe or adjust it accordingly for a smaller batch.

There are many ways to make it, but here is how people seem to like it best:

Ingredients:
3 cups grits
3 1/2 quarts water (14 cups)
2 tsp salt (to taste)
1 lb sausage, browned and drained (I use Jimmy Dean Hot Sausage)
1/2 stick salted butter (or more)
8 oz cream cheese, softened
2-4 cups of shredded cheese (however much you like)
6 eggs (or more) scrambled
Pepper to taste

Directions:
1. Bring 14 cups of water and 2 tsp salt to a boil. Add 3 cups grits while stirring. Let it come back to a boil and turn down heat, cover, and let simmer for 10 minutes or so, or until the grits are done according to the directions on your package. I would suggest stirring every few minutes.

2. While the grits are cooking, brown the sausage, drain, and put in the crock pot. I like to make sure it’s broken up into small pieces.

3. Scramble as many eggs as you like, and put those in the crock pot too. I like lots of eggs and have a lot of mouths to feed, so I usually scramble about 10 eggs.

4. Cut the butter up in pieces and put in crock pot. Put cream cheese in crock pot. Add a bunch (2-4 cups or so) of shredded cheese. I use the Wal Mart brand Mexican blend mix because it melts well and is really creamy.

5. Pour the grits into the crock pot. Sometimes I can’t fit all of the grits in because I have so many other ingredients in the crock pot! Add as much pepper as you would like.

6. Stir all of those yummy ingredients together until it’s well blended and the cream cheese is stirred in. Taste it to see if it needs more salt. Keep the crock pot on the lowest setting – warm or low.

I make this at night and keep it on warm until the next morning when we chow down on it. Grits do thicken over time, so you have to start off having the grits a little thinner than you would ultimately like them. Sometimes I have to stir in a little milk or water to keep it from being too thick. You can also make this and eat it right away.

Variations:
There are lots of variations for this recipe! You could add bacon bits, ham dices, sliced summer sausage, or whatever kind of meat you want. You could cook the grits with cream or milk instead of water. You can add whatever kind of cheese you prefer, and however much of it you like. I have a friend who has made it with shrimp, garlic, a little onion. The possibilities are endless. I promise you are going to love it!

Source: Adapted from Debbie Evans, one of the best country cooks I know! 

Photo: I never realized that grits were actually not very pretty. I had to take close to a hundred shots before I found a few that looked nice enough to post. Grits might not photograph as amazingly as they taste, but that does not matter. Just eat and ENJOY!