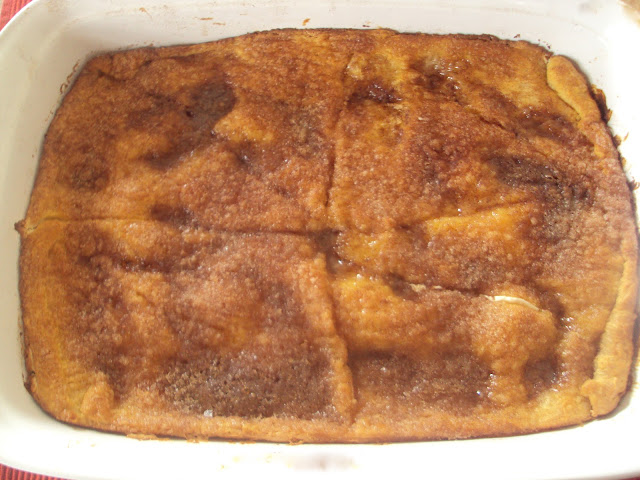
Have you ever tried a recipe from Pinterest only to be disappointed? It’s not bad but it’s not, well, great. This happened to me recently. I saw this great recipe with only 3 ingredients and thought it sounded great. Not so much. But I was able to improve it a lot with the addition of a topping from another recipe in my collection. The result? A pretty darn good dessert.
Desserts
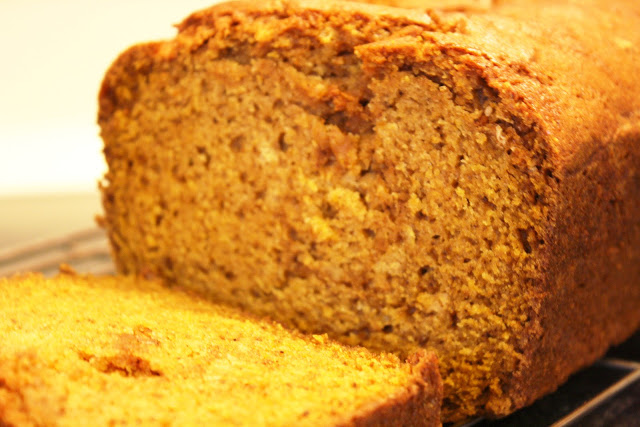
Pumpkinger Bread
I know that I did a post a few months back on how much I love pineapple. But, let me tell you about how much I love Pumpkin and Fall in general! I mean I love this time of year! Any recipe with pumpkin, sweet potatoe, allspice, cinnamon, chocolate, cloves, ginger bread…oh, man! I could go on, and on, and on, but I want. Just know that if I post a recipe on this blog and it has any of the above mentioned…its good. Really good.
This recipe was found on pinterest! I tucked it away for this fall season and pulled it out today to make and take over to my new neighbors! (By-the-way, they are a very nice family.) Anyhoo, this recipe makes me happy for another reason other than the pumpkin and the spices, it make two loaves! You gotta love that. Because, sometimes in baking you can’t just double a recipe. You have to make it twice! And that gets old. So, I loved that this makes two BIG loaves the first go round!
We made some cream cheese icing to smear on it and …sorry, there wasn’t any left to photograph. But it was yummy too!
3 cups white granulated sugar
1 cup vegetable oil
4 large eggs
2/3 cup water
1 (15oz) can pumpkin puree
2 tsp. ground ginger (which is why i named this “pumpkinger” bread)
1 tsp. ground allspice
1 tsp. ground cinnamon
1 teaspoon ground cloves
3 1/2 cups all-purpose flour
2 tsp. baking soda
1 1/2 tsp salt
1/2 tsp. baking powder
Preheat your oven to 350 degrees. Lightly grease two 9×5 inch loaf pan. ( I generously sprayed Pam and it worked great!)
Mix your wet ingredients first. Beat together the following until smooth: sugar, oil, and eggs. Then add the water. Blend well. Add the pumpkin puree, and blend well. Then to the wet ingredients add the spices. The ginger, allspice, cinnamon, and clove.
In a seperate bowl mix together your dry ingredients. The flour, baking soda, salt, and baking powder. Add dry ingredients to pumpkin mixture and blend well. Divide the batter between the two loaf pans and bake!
Bake for about 1 hour or until your toothpick inserted comes out clean. I had to bake mine for about 1 hour and 15 minutes.
Recipe adapted from pinterest.
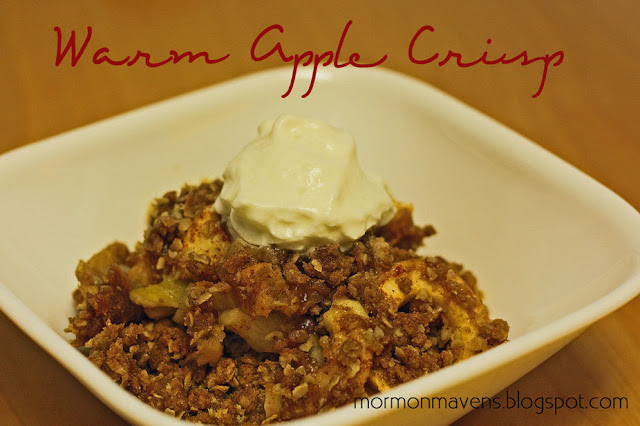
Emily’s Apple Crisp
This weekend is General Conference. I love Conference weekend, especially October Conferences. My whole family gathers together and spends the weekend in the North Georgia Mountains at my grandparent’s mountain home. (yes, Georgia has mountains).
It’s my little family’s tradition to go apple picking between Conference sessions. Lucky for us, my grandparent’s mountain home just so happens to be in the Apple Capitol of Georgia. I love seeing my son running around the orchards looking for that perfect apple. We usually come home with a peck (or more) of apples. We LOVE apples. What all do we do with them? Oh, I little bit of everything. One of my favorites, Apple Crisp!
 |
| Picking apples in Ellijay, Georgia last year |
This recipe has been in the works for close to 7 years. It’s 100% my creation and am pretty proud of how I’ve been able to tweak it and make it perfect!
APPLE CRISP
Ingredients:
6-8 apples, peeled and sliced (Make sure they are good cooking apples. My favorite are Rome Beauties… but you can only find those in the South 🙂 )
1 1/2 cup brown sugar
1 cup oatmeal, old fashioned
1 cup flour
1 stick of butter or margarine, softened
2 tsp cinnamon
Directions:
Preheat oven to 375 degrees.
1. Grease 9×13 glass baking dish.
2. Toss apples in a small amount of sugar and cinnamon. Arrange apples in greased baking dish.
3. Mix all remaining ingredients together. You can either use a pastry cutter or a stand mixer. I prefer the mixer, it gets the butter distributed more evenly. The mixture should look crumbly. Spread evenly over top of apples.
4. Bake 45 minutes until apples are tender and top is crisp.
Makes 6 servings
Top with fresh whipped cream or vanilla ice cream… and ENJOY!!
Ghost Cupcakes
We brought in October by serving these little babies at a lunch date. My four-year-old daughter was SO EXCITED to help me with the eyes. They turned out cute and were a tasty treat for all!
Ingredients:
1 (15.25 oz) box chocolate cake mix with pudding added (I used Betty Crocker’s Devil’s Food Cake)
1 Cup Buttermilk
1/2 Cup Vegetable Oil
3 Eggs
1 Cup Mini Chocolate Chips
4.5 Cups white candy melts or coating wafers
24 Large Marshmallows
48 Mini Chocolate Chips (about 1 Tbsp)
1. Preheat oven to 350 degrees F. Place paper baking cups in 24 regular-sized muffin cups.
2. In a medium bowl, mix cake mix, buttermilk, oil, and eggs on low speed about 30 secs, then increase the speed to Medium for 2 minutes.
3. Stir in 1 cup mini chips. Divide batter evenly between the muffin cups
4. Bake 18 – 20 mins, until toothpick inserted comes out clean. Cool for 10 minutes. Remove muffins from the tins and cool completely on a wire rack.
5. In a large microwavable bowl, microwave the white candy according to package directions until nice and smooth.
6. Place one marshmallow on each cupcake and spoon the white chocolate over to cover letting the excess drip down on the cupcake. Cool slightly. This “cooling slightly” is essential to success. If you put the eyes in too quickly, you’ll end up with LAAA-AAAZZZZY EEEYYYEEES.
7. Press two mini chocolate chips into the side for eyes.
8. Let stand, until set–about 15 minutes.
HAPPY HAUNTING!!
Note: I frosted my cupcakes (as you can see) before I put the mallows on so they would stay in place. It worked well, but the original instructions did not say to do that.
Source: Pillsbury
Nanaimo Bars
I recently presented the country of Canada to our homeschool geography co-op and wanted some recipes that really represented the country well. A Canadian friend highly recommended Nanaimo Bars (pronounced nuh-NYE-mo) and kindly offered me some Canadian custard powder to use for them as well. (I have read that instant pudding powder is a fair substitute for this custard powder if you can’t find it.) These layered bars are very tasty!
Ingredients:
Layer 1:
1/2 cup butter, softened (1 stick)
1/4 cup sugar
5 Tbsp. cocoa powder
1 egg, beaten
1 3/4 cups graham cracker crumbs
1 cup flaked coconut
1/2 cup finely chopped almonds
Layer 2:
1/2 cup butter, softened (1 stick)
3 Tbsp. heavy cream
2 Tbsp. custard powder*
2 cups powdered sugar
Layer 3:
4 (1 ounce) squares semisweet baking chocolate**
2 Tbsp. butter
1. In a double boiler, combine the butter, sugar, and cocoa powder stirring together until melted and smooth. Beat the egg into a small bowl; add a little of the cocoa mixture to the egg bowl and stir together well to temper the egg. Then pour the egg mixture into the double boiler with the cocoa mixture and stir well until thickened, 2-3 minutes.
2. Remove from heat and stir in the graham cracker crumbs, coconut, and almonds. Press firmly into the bottom of an ungreased 8×8-inch pan.
3. In a bowl, cream together the butter with the heavy cream and custard powder. Add in the powdered sugar and mix well. Spread this over the crust in the pan and chill to set.
4. Melt the semisweet chocolate and butter together until smooth (I used the microwave to do this, in 30 second increments). Pour over chilled bars. You can chill to set this or let the bars sit out at room temperature until the chocolate is set. Cut into bars.
Makes 16 bars
Source: allrecipes.com
*–I have read that vanilla instant pudding powder is a fair substitute for this custard powder if you can’t find it.
**–I was out of baking chocolate so I just used 4 ounces of semisweet chips.
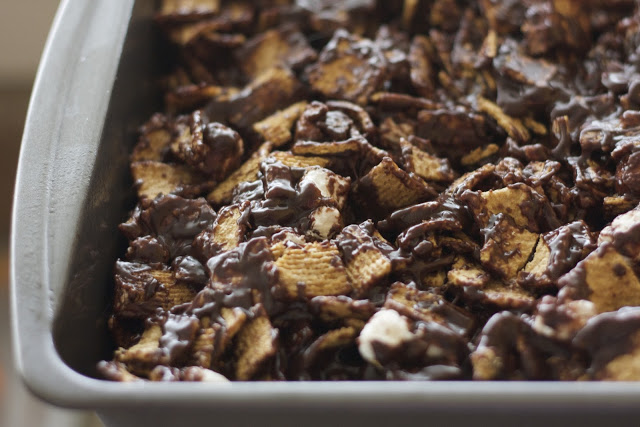
S’mores Treats
I remember coming home from school to these. I LOVE S’mores and these are perfect for an after-school snack without getting all smokey.
Ingredients:
2/3 Cup Corn Syrup (I use white)
1 (12 oz) package Chocolate Chips (your favorite–I used Semi-Sweet)
1 tsp Vanilla
6 – 8 Cups Golden Grahams Cereal (I use closer to 6 Cups because I like them well coated)
3 Cups Mini Marshmallows
1. In a Large mixing bowl, pour your Graham Cereal and Mallows in. You don’t need to mix them yet.
2. In a Medium saucepan, bring just to a boil (not quite!) corn syrup. Remove from heat and immediately add the chocolate chips. Stir until smooth.
3. Add vanilla and stir until smooth, again.
4. Pour over the mallows and graham cereal. Stir until will incorporated. The chocolate may seem a bit thick, but persevere! Also, don’t worry if the mallows melt a little. That’s the best part!
5. Press into a greased 9×13 pan and cut into squares when cool.
Source: My mama, Karri H.
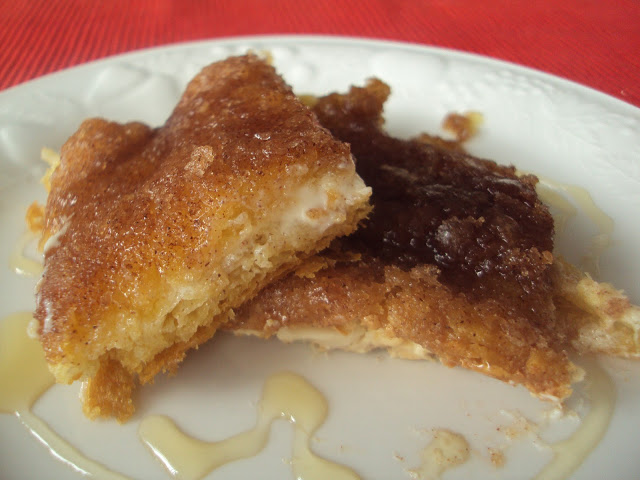
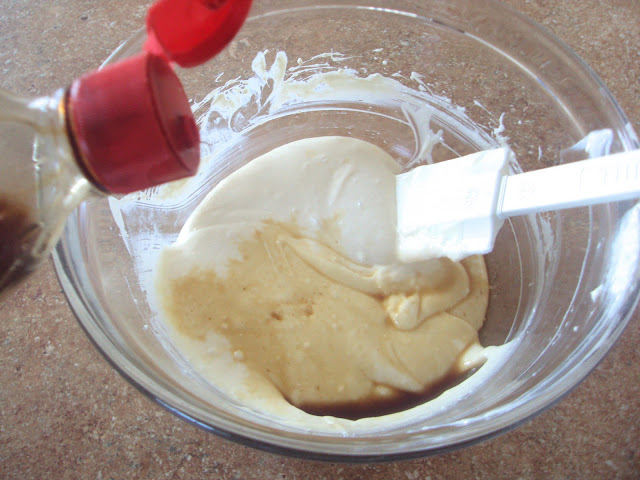
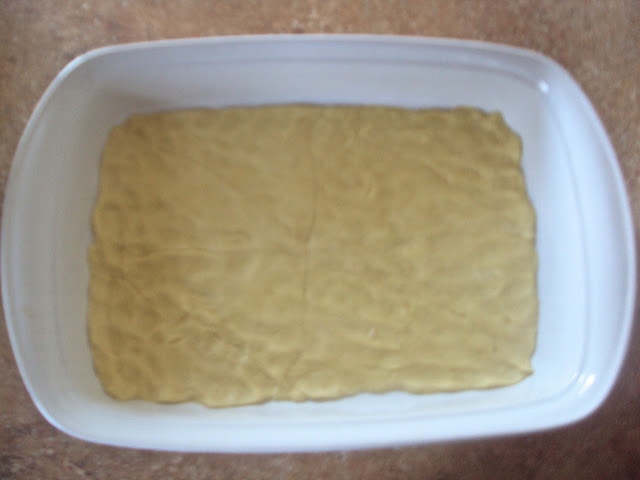
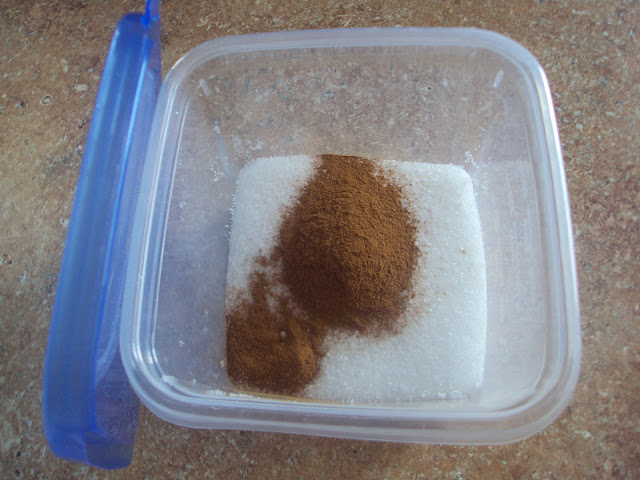
Sopapilla Cheesecake Bars
Here’s a way to make an easy version of a Mexican favorite! (So-pa-pee-ah)
Ingredients:
2 cans (8oz ea.) refrigerated crescent dinner rolls OR Pilsbury Crescent Creations Seamless Dough
2 packages (8oz ea.) cream cheese, softened
1 1/2C Sugar, divided
1 tsp vanilla
1stick butter (1/2C), melted
1 T ground cinnamon
Mini No-bake Key Lime Pies
Anything key lime takes me back to the Keys of Florida or to the Caribbean for that matter, back where everybody says, “Everything is ire (i ree) or in other words, “Life is good, no worries”.
Ingredients for Crust:
Hostess with the Mostess
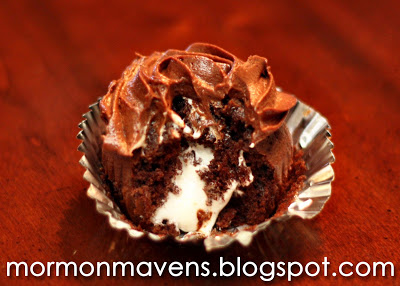
As a child it was a good lunch day if my mom threw in a Hostess Cupcake into my lunch box. Those things are dangerous. I don’t buy them… because I know I’d eat every last one in about 2.4 seconds. So…if you love Hostess Cupcakes, you’re going to LOVE these! One thing, the icing on these is not very sweet. It balances the sweetness of the filling perfectly though. (If you want it sweeter, use milk chocolate chips).
Devil’s Food Cupcakes with Cream Filling and Whipped Chocolate Ganache Frosting
Make your favorite chocolate cupcakes or prepare purchased cake mix. Let cupcakes cool.
Creme Filling
1 – 7 oz container marshmallow cream
1/2 cup softened butter
1/3 cup powder sugar
1 tablespoon water
1/4 teaspoon salt
With electric mixer beat ingredients together until fluffy. Fill the cupcakes with the filling. You can either use an apple corer and remove the center of the cupcake (that’s how I do it) or use a long filling tip to fill them.
Ganache Frosting
12 oz semisweet chocolate chips
1 cup heavy cream
Place chocolate chips into a bowl and pour cream over the top. Heat in microwave until chips are soft. Allow mixture to sit a minute to continue melting the chips. Stir well. Let mixture come to room temperature. With electric mixer beat until fluffy. Fill pastry bag with large star tip and pipe onto cupcakes. Enough frosting and filling for 12-15 cupcakes depending on your frosting and filling style.
Seriously, how good does that look?!
Cream Cheese Peach Pie
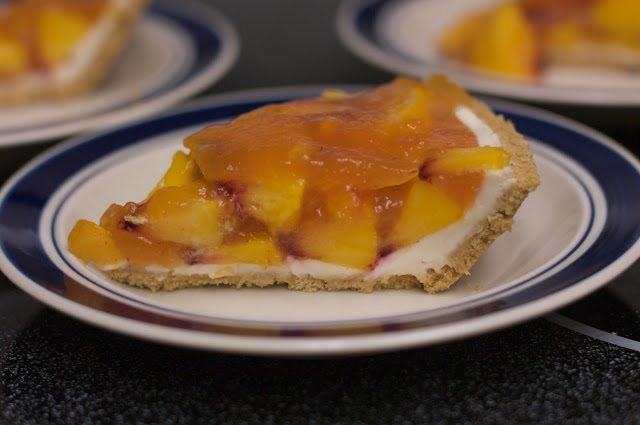
We are in the throws of peach season here and this is my favorite time of year because of it! 🙂 This pie is so light and fresh. It’s hard to go wrong with Cream Cheese AND Peaches. I hope you enjoy it as much as I do! I have to give a big shout-out to our friend, Audrey, for giving us the recipe. It’s quickly becoming a fav!
Ingredients:
2-3 Graham Cracker Crusts (I use 3–and I cheated and used store bought. *gasp!*)
12 – 15 Peaches, Peeled
1.5 Cups Granulated Sugar
1/4 Cup Cornstarch
1/2 Cup Water
1 (3 oz) package Lemon Jello
8 oz Cream Cheese
1/2 Cup Powdered Sugar
1 Cup Whipped Cream (or Cool Whip–I use Whipped Cream)
1. Puree 4 – 5 peaches–enough to make 1.5 Cups. I don’t have a food processor, so I cut them up and sloshed them around in my KitchenAid (be sure to use the splash guard!) until they were good and juicy. It was a little chunky, but I actually like it that way!
2. Dissolve the cornstarch into the water and set aside.
3. In a medium saucepan, bring the puree and granulated sugar to a boil.
4. Add the cornstarch (you may need to shake it up a bit again) and cook until thickened.
5. Remove from heat and stir in the dry jello. Put in the fridge to cool.
6. Cream together the cream cheese, powdered sugar, and fold in the whipped cream.
7. Divide evenly between the pie crusts. Smooth along the bottom and sides. Be careful not to pull the sides away from the pan. It will still taste good, but it won’t look it! 🙂
8. Slice the remaining peaches and distribute them evenly among the pie crusts. I use around three peaches per pie.
9. Pour the cooled mixture over the sliced fruit and put each pie in the fridge to set (about 3 hours).
Source: Audrey Miller, who says she got it from her aunt


