How to Boil Eggs (and avoid the Green Yolks)


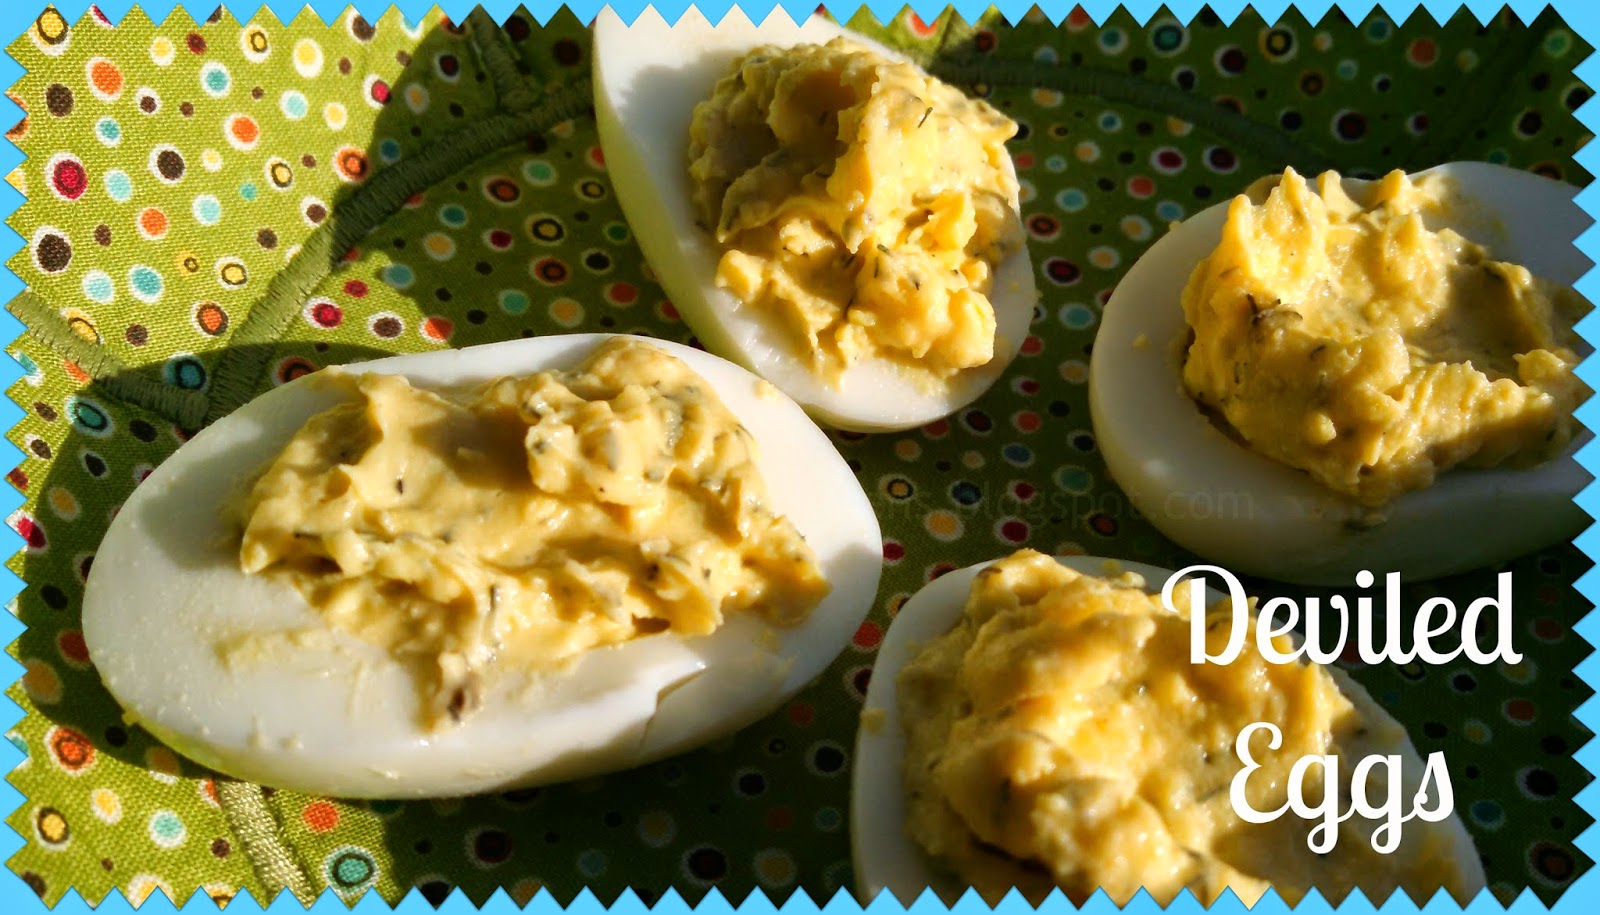
How many times have you boiled eggs for egg salad or Deviled Eggs or just to have some yummy hard-boiled eggs, and when you cut into the egg the yolk has that yucky green outer layer?  Ewww. Nasty. Well Mom taught me how to boil eggs so that doesn’t happen and it works every time.  Here are Mom’s instructions for No More Green (unless you are celebrating Dr. Seuss’ birthday, and then, by all means, green it up!).  Also, you will notice the baking soda listed.  I recently tried that trick while boiling eggs to help with the peeling process and it has worked, so far.
 
Ingredients:
water
eggs
baking soda
 
1.  Placed desired number of eggs in a saucepan.  Do not crowd them.  They need their space. 
 
2.  Put in enough tap water to cover the eggs.   I would start from cool water, not hot.  Don’t ask me why.  I read it somewhere. Add a tablespoon or so of baking soda.
 
3.  Bring water to a rolling boil over high heat.  Once you reach a full, rolling boil, put a lid on the pan and remove pan from the heat .  Set a timer for 15 minutes and step away from the eggs.  Do not even lift the lid.  They are cooking away in the pan as we speak. Go do something else.
 
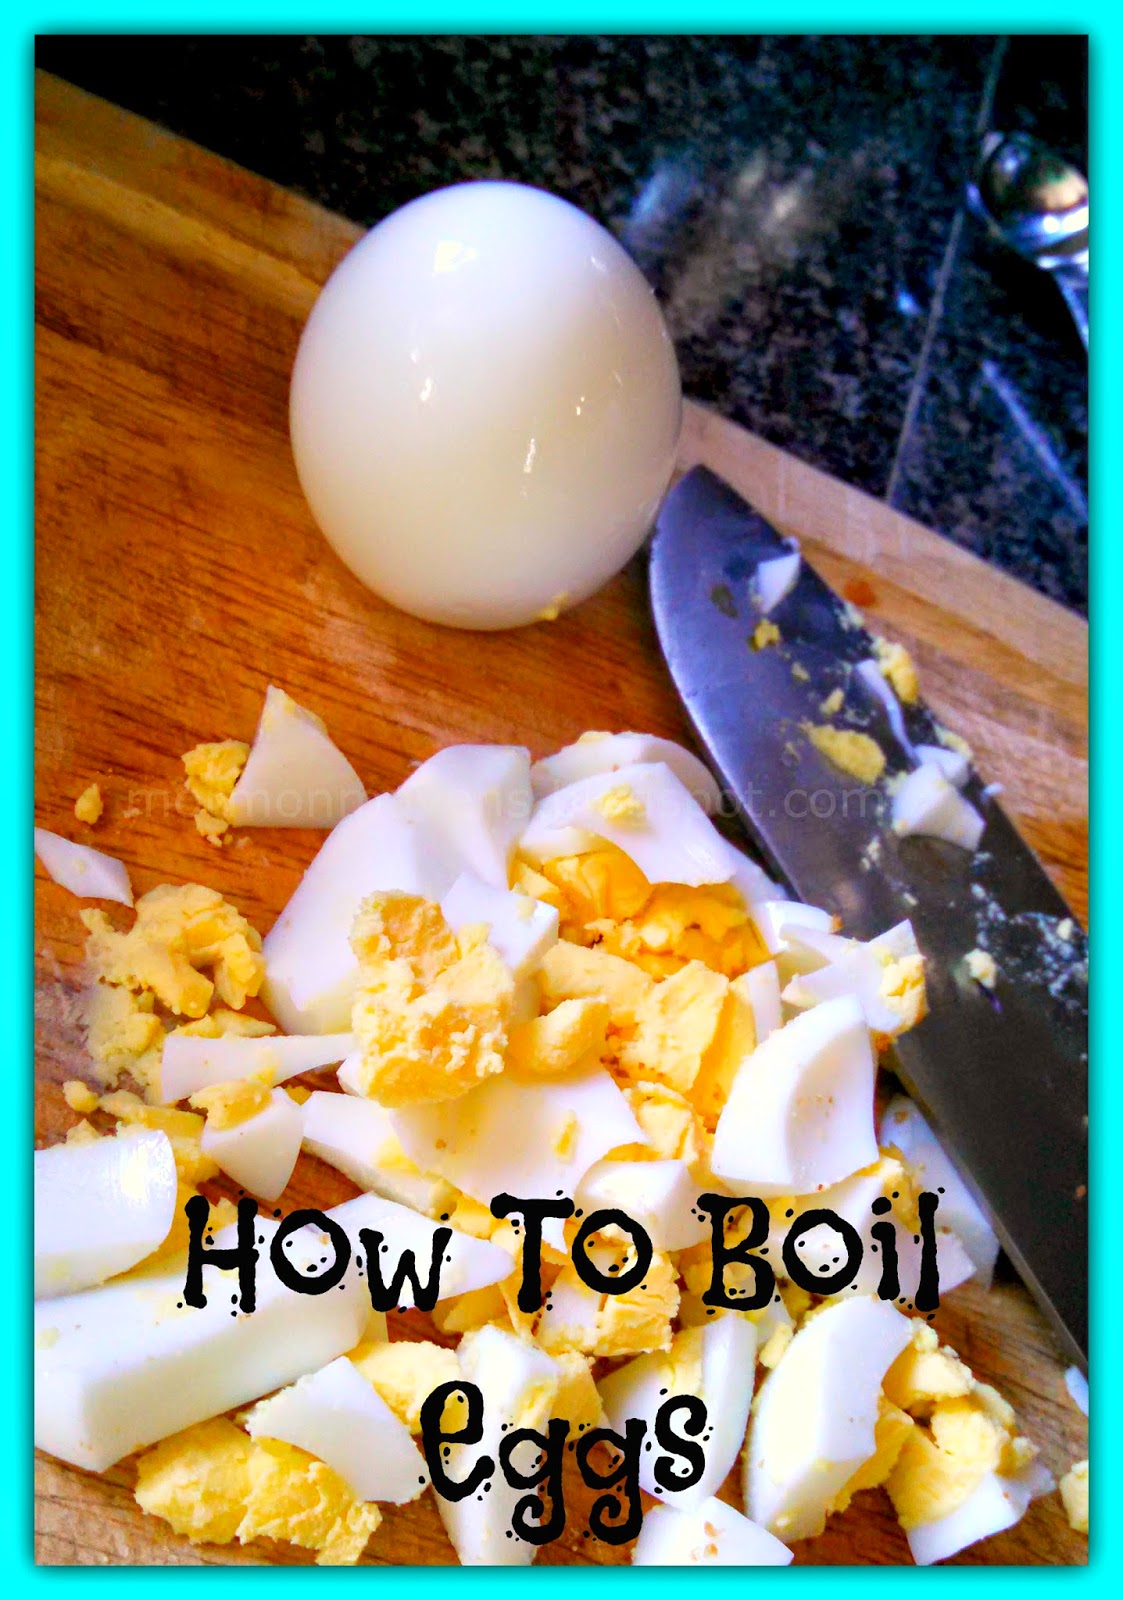
4.  After 15 minutes, drain off the hot water and immediately put eggs in a bowl of ice water.  This will stop the cooking process.  Let them chill out for a few minutes and then you can go in and start peeling away.  Cut the egg open and you will see beautiful, golden yellowness.  Proceed to use those babies any way you desire.  These went into a scrumptious, Fresh Spinach Salad. 

Deviled Eggs

It’s summer–time for picnics and simple foods.  One of our family-favorite dishes is Deviled Eggs–great for picnics with the family or covered dish dinners at church or reunions.  My recipe just comes together as I am making it, but  this is how it usually ends up:

Ingredients:
Hard-boiled eggs, peeled (however many you want to have)
Miracle Whip or Mayonnaise 
Prepared mustard (yellow, Dijon, spicy brown, etc.)
Dill weed
Salt
Pepper
Paprika, optional–sometimes I want it, sometimes I don’t


1.  Slice your hard-boiled eggs lengthwise.

2.  Carefully pop out the yolks and place them in a small bowl.   Set the “whites” aside.

3.   Mash the yolks until crumbly–today I used a pastry blender and it worked perfectly.  Goodbye fork!   Add the rest of the ingredients, except paprika, according to taste (you could just skip mashing and put everything in a food processor).

4.  Spoon egg mixture into the well of each “white.”  You could also use a pastry bag with a fun tip to fill the eggs.

5.  Sprinkle with paprika, if desired.

TIP:  Stay tuned for my next post where I show you how to boil the eggs so that the yolks don’t turn green on the outside. Ewww…

Cuke Check


How many times have you stabbed your fork into a scrumptious salad, laden with fresh cucumbers from the garden (or your grocer’s produce aisle–and I always buy the pickling cucumbers because they taste so much better), popped that bite into your mouth and bitten into the most bitter mess you can imagine?  Yeah.  Me, too.  So to remedy that situation, each time I put cucumbers into anything that I make, I do a Cuke Check.  I take one bite out of each cucumber as I am preparing them to make sure they are not bitter.  There is nothing worse in a salad.  It is worth the extra step and, let’s be honest, we are going to eat some while we are preparing our food, anyway.  You know you are.  Who can resist?  

Mother’s Day


How nice to be able to share a post on Mother’s Day.  This day means different things to different people.  Perspectives are as varied as our moms are. Some of us will use this day to honor our mothers who have meant so much to us, who brought us into this world and helped us to become the women we are today.  For some this day is not really a celebration.  I have friends who struggled with getting pregnant, who dreaded Mother’s Day and wouldn’t attend church on that day.  I used to think that was crazy, but then I mellowed and realized how they must feel when such a focus is put on being a mom–while their arms are empty.  Sometimes, even if we do have kids, we might feel that we don’t measure up and maybe have feelings of guilt and inadequacy on that day of the year.  For others it is a beautiful celebration full of family and children and breakfast in bed and all kinds of good things.
 
 This year my thoughts will go in a couple of different directions.  To my Mom, who’s dementia has lessened her quality of life, but I hope she can feel the love her children have for her.  To my daughter who is an incredible mother to two amazing little boys.  To my daughter who just got married last week who is going to be an amazing mom, as well, some day.
 
I recently read a great article that we are publishing today on Power of Moms called “A Mother’s Day to Remember.”  I hope that you will take the time to read it–and go ahead and check out our site for more great resources and support for moms.  Good stuff to read on Mother’s Day.


Image from Bing free images.

Pesto Chicken Pizza

 
Not an original recipe (see source below) but we all get to tweak away at someone else’s in this recipe blog world, don’t we?  This is a great quickie dinner that you can throw together in about 30 minutes or so if you have the ingredients on hand.  Or you can just send your daughter and her fiancé out to the grocery store to get the stuff for you while you clean off the kitchen island so that there is room to actually EAT there.
 
Ingredients:
Pizza Dough (home- or ready-made)
Basil Pesto
Cooked Chicken (I used a rotisserie chicken from my local grocery store)
Shredded mozzarella cheese
 
1.  Preheat oven to temperature for your pizza dough.
 
2.  Spread dough onto pan or pizza stone; sprinkle corn meal on pan first so your pizza doesn’t stick.
 
3.  An extra step if you are using the refrigerated dough, is to pre-bake it for 6-8 minutes before adding your toppings.
 
4.  Spread pesto, chicken and cheese over the crust.
 
5.  Bake for suggested time for dough, about 8-10 minutes.
 
Adding a salad would be a great idea.
 
 
Source:  Shawni Pothier, 71 Toes Blog.

Creamy & Cheesy Potato Soup

Every once in a great while I will pull out my THRIVE Cookbook so that I can make something with food storage items–really important when you want to “store what you eat and eat what you store.”  I highlight them in the book if they turn out really tasty.  Today was a soup kind of day so I thought I would try this recipe and it did not disappoint.  Yum, yum.  There are no leftovers.  Just sayin’.
Ingredients: (I will note THRIVE if I used the dehydrated or freeze dried item)

3 cups THRIVE chicken broth 
1 T chopped onions
1 cup THRIVE Potato Dices
2 T butter
2 T all-purpose flour
1/4 tsp salt
1 tsp black pepper (I am using less next time–yikes!)
1 cup THRIVE Instant Milk, re-hydrated
1 cup Mexican blend shredded cheese

1.  In a large saucepan, combine chicken broth, onion and potatoes.  Bring to a boil and simmer 5-10 minutes or until potatoes are tender.
2.  Remove from heat and ladle 1/2 the soup mixture into blender or food processor. Cover and blend until smooth.  Repeat with rest of soup and set soup aside.  I used an immersion blender right in the pot and blended all of the soup at the same time, then poured it into another container and set it aside.
3.  In the same saucepan, melt the butter, then whisk in the flour, salt and pepper.  Slowly add the milk while whisking.  Cook and stir the mixture until it is thickened and bubbly.  Stir in the blended potato mixture and the cheese.  Cook and stir until soup is heated through.
TIP:  You could serve this with a variety of drop-ins.  We tried fresh cilantro this time.  Next time maybe bacon pieces, or chopped green chilies.
Source:  THRIVE Cookbook, p. 62.

(I am only highlighting THRIVE foods because that is the brand that I store in my pantry. I am not a paid spokesperson for the company.)

Caliente Chili Dip


I made salsa one day and it was a bit spicy.  So, thinking that I could speak a little Spanish to my Hispanic friend, I told her that the salsa was muy caliente. 
 
“Is it hot or spicy?” she asked. 
 
“Spi-cy.” I said, slowly. 
 
 “Then it is muy picosa,” she said. 
 
 Ahhh….there is a difference.  So that is why the name of my recipe is Caliente Chili Dip–because it is a heated dip; no picosa.  Decades ago I attended a women’s conference and this item was one of the many finger foods served to us that day.  Everyone loves it and it was requested for our recent Super Bowl Bash–well, if you call me, my husband, my daughter, and my two grandsons who are 4 and almost 2 a BASH.  Yeah.  But it was still fun.
 
Ingredients:
1 15-oz. can Chili with Beans
1 15-oz. can Chili, No Beans
8 oz. cream cheese
1 small can diced green chilies
1.  Put all the ingredients in a non-stick skillet or pan.  Cook over medium to medium-high heat until the cream cheese is completely melted.  Stir to mix well.
2.  Serve with Fritos Scoops, to get more dip in your chip.
TIPS:  For a healthier version, use Turkey Chili and neufchatel cheese (low fat cream cheese).  When serving, I like to use a chafing dish, so that the dip stays hot (caliente).

Each One of Us


I just read the most beautiful experience shared by a fellow Power of Moms board member via Segullah.  Catherine is an amazing writer and this is no exception.  I could never do justice to describing how amazing the  Sacrament ordinance is.  Please take a moment to read her words from an experience she and her family had while attending another congregation’s Sacrament Meeting.  Here is the link  The Last Sacrament Cup.
 
I am waiting until you read it…..
 
 
Now, how deeply did this just touch you?
 

Image from LDS.org.

Savory Ham & Cheese Sliders

Another Super Bowl indoor tail-gating favorite at our house are these tasty morsels.  I had something like this at a friend’s house for dinner once.  This recipe was the closest I could find via the all-knowing Pinterest.  The grandsons didn’t even take this one apart, like they did the Reuben Pigs in a Blanket.

Ingredients:
2 12-roll packages of sweet Hawaiian dinner rolls
1 1/2 lbs. smoked ham (not honey)
12 slices Swiss cheese
1 stick of butter–NOT margarine.  Seriously.
2 teaspoons Worcestershire sauce
1 teaspoon garlic powder
1 teaspoon onion powder
1 teaspoon poppy seeds

1.  Slice rolls in half, horizontally.  Place the bottoms of the rolls in two 9 x 13 pans or a large jelly roll pan works really well.

2.  Place about 2 shaved slices of ham on each bottom.  Cut the cheese slices into 4 parts and place 2 pieces on each sandwich.  Place the tops on each sandwich.

3.  In a small saucepan, mix butter, Worcestershire sauce, onion powder, garlic powder and poppy seeds. Heat until butter is completely melted.  Stir to incorporate ingredients.

4.  Brush the melted mixture over the ham sandwiches.  Cover with foil and refrigerate for at least an hour or overnight.  These can also be baked right away.

5.  Preheat oven to 375 degrees and bake for 15 minutes or until cheese is melted. 

Source:  Heather Pettit, via Pinterest.

Reuben Pigs in a Blanket


I needed to make Super Bowl food like I needed another hole in the head.  This wreaks havoc on trying to lose weight, but man, this stuff is yummy.  I got this recipe from Our Best Bites and it was a favorite at my house.  My husband said I hit a home run with the pairings this year.  Well, it wasn’t in football terminology, but it was appreciated.  My grandsons even liked it–of course, they had to pull the pig out of the blanket.  Purists…
 
Do you see that square-ish little part of a sandwich in the bottom right corner?  Yeah, that one.  Future post.  Stay tuned!

Ingredients:
8 all-beef hot dogs (Oscar Mayer has some great choices here)
2 cans refrigerated crescent roll dough
1 cup shredded Swiss cheese
1 cup sauerkraut, well-drained (about a 15-oz. can–I used the Bavarian style with the caraway seeds)
1 large egg, lightly beaten
1.  Preheat oven to 375 degrees.
 
2.  Cut the hot dogs in half, cross-wise. 
3.  Divide the crescent rolls at the perforations.
4.  On the wide end (opposite of the pointy end) of the crescent roll dough, place 1 tablespoon drained sauerkraut, 1 tablespoon of the Swiss cheese, and a hot dog half.  Roll it up, being careful to tuck in the edges to hold things in.  Place on lined baking sheet; repeat with the rest of the dough.
5.  Brush the beaten egg over the tops of each “pig” and bake for 12-15 minutes, until golden brown.
6.  Makes 16 wrapped up piggies.
7.  I served these with Thousand Island Dressing and Spicy Brown mustard for dipping. OBB also suggests Creole mustard.

Source:  www.ourbestbites.com