Arroz a la Mexicana (Mexican Rice)

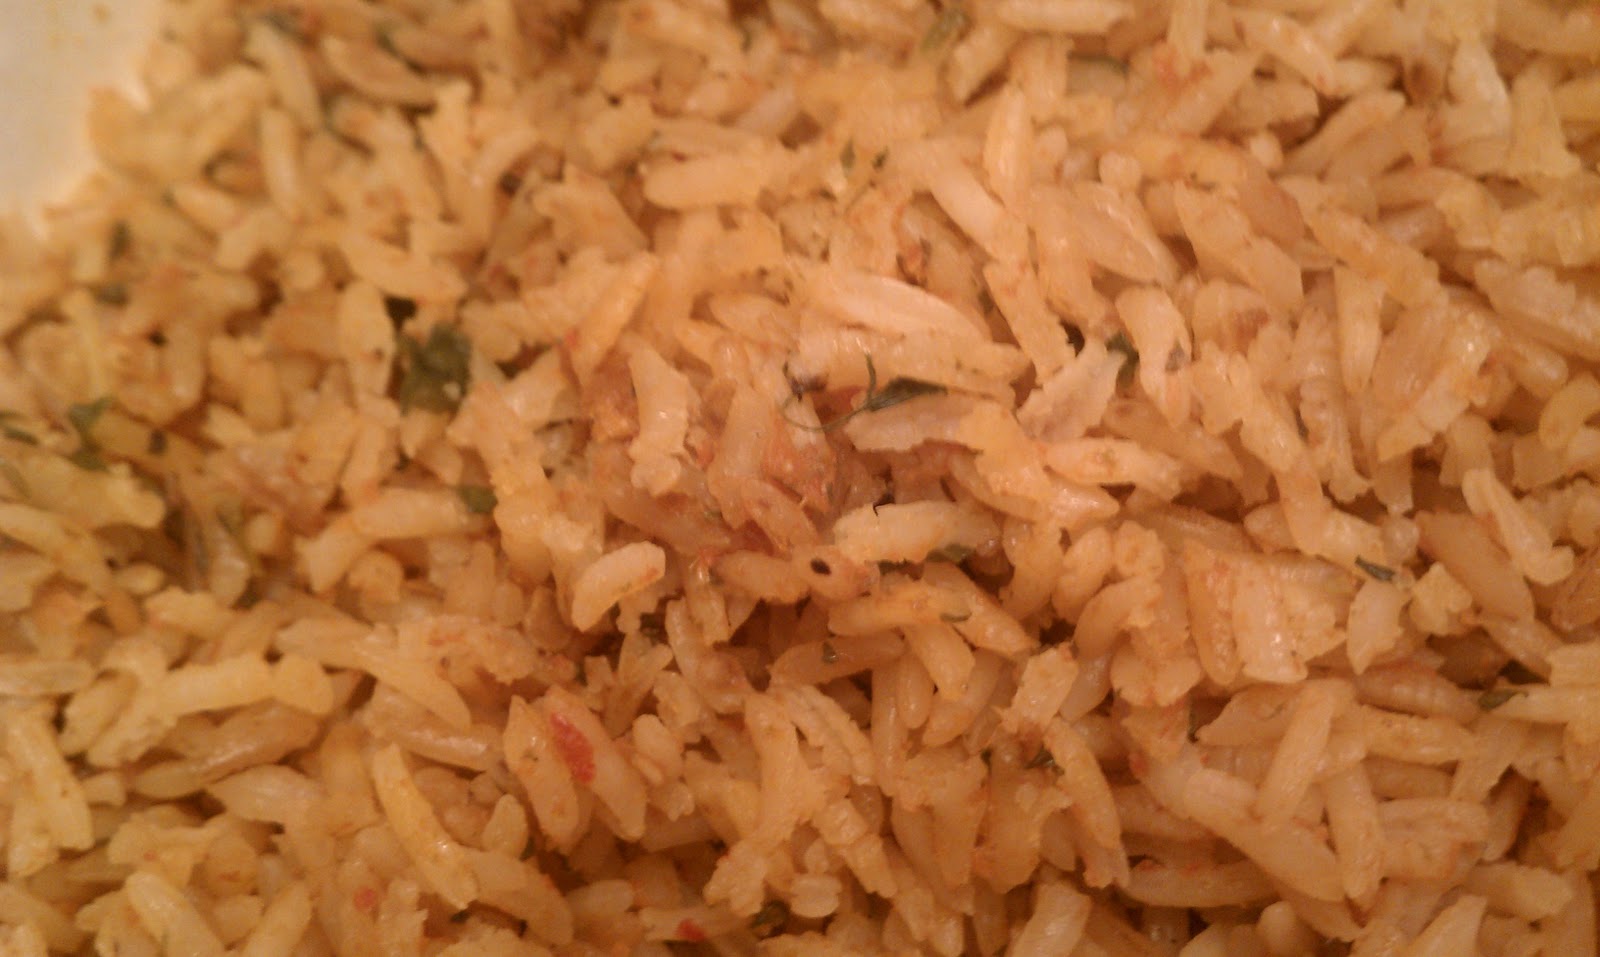
This is an easy recipe for rice.  I know that there are packaged rices that are really good, but for our traditional Christmas Eve dinner I prefer to go with “scratch-made.”  For years I have finagled the process because I didn’t have a Dutch oven.  I would use a cast iron skillet and then transfer the mixture into a stone bowl and flip a round stone baker over that for a lid and bake it.  This year I finally bought a Dutch oven and oh my it is so much easier now!  Love my Dutch oven!  But I digress, this is about the rice…


Ingredients:
2 cups salsa
2 tablespoons olive oil
2 cups white rice, uncooked
1 1/2 cups chicken broth
1 teaspoon salt
1/2 cup coarsely chopped cilantro
 
1.  Preheat oven to 350 degrees.  In a 3-quart, oven-proof saucepan or small Dutch oven (with lid), heat the oil over medium heat.  Add the rice and cook, stirring regularly, until the rice is chalky looking, about 5 minutes.  If some kernels brown, it’s okay.
 
2.  Add the salsa–I use this recipe or just use any roasted tomato and jalapeno salsa–and stir for a minute as the salsa sears and reduces a little.
 
3.  Add the broth and a teaspoon of salt.  Bring to a boil, stir once, scraping down any rice that is on the sides of the pan.  Cover tightly and bake for 25 minutes.  Rice is done if you can bite into a grain and it is nearly cooked through. 
 
4.  If rice is ready, cover and let stand out of the oven for 5-10 minutes longer to finish cooking.  Sprinkle 1/2 cup of fresh chopped cilantro over the rice, then use a fork to fluff rice and fold in the cilantro.
 
Okay, here is a picture of my new Dutch oven.  Isn’t it pretty?  Better Homes and Gardens at Walmart….


Source: Rick Bayless’ Mexican Kitchen.

Rustic Autumn Fruit Tart

Oh my goodness, what a yummy tart!  I pulled this from the internet to use at Thanksgiving but since we ended up having it at my sister’s house, I put the recipe away.  I found it the other day and decided to make it for our Christmas Eve Eve dinner.  That was not a typo.  We had our Christmas Eve dinner early because we went home to eastern North Carolina the next day.  Anyway, this was our dessert and it was really good.  The crust–oh my–I may have to make my next pie with this.

Ingredients:
1/2 cup butter, chilled                                                     1/3 cup brown sugar
1/2 cup cream cheese                                                      1/2 teaspoon ground cinnamon
1 1/2 cups all-purpose flour                                           1/4 teaspoon ground nutmeg  
2 apples peeled, cored, sliced                                         1/4 teaspoon ground cardamom
1 pear peeled, cored, sliced                                            1 1/2 tablespoons cornstarch
1/4 cup orange juice                                                      1/2 cup apricot jam, warmed
                                                                                     

1.  Cut the cold butter and cream cheese into the flour until the mixture looks like coarse crumbs. I usually use a pastry blender but this time I used my Ninja which was much quicker.  You just pulse the butter and flour until the mixture resembles cornmeal, then add the cream cheese and pulse until it looks like the size of small peas.  You should be able to squeeze a handful of the dough and make a ball.  Shape the dough into a small disk, wrap in plastic, and refrigerate for at least an hour.

2.  Toss the apples and pear with the orange juice.  Whisk together the brown sugar,spices and cornstarch.  Toss the fruit with the sugar-spice mixture and set aside.

3.  Preheat an oven to 375 degrees F.  Set out an 8-inch tart pan or do like me and make a free-form tart, lightly greasing a baking sheet.

4.  Roll the pastry out on a lightly floured work surface to form a 10-inch circle.  Transfer the dough to the tart pan or baking sheet.  Arrange the fruit decoratively Plop the fruit in the middle of the pastry (really, I just had no time to be fancy).  If you are using a baking sheet, leave a 2-inch rim of dough and fold it up over the edge of the fruit (the folds will overlap).

5.  Bake the tart in the oven until the crust is browned and the filling is bubbly, about 30 minutes.  Remove the tart from the oven and brush it with the apricot jam.

I served this with a scoop of vanilla bean ice cream.  You could use whipped cream.

Source:  CULINARY JEN, allrecipes.com

Southern Chicken & Corn Chowder

This is probably the first corn chowder I have ever made and possibly the first one I have ever eaten.  I pinned this recipe on Pinterest.  You can get it at this site Add A Pinch.  I made it this afternoon but didn’t get to actually partake until after 9:00 tonight.  Busy, busy Sunday!  Hope you enjoy.

Ingredients:
1 tablespoon olive oil
1 onion (I used 3 shallots, because that is what I had on hand)
2 carrots
3 celery stalks (I used a cup of chopped, re-hydrated celery from my pantry)
3 garlic cloves (didn’t use, since I was using shallots, but think it would be better if I had used some)
1 jalapeno pepper
3-4 boneless, skinless chicken breasts
3 pieces cooked bacon
2 cups milk
2 tablespoons all-purpose flour
2 20-oz. packages frozen creamed corn, thawed


1.  Drizzle olive oil into the bottom of a large, lidded soup pot.  Place over medium heat.

2.  Add roughly chopped onion, carrots, celery, and minced garlic.  Cover pot with lid and cook for about 5 minutes.

3.  Remove stems, seeds, and membrane from jalapeno. Dice pepper finely and add to other vegetables.

4.  Cube chicken breasts and add to vegetables.  Add enough water to slightly cover all ingredients.  Cover and cook for about 20 minutes, or until chicken is done.

5.  Crumble bacon and add to the chowder.

6.  Combine milk and flour in a measuring cup and stir well.  Add to chowder.

7.  Open packages of creamed corn and add to the chowder.

8.  Sprinkle dried thyme into chowder and stir to combine.

9.  Cover pot and simmer over low heat for about 20 minutes.  Be careful not to let it burn.  I actually scorched mine but didn’t realize it until I was pouring the leftover chowder into a bowl to put it in the fridge.  Had a great time scouring the bottom of the pan.  Yeah.

Source: Add A Pinch

Three Cheese Roasted Vegetables

This is one of our family’s favorite side dishes and is actually healthy and easy to prepare.  I read an article–I think it was Family Circle, but it could have been Woman’s Day–by a mother who was trying to prepare healthy, tasty food for her family.  I clipped several of her recipes so maybe you will see some more in future blogs.  This recipe is also visually appealing.  Try it.

Ingredients:
2 medium russet potatoes, peeled and cut into 1-inch pieces
2 medium carrots, pared and cut into 1/2-inch slices
1 tablespoon olive oil
1 teaspoon each basil and oregano, crushed
1/4 teaspoon each salt and freshly ground black pepper
1 large zucchini, cut into 1/2-inch pieces
1 large red bell pepper, cut into 1-inch pieces
2 cloves garlic, minced
2 cups (8-oz.) 4-cheese blend (I use Mexican)

1.  Place potatoes and carrots in greased 13 x 9-inch baking dish. Drizzle with oil; sprinkle with basil, oregano, salt and pepper.  Toss lightly to coat.
2.  Bake at 425 for 20 minutes.  Add zucchini, red pepper and garlic; stir vegetables.  Return to oven and bake 20 minutes more, until vegetables are tender.
3.  Sprinkle with cheese; return to oven about 2 minutes more to melt the cheese.

This could have been a full picture including a lovely dish, but we dug in before I could get the shot!

TIP:  When I need to save time, I cut up my vegetables ahead of time and place them in plastic bags and store in the fridge until I am ready to use them.


Source:  Family Circle or Woman’s Day Magazine, 1990’s


Microwave Fudge

Okay, it’s 3 days before Christmas, you are in a wrapping, baking, last-minute-shopping frenzy!  Oh snap, the neighbors dropped off some goodies!  You were so not expecting that!  What do you do?  You pull out this recipe and whip up a batch (or 2 or 3…) of yummy, quick fudge!

Ingredients:
1 box (1 lb.) powdered sugar, sifted
1/4 cup milk
1/2 cup cocoa
1 stick (1/2 cup) butter, melted
1 teaspoon vanilla
chopped pecans ( opt.)

1.  Pour ingredients in microwavable bowl.  Cook 2 minutes 30 seconds on high.  Stir until smooth.  
2.  Pour into greased pan and cool.
3.  Cut into pieces and ENJOY!!

And for you, Mom, on January 2, when the kids are back in school…a glass of fudge and a good book.  Ahhhh…..

Cookbook Nook: THRIVE Cookbook

How many of you are overly-whelmed when you think about purchasing/organizing/rotating/eating your food storage?  I am.  Believe me.  I have purchased several books, including Food Storage for the Clueless, in an attempt to get up-close and personal with my preparedness and really get my head around it.  Well…still working on that.  However, I have found a few ways to help ME.  One is, I got on the Q program with Shelf Reliance’s THRIVE foods.  I get an automatic shipment each month and they figure out what I need and just ship it.  Anyway, you can find out more about that HERE.  I recently ordered their new cookbook which is fully titled “THRIVE Cookbook: Food That Fits Your Lifestyle.”  I like the sound of that don’t you?
  I have only used a couple of the recipes so far, but we like them!  They taste good.  They taste normal.  I am looking forward to preparing many more dishes from this book and using…yes USING..my food storage. 

STUFFED PEPPERS!!

(For Cooking Channel fans, Kelsey Nixon is very involved with THRIVE foods and has included several signature recipes in this book.)

Grilled Asparagus

These look so much better than mine!
Image by Tina Phillips/FreeDigitalPhotos.net

I bought 2 lbs. of fresh asparagus this weekend to have with some leftover brisket–hmmm…need to post that recipe one day–anyway, it looked kind of sketchy but I got the best two bunches I could at Walmart.  I planned on grilling them on my George Foreman grill but knew they would just roll off and there were too many spears, so then I remembered that I bought a stove top grill last year and had not used it but once.  Well, here was a perfect opportunity to try it again.  It worked perfectly!  And OhMyGosh…that asparagus was awesome.  Here is what I did…

Ingredients:
Fresh asparagus spears
Olive Oil
Sea salt
Garlic Salt
1.  Wash and trim ends of asparagus stalks. 
2.  Place in a gallon-size plastic reclosable bag along with about 2 tablespoons of olive oil and a few shakes of garlic salt. 
3.   Close the bag and “moosh” the asparagus around in the bag and get it well-coated with the oil mixture.
4.   Place on a preheated stove top grill and sprinkle with the salt.  Grill until the asparagus is just flexible but not mushy.  You want it to have a little crunch when you bite into it.  You can also just saute the asparagus in a non-stick skillet if you don’t want the grilled effect, but really…grilled is sooooo good…
Source: Original

Eventually Chicken Soup

Yes.  That is what it is called.  Here’s the deal…I put some frozen boneless, skinless chicken breasts, a can of cream of mushroom soup, about 2 cups of frozen mixed vegetables, sea salt and fresh ground pepper in the crock pot before church and cooked it on high for about 4 hours.  When we got home it was like a chicken stew.  It was okay, but needed help.  The next night I added cilantro, a can of chopped green chilies and some farfalle pasta, some kosher salt and water and let it cook until the pasta was done.  Now that was good and it ended up being a soup.  We ate the last of it tonight–glad there was enough left to get a picture for our blog.

Ingredients:
4 frozen chicken breasts, boneless and skinless
1 can cream of mushroom soup (I used Campbell’s Healthy Request)
1 1/2 – 2 cups frozen mixed vegetables
1 small can chopped green chilies
Kosher salt
Fresh ground pepper
Fresh cilantro
1 1/2 cups farfalle pasta (bow tie)
water


1.  Place chicken breasts, soup, vegetables, salt and pepper in a crock pot.  Cook on high for 4 hours.


2.  Add chilies, cilantro, pasta and enough hot water to desired amount and cook until pasta is done.   


Source: Original Recipe

Apple Cobbler

Back in 1992 we moved from Winterville to Wilson, NC so that Mike wouldn’t have a 45 minute commute to work before the crack of dawn.  We had the most wonderful real estate agent helping us find a home.  Talk about service after the sale!  We moved into our  home in the summer and come Fall she brought several beautiful mums for me to put on my front steps.  Not long after that, she brought me the best apple cobbler I have ever had–she had made several for a church function and just thought I would like one–oh yeah!.  I called her and got the recipe and have used it all these years as a go-to, quick, yummy dessert for when I am in a hurry or when the family begs for this dish.  Sometimes I call this Apple Crisp, but Bea Newton–my realtor and friend–calls it a cobbler.  Whatever you call it, I call it scrumptious!  You will probably have everything on hand except maybe the apples.  Go out right now and buy some Fujis or Galas or Honeycrisps.  Just make this and enjoy!  And if you are ever in Wilson, run over to First Wilson Properties and say hey to Bea for me, if she hasn’t retired or isn’t on one of her many mission trips to a Third World country.  What a lady!

INGREDIENTS:
4 large apples, peeled and sliced
Cinnamon, to taste
Brown sugar, to taste
1 cup sugar
1 cup flour
1 tsp. baking powder
1/2 tsp. salt
1 large egg
1/2 cup chopped nuts
1 stick (1/2 cup) butter, melted

1.  Preheat oven to 375.
2.  Spray a 9×13 (or square) pan with cooking spray.  Add the apples and sprinkle generously with cinnamon and brown sugar (I get pretty heavy-handed here).
3.  Combine sugar, flour, baking powder, and salt in a medium bowl–this will be your crust.  Break the egg into this mixture and stir with a fork until crumbly.  Stir in nuts.
4.  Sprinkle crust mixture on top of apples.  Pour melted butter over crust.
5.  Bake for approximately 30 minutes or until lightly browned.

SOURCE:  Bea Newton, realtor extraordinaire!

Cooking Pasta

I was hanging out at my good friend Susan’s house and we were, of  course, in the kitchen.  I was looking through a pasta cookbook that she has and found these instructions for cooking pasta.  This is the only way I will cook pasta now!  So easy and you don’t have to throw those noodles up against the wall to see if they will stick–who still does that?  Come on, ‘fess up!
Photo by Suat Eman/FreeDigitalPhotos.net

1.  Bring 4 quarts of water to a rolling boil.
2.  Add desired amount of salt and pasta (you could put a little olive oil in if you are worried that it will stick).
3.  Stir pasta, constantly, for 2 minutes.
4.  Put lid on pot and remove from heat. 
5.  Set your timer for 10 minutes and go work on the rest of your meal.
6. After 10 minutes, drain your pasta and it is ready to rock and roll!
Here’s another tip:  get a pasta pot with the removable strainer.  It is well worth it and can be used for other things like boiling potatoes, corn, just about anything that you would need to drain water off of.  Seriously…I love mine.