Apple Cobbler Cupcakes with Pumpkin Pie Frosting

Made these for a school party.  A mouthful of fall flavors!

Cupcakes

Ingredients:

1 1/2 c. flour
1 1/4 t. baking powder
1/4 t. baking soda
1/2 t. ground ginger
1/2 c. unsalted butter, room temperature
3/4 c. brown sugar
1/4 c. sugar
2 eggs
1/2 c. sour cream
1/4 t. lemon extract
2 1/2 c. apples, roughly chopped and loosely packed

Directions:

1.  In a medium-sized bowl, whisk flour, baking powder, baking soda and ginger.
2.  Beat butter and sugars in a large bowl until light and fluffy.
3.  Beat in eggs, sour cream and lemon extract until blended.
4.  Mix in flour mixture.
5.  Fold in apples.
6.  Divide batter evenly among 12 cupcake liners (they will be filled almost all the way to the top).
7.  Bake at 350 degrees for about 25 minutes or until a toothpick comes out of the cupcake clean.

Pumpkin Pie Frosting

Ingredients:

3/4 c. sugar
1/2 t. salt
1 1/2 t. pumpkin pie spice
2 large eggs
15 oz. canned pumpkin
12 oz. evaporated milk

Directions:

1.  Preheat oven to 425 degrees.
2.  In a large bowl, beat eggs.
3.  Stir in sugar, salt and pumpkin pie spice.
4.  Mix in pumpkin.
5.  Mix in evaporated milk.
6.  Pour into 9″ pie plate.
7.  Bake for 15 minutes.
8.  Reduce heat to 350 degrees and bake for another 40-50 minutes, until a toothpick comes out dry.
9.  Remove from oven and leave on counter for two hours before use.

*Put “pumpkin pie” into a piping bag or ziplock bag with a hole cut out.  Pipe frosting onto cupcakes.

Notes:

While you can load a slice of pie directly into the piping bag, I found that the pie piped better if I put it in a large mixing bowl and beat it for about thirty seconds to evenly distribute any moisture before loading it into my bag.

Source:  cupcakeproject.com

We Are Capable of So Much More

It feels like I have spent a lot of time in my life just going through motions and living on the surface.  That is why the following comments struck home to me.  I should know better.  I have a divine lineage that sets me up to be so much more capable than I am on so many days.  Those darn natural man Goliaths can wreak havoc with even the best of us on days when we are doing the best, the very best we can.

“In the absence of a compelling testimony, some have let their daily
thoughts and actions become so focused on the things of the world that they
have minimized the influence of the light of the gospel in their everyday
lives. 

“And then as Elder Neal A. Maxwell has so eloquently
described, also included are those ‘ “honorable” members who
are skimming over the surface instead of deepening their discipleship and
who are casually engaged rather than “anxiously engaged” (D&C
76:75; 58:27)’ (in Conference Report, Oct. 1992, 89; or Ensign, Nov.
1992, 65). . . .

” . . . President Gordon B. Hinckley . . .
said: ‘I have been quoted as saying, “Do the best you can.”
But I want to emphasize that it be the very best. We are too prone to be
satisfied with mediocre performance. We are capable of doing so much
better’ (“Standing Strong and Immovable,” Worldwide
Leadership Training Meeting, 10 Jan. 2004, 21).”

( Elder Donald L. Staheli, “Securing Our Testimonies,” Ensign, Nov. 2004, 37)

So, take comfort in the tender mercies of the Lord as we use daily repentance and trust in His atonement.  Jeffrey R. Holland said, “Surely the thing God enjoys most about being God is the thrill of being merciful, especially to those who don’t expect it and often feel they don’t deserve it.”


Savory Mushroom Sage Stuffing

This is my family’s stuffing recipe. I don’t actually stuff my turkey. I use this recipe and make a big 9×13 inch pan of this stuff. The bread gets slightly crispy on top and the mushrooms and onions and celery are soft. It is really simple, but one of my all time favorite things to eat!

Ingredients:
14-16 slices hearty white bread (I use Grandma Sycamore’s white bread)
2 sticks butter
7-8 celery stalks, chopped
2 medium onions, diced
16-20 ounces button or baby bella mushrooms, sliced
2 tsp. rubbed sage
S & P to taste
1 1/2-2 Cups chicken broth

Directions:
1. Using a serrated knife, cut the bread slices into small cubes. Lay the cubes out on a baking sheet. Dry them out in an oven set to 170 degrees over the course of a few hours or overnight. You want them to be completely dry and crunchy.
2. In a large skillet, melt the butter over medium heat. Add the celery and onions. Saute til just tender. Add the sage and S & P to taste. Add the sliced mushrooms, cook til mushrooms begin to soften.
3. In a large bowl, place the dried bread cubes. Add the warm mushroom mixture. Stir a bit. Then, add about 1 1/2-2 cups chicken broth-depending on how moist you want your stuffing.
4. Place the stuffing in a 9×13 inch baking dish. Cover with foil. Cover with foil and cook for about 30 minutes. Uncover and continue baking until the top becomes slightly crispy and golden.

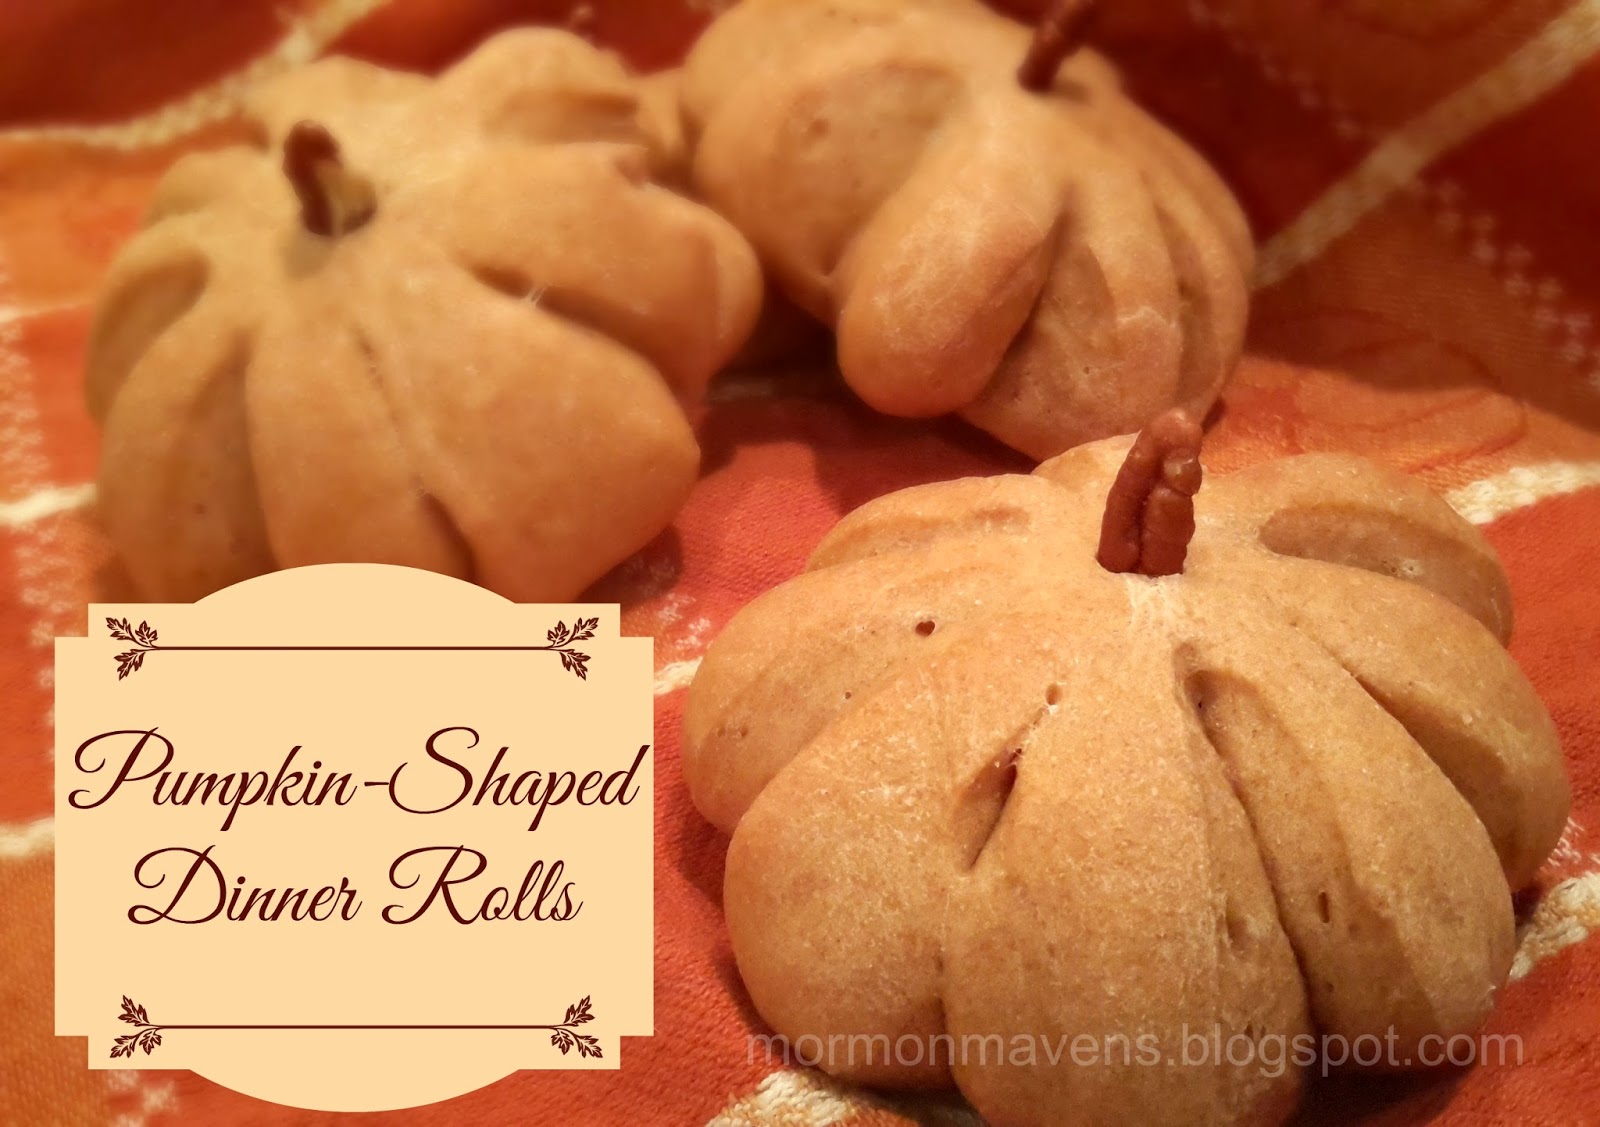
Pumpkin-Shaped Dinner Rolls

http://finlayson.thrivelife.com/honey-whole-wheat-dough-mix.html

This time around I thought I’d post more of an idea than a recipe.  You can use any bread dough recipe you like or use a mix like I did.  Whatever dough you choose to work with, the results will be similar.  This is an easy way to bring a little fall fun to your Thanksgiving table.

Directions for one-loaf’s worth of dough:
1.  Prepare dough according to recipe or can instructions.  Allow to rise until doubled in bulk.  Punch down.
2.  Roll dough into a log.  Using kitchen shears (or unflavored dental floss) cut the log into half, then cut each half into half again.  This will give you four log pieces.  Each of these pieces should then be cut into thirds.  You will have 12 pieces.
3.  Take one section of dough and roll firmly between your palms.  Roll into a tight, smooth ball.  Take your kitchen shears and snip into the edge of the dough eight times equal distance apart.  Do not cut all the way through.
4.  Place on greased baking sheet.  Repeat with remaining dough.  Cover lightly with a sheet of plastic wrap lightly sprayed with cooking spray.  Allow to rise.
5.  Bake according to your recipe.  Garnish with a sliver of pecan.

Source:  it’s all over Pinterest, baby.

Pumpkin Bread

A long time ago, in a land far away (Idaho), I went to my first two years of college.  One weekend we had a homemaking fair kind of thing and I was asked to make a batch of pumpkin bread. Thankfully, I was given a recipe to follow.  I was a student, remember, and I didn’t have a lot of cooking/baking experience.  I learned a lot of that while living off campus.  Anyway, I have just held on to this recipe for 30+ years.  Yeah, the recipe is that awesome.  It also makes great muffins.  In the spirit of pumpkin season, I am now sharing that recipe with you, our faithful followers. Get crazy with it!

Ingredients:
3 cups sugar
1 cup oil
4 eggs
2/3 cup water
3 1/2 cups all-purpose flour
2 t. baking soda
1/2 t. baking powder
15-oz can of pumpkin (or use the equivalent of fresh puree)
2 t. salt
1 t. cloves
1 t. allspice
1 cup raisins
1/2 cup chopped walnuts

1.  Mix sugar, oil, eggs, pumpkin and water.

2.  In a separate bowl, sift together the flour, baking soda, baking powder.  Then add to pumpkin mixture.

3.  Add salt, cloves, allspice, raisins and nuts.  Mix well.

4.  Pour into greased and floured loaf pans.  You will need several, depending on the size. This particular time I used two larger loaf pans and one mini pan.

5.  Bake at 350 degrees F. for approximately 1 hour.  Test for doneness with a cake tester.
NOTE:  This recipe will produce about 30 muffins, baked at 28 minutes.

SOURCE: Ricks College 2nd Stake Relief Society, Rexburg, Idaho.

Peek-a-boo Pumpkin Cake

There’s a pleasant surprise baked into every slice of this fall-inspired pound cake….a pumpkin!  Everyone will be asking, “How’d you do that”?

For the pound cake:

1 (14 oz) box pumpkin bread mix
1 (16 oz) box pound cake mix
Orange food coloring

For the icing:

8 T. (1 stick) butter
3 1/2 c. powdered sugar
3 T. evaporated milk
1 t. vanilla
1/2 c. chopped pecans (optional)

Directions:

1.  Mix up pumpkin bread ingredients according to the directions on the box.  Add orange food coloring to make it more “pumpkin-y” looking (less brown).

2.  Bake in a 9×5 inch loaf pan according to directions.  Remove from oven before completely done, about 8-10 minutes less than instructed.  Let cool, remove from pan and refrigerate for up to four hours.  Cut cold pumkin bread into large slices.  Cut pumpkin shapes from slices.  Align them (vertically) down the center of a lightly greased and floured 9×5 inch loaf pan.

3.  Make pound cake batter according to the directions on the box.  Pour over your pumpkin bread cutouts in the pan, making sure to cover the tops of the pumpkins.  You may have more pound cake batter than you need.  Try not to overfill the pan.  Bake according to the directions on the box.  Let cool when done.

4.  Put powdered sugar in a mixing bowl.  In a saucepan, melt butter and boil, stirring until it starts to brown and form dark flecks on the sides and bottom.  Remove from heat.  Pour the melted brown butter and flecks over the powdered sugar.  Add the evaporated milk and vanilla.  Stir until combined and creamy.  Add more powdered sugar if it appears too runny or more evaporated milk if it seems too stiff.

5.  Remove baked and cooled pound cake from pan and top with brown butter icing.  Add chopped pecans, if desired.  Cut into slices and delight your guests with the pumpkin-shaped surprise that peeks out from inside!

Source:  sheknows.com

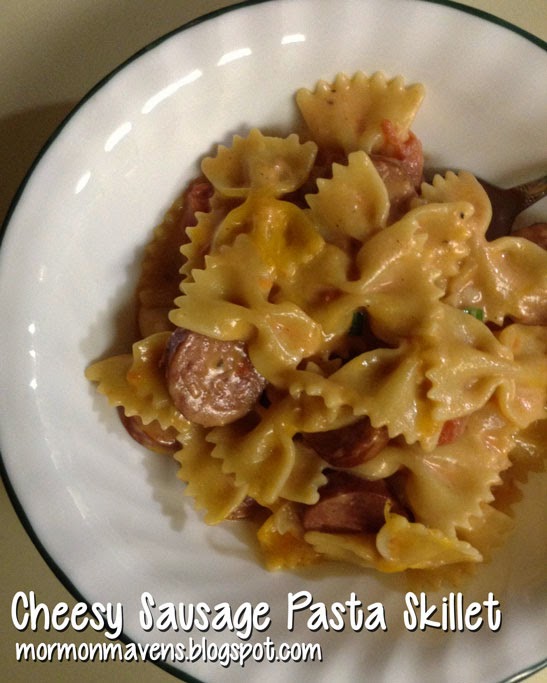
Cheesy Sausage Pasta Skillet

First off, I want to share how happy I am to be back with the Mormon Mavens. I took a year hiatus… and missed it! I love trying new recipes and sharing the good ones I find as well as those tried and true recipes that you can never go wrong with. Thanks for having me back, friends!

Now… onto the yummy food….
Cheese.
Sausage.
Pasta.
YUM!
This recipe is a true one pot meal and comes together quickly. 
Cheesy Sausage Pasta Skillet


Ingredients

1 Tbsp. olive oil
1 lb. Smoked Turkey Sausage, sliced
1 C. diced onions
1 Tbsp. minced garlic (about two fresh cloves)
2 cups Chicken Broth
1 (10 oz) can diced tomatoes
1/2 cup heavy cream (if you don’t have this on hand – milk would work too)
8 oz dry pasta (any small pasta will do)
1/2 teaspoon salt and pepper, each
1 cup shredded Cheddar cheese
1/3 cup chopped scallions, for garnish
Directions

1.  Add olive oil to a 4-5 quart saute pan over medium high heat. Add onions and sausage and cook until lightly browned. Add garlic and cook for about 30 seconds.
2.  Add chicken broth, tomatoes, milk, pasta, and seasonings. Bring the mixture to a boil, cover, and reduce heat to low. Simmer for about 15 minutes, or until pasta is tender.
3.  Turn off the heat and stir in 1/2 cup of cheese. Sprinkle remaining cheese on top and cover for about five minutes to allow cheese to melt. Top with sliced scallions and serve.
Makes about 4 servings.


Many thanks to Yellow Bliss Road for sharing this recipe!

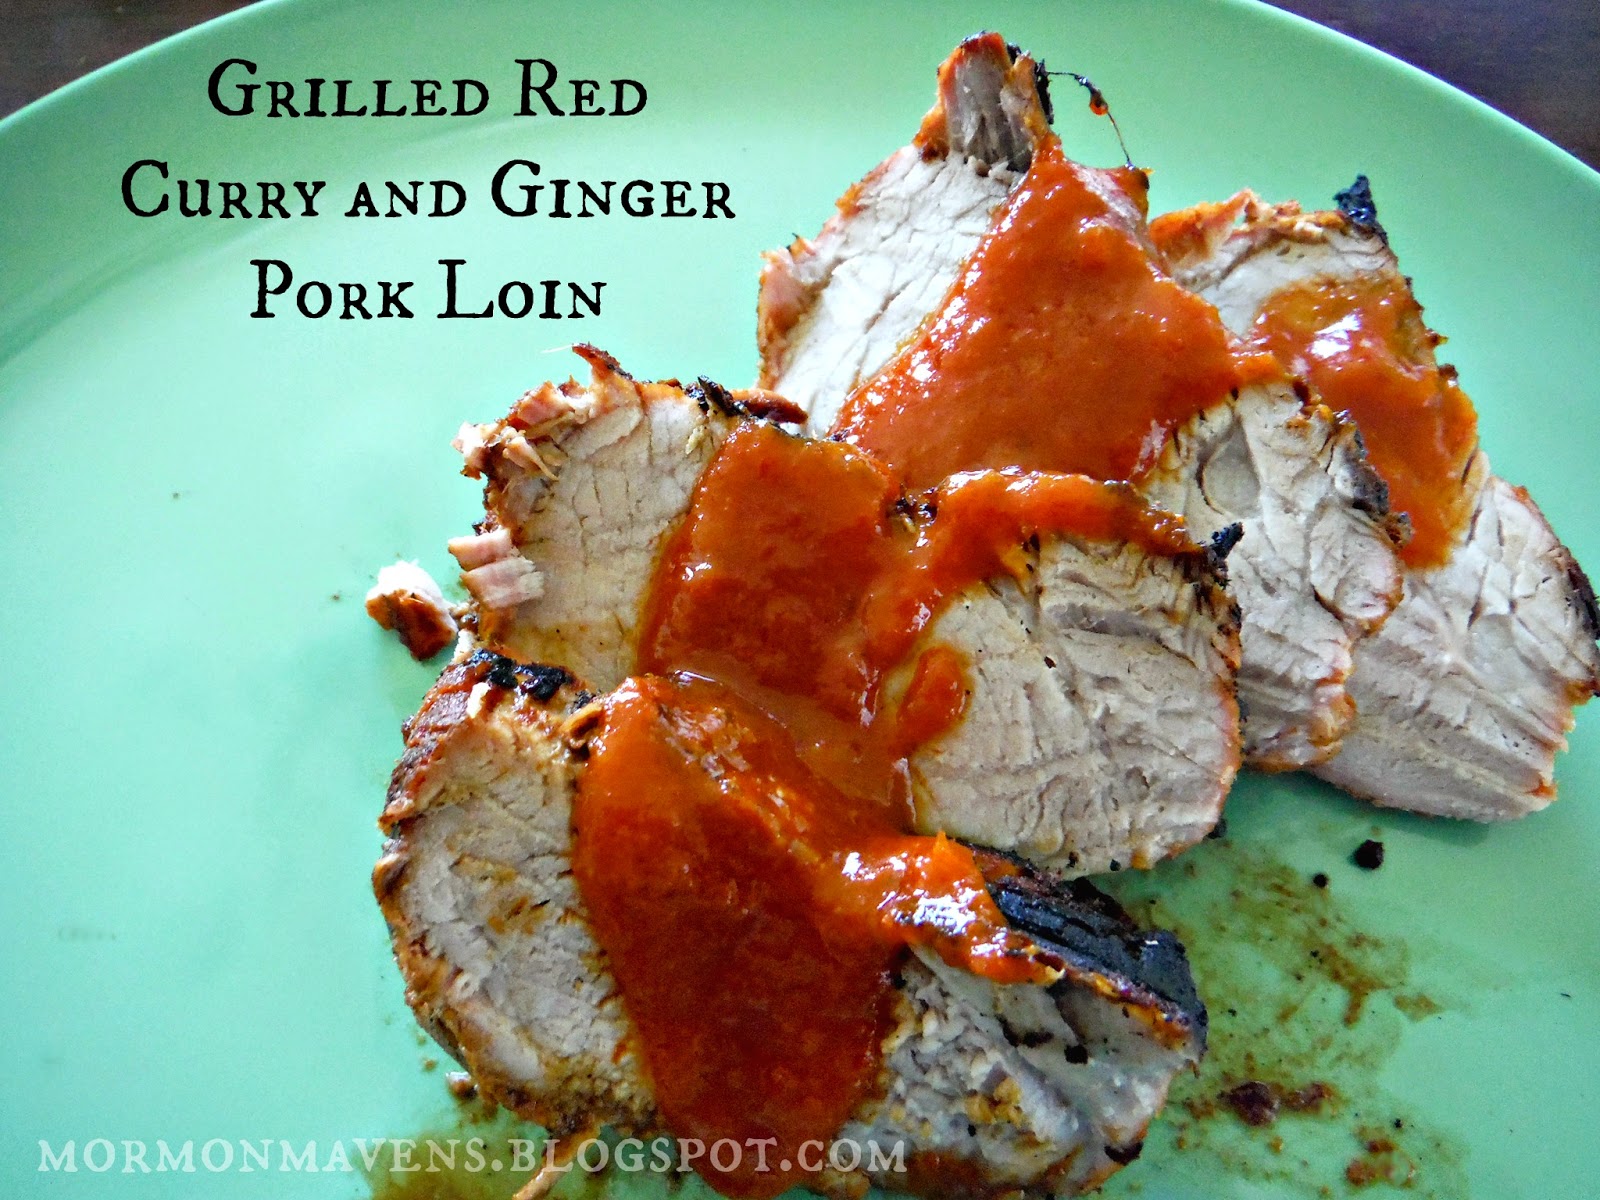
Red Curry and Ginger Pork Loin

So, I like to cook with pork. It is so versatile and lends itself well to different flavors. I decided to make up a curry and ginger marinade and sauce. It is slightly sweet with a definite kick due to the curry.

Ingredients:
1/4 C. oil
juice of 1 lime
2 Tbsp. rice vinegar
2 Tbsp. brown sugar2 Tbsp. red curry paste
1 tsp. fresh ground ginger

2 lbs. meat. I used pork, but it would be great with chicken or beef. 

Mix all ingredients in a small bowl. Place meat in a large zip top bag. Pour marinade over the top. If you have a meat injector, you could also inject some of the marinade into the meat. Let marinate in the fridge for an hour or two.
Heat up your grill over med high to high heat. Oil your grill grate. Remove meat from marinade and place on grill. Let sit for a few minutes, then turn. Continue cooking pork until an instant read thermometer registers between 145 and 160 degrees F. Let meat rest for at least 5 minutes.

For extra sauce cook the following in a small sauce pan:
1 Tbsp. rice vinegar
2 Tbsp. Brown sugar
1/2 tsp. salt
1 1/2 Tbsp. red curry paste
1/3 c. water
juice of 1 lime.
Heat til just boiling, then simmer for 5 mins or so. 

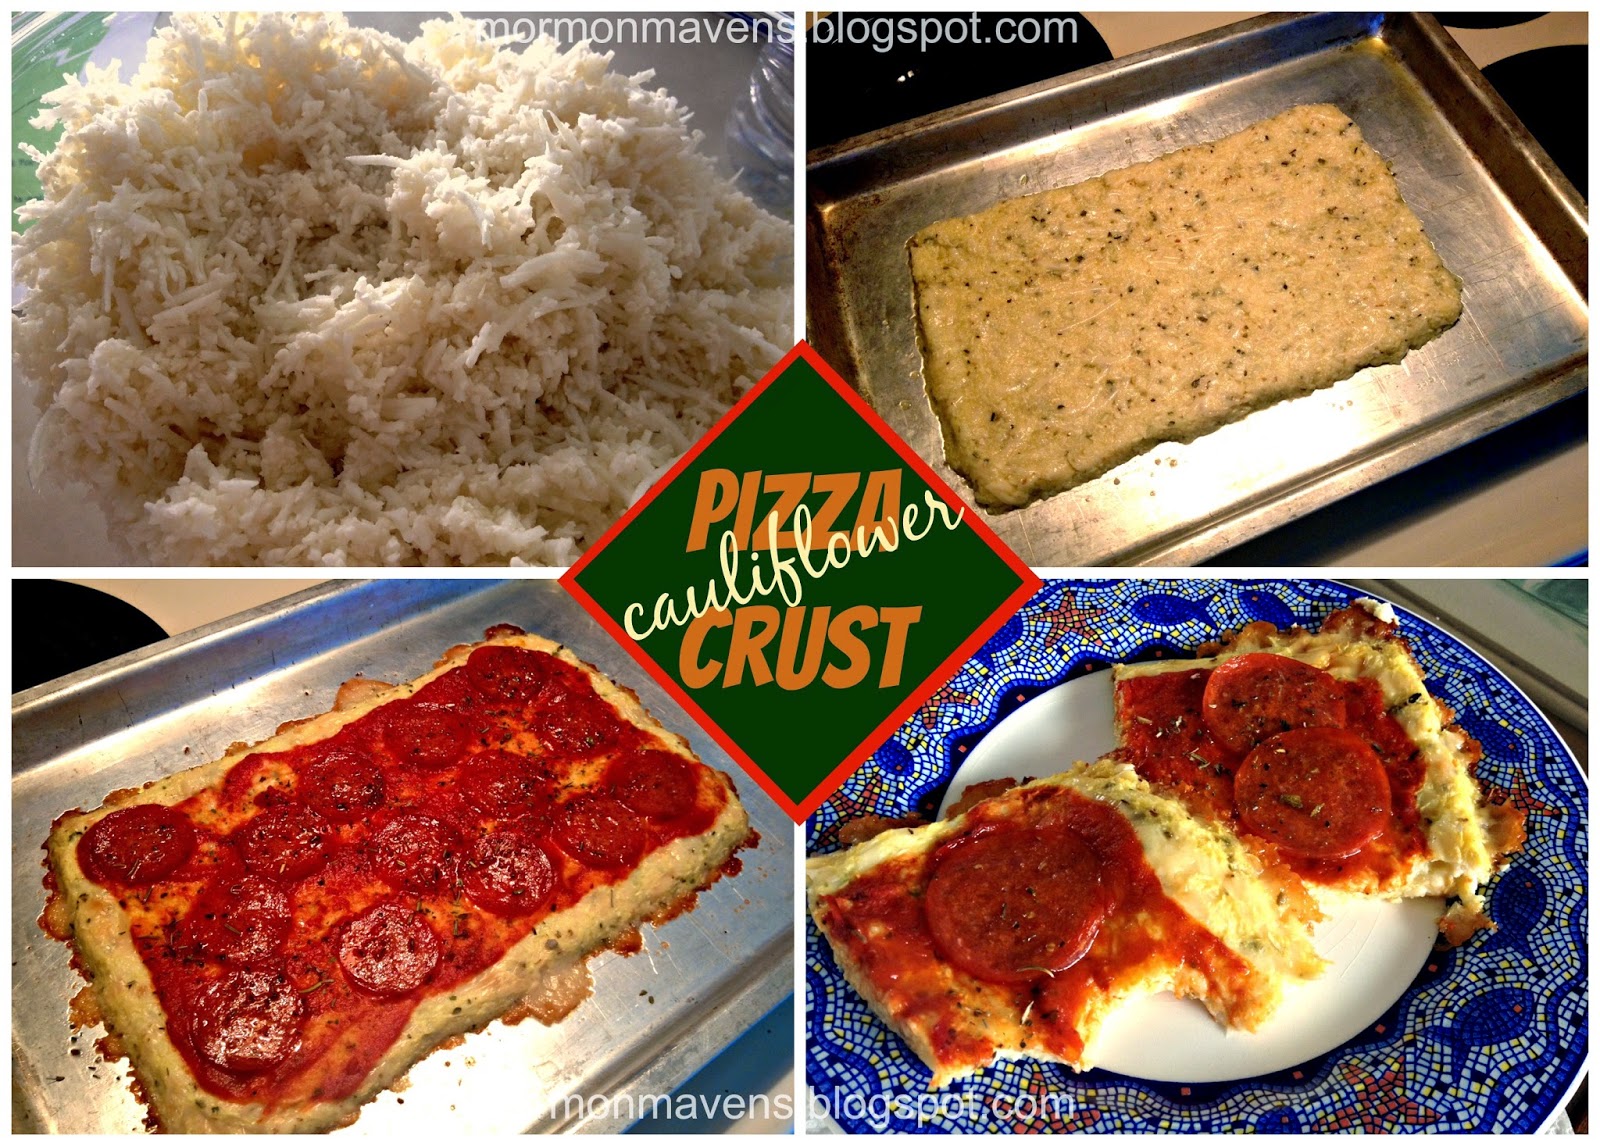
Cauliflower Pizza Crust

One of the things I have a hard time resisting is pizza.  Even when I’m not trying to eat wheat- and dairy-free, pizza is a huge temptation.  I just love it.  But it doesn’t love me.  I didn’t think there would be an alternative that I would enjoy.

I’ve seen pics for this crust all over Pinterest but never really had the gumption to try it until now.  While it doesn’t rival Domino’s or Pizza Hut or Whatever-Your-Favorite-Pizza-Place-Is, it’s good enough that I will be making it again.  And that’s sayin’ somethin’.

Ingredients:
2 cups shredded cauliflower
1 egg, slightly beaten
1 cup mozzarella Veggie Shreds
1 tsp. dry oregano
1/2 tsp. finely minced garlic
1/2 tsp. onion salt

1.  Remove leaves from cauliflower and cut head into pieces.  In a food processor with a grater blade, process the cauliflower.
2.  Place 2 cups of cauliflower in a microwave-safe bowl and cook on full power for 5 minutes.
3.  Cool to room temp.  Add remaining ingredients and stir until combined.
4.  Grease a cookie sheet or pizza pan.  Form pizza crust into desired shape.
5.  Bake at 375 degrees for 20 minutes.  Remove from oven and top with desired toppings.  Return pizza to oven for a few minutes, or broil to melt additional cheese.

Notes:

  • The head of cauliflower I used yielded about 3 1/3 cups of shredded.  
  • You can use regular cheese, but I’m trying to go dairy-free so I used a cheese substitute.  If you want to give it a try, you can find it in the produce section at the grocery store.
  • I didn’t add extra cheese since there is some in the crust already.  I just topped with a bit of pizza sauce and some pepperoni.  If you are adding veggies, you may want to saute them a bit first since they won’t spend long in the oven.
Makes 6 pieces of pizza crust

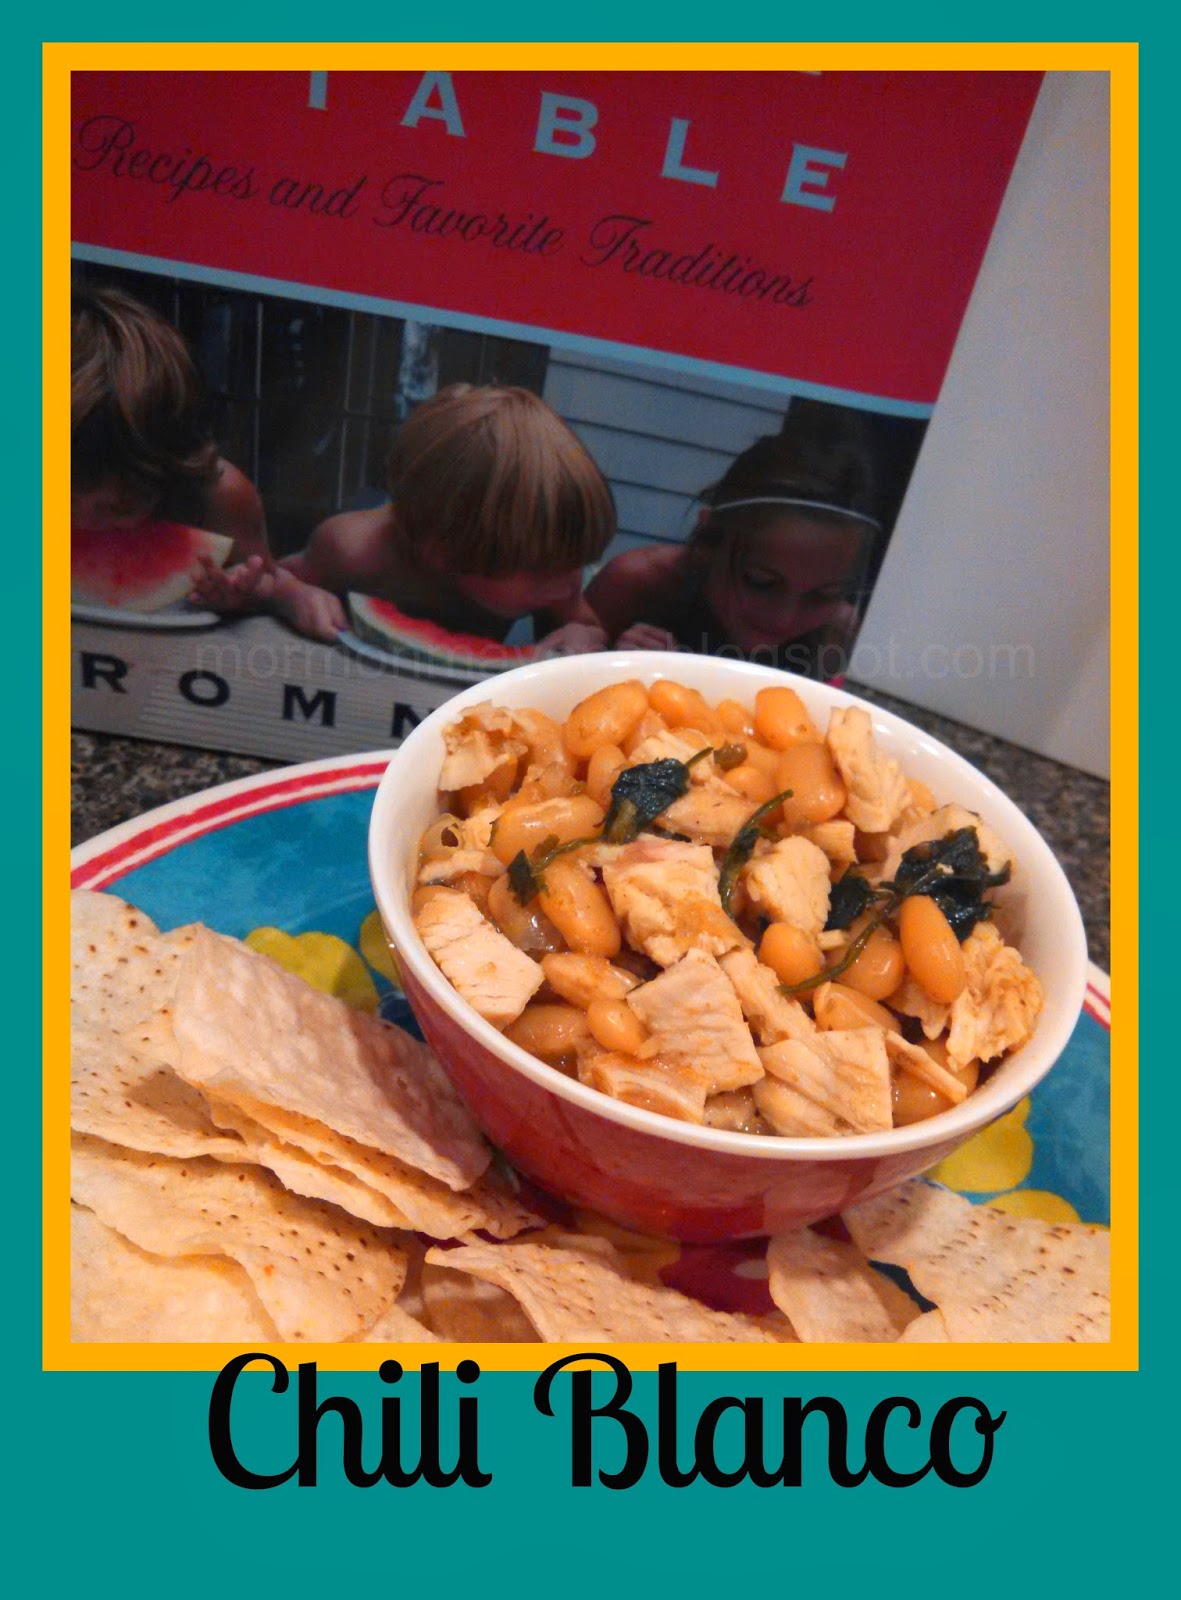
Chili Blanco

This is my favorite time of year for so many reasons.  One is that we get to have stews and soups and all kinds of yummy, warm comfort foods.  This chili recipe is actually quite healthy and was really easy to put together.  You just need to allow time for the beans to cook, as you will note in the instructions.  I will probably be posting other recipes from this cookbook (see source below), so stay tuned for more deliciousness.

Ingredients:
1 pound dry white beans, rinsed and picked over *
4 (14-oz. each) cans of chicken broth *
1 t. chicken stock base (I didn’t have any so I just made my broth stronger)
2 onions, chopped *
1 T. oil
6-8 cloves of garlic, minced
1 (7-oz.) can diced green chilies *
4 t. ground cumin
2 t. dried oregano leaves
2 t. cayenne pepper
4 cups cooked, diced chicken
2 T. chopped fresh cilantro, if desired (I added this)
1 cup fat-free (yeah right!) sour cream *
3 cups shredded Monterrey Jack cheese

1.  Place the beans, broth, chicken stock base, onions, oil, garlic, chilies, cumin, oregano, and cayenne pepper in a large pot and bring to a boil.  Reduce heat to a simmer, cover, and cook very slowly until the beans are done–test to see if they are done as they cook.  You don’t want them to be mushy, just tender.  Beans that are not soaked first take 2-3 hours to cook.  Make sure to add more broth or water if the liquid gets low so they won’t dry out.

2.  Remove beans from heat.  Stir in the cooked chicken and the cilantro.

3.  Top each serving with sour cream and shredded cheese.

* I have noted when I have used freeze-dried or other items from food storage products, just so you can get an idea of how to incorporate those items into your every day cooking.

SOURCE:   The Romney Family Table.