Pumpkin-Shaped Dinner Rolls

http://finlayson.thrivelife.com/honey-whole-wheat-dough-mix.html

This time around I thought I’d post more of an idea than a recipe.  You can use any bread dough recipe you like or use a mix like I did.  Whatever dough you choose to work with, the results will be similar.  This is an easy way to bring a little fall fun to your Thanksgiving table.

Directions for one-loaf’s worth of dough:
1.  Prepare dough according to recipe or can instructions.  Allow to rise until doubled in bulk.  Punch down.
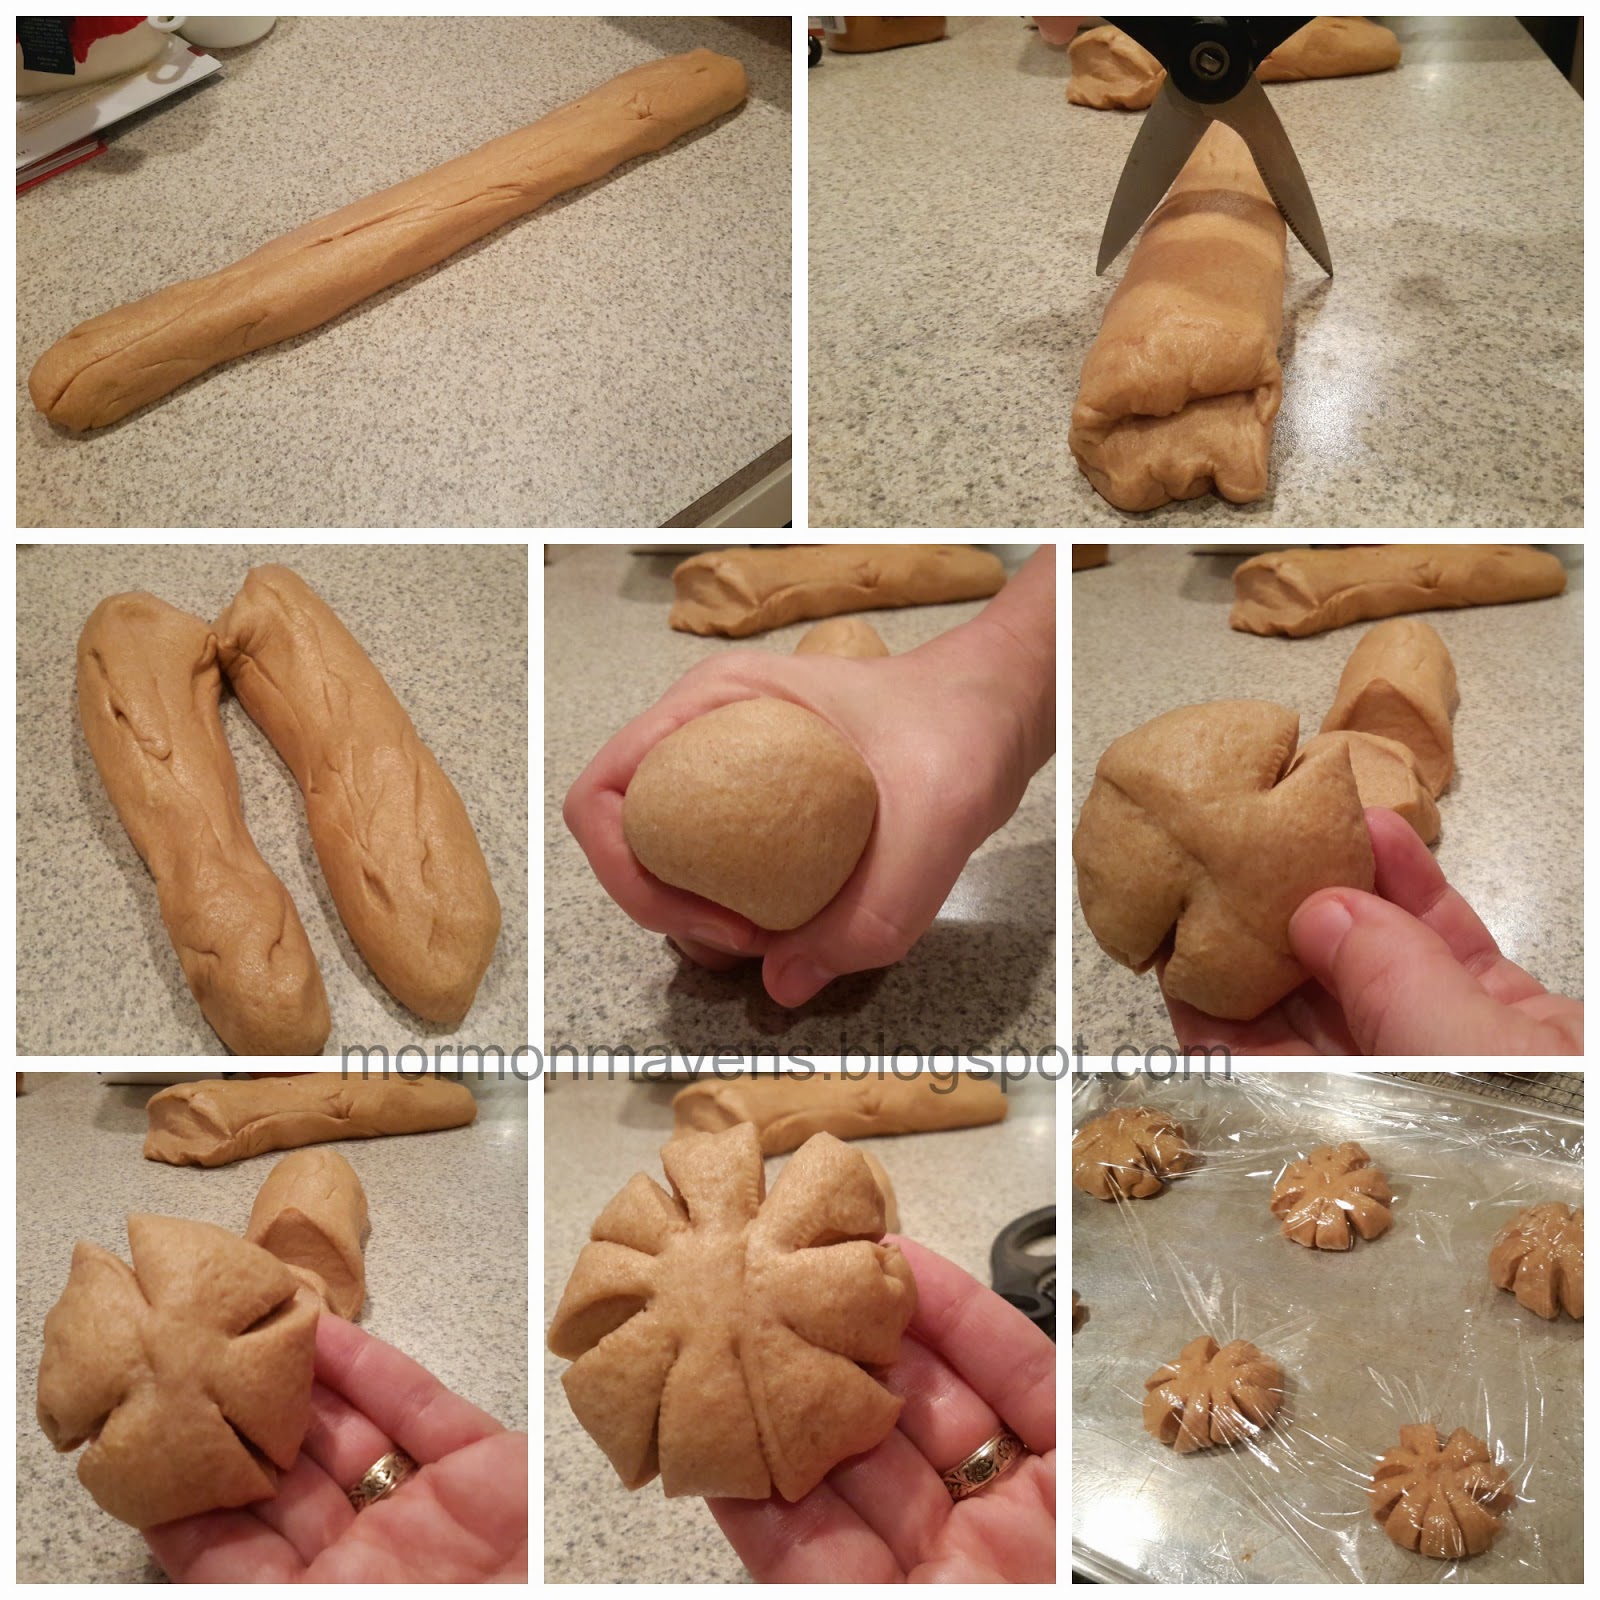
2.  Roll dough into a log.  Using kitchen shears (or unflavored dental floss) cut the log into half, then cut each half into half again.  This will give you four log pieces.  Each of these pieces should then be cut into thirds.  You will have 12 pieces.
3.  Take one section of dough and roll firmly between your palms.  Roll into a tight, smooth ball.  Take your kitchen shears and snip into the edge of the dough eight times equal distance apart.  Do not cut all the way through.
4.  Place on greased baking sheet.  Repeat with remaining dough.  Cover lightly with a sheet of plastic wrap lightly sprayed with cooking spray.  Allow to rise.
5.  Bake according to your recipe.  Garnish with a sliver of pecan.

Source:  it’s all over Pinterest, baby.

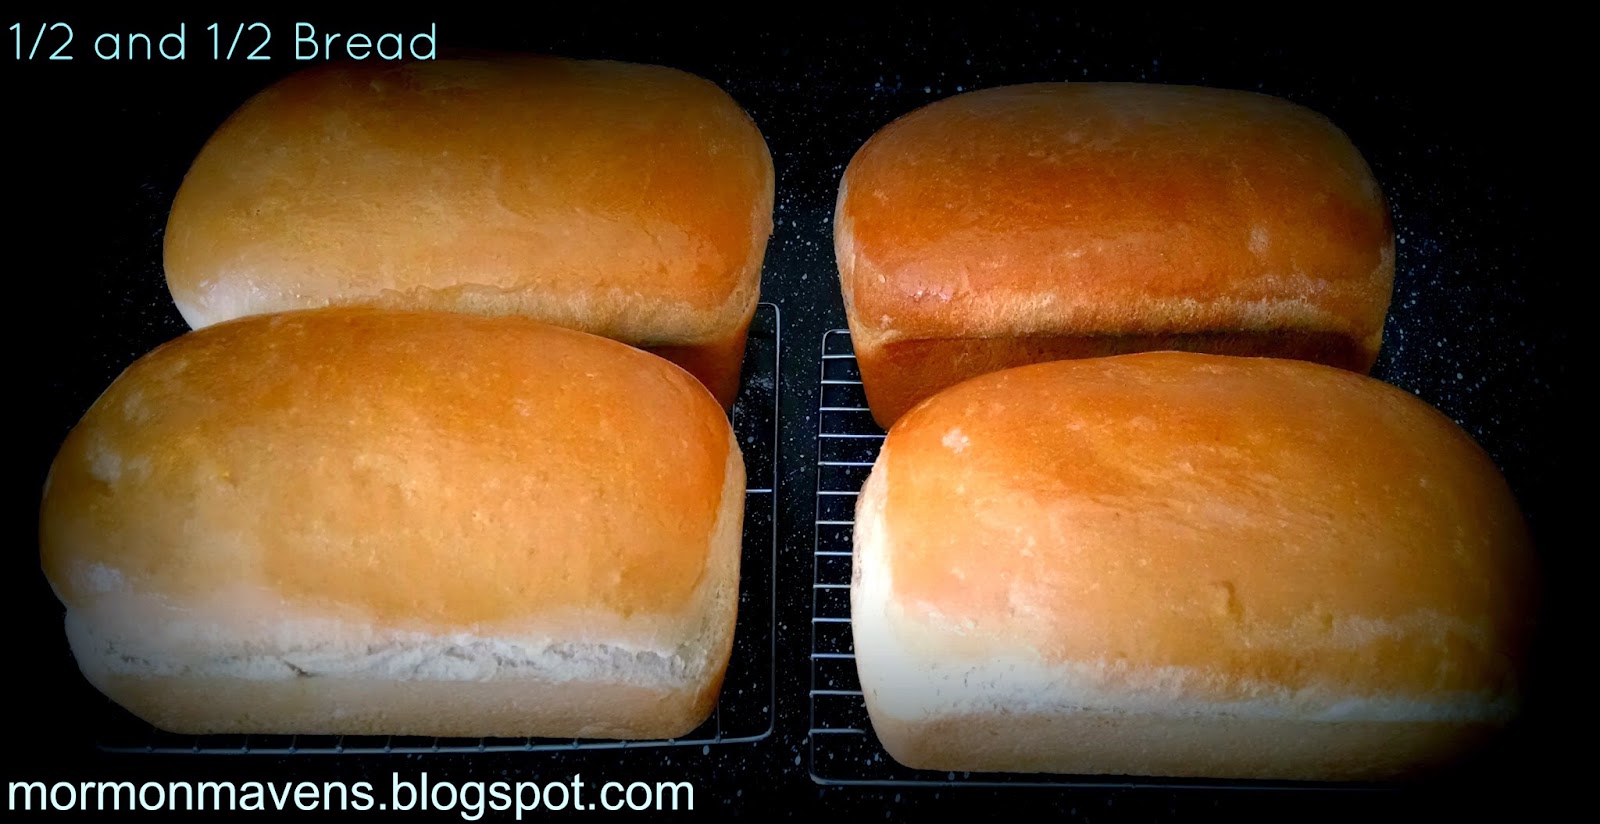
1/2 and 1/2 Bread

My family loves this bread!!!

6 Cups Whole Wheat Flour
6 Cups Luke Warm Water
2 Tbls. Yeast
1/2 Cup Olive Oil
1/2 Cup Brown Sugar

Mix together and let rise until doubled and bubbly then add:

2 Tbls. Salt
8-10 Cups White Flour (dough should be pulling away from the side of the mixing bowl and be a bit sticky)

Mix on medium speed for 10 min (the only mixers I know of that can handle this is a Bosch or a Kitchen Aide, but if you use a Kitchen Aide you need to cut the recipe in half).

When done mixing remove dough from mixing bowl and form it into 4 large loves on a floured surface. Place in greased bread pans.  Let rise until slightly above the lip of the pans.  Bake at 350 for 30 Min.  Remove from pans and place on cooling racks then spread butter on the tops of them to soften the crust.  Let cool before placing them in bread bags.  Enjoy!

Lion House Rolls

On a recent trip to Utah, I stumbled upon a package of rolls in, of all places, a bookstore in downtown Salt Lake City.  Now, I’ve been to the Lion House once for a wedding reception and I remember it was very tasty; but I don’t remember the rolls.  Well, after taking one bite of the rolls I bought at the bookstore, I was hooked.  I found a recipe online through a Google search and although mine weren’t as good as the original, they were pretty dang tasty and a big hit at my house.

Ingredients:
2 cups warm water
2/3 cup nonfat dry milk
2 Tbsp. yeast
1/4 cup sugar
2 tsp. salt
1/3 cup butter, softened
1 egg
5-6 cups all-purpose flour
melted butter

1.  In a large bowl combine the water and dry milk powder; stir well until milk is dissolved.  Then whisk in  yeast, sugar, salt, butter, egg, and 2 cups of the flour.  Whisk well.
2.  Add another 2 cups of flour and whisk well.  Add 1 more cup, stirring well (here’s where I get out my big wooden spoon).  Add remaining flour a bit at a time just to the point where your dough is no longer really sticky but isn’t dry and stiff.
3.  Dump dough onto a floured surface and pour a Tablespoon of vegetable oil on the sides of the mixing bowl.  Return the dough to the bowl, flip it over to coat the surface.  Cover bowl with plastic wrap and let rise in a warm place until the dough has doubled in size (1 to 1 1/2 hours).
4. Punch dough down and turn onto floured surface.  Either roll out and cut or form into roll shapes by hand.  (I divide the dough in half, then half again, half again, etc. until I end up with 2 dozen blobs of dough.  I shape these by hand into rounds).  Place in a greased pan (I used two 9×13 greased pans), cover, and allow to rise for 1 to 1 1/2 hours.
5.  Bake at 375 degrees for 15-20 minutes or until golden on top.  Brush with melted butter as soon as they come out of the oven.

Source:  LDS Living

Pizza Crust

While I love a raised dough for crust, I often fail to plan enough time to allow for it.  So when that happens (which is often!) I turn to this recipe.  Not too thick, not too thin….it’s just right for me!

Ingredients:
2 1/4 tsp. yeast
1/4 tsp. sugar
3/4 cup very warm water
1 3/4 cup flour
1/2 tsp. salt
cornmeal

1.  Combine yeast, sugar, and water and whisk together.  Let sit for 8 minutes.
2.  Add flour and salt to yeast mixture.  Knead for 2 minutes.
3.  Roll out onto a greased pizza pan that is sprinkled with cornmeal.
4.  Top with desired sauce and toppings.  Bake at 500 degrees for 8-12 minutes or until edges reach desired brownness.

Makes 1 pizza crust for a round pan.  I usually double it and roll it onto a large baking sheet.

Easy 100% Whole Wheat Bread

I made many whole wheat bread recipes and almost gave up on ever finding one that was light and soft, until my friend Kelly Wilde shared this one with me. I have never made another whole wheat bread recipe since! It is so light and soft that many people don’t believe it’s 100% whole wheat! Plain ingredients – no tofu or enhancers needed.

Ingredients:

3 cups hot water                                
1 TBS salt                                                    
¼ cup oil                                              
1/3 cup honey
8-9 cups whole wheat flour (I like to use Hard White Wheat, but Hard Red or a mixture is good too!)
2 TBSP yeast
1 egg


Directions:

1. Stir water, salt, oil, honey and yeast together. Add 4 cups whole wheat flour and egg.
Mix in a mixer for 4-5 minutes.You can use a Bosch or Kitchen Aid type of mixer, or just use bowl and wooden spoon. This will be thin like a batter. Mix it well. This will help your bread have a nice texture, and it’s easier than kneading it once all the four has been added in.


2. Add 2 cups whole wheat flour. Mix well. Add 2-3 more cups of flour. The dough has enough flour when it is still a little sticky…if using a Bosch, it will pull away from the sides of the bowl and not stick to the sides of the bowl any longer. That’s the precise moment when you know you have enough flour added in. Remember that it is better to have a little less flour than too much! Too much flour makes a very stiff and dry bread! Knead or mix 10 minutes. 

3. Preheat oven to 325°.

4. Let the dough rise in the bowl until double. Punch down.  

5. Cut the dough into 3 pieces. Shape into loaves and put in pans that have been sprayed with non-stick spray. (See photots below)

6. Let the dough rise until double in pans. Bake 35 minutes at 325°. 

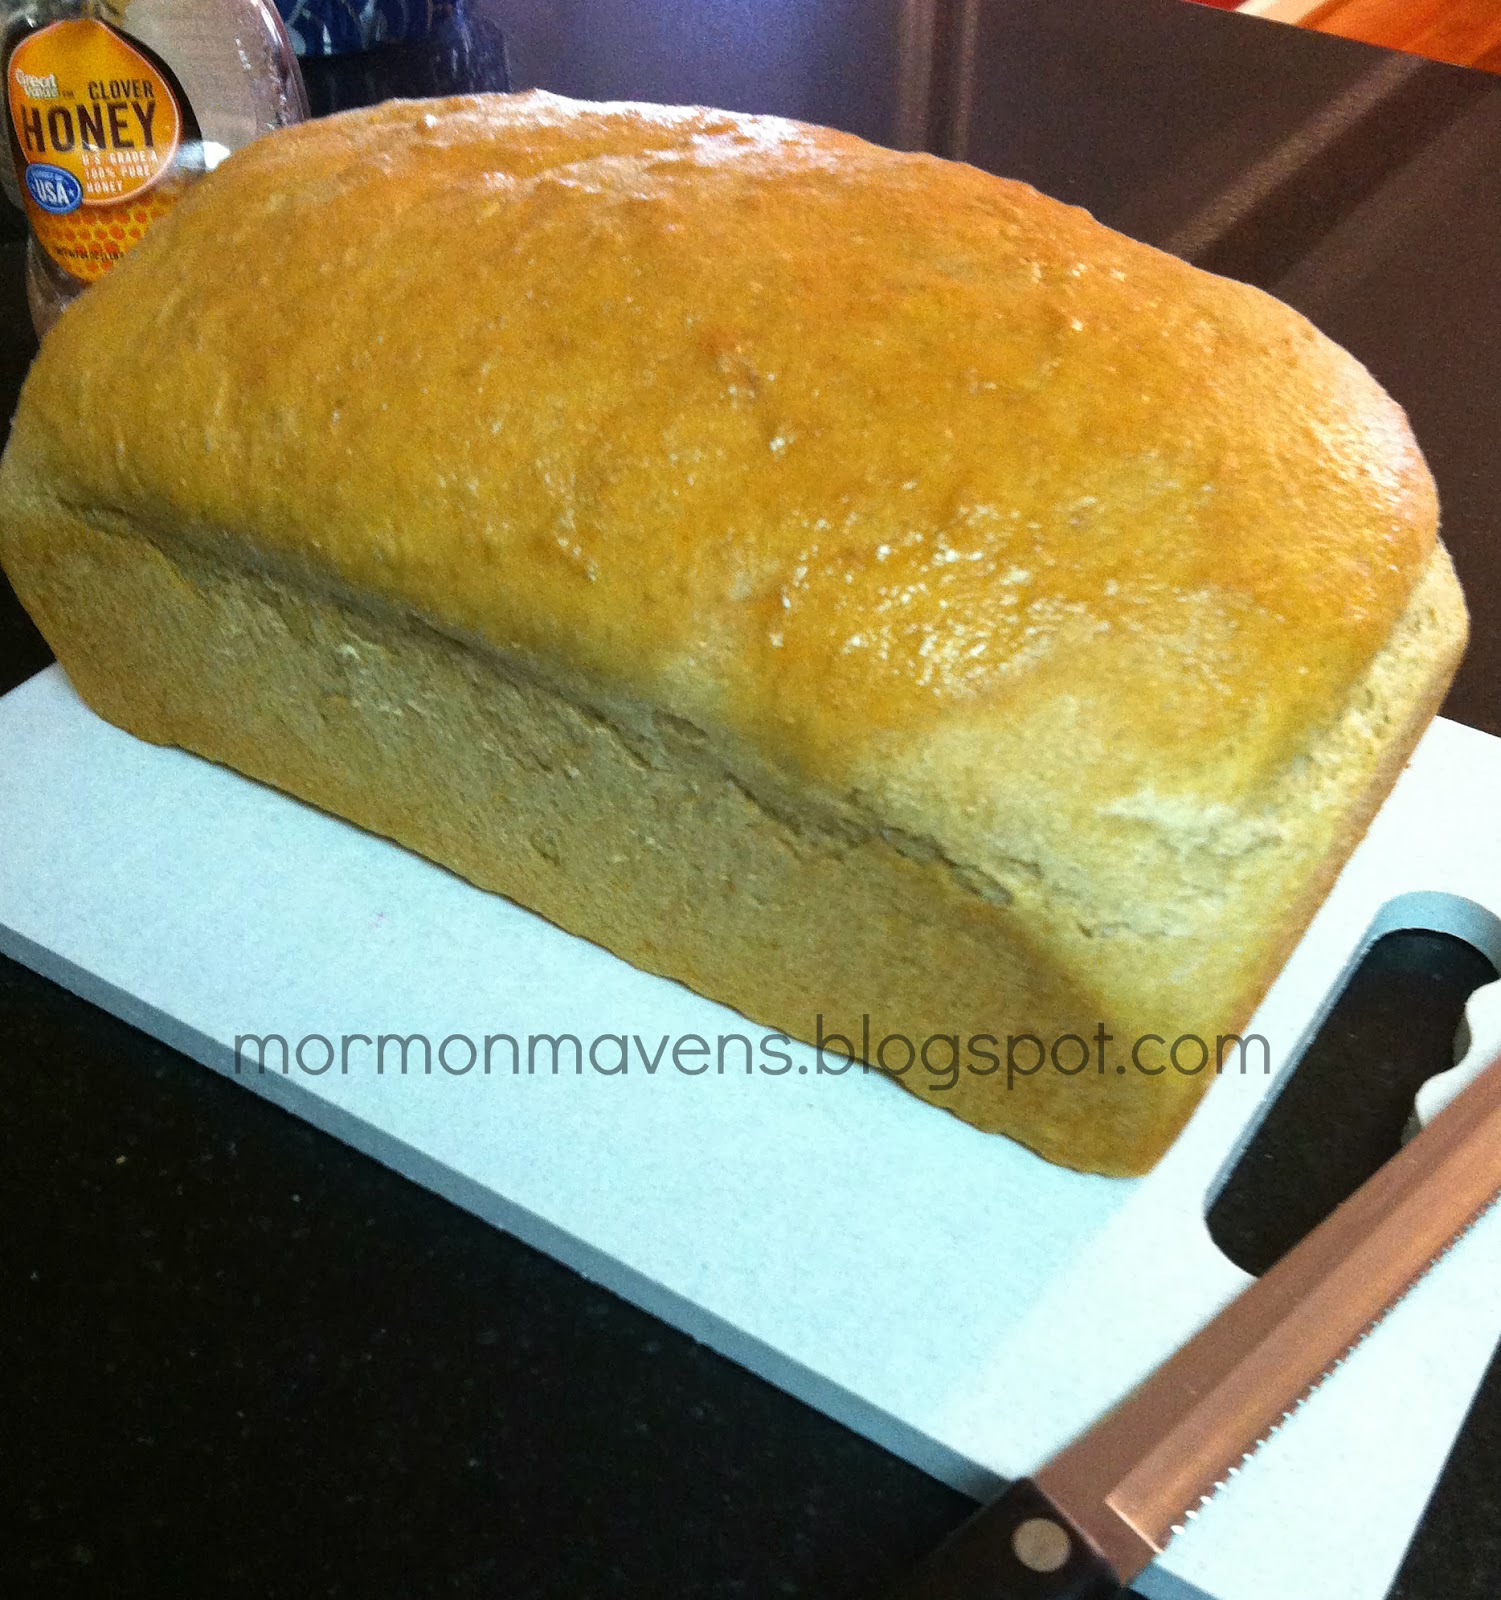
7. Let the bread sit in pans for 10 minutes after baking. Then take out and let it cool on a bread board or wire rack. Or eat immediately with butter and honey or homemade jam, and you will think you are in heaven. Once the loaf has mostly cooled down, you can bag it and freeze it if desired. It will be good in the freezer for a few months. 

I had just put the dough into the pans.

Now they have risen enough and are ready for the oven.

This is so beautiful to me. But if you let it rise much more than this, it will rise too much and then deflate, and you will have a sunken in bread. You can still eat it, but it will look funny and be a little dense. Still good though. With a little practice, you will learn when when your bread is ready for the oven.


Source: Original recipe came from my amazing friend Kelly Wilde about 20 years ago. : )

How To Make Melissa’s Yummy Cinnamon Rolls – Photo Tutorial

I originally posted this on my own blog, but wanted to share it here also since so many people are enjoying this recipe! Perfect for Christmas morning, or to take to Christmas parties! I promise they are easy to make, and they are sooooo delicious! 

Cinnamon Rolls


(I know this picture is obnoxiously large, but I wanted you to be able to get up close and personal with these cinnamon rolls. ha! ha!)


1. Start with the 30 Minute Roll Recipe
Note: This recipe makes about 50 cinnamon rolls! You might want to half the recipe!


Mix and rest 10 minutes:
3 ½ cups warm water                          
¾ cup sugar (OR 1/2 cup honey)
1 cup oil                                                
6 TBSP Yeast (Less yeast may be used, but rising time will be longer)

Add:
1 TBSP Salt                                          
3 eggs (can use egg powder and water)
10 ½ cups flour (wheat flour turns out really light and fluffy)
Mix in mixer or knead. Shape into rolls. Raise 10 minutes. *Bake at 425° for 10-12 minutes or until done. 

2. Here’s How to “Shape into Rolls”
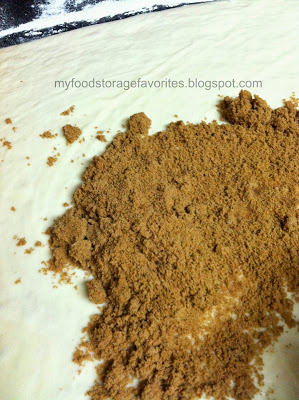
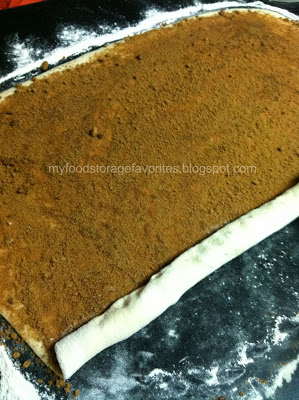
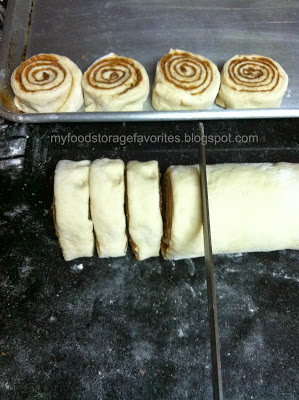
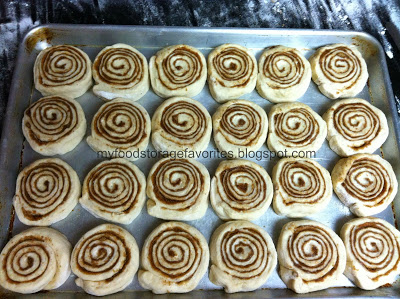
Cut dough in half. Roll out one of the sections into a rectangle about ¼ inch thick (or so!) Spread soft or melted butter over the dough. Spread a mixture of brown sugar and cinnamon over the butter. (I use about 4 cups of brown sugar to 3-4 TBSP of cinnamon. I go heavy on the cinnamon and never really measure. I just dump it in until it taste the way I want it to.) Roll up. Cut into 1 inch sections and place on cookie sheet. Let rise for about 10 minutes or so. Repeat with other section of dough, or just make them into dinner rolls.

*I prefer to bake them at 375 degrees until they are starting to lightly brown and dough is done in the middle. Take out of oven and let cool for about 5 minutes or so. Spread on or drizzle on the frosting.

Photo Tutorial:

Start off by shaping the dough roughly into a rectangle.
Cinnamon Rolls
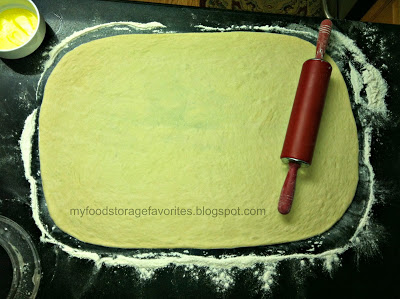
Roll out the dough about 1/4″ thick. This will take practice.
Roll out dough
Spread soft or melted butter over dough. 
Spread on the Butter
Put cinnamon sugar on the dough.
Cinnamon Sugar
Spread it out smoothly – feel free to use your hands.
Spread out Cinnamon Sugar
Roll up the dough.
Roll up the dough
Cut into 1 inch slices.
Cut the dough
Place them neatly on a cookie sheet and let them rise. This is a “jelly roll pan”, which is half of a sheet cake. You can put them on smaller pans that just hold 12 cinnamon rolls.
Let them rise
Bake them in the oven and look how beautiful they are!
Bake in oven
Oh. My. Yumminess!
The best cinnamon rolls
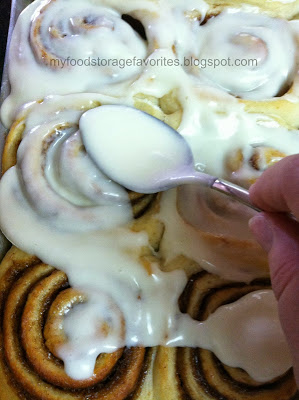
Spread on your cream cheese frosting. (Recipe below)
Spread on Frosting
I wish you could smell these and taste them! Make some! YUM!!!! 
The best cinnamon rolls

3. Here’s How to Make the Frosting
Okay, I have to admit that I never measure! But here is an estimate….Soften about 8 oz of cream cheese and 3 tablespoon of butter in a large plastic bowl. Add 3-4 cups powdered sugar, 1 teaspoon of vanilla extract, and a few (maybe 4??) tablespoons of milk. Mix with hand mixer…you may need to add more milk or powdered sugar to get the right consistency you like. I like it kinda thin like a cake batter, not thick like cake icing.

4. Enjoy!

Eat immediately with a glass of milk and enjoy! They are good for a few days, but you will want to warm them up for about 8 seconds in the microwave!

Easy Donuts

 
Every once in a while my mom would break out the canned biscuit dough and make us these sugary treats. They are so simple and so yummy! Maybe everyone know about these already, but I thought they were worth the reminder. These are best with Pillsbury Grands, but you can use the smaller ones too.
 
Pillsbury Grands, 1-2 cans
sugar
oil, for frying
 
Pour oil into a pot until its about 2-3 inches deep, and heat on medium. While its heating up, open the biscuits and use something to cut a perfect circle into the center of each biscuit. Then drop 2-3  donuts at a time into the oil to fry. The trick to this, is you don’t want the donuts to cook too fast or they will be doughy in the center. So, it should take 25-30 seconds on each side, maybe a bit more if you cook it on lower heat. Using tongs, lift the donuts out of the oil and let the oil drip off good then place the donut into the sugar. Lift all of the donuts and place into the sugar and then transfer to a plate to rest.  Toss the donuts around in the sugar until they are thoroughly coated.  These are really great and so quick.


Buttercup Yeast Bread

This is another recipe I wanted to slide in before squash season is over. I had a subscription to Taste of Home magazine for a few years and this is one of my favorite finds from the magazine. You can use any type of hard squash. I have used butternut, acorn, and sweet mama, all with good results. The squash just gives the bread a lovely golden color and  a hint of sweetness. Everyone loves this recipe!
Buttercup Yeast Bread
Ingredients

  • 3 packages (1/4 ounce each) active dry yeast (about 2 3/4 tsp)
  • 1/2 cup warm water (110° to 115°)
  • 2 tablespoons sugar
  • 2-1/2 cups mashed cooked buttercup or butternut squash
  • 2 cups milk
  • 2/3 cup packed brown sugar
  • 2/3 cup butter, softened
  • 2 eggs, lightly beaten
  • 3 teaspoons salt
  • 13 cups all-purpose flour

Directions
  • In a very large bowl, dissolve yeast in warm water. Add sugar; let stand for 5 minutes. Add the squash, milk, brown sugar, butter, eggs and salt; mix well. Add 6 cups flour. Beat on medium speed for 3 minutes. Stir in enough remaining flour to form a soft dough.
  • Turn onto a floured surface; knead until smooth and elastic, about 10 minutes. Place in a greased bowl, turning once to grease top. Cover and let rise in a warm place until doubled, about 1-1/4 hours.
  • Punch dough down. Divide into three portions; shape into loaves. Place in four greased 9-in. x 5-in. loaf pans. Cover and let rise until doubled, about 45 minutes.
  • Bake at 350° for 35-40 minutes or until golden brown. Cool for 10 minutes before removing from pans to wire racks to cool completely. Yield: 4 loaves (16 slices each).


Easy French Bread

 If you have never made bread before, this is a perfect place to start! This is such an easy, delicious bread! And really it’s hard to mess it up! It makes fabulous garlic bread, French toast, delicious sandwiches and bread bowls! It will be a family favorite!

Easy French Bread

Ingredients:
2 TBSP yeast     
5 TBSP oil
2 ½ cups warm water                      
1 TBSP salt                           
2 TBSP sugar                                       
6 cups white flour 

Directions:

1. Mix all ingredients together and knead in a mixer (like a Bosch or Kitchen Aid) for 10 minutes. You can do it by hand with a bowl and spoon, but just add half of the flour at first and stir for a while until the “batter” seems smooth. Then add in more flour and mix until it gets too difficult to stir by spoon. Dump it out onto a floured surface and knead in the remaining of the flour. I actually do not ever exactly measure the flour. I know I have enough flour when the dough is no longer really sticky, but be careful to not add too much. You do not want the dough to be stiff or dry. A little less flour is better than too much!

2. Let the dough rise in the bowl until doubled. Punch down. (I usually cover the dough with a damp kitchen towel to keep it from drying out.)

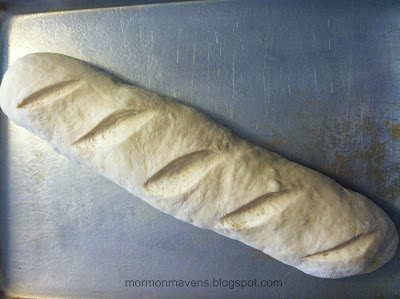
3. Divide and form into 2 french loaves. (Or you can braid it!) Cut top of loaves three times with a serrated knife. You can also brush with beaten egg white and sprinkle with sesame seeds.  

4. Let rise until double – 30 mins or so. Bake for 20 to 30 minutes at 400 °. (Shorter for a soft crust, longer for a thick and chewy crust.)  

Notes: 

*You can also put balls of this dough on a cookie sheet to make “Bread Bowls”. Once baked, cut out center of round loaf and  pour in a creamy soup. Make the Bread Bowls any size you want.
*People love to receive this as a gift, especially the braided bread below!

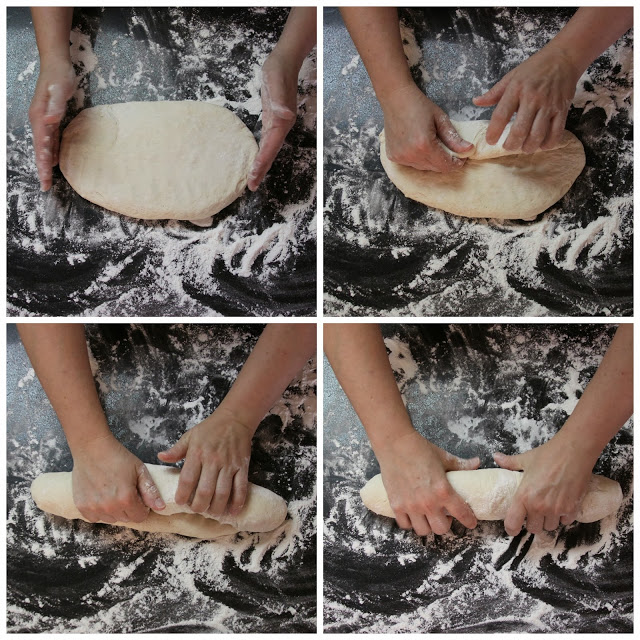
Here is how I form the loaves:

Then put it on a baking sheet and cut the top of the loaf, and let it rise.
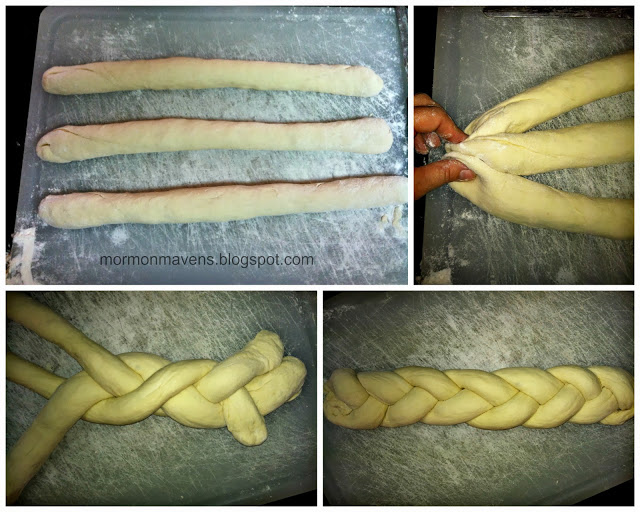
If you want to braid it, divide one half of the dough into 3 equal pieces, and roll out each piece with your hands into a long skinny “snake”. Pinch the ends together, or start braiding it however you can. I often have to rebraid it because I get messed up a bit, like in the picture below. I eventually got it right. : ) Pinch the ends together and tuck them under and try to make it pretty. Even if it’s not perfect, it will still look pretty and taste delicious!

 I forgot about my bread that morning while I was homeschooling my children, and I let it rise a little too much. It got huge, but it was still gorgeous and delicious! You can spread a little butter on the top of the hot loaves when it comes out of the oven. ENJOY!!!

Olive Cheese Bread

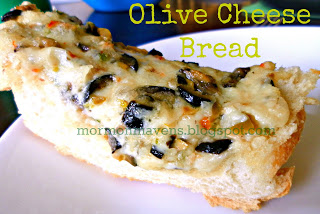
 This bread is amazing. It is soft and gooey and salty and cheesy. The recipe came from the amazing Pioneer Woman. However, as with most recipes that I cook, I tweaked it a bit. I found the original recipe much too salty. To cure that, I cut down the amount of green olives and also rinsed them before chopping them. I also cut the amount of butter. Original recipe here.


Olive Cheese bread
4 TBSP butter-room temp
1/2 C. Mayo
4 oz. green olives (about 1/2-3/4 C.)
1 can black olives (6 oz.)
2 green onions
3/4 lb. grated Monterrey Jack cheese (I always use a block and grate it myself. I used the pre-grated stuff once and it was not as good.)
1 loaf french bread

preheat oven to 325.
Mix butter and mayo in a bowl. Chop up green olives, black olives and green onions. Add them to the bowl and mix it up. Then add the grated cheese and stir to combine.
Cut the french bread in half lengthwise. Spread the olive cheese mixture evenly over both sides of the french bread. Place on a baking sheet. Bake for 25-30 minutes until cheese is melted and bubbly.
I like to turn the broiler on for just a minute or two to get a nice golden color on the melted cheese.
Remove from oven, let cool for a few minutes and then slice and serve.