Pomegranate-Avocado Dip

I hope it’s not too late and that you can still find Pomegranates in the produce aisle. If it is too late, I’m really sorry, but put this recipe away for next year. Don’t be fooled by the variety of ingredients that you wouldn’t normally see together. It has just the right amount of sweet/savory to make it ADDICTING!

Ingredients:

1/4 tsp Chili Powder
1/8 tsp Cayenne (Red) Pepper

1 Tbsp Lemon Juice

1 small Onion, chopped (I used a yellow onion)
1 Roma Tomato, chopped
1-2 Avocados, sliced into bite-sized pieces
1 Pomegranate, seeded

1. Mix the chili powder, red pepper, and lemon juice in a small bowl and set aside.
2. Mix all the produce well in a Medium-sized bowl.
3. Pour the lemon juice mixture over and coat well.

Serve with your favorite chips or crackers. We like it with Club Multi-grained or some other multi-grained crackers.

Source: Aunt Beth

Sugary Peanut Butter Kisses

 
These are so yummy.  The kids enjoyed mixing the colors into the sugar, and then rolling the cookies in the different colored sugars.  So, this is a very kid friendly recipe and so good to eat!
 
Coloring sugar:
1-2 drops Wilton Gel Food Colors
1/2 c – 3/4 c Granulated sugar
 
Pour sugar into a ziploc bag and squeeze one drop of gel color into the sugar. Seal the bag and start squishing the color into the sugar unto all the sugar is colored.  You can darken the color  by adding more drops of the gel. You can lighten the color by adding more sugar.
 
 
Cookie Ingredients:
1/2 c. sugar
1/2 c. firmly packed brown sugar
1/2 c. real butter, softened
1/2 c. peanut butter
2 TBSP. milk
1 tsp. vanilla
1 egg
1- 3/4 c. self-rising flour
Hershey kisses, about 30 or more pieces, with the foil off
 
Preheat your oven to 375%. Cream together the white sugar, brown sugar and butter. Really give a few minutes to get nice and creamy. Scrape down the sides of your bowl and add the following peanut butter, milk, vanilla and egg. Mix well and scrape down the sides of your bowl. Whisk the flour and then scoop up the right amount needed.  Slowly add in the flour and continue to scrape down the sides of the mixing bowl.
 
Pour colored sugars onto paper plates. With a cookie scoop drop 1″ balls of the dough into the different colors of sugar and roll around. Place the cookies about 2″ apart on the cookie pan. Bake for 10 minutes for a soft chewy cookie, and 12 minutes for crunchy cookie.  (The cookie will flatten a bit as it bakes.)
 
Take cookies out of the oven and immediately press the hershey kiss into the cookie slightly! Move cookies to a rack to cool.  It takes a while for them to cool down because the hershey kiss melts a bit and then solidifies again.  So, give them time.  Then enjoy!


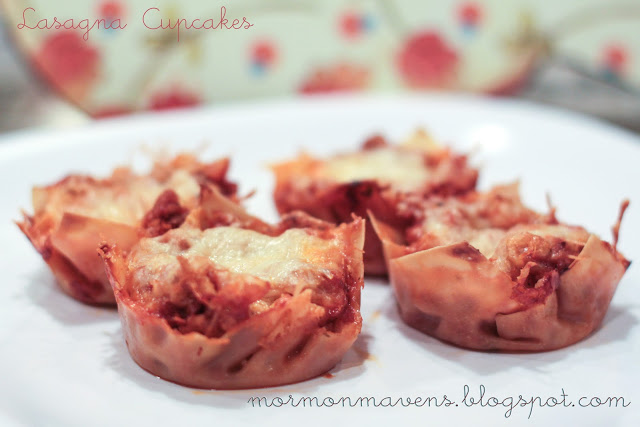
Lasagna Cupcakes

I can never seem to get lasagna noodles to cook correctly.  These lasagna cupcakes are made with wonton wrappers instead of traditional lasagna noodles.  They are a great alternative and work well for individual servings and kid portions.  This recipe is quick and easy, but I think it tastes better than traditional lasagna.
Ingredients:
Olive oil
One onion and a few cloves of garlic 
1-1.5 pounds of ground turkey or beef
26-ounce jar of your favorite pasta sauce
Shredded mozzarella cheese
Shredded parmesan cheese
Directions:
Pre-heat oven to 350 degrees
Cut up the onion and garlic cloves and cook in olive oil until translucent.
Add the ground turkey and cook until no longer pink.  
Add a jar of your favorite pasta sauce.

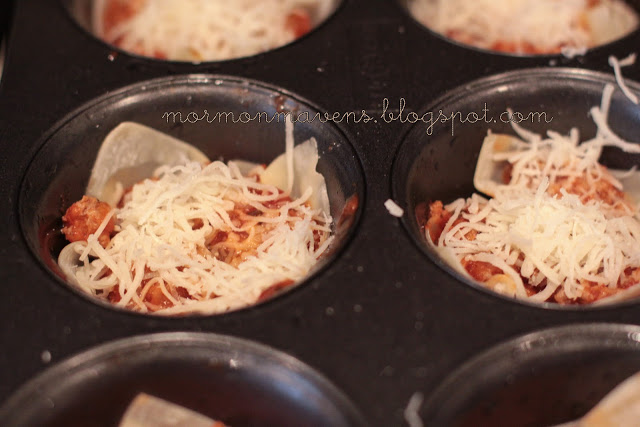
While the meat is cooking, grease the cupcakes pans with olive oil and press the wonton wrappers into the bottom on the pan.  You can use square or circle wonton wrappers.
Add a layer of the meat and sauce.

Then add a layer of the cheeses.  I simply sprinkle a little of each.
You could also add ricotta to the cheese mix.  If you do this, mix the three cheeses in a bowl and spoon the mixture in for the cheese layer.
Add another layer of the meat sauce and a layer of the cheese. 
Bake at 350 degrees for 18-20 minutes or until sauce and cheese are bubbly.
Notes:
Makes 24-30 cupcakes.  
Let them cool for at least five minutes before removing them for the pan or they will not hold their shape.
Any part of the wonton wrapper that is not covered by the lasagna mix will be crunchy so make sure they are completely covered or pushed into the mix.
You can substitute the meat for veggies sautéd in olive oil and pasta sauce.

Source:  Adapted from a recipe on tablespoon.com

Favorite Cheeseball

I was given a Lion House Christmas cookbook as a wedding gift.  One of the very first recipes I tried from it was this cheese ball.  At the time, all cheese balls seemed to include canned pineapple and that just grossed me out!  I didn’t want any sweet in my savory!  It’s been my go-to recipe for cheese ball ever since.  My kids request it for when we do party food for different celebrations.  After 20+ years, it’s still a favorite!

Um, as for the spider….well, it was for a family reunion where we celebrated several holidays all in the same week (we called it Holiday Inn week) and I was in charge of Halloween.  I hope it doesn’t freak you out too much.  I hate spiders and it freaked me out a little to make it!

Ingredients:
2 8-ounce packages of cream cheese, softened
2 cups finely grated sharp cheddar cheese 
2 Tbsp. finely chopped green onions
2 tsp. Worcestershire sauce
1 tsp. lemon juice
1/2 tsp. lemon pepper
1.  In a mixing bowl, combine all ingredients and cream together until well-combined.
2.  Line a bowl with plastic wrap, leaving enough overhang to fold back over the cheese ball mixture you’re going to put in it.  Firmly press the mixture into the bowl.  Flatten the top and fold the plastic wrap over to cover.  
3.  Refrigerate until ready to use.  Let it sit out for at least half an hour before serving.
Notes:
  • Half a recipe makes about a 3-inch ball.
  • For a fancier looking cheese ball, you can form the ball inside wax paper or plastic wrap, then roll it in finely chopped pecans and finely chopped parsley, mixed together.  Then wrap it in plastic wrap to put in the fridge.  I don’t do this anymore as my kids prefer it without nuts.
  • You’ll have to eyeball what size bowl to use.  I usually use a wide soup bowl from my china, but I have also used other shaped bowls for a different look.
  • Serve with all types of crackers, pretzels, pita points, or bagel chips.  (Bagel chips are a favorite in my house!)

My Favorite Carrot Cake!

This is the best carrot cake I have ever had! Even people who think they do not really like carrot cake LOVE this one! 

My mom is famous for this cake! Her co-workers always request this for their birthday, and she is asked to bring it to family and church activities all the time. This is a picture of the one she made for our family Christmas party. I wish there was a “scratch and sniff” and a way you could have a little nibble. The texture is so amazing…mmmmm…and the flavor is just perfect! It’s very dense and so moist, and I love the nuts in it! But it’s the icing that I dream about!

Mom’s Famous Carrot Cake

2 1/2 cups all purpose flour
2 tsp baking soda
1 tsp cinnamon
1 tsp salt
2 cups white sugar
1 cup oil
2 tsp vanilla
2 eggs
2 cups shredded carrots (I like fine shreds)
1/2 cup drained crushed pineapple (this is what makes it extra amazing!)
1/2 cup chopped pecans (optional – I like lots!)
1/2 cup raisins (optional – you’ll never find them in MY cake!)

1. Preheat oven to 350 degrees. Grease and flour (or spray) a 9 x 13 pan.

2. In medium bowl, combine flour, baking soda, salt and cinnamon. Set aside.

3. In large mixing bowl, combine sugar, oil, vanilla and eggs. Beat well. Stir in flour mixture, then carrots, pineapple, nuts (and raisins if you insist.)

4. Pour into prepared pan. Bake for 50 – 60 minutes or until done in center.

Icing for Cake
(People have actually requested that my mom make an extra bowl of frosting, just so they can eat it by itself! This icing is AMAZING!!)

8 oz cream cheese, softened
2 1/2 cups powdered sugar
6 TBSP butter
2 tsp vanilla
1/2 cup chopped pecans 
1 cup shredded coconut 

1. In medium bowl, combine all ingredients and beat until smooth. Then stir in nuts and coconut. Spread over cooled cake. It’s sooooooo good! You are going to love it!

Notes:
Because this cake is so dense and moist, it might be difficult to make it into a 2 layer cake. Mom always keeps it one layer, which I think is perfect!


Source: My cute little mom, Brenda Joyner.

Christmas Peanut Butter Crackers

      CAUTION!  CAUTION!  CAUTION!!  CAUTION!!  CAUTION!!  CAUTION!!  CAUTION!!

These are just about good enough to make you slap your momma!   Ha-Ha-Ha! No, seriously, these things are scrumptious and addicting.  We make these every year as part of our Christmas Treats Extravaganza! Some families probably just call that night Christmas Eve.  But, we call it our Christmas Treats Extravaganza!  (It’s fun to say. Use your biggest announcer’s voice.  Try it.)  We make a ton of different kinds of goodies/ treats and we eat them for dinner, and then we have plenty for our company that comes to visit.   You should try these, and I promise your family will love them! They almost taste like Nutter butter cookies!

Ingredients:
Creamy Peanut Butter
Ritz crackers
Almond Bark Candy
Wax Paper

Lay out a long piece of wax paper.  Spread peanut butter on a Ritz cracker and sandwich it with another Ritz cracker.  Make these using 1 whole sleeve of crackers.  Once you get this far, set them aside and break your almond bark into squares. Place them into a microwavable bowl, and melt them in the microwave for about 60 seconds.  Take the bowl out of the microwave and try to stir the squares and break them up as much as you can.  Then put the bowl back in the microwave for about 15 seconds.  Then stir and break up lumps. You will do this over if needed until the candy is all melted and smooth.  Then put a Ritz cracker sandwich into the candy and flip it over with the fork covering as much of the sandwich as you can.  You have to work quickly because the hot candy melts the peanut butter!  Then as you pick up the Ritz cracker sandwich with a fork (kind of scoop it up. don’t stab it with the tongs!) , you can tap the fork gently on the bowl to get off excess candy.  Then put the Ritz cracker onto the wax paper you have layed out.  Finish the entire sleeve of cracker sandwiches you have made. 

You can get about 1 & 1/2 sleeves of Ritz cracker peanut butter sandwiches dipped to one package of almond bark candy.

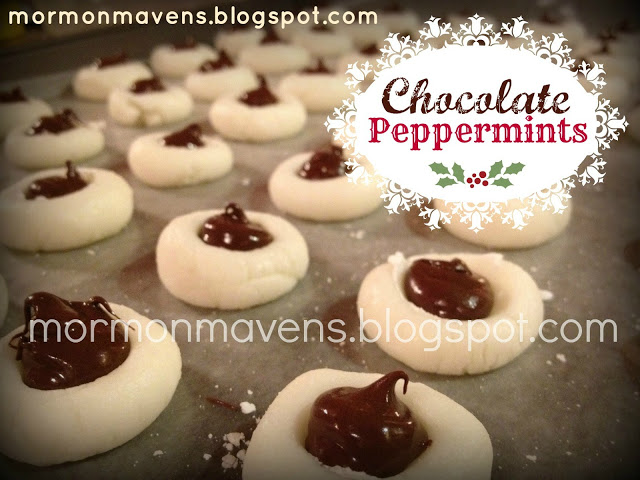
Chocolate Peppermints

I recently made these little gems for a family gathering and they were quite tasty.  A great recipe for the holidays or for special events….or just because you want ’em!

Ingredients:
1 pound powdered sugar
4 ounces cream cheese, softened
1/4 tsp. peppermint extract
6 ounces semisweet chocolate chips

1.  In a mixer, slowly add the sugar to the cream cheese, working in a little at a time, until well blended.  Add the peppermint extract and mix well.  Cover mixer bowl with a damp cloth.
2.  Line a cookie sheet with wax paper.  Roll your peppermint “dough” into teaspoonful sized balls and place on wax paper.  Make an indentation in each ball, either with your finger or with the back of a 1/4-teaspoon.   Cover and refrigerate while you get the chocolate ready.
3.  Melt the chocolate chips in a disposable decorating bag in the microwave until fully melted.  Snip off the very end and fill each indentation.  (OR, if you don’t have these bags–but you should cuz they’re awesome– melt the chips in a microwave proof bowl and then pour the chocolate into a ziplock bag, seal, snip the end, and fill the indentations).  Refrigerate until set.

Notes:

  • Take them out of the fridge for a half hour to an hour before serving.
  • While making the balls, keep the unused “dough” covered so it won’t dry out. 
  • Make the indentations as you go.  If you wait until you’ve formed all the balls, the dough will crack.
Source:  from Amy at She Wears Many Hats

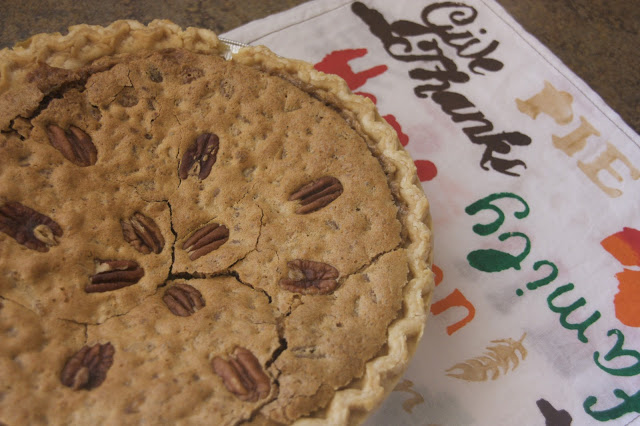
Pecan Pie

‘Tis the season of PIE! I love pie. Pecan is my favorite. Or maybe Banana Cream. Or maybe Chocolate Cherry. Or maybe…

Ok, you get it. I love pie.

Last year I wanted to make a Pecan Pie. The trouble was I had all the ingredients except Karo Syrup. No opportunity to go to the store was presenting itself and I was desperate for PIE! So I did what we all do when we’re in a pinch. I went to All Recipes to see if, perchance, there was a Pecan Pie recipe without corn syrup in it. Success!!

I know all my Southern friends will be skeptical. I was. But, like I said, I wanted pie, and with over 1300 ratings with 4.5 stars, I thought I’d give it a go. I’m so glad I did! It’s delish and easy–two requirements of mine.

Ingredients:
2 Eggs, room temperature
1/2 Cup (1 stick) Butter, melted
1 Cup light brown sugar
1/4 Cup white sugar
1 Tbsp all-purpose flour
1 Tbsp Milk
1 tsp Vanilla
1 Cup chopped Pecans
1 9-inch unbaked pie crust
A few whole Pecans for garnishing if you wish

1. Preheat the oven to 350 degrees F.
2. In a large bowl, beat eggs until foamy. Stir in the melted butter.
3. Stir in both sugars and flour. Mix well.
4. Add the milk, vanilla, and chopped nuts.
5. Pour into the unbaked pie crust. Garnish the top with pecans (opt).
6. Bake for 15 minutes. Reduce heat to 300 and bake 50 minutes more, or until done.

*As per reviews, I made a slight change to the original baking time which began at 400 degrees and reduced to 350 for lessor times.

Happy Holidays to you!

Source: allrecipes.com, Elaine Helms

Mistaken Chocolate Brownie Cake

 
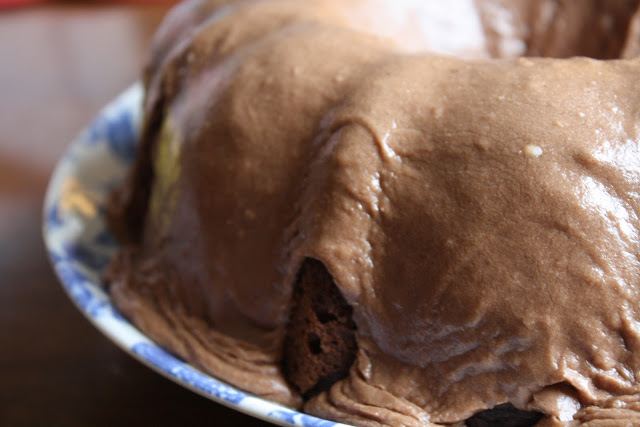
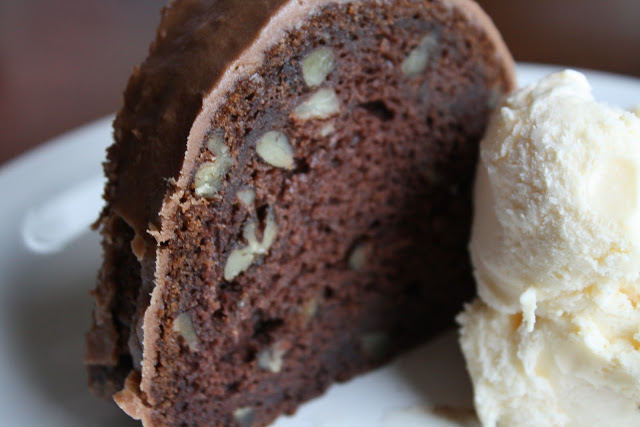
So, I have never said that I was a great cook.  Never.  I try.  But, you know what, I walk away from the oven and help someone with homework, or I have to get a band aid for someone, or I have to run upstairs and take the clothes out of the washer and put them in the dryer.  You know you can’t be distracted when your cooking.  Everyone knows this. I know it,  I just choose to multi-task 😉  This cake was a big mistake!  It turned out Delicious but it wasn’t even supposed to be a cake!!!  I was attempting to make a dessert to take over to friend’s home for a “get-together”  and like I always do, I tried a new recipe at the last minute.  I was trying The Pioneer Woman’s Knock You Naked Brownies, but, um, I didn’t make the brownies.  I mixed the cake mix like the box said then I added all of the ingredients from the brownie recipe.  It was very wet.  I wasn’t sure if I could even bake it. But, I put it aside and made the brownies and then went back to the mess I made. I just stared at it.  It had a lot of stuff in it.  Ingredients that I didn’t want to waste.  So I dumped it into a bundt pan and cooked it. Then I made my homemade chocolate frosting and it was Delicious!  Very moist and chocolaty and just good!  So, that mistake turned out well.
 
Cake:
1 box of Betty Crocker Cake Mix
(the ingredients needed on the box)
1 cup chopped pecans, or less, or none!
1/3 cup evaporated milk
1/2 cup butter, melted
 
Preheat oven to 350 degrees. Spray your bundt pan with cooking spray really generously.
In a large bowl, mix the cake mix together like you normally would.  Leave it in the mixing bowl. Add the following to the mixture, pecans, evaporated milk, butter.  Mix these into the cake batter.  Pour into the bundt pan, and bake for at least 30 minutes.  You may need to let it cook a bit more, but check it with a toothpick .  Let it cool completely before frosting.
 
Frosting:
3/4 bag powder sugar
1/2 cup Hershey’s baking cocoa
1/8 cup milk
1/2 stick butter, room temperature (don’t melt it, let it set out and soften)
 
This is the starter mix for the frosting.  You may need to add a tad more milk, add only a Tablespoon at a time. Taste it, and go from there. More chocolate if it needs to be more chocolaty for you.  More powder sugar, if it needs to be thickened or sweetened.
 
 Adapted from The Pioneer Woman.


Ghost Cupcakes

We brought in October by serving these little babies at a lunch date. My four-year-old daughter was SO EXCITED to help me with the eyes. They turned out cute and were a tasty treat for all!

Ingredients:

1 (15.25 oz) box chocolate cake mix with pudding added (I used Betty Crocker’s Devil’s Food Cake)
1 Cup Buttermilk
1/2 Cup Vegetable Oil
3 Eggs
1 Cup Mini Chocolate Chips
4.5 Cups white candy melts or coating wafers
24 Large Marshmallows
48 Mini Chocolate Chips (about 1 Tbsp)

1. Preheat oven to 350 degrees F. Place paper baking cups in 24 regular-sized muffin cups.
2. In a medium bowl, mix cake mix, buttermilk, oil, and eggs on low speed about 30 secs, then increase the speed to Medium for 2 minutes.
3. Stir in 1 cup mini chips. Divide batter evenly between the muffin cups
4. Bake 18 – 20 mins, until toothpick inserted comes out clean. Cool for 10 minutes. Remove muffins from the tins and cool completely on a wire rack.
5. In a large microwavable bowl, microwave the white candy according to package directions until nice and smooth.
6. Place one marshmallow on each cupcake and spoon the white chocolate over to cover letting the excess drip down on the cupcake. Cool slightly. This “cooling slightly” is essential to success. If you put the eyes in too quickly, you’ll end up with LAAA-AAAZZZZY EEEYYYEEES.
7. Press two mini chocolate chips into the side for eyes.
8. Let stand, until set–about 15 minutes.

HAPPY HAUNTING!!

Note: I frosted my cupcakes (as you can see) before I put the mallows on so they would stay in place. It worked well, but the original instructions did not say to do that.

Source: Pillsbury