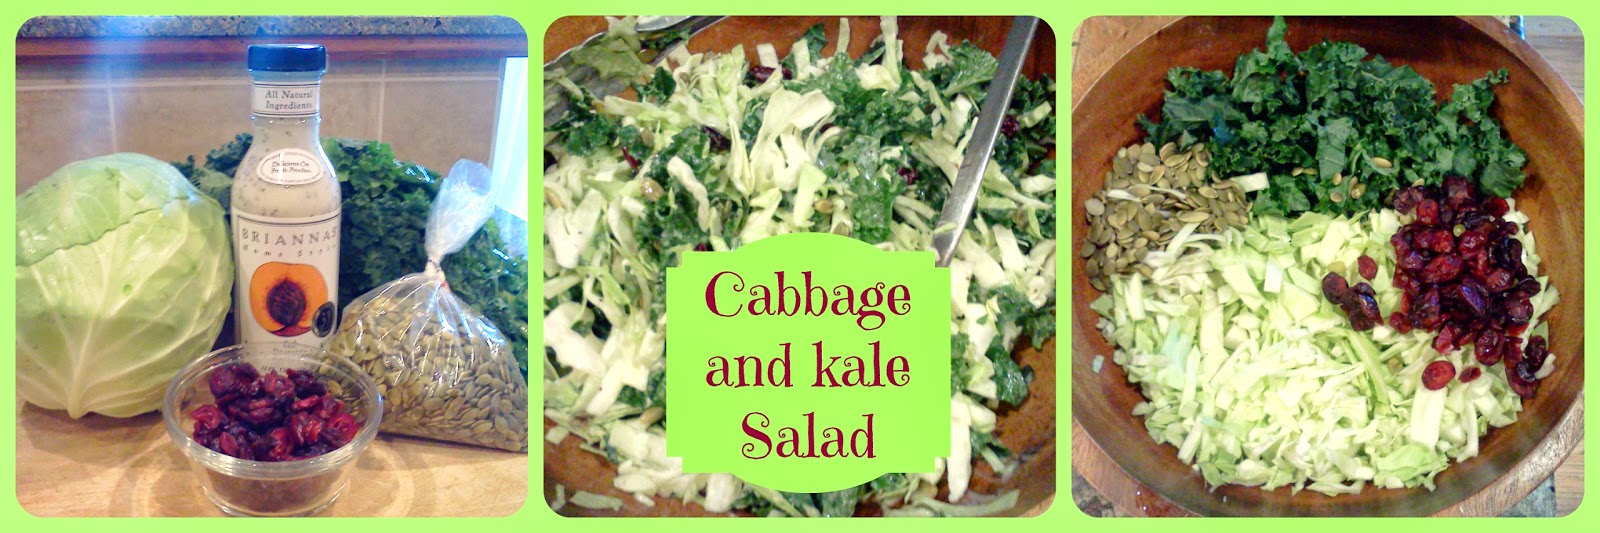
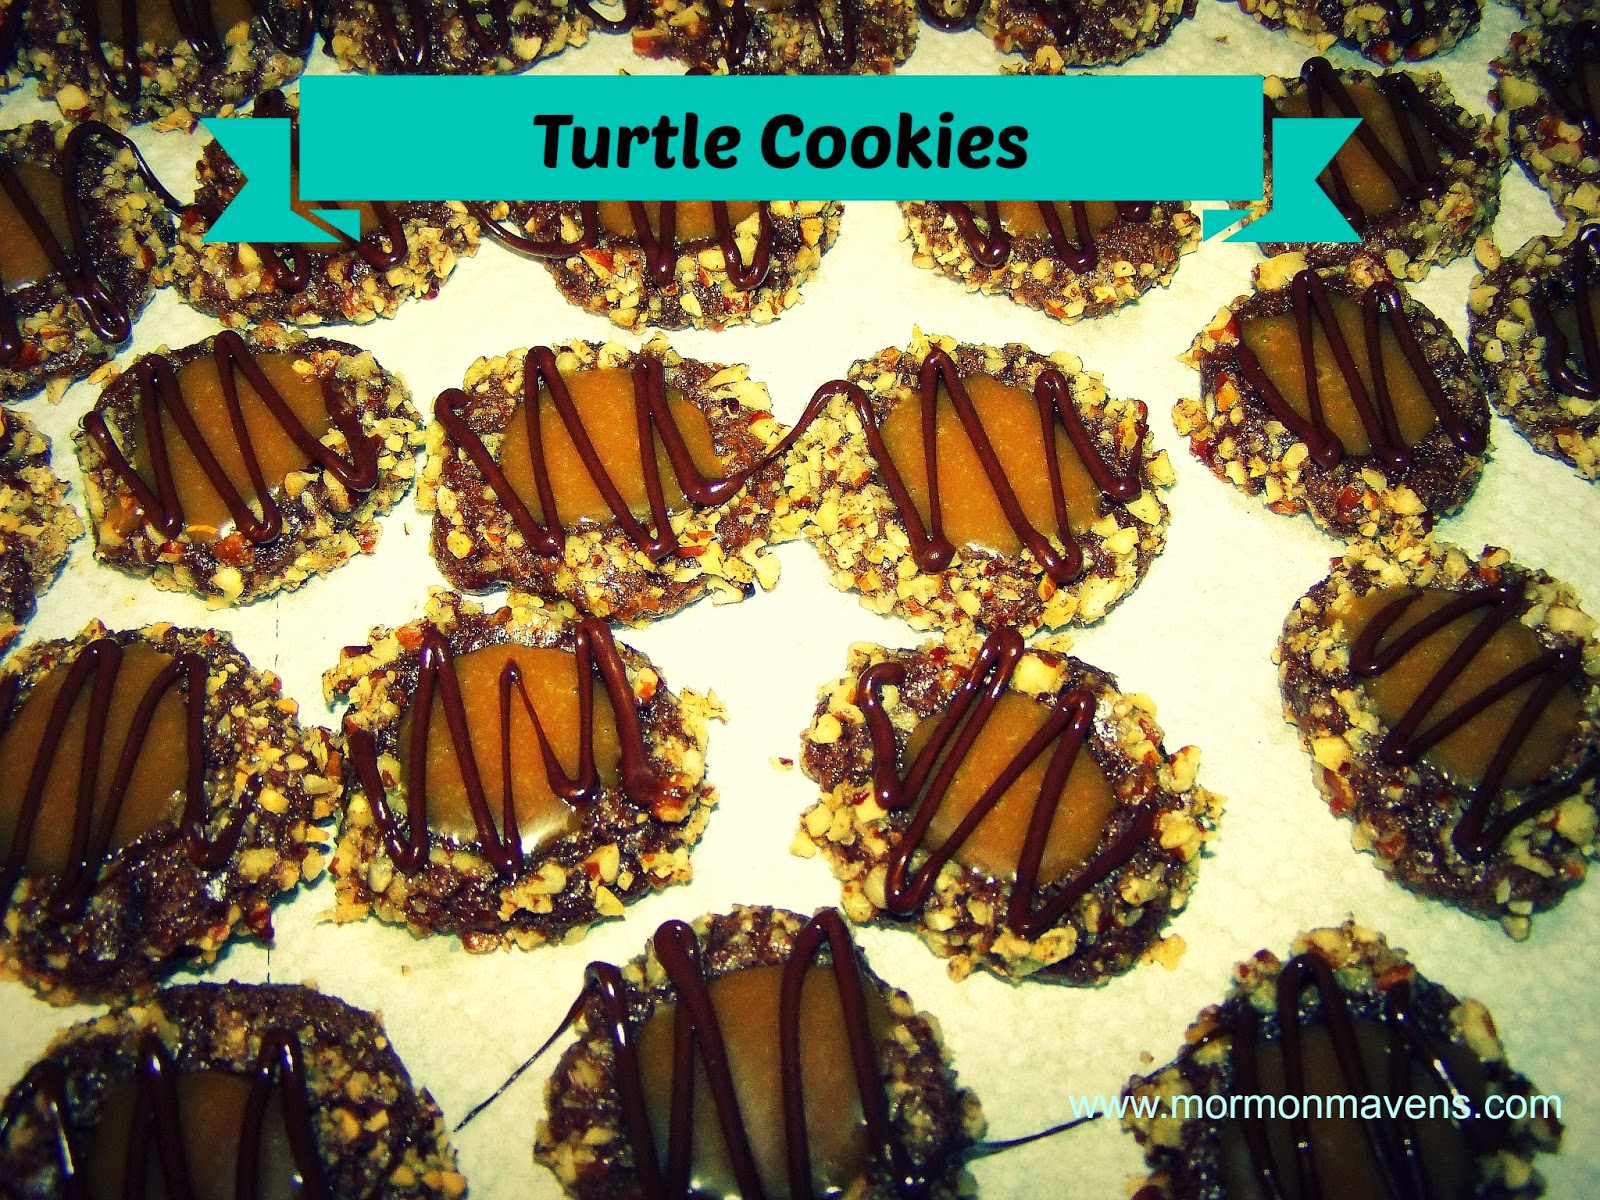
Look Not Behind Thee


It’s a new year.

And of course, we all have at least thought about what our goals are for 2014.  Sometimes we may not want to even try for goals because we have experienced failure in the past.  Maybe we are bitter at where life has “brought” us up to this point.  Maybe we can’t let the past go.

But we should remember this:

Failure is only the opportunity to begin again, only this time more wisely.  –Henry Ford

Lot’s wife had the opportunity to begin again.  She didn’t take it.  Really, she didn’t just “look” back, she yearned for what she didn’t want to leave behind.  She had comfort there and was unwilling to leave that comfort zone.  She had no faith in what the Lord had in store for her.

What comfort zone are we wrapped up snugly in?  And why are we so unwilling to leave it for frontiers unknown?  What are we afraid of?  Failure?  Pain?  Disappointment?

We must make a choice between suffering the pain of making mistakes (often inaccurately equated with failure) or the pain of regret.  I mean, let’s face it….that’s the choice.  Because none of us will pursue a goal without making mistakes.  But nearly every worthy goal left unpursued will become a regret.

If we fail to give our best personal self and undivided time to those who are truly important to us, one day we will regret it.  –Dieter F. Uchtdorf

This quote applies not only to loved ones but to ourselves.  We should be truly important to ourselves!  And if we don’t give our best personal selves TO ourselves in order to achieve our goals, we will be filled with regret and remorse.

As we give our best selves to ourselves and our loved ones, let’s remember to be kind to us.  Let’s remember that we improve ourselves in small, consistent ways.  Progress, not perfection.   Steady, persistent improvements in our lives will yield amazing results.

My grandfather used to love to ask me this question:  If I paid you a penny the first day but doubled that pay each day after that for a whole month would you work for me?   The total after 30 days is $5,368,709.12!!!!  But it all started with one little penny.

Go ahead.  Invest a penny in 2014.

Cabbage and Kale Salad

So, there is this salad mix that you can get from Costco. I decided I would attempt my own version.

Really easy, super crisp, sweet and tangy. There aren’t any measurements, just make as much or as little as you want.

Cabbage and Kale Salad

Green cabbage (red as well, if you choose)
Kale
dried cranberries
pumpkin seed kernels
Brianna’s Poppy Seed dressing

Wash and finely chop the cabbage.
Wash, remove ribs and roughly chop the kale.
Lightly toast the pumpkin kernels in a skillet
Add everything to a bowl. Pour some dressing over top. Toss it all together.

Chicken & Broccoli Casserole

I got this great recipe from a good friend named Ginni.  I do things differently with it from time to time, but it is still basically the same. Its all good.  You can not go wrong with this one. Its simple, tastes great, comforting, and all in one dish!  Enjoy!

Ingredients:
1 box Chicken Flavored Stovetop Stuffing Mix. Prepared according to package directions.
3 chicken breasts, cooked the way you like it (I grill it.) chopped into bite sized pieces
1 head of broccoli, cleaned and cooked until it looses some of the crunch, cut into bite sized pieces.
1 can cream of chicken
1 can cream of mushroom
1 cup water, or milk
salt
pepper
Swiss cheese slices

Preheat oven to 375 degrees. Spray your baking dish. I use an 11×7 size dish. Spread out your Chicken flavored Stovetop Stuffing on the bottom of the baking dish.  I usually spoon in the stuffing and then wit  a wet spoon I spread it out a bit until the bottom of the dish is covered.  Sprinkle the chicken over the stuffing evenly.   Sprinkle the broccoli over the chicken. then in a separate bowl pour in the cream of chicken and the cream of mushroom soup. add the cup of water and stir until incorporated. Continue to add water until the mixture is pourable. Pour the mixture over the casserole. Sprinkle with salt and pepper. Lay swiss cheese slices over the top of the casserole. Bake at 375 for about 25-30 minutes. Watch that the cheese doesn’t brown too much. You can always turn it down or cover it with tin foil.

Original recipe by Ginni White

“True and Faithful”

I have a connection to the 10th president of The Church of Jesus Christ of Latter-day Saints.  I was born on his birthday, July 19th (a mere 88 years after his 1876 birth).  I am excited to study his teachings this year in Relief Society.  As I was perusing the first lesson in the new manual for our 2014 course of study, I read the following the words:

Taken from the manual, Teachings of Presidents of the Church:  Joseph Fielding Smith, “President Joseph Fielding Smith ‘used three words that I can never forget, ‘ recalled President Gordon B. Hinckley.  Those words were “true and faithful.’  President Hinckley said, “In his public addresses, in his private conversation, in his prayers to the Lord, he pleaded that we might be true and faithful.”  President Thomas S. Monson shared a similar memory:  “Even in his advanced years, [he] always prayed, ‘May we be true and faithful to the end.'”

My initial reaction was, “huh, that’s not what I was expecting”.  Then it hit me!  President Smith had been born into a family that had experienced many dramatic events in the history of the church.  His grandfather, Hyrum Smith, was martryed alongside his brother Joseph Smith  (the founder) of the Mormon church.  His father, Joseph F. Smith, was only 5 years old when his father was martyred and helped his family migrate to Salt Lake City across the plains.  His mother, Julina Smith, came from pioneer stock as well.  His heritage was rich indeed.  Therefore, being “true and faithful” was a magnanimous task yet so pertinent and straightforward to the heart of the gospel of Jesus Christ.

I began to ponder how my life could be changed for the better if I were to put those 3 words to the test.  I desire to be “true and faithful” to the end.  I decided to make these 3 words part of my New Year.  May we all be found striving to be “true and faithful”.

Christmas Vacation!

It’s been almost two and a half years since Mormon Mavens in the Kitchen was born.  In that time we’ve posted hundreds of our favorite recipes.  It’s a labor of love that we all enjoy but we hope you’ll understand if we take a short vacation to enjoy our families!

We’ll be back on January 6th!!

Merry Christmas and Happy New Year to you all!

Family

12 years ago today I got the best Christmas present of my life, I married my husband for time and all eternity in the Idaho Falls LDS Temple.    The greatest lesson I have learned in these last 12 years of marriage is that this life is made more full, more happy, and more meaningful by being a part of a family unit.    

In The Family: A Proclamation to the World the First Presidency of the church states:

“THE FAMILY is ordained of God. Marriage between man and woman is essential to His eternal plan. Children are entitled to birth within the bonds of matrimony, and to be reared by a father and a mother who honor marital vows with complete fidelity. Happiness in family life is most likely to be achieved when founded upon the teachings of the Lord Jesus Christ. Successful marriages and families are established and maintained on principles of faith, prayer, repentance, forgiveness, respect, love, compassion, work, and wholesome recreational activities. By divine design, fathers are to preside over their families in love and righteousness and are responsible to provide the necessities of life and protection for their families. Mothers are primarily responsible for the nurture of their children. In these sacred responsibilities, fathers and mothers are obligated to help one another as equal partners. Disability, death, or other circumstances may necessitate individual adaptation. Extended families should lend support when needed.”

I am so grateful for my family and especially for my husband who is devoted to me and his 3 (almost 4) children.  I pray that you and your family be blessed this holiday season and that you remember what a gift it is to be a part of a family!

Creamy Ham and Potato Soup

This is a great and easy recipe to use up your left over ham!  Enjoy

3 1/2 cups peeled and diced potatoes
1/3 cup diced celery
1/3 cup finely chopped onion (I like to use dried onions because lets face it chopping onions is no fun)
1/2 cup carrots, diced
1 cup cooked ham (I use ham steak)
3 1/4 cups chicken broth
salt and pepper to taste
5 tbls. butter
5 tbls. flour
2 cups milk

Combine potatoes, celery, onion, carrot, ham and chicken broth together in stockpot.  Bring to a boil then turn down heat to simmer until vegetables are tender.  Add salt and pepper.

In a separate saucepan, melt butter over medium-low heat.  Whisk in flour and cook stirring constantly until think (about 1 min).  Slowly stir in the milk and continue stirring over medium-low heat until thick (4-5 min).

Add the milk mixture to the stockpot.

Serve with grated cheese, chives, bacon etc.

SOURCE: http://www.the-girl-who-ate-everything.com

Turtle Cookies


Turtle Cookies
 
    These might be my new favorite cookie! They are soft, the caramel is gooey, and aren’t they pretty? The perfect holiday cookie. They were also not difficult at all and pretty foolproof, which is always a bonus!
 
Ingredients:
 
Cookie:
1 C. flour
1/3 cup cocoa
1/4 tsp salt
1 stick (8 Tbsp.) butter, softened
2/3 C. sugar
1 large egg, separated, plus one additional egg white
1 tsp vanilla extract
2 Tbsp milk
1 1/4 c. finely chopped pecans
 
Caramel filling:
14 traditional caramels (I used Werther’s soft caramels)
3 Tbsp. cream
 
Chocolate Drizzle:
2 oz. semi-sweet chocolate chips or chocolate bar
1 tsp shortening
 
Directions:
 
Combine flour, cocoa, and salt in a bowl and set aside. Beat butter and sugar with electric mixer on med-high speed until light and fluffy, about 2 minutes. Add egg yolk, vanilla, and milk until incorporated. Reduce speed to low and add flour mixture just until incorporated. Do not overbeat. 
 
Wrap dough in plastic wrap and refrigerate at least one hour.
 
Whisk egg whites until fluffy (by hand). Place pecans in a separate bowl. Roll dough into 1 inch balls. Dip in egg whites and then roll in pecans. Place on cookie sheet at least 2 inches apart. Use the back of a 1/2 teaspoon measuring spoon to make an indentation in the center of each cookie. Bake at  350 until set, about 12 minutes.
 
For caramel filling: Microwave caramels and cream, stirring occasionally, until smooth and melted, about 1-2 minutes.
 
When cookies come out of the oven, gently re-press indentations. Fill with 1/2 tsp. caramel filling. Let cool on the pan for 10 minutes, then remove to wire wrack. 
 
Melt chocolate and shortening together in a plastic bag dipped in hot water. Cut tip off bag and drizzle over cooled cookies.
 
Yield: About 30 cookies. 
 
Source: America’s Test Kitchen
Cookie:
1 c. all-purpose flour

campaignIcon
1/3 c. cocoa powder

campaignIcon
1/4 tsp. salt

campaignIcon
8 T. (1 stick) butter, softened
2/3 c. sugar
1 large egg, separated, plus 1 additional egg white
2 T. milk
1 tsp. vanilla extract
1 1/4 c. pecans, finely chopped
 
 
Caramel Filling:
14 soft caramel candies (I used Kraft Traditional Caramels)
3 T. heavy cream
 
 
Chocolate Drizzle (optional):
2 oz. semi-sweet chocolate (I used 2 squares of Baker’s semi-sweet chocolate)
1 tsp. shortening


Directions
Prepare the Cookies:  
1.  Combine flour, cocoa, and salt; set aside.

2.  With electric mixer on medium-high speed, beat butter and sugar until light and fluffy, about 2 minutes. Add egg yolk, milk, and vanilla; mix until incorporated. Reduce speed to low and add flour mixture until just combined.

3.  Wrap dough in plastic wrap and refrigerate until firm, 1 hour.


4.  Whisk egg whites in a bowl until frothy.  Place chopped pecans in another bowl.  Roll chilled dough into 1-inch balls, dip in egg whites, and then roll in pecans.  Place balls about 2 inches apart on a baking sheet. Using a 1/2 teaspoon measuring spoon, make an indentation in the center of each dough ball.

5.  Bake at 350 degrees until set, about 12 minutes.


Prepare the Caramel Filling:  
6.  Microwave caramels and cream together in a small bowl, stirring occasionally, until smooth, about 1 to 2 minutes.

7.  Once cookies are removed from the oven, gently re-press the indentations.  Fill each indentation with about 1/2 teaspoon of the caramel mixture. Cool on the pan for 10 minutes, then transfer to a wire rack to cool completely.


Prepare the Chocolate Drizzle (optional):  
8.  Place chocolate and shortening in a small zip-top plastic bag.  Set bag in a bowl of warm water to soften.  Gently knead the chocolate with your fingers until melted and smooth, placing back in the warm water for a minute or two as needed.

9.  Snip a very small hole in the corner of the plastic bag.  Drizzle chocolate over the cooled Turtle Cookies.

Makes about 30 cookies.

 
Enjoy! 

Read more at http://www.thekitchenismyplayground.com/2012/09/insanely-delicious-turtle-cookies.html#vAFMPMioIaCqGHIJ.99

Sausage and Apple Stuffing

Ingredients:

2 sticks plus 3 T. butter, divided
2 c. water
2 (14 to 16 oz) bags of your favorite dried cornbread stuffing mix
1 lb. pork sausage
1 large onion, diced
3 cloves garlic, minced
2 stalks celery, diced
1 t. dried thyme leaves
1 t. dried sage leaves
1 c. chopped walnuts
3 medium apples, cored and sliced
2 to 3 c. homemade giblet stock or low sodium chicken broth

*I added a cup or so of dried cranberries for taste and color.

Directions:

1.  In a large pot melt 2 sticks butter in water.  When melted add dry cornbread stuffing, stirring to incorporate liquid, set aside.

2.  In a large saute pan set over medium-high heat melt 1 T. butter and add sausage.  With a wooden spoon break up sausage and saute until lightly browned and cooked through.  Transfer sausage to paper towels to drain.

3.  In the same pan melt remaining butter and saute onions with the garlic, celery, thyme and sage until onions are translucent and celery is crisp tender.

4.  Add walnuts and saute for 1 minute.  Add apples and saute for one minute more.  Remove from heat.

5.  Combine cornbread stuffing with sauteed ingredients and stuff turkey.  Roast turkey as usual.

Alternatively:  Fill a 10x15x2 inch pan with the stuffing, moisten with the giblet stock and bake in a preheated 350 oven, covered with foil for 1/2 hour.  Remove foil and bake until top is lightly browned, about 15 minutes more.

Source:  Food Network

How To Make Melissa’s Yummy Cinnamon Rolls – Photo Tutorial

I originally posted this on my own blog, but wanted to share it here also since so many people are enjoying this recipe! Perfect for Christmas morning, or to take to Christmas parties! I promise they are easy to make, and they are sooooo delicious! 

Cinnamon Rolls


(I know this picture is obnoxiously large, but I wanted you to be able to get up close and personal with these cinnamon rolls. ha! ha!)


1. Start with the 30 Minute Roll Recipe
Note: This recipe makes about 50 cinnamon rolls! You might want to half the recipe!


Mix and rest 10 minutes:
3 ½ cups warm water                          
¾ cup sugar (OR 1/2 cup honey)
1 cup oil                                                
6 TBSP Yeast (Less yeast may be used, but rising time will be longer)

Add:
1 TBSP Salt                                          
3 eggs (can use egg powder and water)
10 ½ cups flour (wheat flour turns out really light and fluffy)
Mix in mixer or knead. Shape into rolls. Raise 10 minutes. *Bake at 425° for 10-12 minutes or until done. 

2. Here’s How to “Shape into Rolls”
Cut dough in half. Roll out one of the sections into a rectangle about ¼ inch thick (or so!) Spread soft or melted butter over the dough. Spread a mixture of brown sugar and cinnamon over the butter. (I use about 4 cups of brown sugar to 3-4 TBSP of cinnamon. I go heavy on the cinnamon and never really measure. I just dump it in until it taste the way I want it to.) Roll up. Cut into 1 inch sections and place on cookie sheet. Let rise for about 10 minutes or so. Repeat with other section of dough, or just make them into dinner rolls.

*I prefer to bake them at 375 degrees until they are starting to lightly brown and dough is done in the middle. Take out of oven and let cool for about 5 minutes or so. Spread on or drizzle on the frosting.

Photo Tutorial:

Start off by shaping the dough roughly into a rectangle.
Cinnamon Rolls
Roll out the dough about 1/4″ thick. This will take practice.
Roll out dough
Spread soft or melted butter over dough. 
Spread on the Butter
Put cinnamon sugar on the dough.
Cinnamon Sugar
Spread it out smoothly – feel free to use your hands.
Spread out Cinnamon Sugar
Roll up the dough.
Roll up the dough
Cut into 1 inch slices.
Cut the dough
Place them neatly on a cookie sheet and let them rise. This is a “jelly roll pan”, which is half of a sheet cake. You can put them on smaller pans that just hold 12 cinnamon rolls.
Let them rise
Bake them in the oven and look how beautiful they are!
Bake in oven
Oh. My. Yumminess!
The best cinnamon rolls
Spread on your cream cheese frosting. (Recipe below)
Spread on Frosting
I wish you could smell these and taste them! Make some! YUM!!!! 
The best cinnamon rolls

3. Here’s How to Make the Frosting
Okay, I have to admit that I never measure! But here is an estimate….Soften about 8 oz of cream cheese and 3 tablespoon of butter in a large plastic bowl. Add 3-4 cups powdered sugar, 1 teaspoon of vanilla extract, and a few (maybe 4??) tablespoons of milk. Mix with hand mixer…you may need to add more milk or powdered sugar to get the right consistency you like. I like it kinda thin like a cake batter, not thick like cake icing.

4. Enjoy!

Eat immediately with a glass of milk and enjoy! They are good for a few days, but you will want to warm them up for about 8 seconds in the microwave!