Baked Buffalo Wings

One of my favorite appetizers to order at a restaurant is Buffalo Wings.  A good plate of Buffalo Wings makes me a happy girl.  But I usually ONLY have them on a night out because they are kind of indulgent.  Baking instead of frying makes these wings a dish you can eat a little more often.  Without the side order of guilt.

Ingredients:
cooking spray
3/4 cup all-purpose flour
1/2 tsp. cayenne powder
1/2 tsp. garlic powder
1 tsp. salt (divided)
about 20 chicken wings (you know, appetizer size)
1/2 cup butter, melted
1/2 cup Frank’s Red Hot Wing Sauce (or Texas Pete or Texas Pete Wing Sauce)
2 Tbsp. honey
2 Tbsp. soy sauce

1.  Line a baking sheet with foil.  Then set a cooling rack in the baking sheet.  Spray this with cooking spray and set aside.  Rinse the wings and then dry them well with paper towels.
2.  Combine the flour, cayenne, garlic powder, and 1/2 tsp. of the salt in a gallon-size zip-top bag and shake well to combine.  Drop the wings into the bag, zip closed, and shake to coat.  Remove wings one at a time, shake off any extra flour, and place on the sprayed cooling rack.
3.  Place the wings in the fridge, uncovered, for one hour at least.  Preheat your oven to 400 degrees.  Remove the wings from the fridge and bake for 25 minutes.  Remove sheet from the oven, turn each wing over, and return to the oven for another 25 minutes.
4.  Combine the butter, wing sauce, honey, soy sauce, and remaining 1/2 tsp. salt in a bowl.  Whisk until well blended.  When wings have finished their second trip to the oven, dip 3 or 4 at a time into the sauce mixture, making sure the wings are completely coated.  Return wings to baking sheet/rack and bake  for 7-9 minutes.
5.  Remove wings from oven, place on a serving platter, and pour any remaining sauce over them.  Serve with the traditional celery sticks and blue cheese dressing.

Yum!

Source:  Lana’s Cooking via Pinterest

Faith

“DOUBT IS A PAIN TOO LONELY TO KNOW THAT FAITH IS HIS TWIN BROTHER”…………Khalil Gibran

Stop a moment and really ponder this simple phrase.

We know that lightness and darkness cannot occupy the same space at the same time.

 “Somewhere in your quest for spiritual knowledge, there is that ‘leap of faith,’ as the philosophers call it. It is the moment when you have gone to the edge of the light and stepped into the darkness to discover that the way is lighted ahead for just a footstep or two.”—Boyd K. Packer

Faith IS an exercise.  Though my faith “muscles” have atrophied as of late, I will get up each new day and have the goal to exercise them, to bring those muscles to a state of being chiseled and honed, a spiritual 6 pack if you will.  I’ve got to “go for the burn”; no pain – no gain.  You get the picture!

Nutty Apple Salad

A cool summer salad for hot summer days. Think of things you like with Peanut Butter and it might be in this salad!  
Ingredients:  
2 Granny Smith Apples
3 stalks of Celery, diced
2 C seedless grapes, halved
1 C mini marshmallows (I omitted these in a valiant effort to use less sugar, but by all means…toss ’em in!) 
1/3 C cold Evaporated Milk
1/2 tsp sugar (I used a squirt of Agave Nectar)
1/4 tsp vanilla extract
3T Mayo (I used Vanilla Yogurt because I despise mayo!) 
3T (heaping Tablespoons) creamy Peanut Butter
1/2 C mixed nuts (or nuts of your choice), chopped
Prep:  Before you even think about getting your celery and fruit chopped up, put a medium sized glass or metal bowl in the freezer and a can of evaporated milk in the fridge. You’ll want them both nice and cold. Ok…now you can chop the apples, dice the celery, half the grapes and set them aside. And if you’re using marshmallows, add them in with this stuff.

After your bowl is nice and COLD, take it out of the freezer–maybe with an oven mitt so it doesn’t stick to your hands…and don’t lick it 😉  You know I’m thinking of the Christmas Story, right? Ok…moving on:

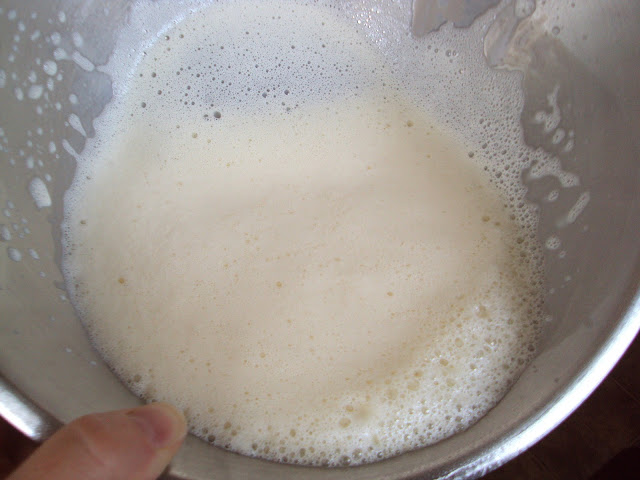
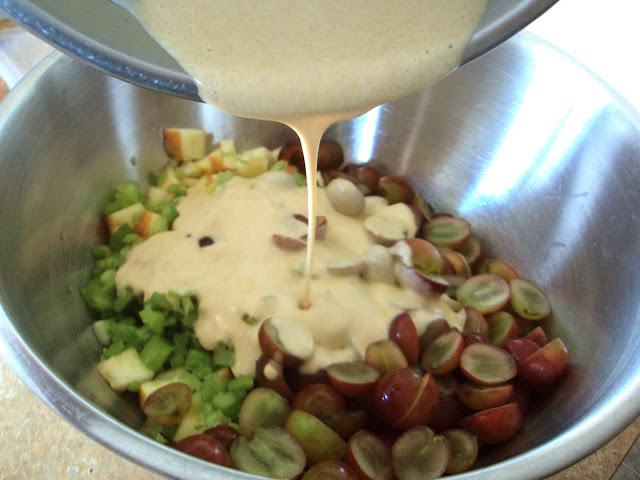
Next, pour the cold evaporated milk into the cold bowl and beat it on high with a mixer until it’s nice and frothy (I love that word).  Beat in the yogurt and PB, take a little taste, then pour the mixture over the solids.

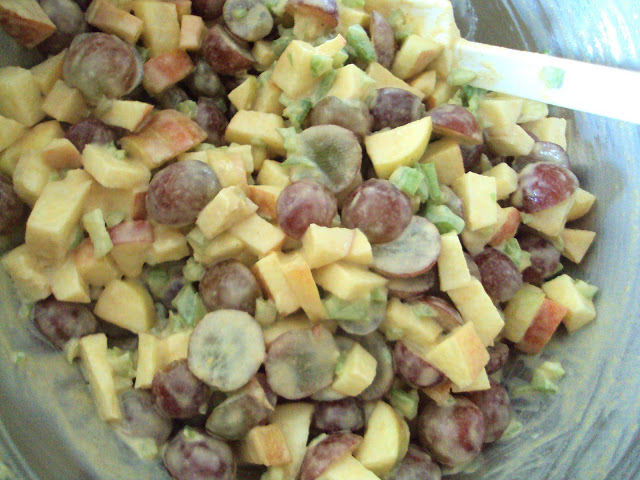
Stir it all together and chill until serving.  Yum!

Cynthia’s Fried Okra

Does anyone else out there just love the Mitford Series of books by Jan Karon?  I have enjoyed every one of the books that I have read and they are so uplifting, funny, clean–just really good reads.  Anyway, one Christmas my sister gave me the Mitford Cookbook & Kitchen Reader–bunches of recipes contributed by the “characters” in Ms. Karon’s books.  What a fun concept.  So, we had some fresh okra that needed to be cooked and I wasn’t about to boil the slimy things so I decided to fry them up.  I have never really fried a good batch of okra, so I thought if anyone has a good recipe for southern fried okra it would be somebody in Mitford.  So here you go…


Ingredients:
1 pound fresh okra
2-3 cups milk
2 1/2 cups White Lily Self-Rising Cornmeal
2 tablespoons self-rising flour
1 tablespoon salt
1 teaspoon freshly ground black pepper
1 teaspoon Creole Seasoning
      Vegetable oil for frying


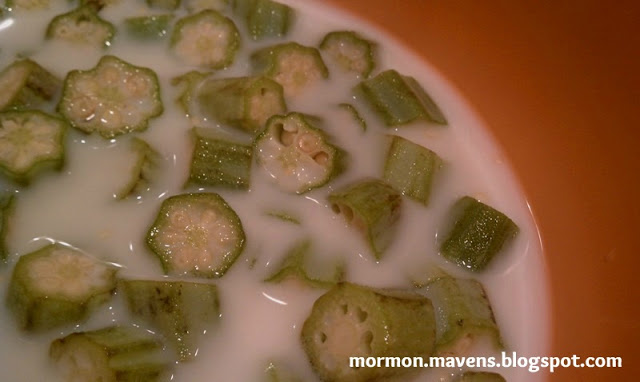
1.  Cut off tips and stems of okra.  Cut into 1/2 inch slices and place in a large bowl.  Pour milk over the okra and let them soak for at least 10 minutes, or longer up to 30 minutes.

2.  In a separate large bowl, combine cornmeal, flour, salt, pepper and Creole seasoning.  I didn’t have any, so I found this recipe by Emeril Lagasse on line.  Use a slotted spoon to lift the okra out of the milk, allowing  the okra to drain.  Place small batches of okra in the cornmeal mixture, tossing to coat.
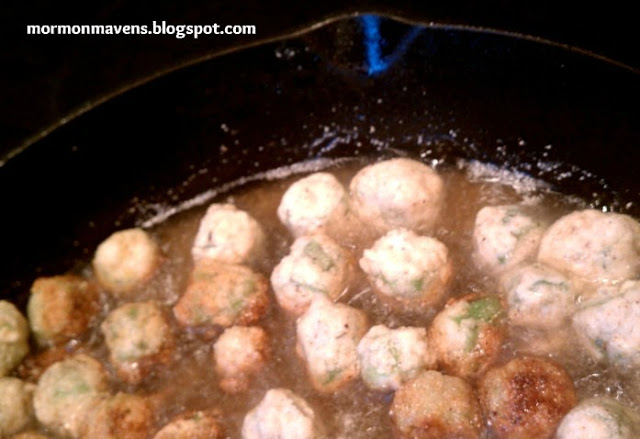
3.  Heat the oil in a deep cast iron skillet.  Lift the okra from the bowl in batches, allowing the excess cornmeal to fall back in bowl.  Fry okra in the hot oil until browned.  Don’t overcrowd the skillet.  Remove the okra from the oil with a slotted spoon and place on paper towels to drain.
4.  You can adjust the salt and pepper to taste while it is still hot.


Source: Jan Karon’s Mitford Cookbook & Kitchen Reader


Standing Firm

We live in a world where we are constantly battling to find firm ground to stand on and the strength to go on. There are so many different struggles that we, as humans, face–so many ways to be pulled away from the gospel. Whether those are physical or mental infirmities, distractions, etc., it is sometimes hard to grasp hold of the truths that we know are important.

I found two quotes from our prophet, President Monson concerning testimonies–and really, if you think about it, testimony is that base that keeps us, as individuals, going. What do you believe? Why do you believe it? What experiences have kept you steadfast in the gospel? Everyone is so different and yet we all have the same goal. Exaltation. To be with God, and our families, FOREVER.

It is my personal opinion that the following is a key to getting there. And when we are living our testimony, we are a beacon to those around us.

President Thomas S. Monson:

“My…plea…is that you have the courage to stand firm for truth and righteousness. Because the trend in society today is away from the values and principles the Lord has given us, you will almost certainly be called upon to defend that which you believe. Unless the roots of your testimony are firmly planted, it will be difficult for you to withstand the ridicule of those who challenge your faith. When firmly planted, your testimony of the gospel, of the Savior, and of our Heavenly Father will influence all that you do throughout  your life. The adversary would like nothing better than for you to allow derisive comments and criticism of the Church to cause you to question and doubt. Your testimony, when constantly nourished, will keep you safe.” (April 2009, General Young Women’s Meeting)

“Although that testimony can continue to be fed spiritually and to grow as you study, as you pray for guidance, and as you attend your Church meetings each week, it is up to you to keep that testimony alive. Satan will try with all his might to destroy it. Throughout your entire life you will need to nurture it. As with the flame of a brightly burning fire, your testimony–if not continually fed–will fade to glowing embers and then cool completely. You must not let this happen.” (April 2012, General Young Women’s Meeting)

Mexican Stuffed Shells

I love tacos…. I love pasta. So naturally when I came across this recipe a while back – it was meant to be made. This recipe is so easy and a really nice spin on taco night. I know you’ll enjoy it. It is easy to either kick up the heat or to tame it down by varying the ingredients.


Mexican Stuffed Shells

Ingredients: 
1 lb. ground beef (turkey or chicken would be great too)
1 package taco seasoning
4 oz. cream cheese
16-20 jumbo pasta shells
1.5 cup salsa (more/less depending to your taste)
1 cup taco sauce (at least)
1-2 cup cheddar cheese (depending on how cheesy you want it!)

Directions:
– Preheat oven to 350°.
– In a pan cook ground beef; add taco seasoning and prepare according to package directions. Add cream cheese to beef, cook on medium/low until cream cheese is melted and incorporated. Set aside and cool. (If you want to kick up the heat, diced green chiles would be great to add to the beef.)
– Cook pasta shells and drain. Set shells out individually on cutting board/baking sheet so that they don’t stick together.
– Pour salsa on bottom of 9×13 baking dish.
– Stuff each shell with the meat mixture.
– Place shells in 9×13 pan open side up. Cover shells with taco sauce.
– Cover with foil and bake for 30 minutes. After 30 minutes, add shredded cheese and bake for 10-15 more minutes, with the foil removed.
– Top with any condiments you’d like. Green onions, sour cream, lettuce, salsa, taco sauce… you name it!

Marinated Grilled Chicken

“Kara, can you give this recipe to my mom so she can make it? It is SO GOOD!”

Liam is six years old. He has the most adorable face and the most beautiful hair (that’s right. HE does). I cannot deny the child the one pleasure in life he has asked me for. I daren’t. So, here you go! The real plus is how dang EASY-PEASY it is!
Easy.
Ingredients:
1 Cup 7-UP* 
1/2 Cup Soy Sauce**
1/2 tsp Garlic Powder
1 tsp+ Ground Ginger
5-6 Chicken Breasts (about 1.5 lbs)
1. Mix all ingredients in a 1 Gallon zip lock bag (I do two bags just in case) and refrigerate over night.
Peasy.
2. Slap those bad boys on a grill the next day for lunch or dinner and VOILA!  You’ll have 6-year-old boys…and 80-year-old boys for that matter…lined up begging you to give their moms the recipe. (Please cook the chicken all the way through until the juice runs clear. Those boys will take it all back if they get food poisoning!)
*Sprite works, too, but I really do think 7-UP is better for some reason. I feel a science experiment coming on!
**For a different kick, try 1/4 Cup Soy Sauce and 1/4 Cup Teriyaki Sauce.
NOTE: I think that smaller chicken breasts work better. I always cut the chicken down into “Smallish” sized portions. This way, the portion size is great for kids, too.
Source: My Great Aunt, Audrey
~Kara

Family Favorite Chicken Salad

When it comes to chicken salad, my family can’t get enough! That includes my extended family. It’s a go to meal for all of us. An entertain the company meal, even!  So, several years ago one of my girls had a preschool teacher that introduced us to her chicken salad. And this is the chicken salad that I always make. But, I will warn you, if you have a hard time taste testing your recipes, or playing around with them, this probably isn’t for you. It always tastes the same to me. But, its one of those recipes that I just make up as I go. So, I will try to give you a general idea  and then you have to experiment!  It will be fun! And your family will love this!

5 or more chicken breasts, boiled, and chopped into bite sized pieces.
3-4 big stalks of celery, chopped
1 med. sized onion, chopped
Note: But, be careful not to add all of the onion at first.  you don’t want to over power the celery!
2-3 big red delicious apples, chopped
2-3 big granny smith apples
Note: You use the apples to stretch the salad. If you have a lot of people to feed up the apples! Up the veggies even!
2 cups Red seedless grapes, halved (obviously you can add more)
1 cup walnuts, or pecans, optional
Duke’s Mayo
Kraft Creamy Poppy seed Dressing (this is the secret ingredient)
Crescent rolls, crackers, yeast rolls, lettuce, etc. Anything and everything you would like to serve with this!

After you have boiled and chopped the chicken add all ingredients to a super large bowl and mix. In a separate bowl pour in the entire bottle of the poppy seed dressing and add about 3/4 c of mayo and stir until mixed well and the dressing has thickened up.  You made need to add more mayo. But, be careful not to over do the mayo, you will lose the poppy seed flavor if you add too much. Chill and serve!  Delicious!

Sometimes I find myself without poppy seed dressing and so I will make up a mixture of mayo and sugar and vinegar. This will taste yummy too!

Recipe adapted from Sherene Winkle.

Cheesecake Berries

I had some friends over a few nights ago and wanted to try some new recipes that were collecting dust in my “Recipes to Try” Pinterest board.  I needed something simple, easy, and tasty.  BINGO!

I think this will be my new go-to treat to bring to parties and showers, or just to eat in the privacy of my closet while my children clean the kitchen.

I can dream can’t I?

Ingredients:
a carton of strawberries (there were about 20 in mine)
8 oz. cream cheese, softened
1/2 cup powdered sugar
1/2 tsp. vanilla
graham cracker crumbs (it doesn’t take much)
chocolate or vanilla melts for decor (optional)

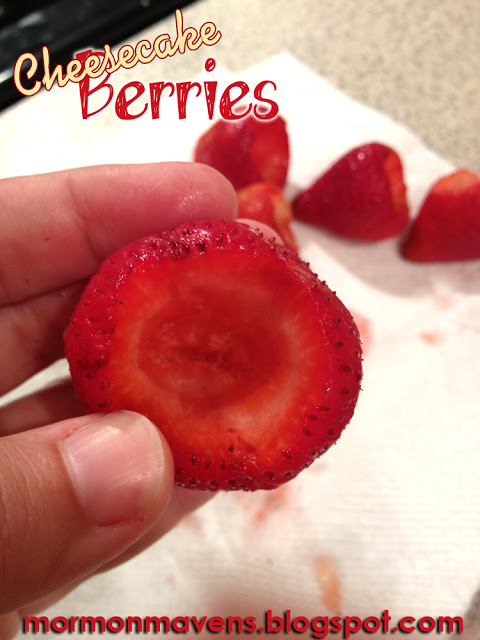
1.  Wash the strawberries, drain completely, and dry completely.   With a pairing knife, begin coring out the middle of each berry down through the stem.  For me this was easiest while holding the pairing knife higher up on the blade with maybe and inch of blade actually exposed beyond my fingers.  Work slowly until you get a feel for it.  You want a nice, roomy area for the yummy cheesecake filling; just don’t go all the way through the berry.

2.  In a mixer blend together the cream cheese, powdered sugar, and vanilla.  Scoop this mixture into a zip-top baggie, seal the bag, and snip off one corner.  You can always snip off more if the hole’s not big enough, so be stingy with your cut.  Holding a berry in one hand, use your other hand to squeeze the cheesecake-baggy mixture into the strawberry holes, allowing the filling to come up out of the berry just a bit.
3.  After filling the berries, either sprinkle on or dunk the tops of the berries with graham cracker crumbs.
4.  Place the berries on a cooling rack with a sheet of wax paper underneath.  Melt your chocolate and drizzle over the berries.  A tip here:  don’t try to “draw” the lines onto the berry.  This will make for a sloppy job.  Just quickly go back and forth over the berry, letting some of the chocolate go past the berry on each side.  I had a lot of melted decor here so I did lines in two directions.

Refrigerate until ready to serve.  YUM!

I think next time I will:

  • double the berries and one-and-a-half the cheesecake mixture.
  • try a chocolate cheesecake filling.
  • not invite people over so I can have more for myself.  (Just kidding.  Sort of.)

Source:  Sugar Derby via Pinterest

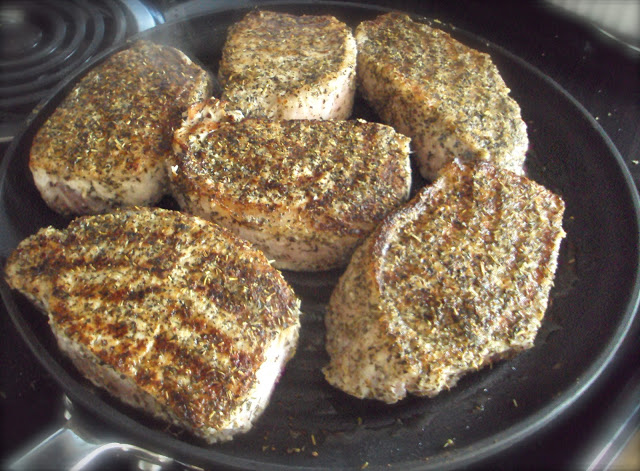
Pepper Rubbed Pork

I found this recipe for pork rub on a little sticker attached to a pork loin roast. After trying it, I just couldn’t let it go undiscovered! Great for roast or chops.

The Rub:
1/2-1tsp ground pepper (depending on how spicy you want it)
2 tsp each: dried basil, rosemary, thyme
2T Grated parmesan cheese
1/4 tsp each: garlic powder and salt

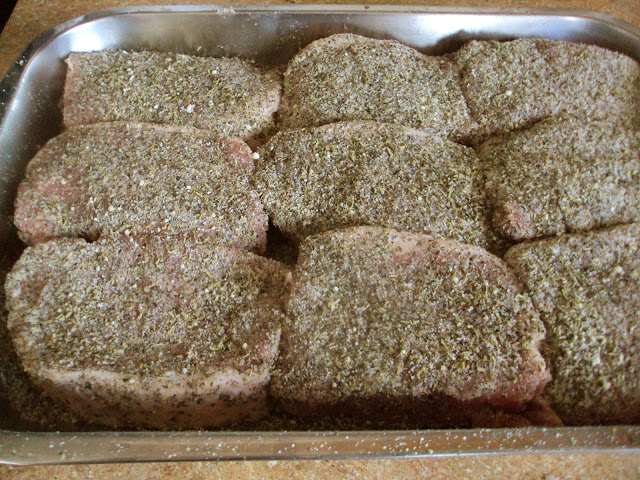
Combine all of the ingredients together in a small bowl and apply liberally to all surfaces of your pork. The first time I used the rub, it was on a pork loin roast. I had just enough to cover the whole thing.  When I made these chops, I doubled the rub recipe. It seemed there was more surface area to cover since I was working with the front and back of each piece.  Now here’s where you can choose your own adventure!


If you plan ahead and have some time before dinner:  Place the pork chops in a 9×13 dish with a splash of water in the bottom, cover tightly with foil and bake for about 3 hours at 300*. 
Now, I know some will warn you not to cook them too long for fear of drying them out.  I will say this:  If you’re foil is on tight, and your temp is not too high. They will be juicy, slow cooked chops.  The longer they bake the better, if you ask me.  They were falling to pieces!  Mmmmm!  And the flavor? WOW! 

Or, if you’re ready to get dinner on the table sooner than later:  Let the pork rest with the rub on it, preferably in the fridge, for about 10 minutes or so.  It just gives the pork juices a chance to mingle with the spices.  Then…I used my marvelous grill pan (any pan will do) to sear the flavors and juices into the pork.  About 3-5 minutes on medium heat on each side. Then another 10-12 on each side to cook through (internal temp. should read between 140-160.  I always shoot for 160).

   Enjoy!  (I know I did =)