Sopapilla Cheesecake Bars


Here’s a way to make an easy version of a Mexican favorite!  (So-pa-pee-ah)

Ingredients:
2 cans (8oz ea.) refrigerated crescent dinner rolls OR Pilsbury Crescent Creations Seamless Dough
2 packages (8oz ea.) cream cheese, softened
1 1/2C Sugar, divided
1 tsp vanilla
1stick butter (1/2C), melted
1 T ground cinnamon

First mix together the softened cream cheese and 1 cup of sugar, then add the vanilla.  
I don’t like to measure vanilla. Just splash it in…you can’t go wrong.  Go ahead, try it. I can almost guarantee it’ll make you happy. 😉 Then stir it until it’s nice and creamy.
Next, unroll one can of crescents into the bottom of a 9×13 pan.  Press together the seams and fill out the pan to the edges like this:
Pour the cream cheese mixture over the bottom layer of crescents 
Then unroll the second can of crescents over the cream cheese mixture. This part is a bit trickier than the first.  Sometimes it helps to unroll the dough on the counter, press the seams together, roll it back up and then unroll it again over the mixture.  Either way it’s a sticky, tricky job.  But don’t worry about perfection. It ends up looking DELICIOUS, no matter what. 
Then…you know what to do.  That’s right…pour–that–butter!  You might be thinking, “Why in the world would I need ALL THIS BUTTER?”  I will happily answer that question for you.  Because it’s good.  And because it gives the whole top of the dish a deep-fried-with-butter effect.   
Now, you’ll mix 1/2 C of sugar with 1T of ground cinnamon.  
I like to put it in a container with a lid and shake it up!  
After you do that, sprinkle it evenly over the melted butter. Mmmmm. I can taste it now.

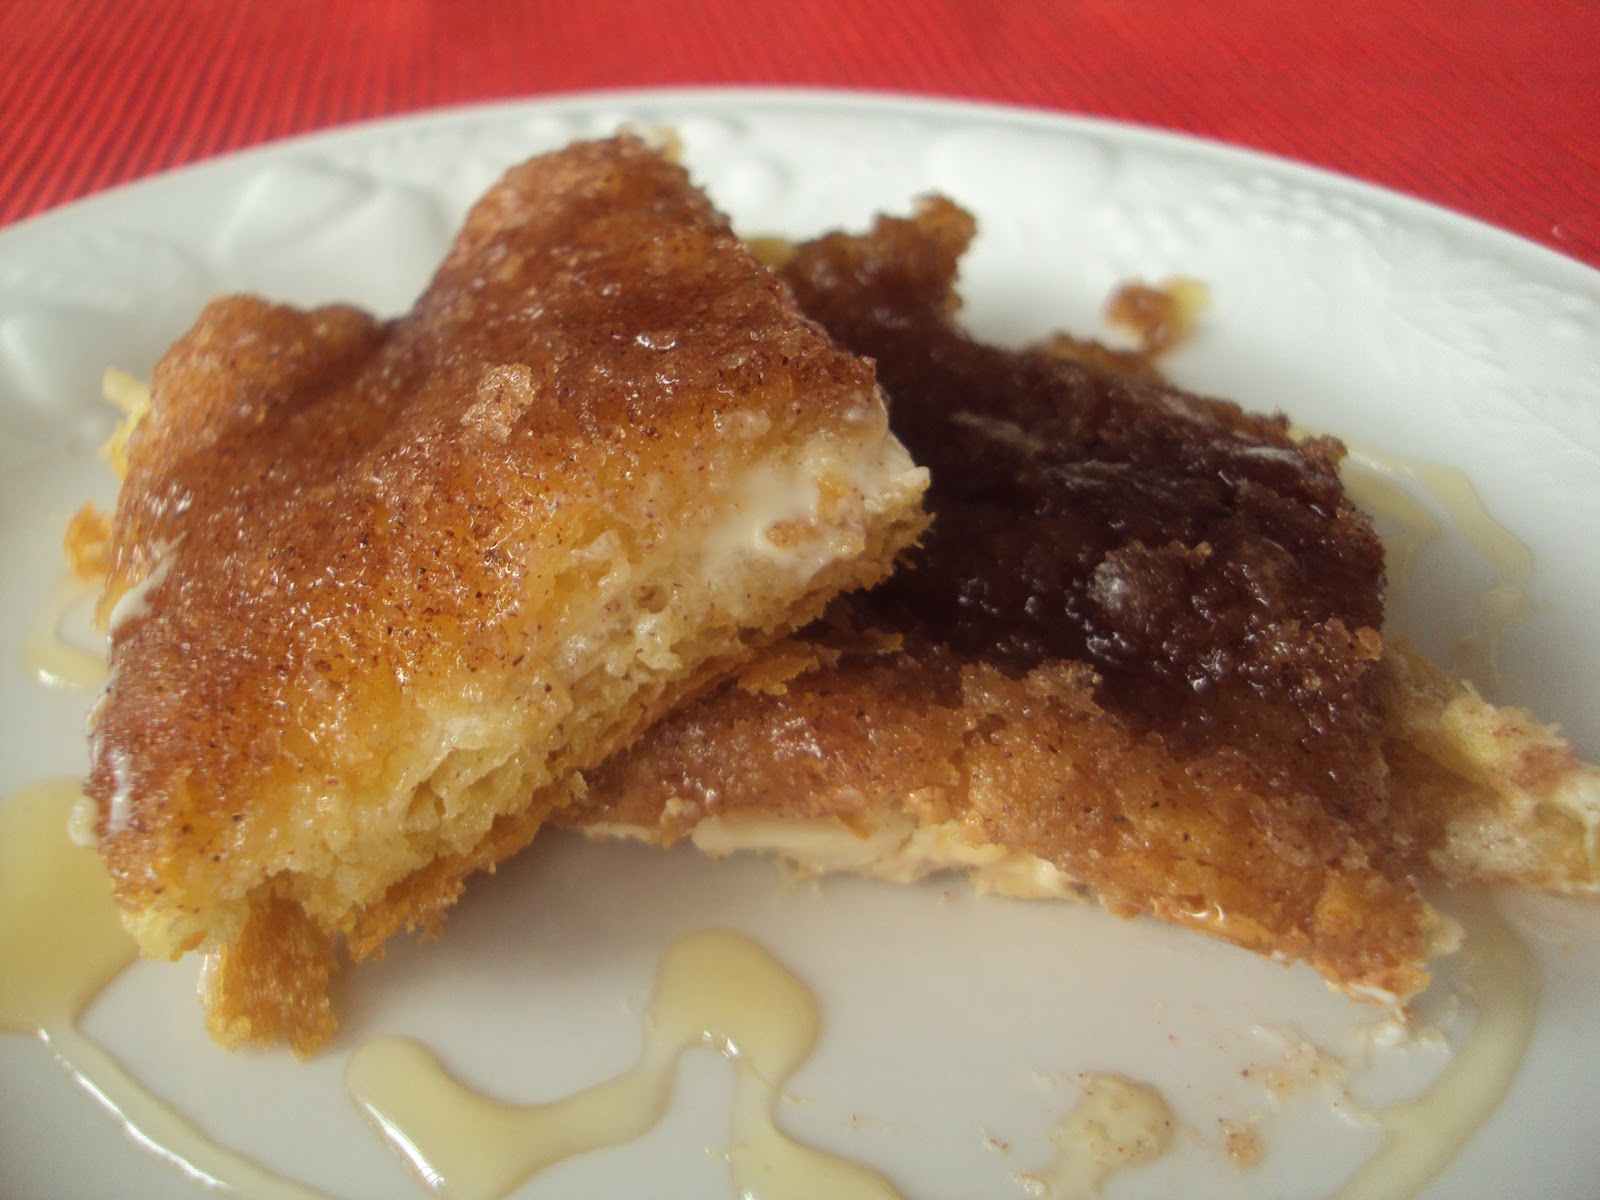
Bake for 30 minutes at 350* and let it cool a bit before you cut into it.  Let me show you, again:
Mmmm. Mmmm. Mmmm. Fabuloso! 


Summer Corn Cakes

Yes.  Another Pinterest Repin.  This one is my SAVORY board cover so I just had to try it.  It’s so pretty.  It’s so yummy.  I will now post the original ingredients, but know that I was able to pull things from food storage and, by rehydrating the freeze-dried corn, I had perfect kernels for this recipe, and my buttermilk was from a mix.  Also, I didn’t have a scallion but I did have a leek, so I substituted that and took out the minced garlic.  Now, there are two different recipes here, one for the corn cakes and one for the Chopped Tomato & Avocado Salsa.  Pay attention and be sure to get all of your ingredients for both recipes.  Pay ATTENTION…I emphasize this because I put the red onion in the salsa instead of the corn cakes because I was trying to watch the Republican National Convention at the same time. 

Corn Cakes Ingredients:
3 ears of corn, shucked
1 cup all-purpose flour
1/2 cup cornmeal
1/4 cup diced red onion
1 teaspoon baking powder
1/2 teaspoon baking soda
Sea salt and freshly ground pepper, to taste
2 tablespoons well-shaken (not stirred) buttermilk (sorry, just had to use that James Bond reference)
2 tablespoons unsalted butter, melted
Canola oil, for frying
1.  Preheat oven to 200 degrees F.  Line a baking sheet with a brown paper bag.
2.  Cut the corn from the cobs into a large bowl.  Scrape the stripped cobs with the back of the knife or spoon to release the juices into the bowl.
3. Place 2 cups of the corn kernels into a food processor. Pulse several times until the corn is slightly pureed but still chunky.  Scrape into the bowl with remaining kernels.
4.  Add flour, cornmeal, onion, basil, baking soda, baking powder, salt and pepper to the corn.  Stir to mix.
5.  Add the eggs, buttermilk, and butter, and stir just to combine–do not overmix.
6.  Place a large skillet over medium heat.  Add just enough canola oil to cover the bottom, and heat until sizzling hot.
7.  Scoop the batter onto the skillet, one heaping tablespoon at a time.  To avoid overcrowding, do in batches of 4 or 5 at a time.  Fry the cakes 1-2 minutes per side, until golden brown.

8.  Drain on the lined baking sheet, and place in the oven to keep warm while cooking the rest of the cakes.  Serve warm with LARGE spoonful of the Chopped Tomato & Avocado Salsa.
Chopped Tomato & Avocado Salsa Ingredients: 
1 large tomato, cored and chopped
1 scallion, trimmed and minced
1/2 jalapeno pepper, cored, seeded and diced
1 tablespoon chopped fresh basil
1 tablespoon chopped fresh cilantro
1 garlic clove, minced
Juice of 1 lime
1 1/2 teaspoons extra-virgin olive oil
1.  Place all ingredients, except avocado, in a bowl and stir to mix.  Refrigerate in an airtight container until ready to serve (for up to 2 days).
2.  Just before serving, add the avocado and mix gently.

Source:  Ezra Pound Cake

Mini No-bake Key Lime Pies

Anything key lime takes me back to the Keys of Florida or to the Caribbean for that matter, back where everybody says, “Everything is ire (i ree) or in other words, “Life is good, no worries”.

Ingredients for Crust:

3/4 c. graham-cracker crumbs
1/4 c. finely chopped pecans
3 T. unsalted butter, melted
Ingredients for Filling:
8 oz. reduced-fat cream cheese, softened
1 can (14 oz) sweetened condensed milk
1/2 c. bottled Key Lime juice
1 container (8 oz) frozen whipped topping, thawed
Lime slices, optional
Directions:
1.  Line 12 cupcake cups with foil liners.  In bowl, stir together graham cracker crumbs, pecans, and melted butter.  Spoon 1 T. mixture into each liner, pressing it down to form crust.
2.  In large bowl with electric mixer on low speed, beat cream cheese about 30 seconds, or until creamy.  Add condensed milk and Key Lime juice, and blend on medium speed 20 to 30 seconds, or until just combined.  Add 1 cup whipped topping and blend on low speed 15 seconds longer.
3.  Spoon mixture evenly into liners.  Cover pan with plastic wrap and freeze at least 3 hours, or until firm.  Remove from freezer 15 minutes before serving; peel off liners and dollop 1 T. remaining whipped topping on each pie.  Top with lime slices, if you like.
Source:  Quick and Simple

Hostess with the Mostess

As a child it was a good lunch day if my mom threw in a Hostess Cupcake into my lunch box. Those things are dangerous. I don’t buy them… because I know I’d eat every last one in about 2.4 seconds. So…if you love Hostess Cupcakes, you’re going to LOVE these! One thing, the icing on these is not very sweet. It balances the sweetness of the filling perfectly though. (If you want it sweeter, use milk chocolate chips).

Devil’s Food Cupcakes with Cream Filling and Whipped Chocolate Ganache Frosting 

Make your favorite chocolate cupcakes or prepare purchased cake mix. Let cupcakes cool.

Creme Filling 
1 – 7 oz container marshmallow cream
1/2 cup softened butter
1/3 cup powder sugar
1 tablespoon water
1/4 teaspoon salt

With electric mixer beat ingredients together until fluffy.  Fill the cupcakes with the filling. You can either use an apple corer and remove the center of the cupcake (that’s how I do it) or use a long filling tip to fill them.

Ganache Frosting 
12 oz semisweet chocolate chips
1 cup heavy cream

Place chocolate chips into a bowl and pour cream over the top. Heat in microwave until chips are soft. Allow mixture to sit a minute to continue melting the chips. Stir well. Let mixture come to room temperature. With electric mixer beat until fluffy. Fill pastry bag with large star tip and pipe onto cupcakes. Enough frosting and filling for 12-15 cupcakes depending on your frosting and filling style.

Seriously, how good does that look?!

Cream Cheese Peach Pie

We are in the throws of peach season here and this is my favorite time of year because of it! 🙂 This pie is so light and fresh. It’s hard to go wrong with Cream Cheese AND Peaches. I hope you enjoy it as much as I do! I have to give a big shout-out to our friend, Audrey, for giving us the recipe. It’s quickly becoming a fav!

Ingredients:
2-3 Graham Cracker Crusts (I use 3–and I cheated and used store bought. *gasp!*)
12 – 15 Peaches, Peeled
1.5 Cups Granulated Sugar
1/4 Cup Cornstarch
1/2 Cup Water
1 (3 oz) package Lemon Jello
8 oz Cream Cheese
1/2 Cup Powdered Sugar
1 Cup Whipped Cream (or Cool Whip–I use Whipped Cream)

1. Puree 4 – 5 peaches–enough to make 1.5 Cups. I don’t have a food processor, so I cut them up and sloshed them around in my KitchenAid (be sure to use the splash guard!) until they were good and juicy. It was a little chunky, but I actually like it that way!
2. Dissolve the cornstarch into the water and set aside.
3. In a medium saucepan, bring the puree and granulated sugar to a boil.
4. Add the cornstarch (you may need to shake it up a bit again) and cook until thickened.
5. Remove from heat and stir in the dry jello. Put in the fridge to cool.

6. Cream together the cream cheese, powdered sugar, and fold in the whipped cream.
7. Divide evenly between the pie crusts. Smooth along the bottom and sides. Be careful not to pull the sides away from the pan. It will still taste good, but it won’t look it! 🙂
8. Slice the remaining peaches and distribute them evenly among the pie crusts. I use around three peaches per pie.
9. Pour the cooled mixture over the sliced fruit and put each pie in the fridge to set (about 3 hours).

Source: Audrey Miller, who says she got it from her aunt

My Best Mac & Cheese

    
   How many recipes have you tried for mac & cheese? Seriously, I have tried too many.  Look no further! This is the one!  Totally delicous! My kids totally asked for 2nds and 3rds!   There are 4 differents cheeses in this and seasonings that you already have handy. You are going to make this your go to recipe for homemade mac & cheese. I promise!

This recipe makes a 13″x9″ casserole dish full! 

2 TBSP. butter, melted
1/2 cup all-purpose flour
1/4 tsp. ground black pepper
4 cups milk
1 cup grated parmesan cheese
1 cup shredded sharp cheddar cheese
1- 1/2 cup cubed velveeta cheese
1/2 cup cubed cream cheese
1-1/2 boxes of Rotini pasta, cooked
onion powder
italian bread crumbs, or your favorite
Pam

Spray your casserole dish with pam, and set it aside. Preheat your oven to 350 degrees.

Cook your pasta and drain. Set it aside.

In a good sized pot melt the butter over medium heat. Add in the following: flour, pepper and milk. Slowly add the milk using a whisk until mixture is smooth. Bring this to boil over medium heat; cook for one minute, stirring constantly so your sauce doesn’t stick! Immediatly reduce heat; add cheeses, stirring in until melted. Remove from the heat and add in the pasta. Stir until the pasta is coated well and pour into the casserole dish. 

(If youhave a bigger dish it might be a good idea to use it. My 13x 9 overflowed! But man, was it good!)

Sprinkle over the onion powder over the top, generously, but don’t go crazy! The sprinkle the bread crumbs over the top. You can add as much or as little as you want.

Bake for 30 minutes or until bubbly.

Recipe seriously adapted from Gooseberry Patch.

Coconut Whipped Cream

I’ve been wanting to try this for a while now.  It’s a gluten-free, dairy-free way to enjoy something like whipped cream and can be enjoyed in hot chocolate, on desserts, or on fruit.  It’s easy and fast, too!

Ingredients:
Coconut Milk
Vanilla
Cinnamon

1.  Chill an unopened can of coconut milk in the fridge for several hours or overnight.
2.  Open the can; into a bowl scoop out just what has firmed up on the top.  What’s left underneath is coconut water…don’t use that for your “whipped cream” but do save it to use in smoothies.

the leftover water after scooping

3.  Add some vanilla (I used about a teaspoon for the one can) and a sprinkle of cinnamon.  Mix well with a fork.

That’s it.  You’re done!  Now, obviously this doesn’t taste just like, or have the same consistency as, real whipped cream.  It has a slight coconut flavor.  But it’s kinda fun and may be good for those trying to cut back on dairy.  Give it a try and see if you like it.

Source:  about a million places via Pinterest

DIY All Natural Deodorant–non food

Is this a recipe? Yes.  Should you serve it with a side veggies? No.  But you could confidently wear it to a special dinner feeling fresh and dry. You can even count on it to eliminate odors.  After my husband became allergic to one deodorant after another, we gave up and decided to search out a more natural alternative.  My friend Cindy introduced us to this recipe.  For us, it literally works–ALL DAY.  And the most important benefit is that you get to miss out on all of the harmful ingredients that you find in store-bought Antiperspirants.  You can find a list of those HERE.  And it’s simple to make:

Ingredients:
1/3 C Coconut Oil (in it’s soft solid stage, room temp. Somewhat resembling Crisco)

1/4 C Baking Soda (You know…the greatest–all-time–odor absorber!??)
1/4 C Arrowroot Powder* (found in the whole food section or baking aisle or a whole foods store)
    *I’ve recently researched that you could substitute Corn Starch for the Arrowroot Powder, but I haven’t personally tried it.

Measure and mix all ingredients in a small or medium size bowl until smooth and looking a bit like this:

For a container, I used a small freezer jam jar. They’re plastic with a nice tight-fitting lid…and just the right size!  I made the mistake of trying to stir it all together in the jar.  What a mess!  Eventually we got it…but please, learn from my mistake.

Now you’re ready to use it!  All you need is a small amount on the end of your finger tip for each application (I was going to say “for each pit” but that didn’t sound very lady-like…lol).  When you’re applying the deodorant in a paste, like this, just rub it in until you feel the coconut oil softening or melting. Then you’re good to go!

I’ve always wondered if I could somehow maneuver this mixture into an empty deodorant container. Hmm….Maybe I’ll try it sometime.

*Make sure to store in a cool area.
*If your Coconut Oil does liquify after you’ve made the mixture (like…you forgot and left it in the bathroom while you took a steamy shower), just stir it well and return to a cooler area.
*If you don’t over apply, this stuff will last you a long, long time!

–Jamie

Lime Pepper Grilled Chicken

Today I am going to share with you a quick, easy, healthy, tasty chicken recipe.  Not only that, I am going to give you the whole meal so that you will have a yummy addition to your 30-Minute Meal Arsenal.  And you know why?  ‘Cuz that’s how I roll….

The chicken part of this recipe is original, the other components of the meal are straight out of the can, already seasoned, tried and tested in the Jenkins Family Test Kitchen–two thumbs up!!


Ingredients:
4 skinless, boneless chicken breasts
Olive oil
Lime Pepper seasoning
1 can Margaret Holmes Southern Style Seasoned Mixed Greens
1 can La Costena Frijoles Charros


1.  Place chicken breasts in a gallon-size zippered freezer bag.  Add about 2 tablespoons of olive oil and about a teaspoon of Lime Pepper seasoning (to taste). Close the bag and kind of “moosh” things around until the chicken is evenly coated with oil and seasoning.

2.  Grill chicken on a counter-top nonstick grill (I used my George Foreman grill) for approximately 8 minutes, checking for done-ness.

3.  Meanwhile, open the cans of beans and greens and heat each over medium heat until ready to serve.

4.  That’s it.  Really.

Sweet and Salty Roasted Chick Peas

Cheap, easy and addictive!

Ingredients:

  • 1 can (14 oz) chickpeas (garbanzo beans), drained
  • 2 teaspoons olive oil
  • 1 teaspoon cinnamon or your spice(s) of choice
  • 1 1/2 teaspoons brown sugar
  • 1/4 teaspoon salt

Directions:

  1. Place chickpeas on a baking sheet lined with parchment paper.
  2. Bake at 450 F for 30 minutes. (You didn’t miss anything here.  You don’t oil or season them until after they are done.  In fact, for an extra healthy treat, try them when they get out of the oven before even adding the oil.  They are enjoyable all on their own.)
  3. Transfer chickpeas to a bowl and mix thoroughly with the rest of the ingredients.
  4. Enjoy hot, or bring to room temperature and store in an air-tight container.  Like popped corn, the chickpeas are never as good the next day.  However, they are still quite enjoyable 3-4 days after making them.  

Source:  Cupcake Project

This entry was posted in Snacks.