Gluten-free and Dairy-Free Blueberry Muffins

Are you gluten-free?  Do you find that you are sometimes less than thrilled to try new gluten-free recipes because they often don’t satisfy?  Maybe it’s just me.  I guess I’m jaded now.  Nevertheless, I decided to try this one for breakfast today because, well, I suppose I haven’t lost all hope.

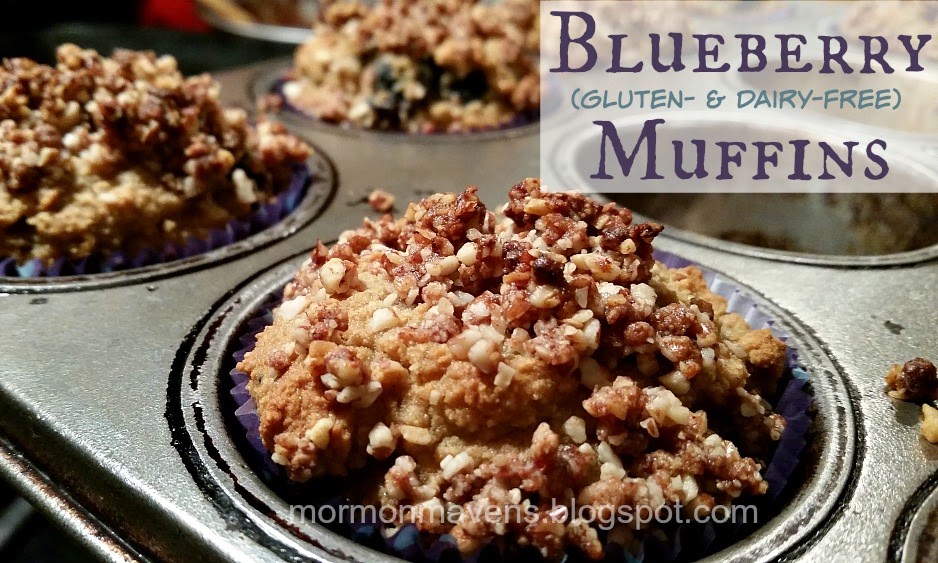
I wasn’t expecting much.  Actually, I was expecting a slightly sweet blob of cardboard.  But I was really happy with the result.  Happy, as in, I will make these again.  And that’s saying a lot….for me, anyway.


Gluten-Free and Dairy-Free Blueberry Muffins

2 large eggs, at room temp
2 Tbsp. lemon juice
1/3 cup palm shortening, softened
1 tsp. vanilla extract
1/3 cup honey
1/2 cup warm water
1 3/4 cup Pancake Mix (see recipe below)
1/2 tsp. ground cinnamon
1/2 cup fresh blueberries (or reconstituted freeze-dried blueberries–what I used)

Topping
1/3 cup pecan halves
1 Tbsp. unsweetened shredded coconut
1 Tbsp. solid coconut oil
1 Tbsp. blanched almond flour
1 Tbsp. honey
3/4 tsp. ground cinnamon
1 large date, pit removed
pinch of sea salt

1.  Preheat oven to 350 degrees.  Place an oven-safe dish filled with 2 cups of water on the bottom oven rack.  Place a rack in the middle–this is where the muffins will bake.
2.  Place all the muffin ingredients, except the blueberries, in a blender.  Process for half a minute, scrape down, and process again until smooth.  Pour mixture into a bowl and stir in the blueberries.
3.  In a muffin tin, place 10 paper liners.  Fill each liner 2/3 full.
4.  In a food processor, combine all the topping ingredients.  Pulse them together until like coarse crumbs.  Sprinkle atop each muffin.
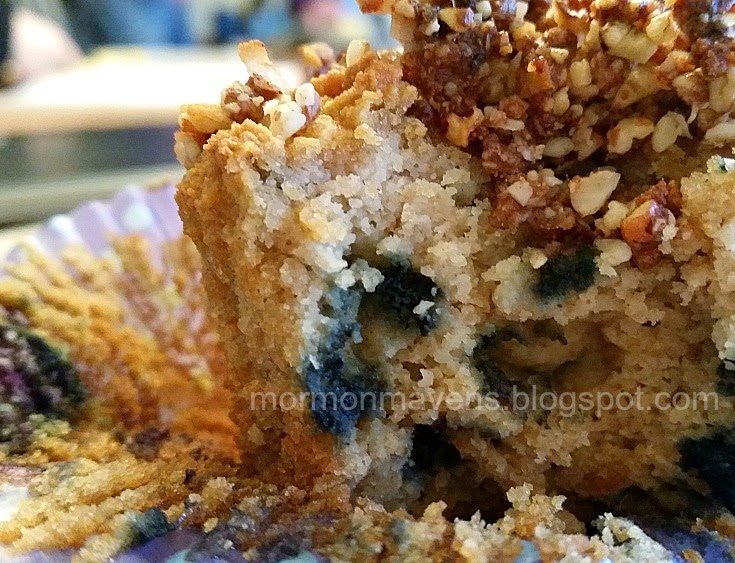
5.  Bake for 20-25 minutes.  Test with a toothpick by inserting into the middle of a muffin; if it comes out clean, it should be ready.  Remove the baked muffins to a wire rack to cool for a bit.

Pancake Mix
3 cups blanched almond flour
1 cup coconut flour
1 Tbsp. baking soda
2 tsp. cream of tartar
3/4 tsp. sea salt
Whisk together and store in airtight container in fridge (will last for 6 months).

Source:  Against All Grain by Danielle Walker

Mom’s Beef Stew

I love simple, tasty food.  Especially when it’s comfort food.  And this Beef Stew hits all those attributes for me.  I just love it.

Ingredients:
2 pounds stew beef
2 Tbsp. bacon grease (or shortening)
1 large onion (sliced)
1 tsp. minced garlic (from the jar)
1 quart hot water
1 Tbsp. salt
1 Tbsp. lemon juice
1 tsp. sugar
1 tsp. Worcestershire sauce
1/2 tsp. black pepper
1 bay leaf

6 small potatoes, cut in chunks
6 small onions, cut in chunks
3 carrots cut into 1″ pieces
1/2 cup flour
1/2 cup cold water

1.  In large pot, heat bacon grease over medium-high heat.  Brown stew beef.
2.  Add remaining ingredients up to and including the bay leaf.  Bring to a boil; then reduce heat, cover, and simmer for 1 1/2 hours.
3.  Add veggies.  Cover and simmer 1 hour.
4.  Remove and discard bay leaf.  Combine flour and water in a small bowl to form a paste.  Stir this into the stew.  Cover and cook over medium heat until thick and bubbly.

Makes 2 1/2 quarts of stew.

Notes:

  • Though I always use the same type of ingredients, their form varies from time to time for me.  This time I didn’t have any fresh onions so I used my freeze-dried Thrive onions.  
  • To make this GLUTEN FREE, use an alternative flour like I did this time.  I used Krusteaz Gluten Free flour.
Source:  my mom

Southwestern Frittata

One of the things I love about Thrive Life foods is the convenience.  This morning I awoke to realize that all my scheduled recipe posts have run out!  I thought I had a few more in the reservoir.  But alas, they are all gone.  And today is my posting day…what to do? 

Thrive Life to the rescue.  I quickly went to one of my newest cookbooks, Against All Grain, and tried to find a breakfast recipe that I could Thrivalize.  I had tagged this frittata recipe because I have always wanted to try making one and the ingredients sounded pretty tasty.

I was able to sub Thrive freeze dried foods for almost all of the ingredients.  And really, I could have also subbed the eggs for the scrambled egg mix (which is SO good) but I wanted to try it with traditional eggs first.  I could also have used Thrive zucchini, but I was out.

When I use Thrive in a skillet meal, I just keep adding water a few tablespoons at a time until things get hydrated the way I want them.  If I end up adding in too much, I just wait for it to simmer off and then move on with the recipe.  If you are not using Thrive, see the notes at the bottom of the recipe for conventional directions.

Ingredients:
oil or bacon grease for the pan
1 cup Thrive freeze dried ground beef (or 1/2 pound raw ground beef)
1/4 cup Thrive freeze dried onion (or 2 Tbsp. chopped onion)
1/2 cup Thrive freeze dried butternut squash (or 1/2 cup diced butternut squash)
2 1/2 tsp. taco seasoning
1/2 tsp. salt
1 cup Thrive freeze dried spinach (or 2 cups fresh  baby spinach)
1/2 cup diced zucchini
1/3 cup Thrive freeze dried red bell pepper (or 1/3 cup diced red bell pepper)
10 eggs, beaten
cheddar cheese, grated
avocado
salsa
sour cream

1.  Preheat oven to 350 degrees.
2.  In a cast iron skillet (mine is a square 10″) melt some bacon grease over medium heat…about 1 Tbsp (or use your oil of choice).  Pour in the ground beef and onion and stir to toast a little.  Add in about 1/4 cup of water and allow the beef and onion to rehydrate.  Add in the butternut squash and keep adding water a little at a time.  You will see the squash change color a little as it rehydrates.
3.  Once these ingredients are well-hydrated, add in the taco seasoning and salt and stir well to combine.
4.  Add in the spinach, zucchini, and red bell pepper….adding in more water as needed to adequately hydrate the ingredients.  Cook for about 4 minutes.
5.  Turn off burner, pour eggs into skillet, and place skillet into preheated oven for 20 minutes OR until the eggs have puffed up AND are cooked through (no wet jigglies on the surface).  Immediately sprinkle with grated cheddar, if desired.  Allow to melt for a minute or two.

Serve with avocado, salsa, sour cream.

Conventional Directions:
1.  Preheat oven to 350 degrees.
2.   In a cast iron skillet (mine is a square 10″) melt some bacon grease over medium heat…about 1 Tbsp (or use your oil of choice).  Add in ground beef, onion, squash, taco seasoning, and salt and saute until the meat is mostly cooked through.
3.  Add spinach, zucchini, and red bell pepper and cook for 4 more minutes.
4.  Turn off burner, pour eggs into skillet, and place skillet into preheated oven for 20 minutes OR until the eggs have puffed up AND are cooked through (no wet jigglies on the surface).  Immediately sprinkle with grated cheddar, if desired.  Allow to melt for a minute or two.

Notes:

  • Original recipe stated 12 minutes of bake time, but I needed a full 20.  Check your frittata starting at 12 minutes.
  • Make sure your skillet is oven-proof.
  • Cast iron is the best!!!!!!
Recipe Source:  adapted from a recipe in Against All Grain, by Danielle Walker (her website: Against All Grain)

How to Cook Spaghetti Squash

Okay, I admit it.  I’ve never tried spaghetti squash before this.  But I’ve always wanted to.  It always looks so cool….all those little curly fibers.  But I never had motivation to try it until I had to go wheat-free.  You know, rice pasta is nice and all, but it’s a little bland.  So I was really hoping for something interesting here.  I got it, and it’s pretty versatile to boot.  You can serve it with a sauce like you would pasta or just top it with Parmesan cheese and chopped basil, or serve it as a side with salt, pepper, and butter or ghee.

And it’s just so stinkin’ fun to scrape all those little fibers!!!  Seriously, I giggled.

How to Cook Spaghetti Squash

Preheat oven to 350 degrees.  Cut a spaghetti squash in half lengthwise.  Scoop out seeds and loose flesh and discard.  Place cut-side down on a foil-lined baking sheet.  Bake for one hour.

Remove from oven and carefully turn the squash halves over to cool.

When it has cooled enough for you to handle it, take a fork and scrape the squash flesh towards the middle.  (This would be so fun for kids to help with!)

You just made spaghetti!!  Now wasn’t that fun?!

Who Can Find a Virtuous Woman? Can I?

I’ve been thinking a lot about goal and resolutions lately.  No, not just in the last few days–in the last few months, even years with some of them.  But with my history, I can sometimes be hesitant to set goals.

Why?  Well, I suppose I either aim too high and then can’t reach the goal or I lack the drive to get there or my whole plan is just flawed.  I don’t know.

But this feels different.

I guess because I’ve been thinking it over for so long.  That’s typically how I can tell that I’m on to something.  On to something for me, anyway.

And since this has been on my mind and heart for so long I feel like it is something I need to approach differently.  I mean, if my success with goals in the past has been mediocre then shouldn’t I change the approach?  Doing things the same way all the time and then expecting different results is a recipe for uber frustration, right?

Pinning ideas, graphics, articles for inspiration for becoming more like the Proverbs 31 woman

So, anyway, this Proverbs 31 woman.  She’s amazing.  And I want to be like her.  But how?  I’ve been reading great blog posts and articles about how others have interpreted her characteristics, and that has helped a lot.  I’ve pondered it myself, reading and rereading the passage, and have taken a few notes.  But it seems pretty overwhelming.

And then I thought of it.  I will take her and dissect her into 12 months and then I will work on one thing every month and divide each month into subcategories and by the end of the year I will be perfect and wait a minute this is the same old plan I always do when I try a goal and overreach and so I better not do it this way.

<screeching halt>

No.  For me, this year, I have to do this differently.  I can’t approach this like a science.  I need inspiration.  I need guidance.  I need advice from One who knows me a lot better than I do and knows exactly what I need to work on and when.

So, this year’s efforts will be different.  This year I am going to feel what I need to work on first.  And that takes thought, introspection, pondering, prayer.  Not a formula, not a checklist, not a spreadsheet.  Not the same old way (that never really worked for me anyway!).

I’ve already picked 3 small, measurable, attainable goals to work on in relation to my Proverbs 31 project.  They are personal, but I will share one of them–have a devotional study time every single day of 2015–no excuses, no misses.

The other two are related to a characteristic of the P31 woman that I feel like I am supposed to work on now.   When I feel it’s the right time, I’ll move on to another couple of things.  And I’m totally okay if this whole P31 thing takes more than the number of days 2015 has to offer me.  In fact, I am kind of expecting that to be the case.

And that’s okay.

To paraphrase a favorite poem:

Little by little,
Day by day,
Julie and flowers
Grow that way.

What are your goals?  Do you feel like you should change your approach to achieving your goals? 

Spinach Chips

A while back I posted a recipe for Kale Chips.  I never even considered that you could use another type of green but I like these Spinach Chips even better than the kale!  If you can find curly spinach it will probably be even easier, but the baby spinach leaves are great.  Just make sure you put them in a single layer not touching each other.  And take it easy on the salt–these are really easy to overseason.

Ingredients:
2 cups fresh spinach leaves
2 Tbsp. extra virgin olive oil
Italian seasoning, to taste
salt, to taste

1.  Preheat oven to 325 degrees.  Line a large baking sheet with foil.
2.  Put the spinach leaves in a large bowl.  Drizzle olive oil over leaves and gently toss with your hand to evenly coat the leaves.  Sprinkle with Italian seasoning and salt and toss.
3.  Arrange the leaves in a single layer not touching each other.  Bake for 8-12 minutes or until leaves are crispy.  Take from oven and allow to cool for 2 minutes.  Use a spatula to remove from foil.

Source:  Divas Can Cook

Avocado Tuna Salad

I love a good tuna sandwich, but it can be a bit, well, uninspired sometimes.  Here’s a way to jazz up your tuna salad.  And you can eat it plain, over greens, on crackers, or in a a good old sandwich.  I ate it over salad and didn’t need any dressing because it’s so moist.

Ingredients:
2 cans tuna packed in water
1 ripe avocado
1/2 cup finely chopped celery
1/2 red apple, finely chopped
1/4 cup pecans, chopped
1 Tbsp. water
1 tsp. dried dill
1/2 tsp. Dijon or Dusseldorf mustard
1/4 tsp. cumin
salt and pepper to taste

1.  Drain the tuna.  Mash the avocado in a bowl with the back of a fork.  Mix the tuna and avocado together.
2.  Add celery, apple, and walnuts.  Stir to combine.
3.  In a small bowl mix water, mustard, and spices.  Add to tuna mixture and mix well.

Can store in fridge for up to a week.  Serves 4-6

Source:  slighly adapted from thehealthymaven.com

No-Fry Fries

I love homemade fries.  But I don’t make them anymore for two reasons:  (1) fried food is unhealthy, and (2) frying stuff makes my whole house smell gross.  I’ve seen this recipe bounce around Pinterest enough to know that these fries must be pretty good.  So I figured I’d give ’em a try.  I’m not normally a crispy fry person, but I must say with these I prefer them crunchier.

Ingredients:
2 large Russet potatoes
2 Tbsp. olive oil
coarse sea salt or kosher salt

1.  Preheat oven to 450 degrees.  Cut potatoes into 1/3″ thick fries.  (Cut in half first, then cut each half into 1/3″ slices, then cut each slice into fries.)
2.  Place in a bowl of very cold water and stir them around with your hand.  Strain in a colander and place on a cookie sheet lined with a clean kitchen towel.  Use another clean towel to dry the fries well.
3.  Remove the towels.  Drizzle olive oil over the fries and toss to coat.  Sprinkle with salt and toss again.  Spread the fries out evenly.
4.  Bake until browned, turning halfway through…..25-35 minutes, depending on your oven and preference.

Source:  this is all over Pinterest and is supposedly from Gwyneth Paltrow

Pumpkin-Shaped Dinner Rolls

http://finlayson.thrivelife.com/honey-whole-wheat-dough-mix.html

This time around I thought I’d post more of an idea than a recipe.  You can use any bread dough recipe you like or use a mix like I did.  Whatever dough you choose to work with, the results will be similar.  This is an easy way to bring a little fall fun to your Thanksgiving table.

Directions for one-loaf’s worth of dough:
1.  Prepare dough according to recipe or can instructions.  Allow to rise until doubled in bulk.  Punch down.
2.  Roll dough into a log.  Using kitchen shears (or unflavored dental floss) cut the log into half, then cut each half into half again.  This will give you four log pieces.  Each of these pieces should then be cut into thirds.  You will have 12 pieces.
3.  Take one section of dough and roll firmly between your palms.  Roll into a tight, smooth ball.  Take your kitchen shears and snip into the edge of the dough eight times equal distance apart.  Do not cut all the way through.
4.  Place on greased baking sheet.  Repeat with remaining dough.  Cover lightly with a sheet of plastic wrap lightly sprayed with cooking spray.  Allow to rise.
5.  Bake according to your recipe.  Garnish with a sliver of pecan.

Source:  it’s all over Pinterest, baby.

Cauliflower Pizza Crust

One of the things I have a hard time resisting is pizza.  Even when I’m not trying to eat wheat- and dairy-free, pizza is a huge temptation.  I just love it.  But it doesn’t love me.  I didn’t think there would be an alternative that I would enjoy.

I’ve seen pics for this crust all over Pinterest but never really had the gumption to try it until now.  While it doesn’t rival Domino’s or Pizza Hut or Whatever-Your-Favorite-Pizza-Place-Is, it’s good enough that I will be making it again.  And that’s sayin’ somethin’.

Ingredients:
2 cups shredded cauliflower
1 egg, slightly beaten
1 cup mozzarella Veggie Shreds
1 tsp. dry oregano
1/2 tsp. finely minced garlic
1/2 tsp. onion salt

1.  Remove leaves from cauliflower and cut head into pieces.  In a food processor with a grater blade, process the cauliflower.
2.  Place 2 cups of cauliflower in a microwave-safe bowl and cook on full power for 5 minutes.
3.  Cool to room temp.  Add remaining ingredients and stir until combined.
4.  Grease a cookie sheet or pizza pan.  Form pizza crust into desired shape.
5.  Bake at 375 degrees for 20 minutes.  Remove from oven and top with desired toppings.  Return pizza to oven for a few minutes, or broil to melt additional cheese.

Notes:

  • The head of cauliflower I used yielded about 3 1/3 cups of shredded.  
  • You can use regular cheese, but I’m trying to go dairy-free so I used a cheese substitute.  If you want to give it a try, you can find it in the produce section at the grocery store.
  • I didn’t add extra cheese since there is some in the crust already.  I just topped with a bit of pizza sauce and some pepperoni.  If you are adding veggies, you may want to saute them a bit first since they won’t spend long in the oven.
Makes 6 pieces of pizza crust