Whole Wheat Multigrain Bread

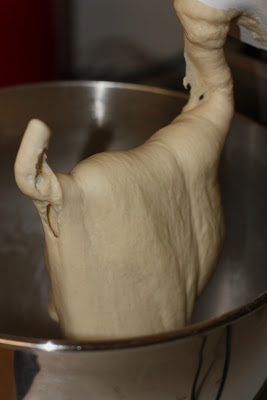
Everyone (unless people are lying to me) loves my homemade bread.  I make it every week!  I love that I know exactly what goes into it and that it is full of wholesome grains for my children!  This recipe makes 4 loaves and to do so I use my Bosch Mixer, if I were using a Kitchen Aide I would cut the recipe in half.

Audrey’s Whole Wheat Multigrain Bread
Yield: 4 large loaves or 5 small loaves

6 cups whole wheat flour (Hard Red or Hard White works best)
6 cups warm water
2 Tbsp. yeast
1/2 cup extra virgin olive oil
1/2 honey (or dark brown sugar)

Mix ingredients together in mixer and let rise until double and bubbly.  Then add:

2 Tbsp. Salt
1/4 cup of any or all the following grains: Amaranth, Quinoa, Chia Seeds, Sunflower Seeds, Poppy Seeds, Sesame Seeds, Flax Seeds (I would grind the Flax in your blender first)
8-10 cups whole wheat flour- while mixer is set at lowest speed add one cup at a time until you get to 8 cups then add 1/2 cup at a time until it pulls away from the sides of the mixer (if you add too much it will be crumbly so be careful).

Mix on medium speed for 10 minute.  On a floured surface separate dough into 4 pieces.  Knead each piece into the shape of a loaf then pat with hand to get the air bubbles out and place into a greased loaf pan.  Let rise for 30 min or until the dough has risen slightly above the pan.  Bake at 350 for 28 to 30 min.  Let cool in pans for 3 minutes then continue cooling on cooling racks.  Once cool wrap in plastic wrap or place in bags.

Note:  I have been reading more and more about soaking grains to help with digestion. So as of late I have been soaking the following ingredients overnight; 6 cups flour and any other grains I am using, 5 cups water, and 1 cup buttermilk.  The next day I add yeast, oil, and honey to the soaked wheat and let it rise then continue with the recipe (minus the grains since they have been added to the soaking mixture).  Because it is cool from soaking it does take longer to rise.  It also has a bit of a sourdough flavor when doing this (which I love but others may not).

30 Minute Rolls!

I think this is my favorite recipe of all time! 

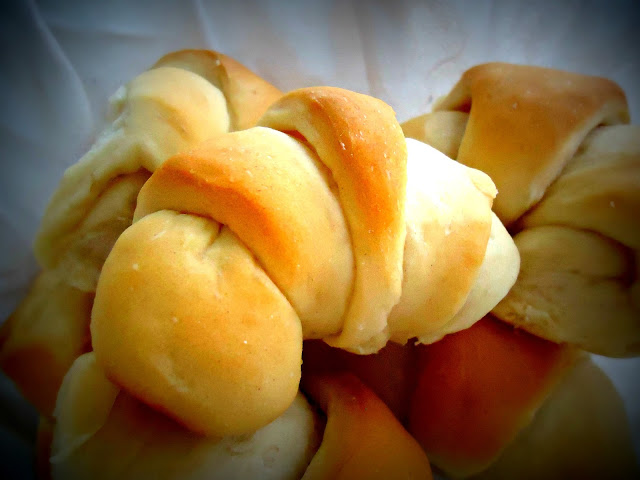
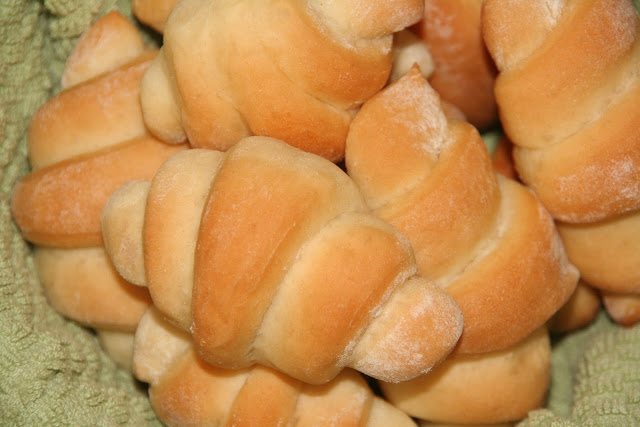
I use it to make dinner rolls, cinnamon rolls, hamburger and hot dog buns, crescent rolls, bread bowls for soup, etc. I think they should be called “45 Minute Rolls”, because I’ve never made them in 30 minutes. I like to let them rise a little longer and bake a little slower than the original recipe calls for. Here’s how I make the AMAZING dinner rolls you see in the picture.

(PS – this recipe makes 48 rolls, so you might want to half the recipe. I do the whole recipe and usually make a pan of 24 dinner rolls, and a pan of 24 cinnamon rolls!)


30 MINUTE ROLLS

3 1/2 cups of warm water (as warm as a nice bath…not scalding)
1 cup oil (I use canola)
1/2 cup honey (or 3/4 cup sugar)
6 TBSP yeast

1 TBSP salt

3 eggs
10 1/2 cups flour (approximately) This recipe is FABULOUS for whole wheat rolls too!

1. I put the water, oil, honey and yeast in my Bosch and turn it on for just a second to mix it up a little. (You can do the same with a mixing bowl and wooden spoon.) Then I let it sit until the yeast rises up and is frothy looking. This might take 10-20 minutes, depending on how warm your mixture is and how fast the yeast grows.

2. Then I add the salt, eggs and half of the flour. The secret to good bread is not adding too much flour. Start off by adding half the flour and turn on the mixer. Then keep adding in a cup or less at a time until the dough forms a ball and is no longer sticking to the side of the bowl. The second it stops sticking to the bowl, do not add any more flour. Keep mixing for a few more minutes. Then turn it off and let the dough rise for about 10 minutes. I put a cloth over it to help it not dry out.


If you are using a bowl and spoon, follow the same directions. Just add half the flour at first and give it a good mixing. Then start adding in more flour until it gets difficult to stir. Then you can turn it out onto a floured counter and keep kneading in a little flour at a time until the dough stops being so sticky. It takes a little practice to know when you have the right amount of flour. But a little less flour is better than a little too much! Too much gives you a hard, dry bread.


3. Form into rolls. I divide the dough in half and work with one half at a time. I just gently press it out with my hands until it is about 1 inch thick. Then I take a cup and cut out rolls and place them onto my large baking sheet (half sheet pan). I can put 24 rolls on that pan, and they are placed touching each other.


4. Let the rolls rise for about 10 minutes or more until you think they look perfect, and put into the oven. Bake at 375 degrees for 15-20 minutes or so, or until they are lightly browned and are done in the center. You can brush them with butter when they come out of the oven. Get your honey butter and homemade jam ready, and ENJOY! (The original recipe says to bake at 425 degrees for 10-12 minutes. I like to cook them slower and not have them get so dark brown on the top.)


I HAVE LOTS OF NOTES:


1. I use the Saf Instant yeast. It’s a lot of yeast, but that’s how it rises so fast! If you are not in a hurry, use less yeast. You can use 2-3 TBSP and still have fabulous rolls, but it will take longer to rise!


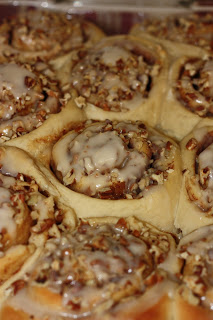
2. How to make cinnamon rolls: Take half the dough and roll it out into a rectangle about 1/4 inch thick. Pour on enough melted butter to coat the whole surface. Mix brown sugar and cinnamon together and spread on. I’ve never measured how much…maybe 2-3 cups brown sugar and 2 TBSP cinnamon. Be generous with the cinnamon….that’s what makes them taste so amazing. Roll up the dough from one of the long sides, forming a long roll of dough. Cut into 1 inch slices and place onto the pan to rise. Follow the rest of the directions above for the rolls. I make a cream cheese frosting for mine. Of course, I never measure, so here’s approximately what I do: Soften about 2 oz of cream cheese and 1 tablespoon of butter in a large plastic bowl. Add 3-4 cups powdered sugar, a dash of salt, 1 teaspoon of vanilla extract, and a few (maybe 4??) tablespoons of milk. Mix with hand mixer. You may need to add more milk or powdered sugar to get the right consistency you like. I like it kinda medium like a cake batter, not thick like cake icing.


3. I have learned that making bread is really easy but can be tricky to give an exact recipe. It depends on what kind of flour you use, how warm the water is that you use, how your oven cooks, and a dozen other variants. When I use freshly ground whole wheat flour, I use a different amount than when using white flour. Just remember the rule about the dough forming a ball and pulling away from the bowl and not sticking to the bowl anymore. That’s the precise moment when your dough has the perfect amount of flour. Also, I use a convection oven at 350 degrees (instead of a regular oven at 375 degrees) and cook two pans of rolls at once. In my mom’s oven, I can only cook one pan at a time, and it cooks hot and uneven, so I lower the temp just a bit and rotate the pan halfway through the cooking process. With a little practice you can perfect the art of bread making!


Source: My mother in law, Glenna Coombs, first shared this recipe with me. She’s a wonderful bread maker! 

Our Favorites from 2012


Last year around this time we posted the most popular recipes of 2011.  This year we thought we’d do something different…..this time we are sharing OUR favorites!  Each of the Mavens has chosen their favorite personal recipe of 2012.  We hope you’ll give them a try if you haven’t already!

from Emily…..Balsamic Glazed Pork Loin
 
from Anna…..Mexican Street Corn
 
from Melissa…..Amazing Crockpot Grits
 
from Audrey…..Mom’s Rolls
from Niki…..Cheesy Vegetable Chowder
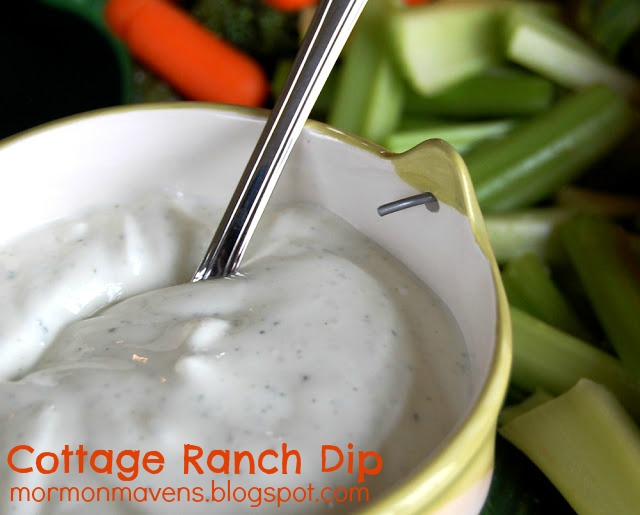
from Julie……Cottage Ranch Dip
 
 
from Amy…..Cobbler Custard Cups
from Kara…..Spinach Dip
 
Care to share what some of your favorite Maven recipes have been?  We’d love to hear from you!
 
image source: Microsoft Office Clipart (manipulated through Picmonkey)
 

The Perfect French Bread

More than a decade ago the ladies at my church had a monthly “homemaking” meeting and, although I do not remember what else we had to eat that night, I do remember the delicious, homemade French bread that my friend Irene Jarvis made.  She shared the recipe with me and when I have the time I like to make my own from her recipe.

Ingredients:
2 1/2 cups very warm water
2 tablespoons cooking oil
2 tablespoons sugar
1 tablespoon salt
6 cups all-purpose flour, stirred and measured
2 pkgs. dry yeast (2 tablespoons)

1.  Into a large warm mixing bowl, pour warm water, then stir in sugar , salt, oil and half of the flour, and the yeast.  Beat vigorously 2-3 minutes.  Stir in remaining flour until all dry ingredients are completely mixed in, leaving the spoon right in the heavy batter.

2.  Allow dough to rest 10 minutes, then stir down.  Allow dough to rest another 10 minutes, then stir down.  Repeat this process until dough has been stirred down five times.

3.  Turn dough onto floured board, kneading only enough to coat dough with flour so it can be handled easily.  Divide into two parts.  Roll each part of dough into rectangles about 9″ x 12″, and roll up like a jelly roll, starting from the long side.  Pinch edge of loaf to seal the dough.

4.  Arrange dough lengthwise on large cookie sheet that has been sprinkled with corn meal, allowing room for both loaves.  Cover lightly and let rise at room temperature for 30 minutes.

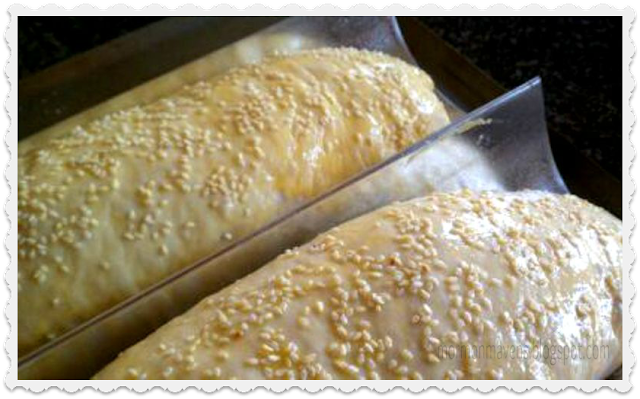
5.  With a very sharp knife, cut 3 gashes(oops, forgot to do that…) at an angle on top of the dough then brush entire surface with lightly beaten whole egg.  If desired, sprinkle with sesame or poppy seeds.

6.  Bake immediately at 400 degrees F. for 25-30 minutes or until golden brown (you will notice mine was a little more brown.  I wasn’t downstairs at the time I should have taken it out!)  Remove from baking sheet immediately and cool on racks.  2 LOAVES


Source:  Irene Jarvis, El Paso, Texas

Mom’s Rolls

For my first recipe post I thought I would share one of my families favorite recipes.  Growing up we had these almost every Sunday.  They are light, buttery, and melt in your mouth.  Enjoy!

½ cup Warm Water
2 ½ T. Yeast

Mix together and set aside.

1 can evaporated milk
2/3 cup sugar
2 eggs
1 T. salt
½ stick butter softened

Mix above ingredients with 4 cups flour.  Add yeast mixture and 1 cup HOT water.  When mixed well add 4-6 cups flour, if the dough is too sticky (I like mine to pull away from the sides of the mixer but still stick to my finger) add flour ¼ cup at a time.  Knead for 2 min on medium speed.  Let rise until double.  Punch down and let rise until double again.  Punch down then separate into 4 equal parts. Roll 1 part of the dough into a circle. 


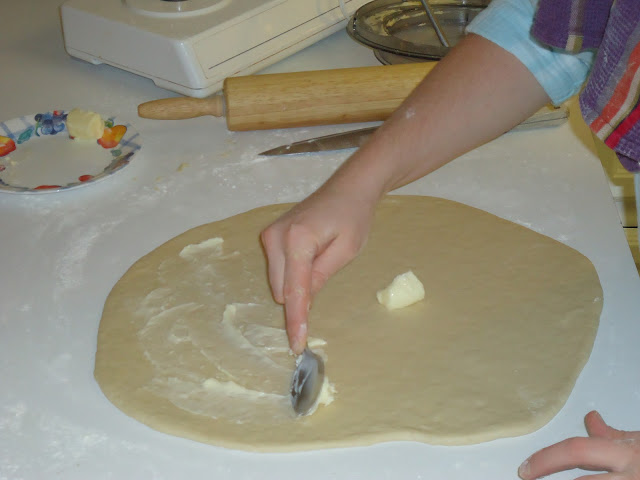
Spread about 2 T. of  softened butter onto the dough.

Cut the dough into 12 wedges.


Roll each wedge from the outside towards the center to create a croissant shape (My kids love to help me with this). Repeat with remaining dough.  Place 2 dozen rolls on a cookie sheet (this recipe will fill 2 sheets) cover and let rise until double again.  Bake at 350 for 12-15 min, or until golden brown.

NOTE: This recipe works well for cinnamon and orange rolls.  Instead of rolling into circles roll into rectangles and fill with either of the following:

Cinnamon:                                                  Orange:
1 stick melted butter                                  1 stick melted butter
1 c. brown sugar                                        1 c. sugar
1 t. cinnamon                                             1-2 t. orange zest

Top with cream cheese frosting               Top with orange frosting.  

Navajo Tacos

Mr. Blue Eyes tells a story about how one of his history teachers was teaching them about the Sioux Native American Tribe. The teacher got up and wrote “Sew” on the black board (this was before white boards–when did I get so old?). No kidding. The man should have been fired on the spot. I know a regular Joe could have made that same mistake, but this guy was TEACHING the class. Fired.

What does this have to do with cooking? Absolutely nothing. But if you’re going to make Navajo Tacos, you have to know how to say it. The “j” says the “H” sound. Don’t let it tell you otherwise. Nava-hoe. Say it with me, now. Nava-hoe. Let’s try it with the correct spelling. Navajo. Good.

Also, before we begin: I am not using native Navajo Fry Bread. It’s fairly easy to do and maybe someday I’ll make a post of it, but today is not that day. I am not an experienced Fry Bread maker and so I stick to what I know–regular old yeast-risen dough.

Let’s begin, shall we?

Meat Mixture Ingredients*:
1 Medium Onion
1 lb Ground Beef
2.5 – 3 cups Chicken Broth
1 Tbsp Chili Powder
2 cloves Garlic, chopped (or use powdered)
2 tsp ground cumin
2 tsp dry oregano
2 tsp dry basil
2 cans Pinto Beans

1. In a Large pot, saute the onion in a Tbsp butter or oil, about 3 minutes, until limp.
2. Add ground beef and brown. Drain off any fat.
3. Add the chicken broth and all the herbs. Stir until combined. Add beans.
4. Set to simmer and stir occasionally. (I also do this in the morning and put it in my crock pot on Warm for dinner in the evening.)

Fried Scones Ingredients**:
Bread Dough: I use this recipe. You can also use Frozen Rolls–thawed, or whip up some fry bread yourself.
2 – 4 cups Vegetable Oil

1. In a Large Skillet, pour oil in until there’s about 1/2″+ in the bottom. Heat the oil over med/high heat.
2. While the oil is heating, roll out a portion of bread dough on a slightly floured surface. Using a pizza cutter or knife, cut into sections. OR take a large handful of dough and work it flat into a disc shape (if you are using frozen rolls, for example).

3. When the oil is hot (and not until then!), gently place a section of bread into the oil. Let it cook about 1 minute or until lightly browned. It will puff up–and it’s supposed to! Using tongs or two forks, gently turn it over. Be CAREFUL! Oil burns are NO FUN.

4. Remove onto a paper towel and keep warm in the oven, if needed.

Don’t be fooled! I used paper towels between each layer, but that wouldn’t look very good in a picture, would it?

Topping Ingredients:
1-2 Large ripe tomatoes, chopped
3/4 lb cheese, shredded (we use Cheddar)
1 sm bag (or 1/2 head) Lettuce, shredded
1 C sliced green onions
1 C sour cream
Salsa (if preferred. I like it. Mr. Blue Eyes does not.) 🙂

Layer a Scone, a ladle full of meat sauce, and the toppings you want onto a plate. Cut into it with a fork, or eat it by hand.

*I have found that sometimes the chicken broth needs a little thickening. It tastes great without the thickening, but it can be a little runny. This leads to soggy scones. Gross! Use a little corn starch and cold water (maybe 1/3 C corn starch to 1/4 C water).

**Scones are DELICIOUS lathered in a layer of honey/butter, too! We always leave some room for this delectable dessert!

Source: Modified from a good family friend, Janet

~Kara

Hot Dog Buns

I’d been wanting to try this recipe for a while, since first seeing it on Annie’s Eats (one of my favorite cooking blogs).  When I saw an idea for Mexican-inspired hot dogs on Pinterest, I figured now was as good a time as any to give it a shot!  (Incidentally, those Mexi-Dogs are coming in a recipe post soon.)

Ingredients:
1 Tbsp. sugar
2 1/4 tsp. instant yeast
1/4 cup warm water (105-110 degrees F)
1 cup warm milk
1 Tbsp. vegetable or canola oil
1 tsp. salt
3-4 cups all-purpose flour
1 beaten egg with 1Tbsp. water
sesame seeds, optional

Directions:

  1. In the bowl of a stand mixer, combine the sugar, yeast, and warm water.  Stir in the milk, oil, salt, and 3 cups of the flour.  Using the dough hook, mix until well combined.
  2. One tablespoon at a time, add in more flour (up to one cup) until dough pulls away from the side of the bowl or until it is no longer wet/sticky.  The full cup may not be needed.  I used about 7 tablespoons this time.  Machine-knead on low for 5-7 minutes; the dough should be smooth and elastic at this point.
  3. Turn the dough into a lightly-oiled bowl, turning over to coat the entire surface.  Cover the bowl and let the dough rise until doubled, about an hour.
  4. Line your baking sheet with parchment paper.  Turn the dough out onto a work surface sprayed with nonstick cooking spray (I used a flexible cutting mat).  Use your kitchen scale (I used mine on “grams” for easier math!) to divide the dough into 9 equal portions.  Shape each portion into a ball, and then into a cylinder about 4 1/2″ long.  Place on the parchment paper, flattening each bun just slightly.  Place the buns next to each other to where they almost touch.  (They’ll kind of morph into each other as they sit there.)  Cover with a clean kitchen towel and allow to rise until almost doubled, about 45 minutes.
  5. Preheat oven to 400 degrees.  Brush bun tops with the egg wash; then sprinkle with sesame seeds, if desired.  Bake for 18-20 minutes or until golden brown.  Place the buns on a wire rack to cool.

Notes:
  • Upon sampling the buns plain, we all thought they needed a bit more salt.  But eaten with the actual hot dog and fixin’s, we didn’t even notice.  Still I may try a little more salt next time.
  • If you don’t have a kitchen scale, you really should get one.  I used to scoff at celebrity chefs who used them, but I’m a believer now.  I got an inexpensive one at Target that can be read with either grams or ounces/pounds.  I use both, depending on what I’m doing.
  • Parchment paper, too, seemed unnecessary to me at one time;  but after trying it, I have to admit that I love it.  Clean up is a breeze.  No more scraping things off the cookie sheet!
  • You can either cut the tops or the sides of these buns, but I prefer top-cut.
Source:  Annie’s Eats

All Purpose Bread Dough

I love making bread. Maybe it’s my mom’s blood coursing through my veins, but making bread just makes me feel so…so…ACCOMPLISHED! If I do nothing else in a day but make a loaf of bread, I have been successful. The end.

We use this recipe for many things. That’s why it’s ALL PURPOSE! Rolls, Cinnamon Rolls, a regular loaf, etc. I have even used it to make Navajo Tacos and fried it for the scones. All these things will be posted on the blog eventually, but we have to have the basics first. Right?

Ingredients:
4 Cups Warm Water, divided
4 Tbsp Yeast
2/3 C + 1-2 Tbsp Sugar
4 Eggs
1/2 C Butter (or margarine)
4 tsp Salt
10 – 12 Cups Flour

1. In a mixing bowl combine 1.5 C warm water, yeast and 1-2 Tbsp Sugar. Wait approximately 5 minutes for it to activate (get bubbly).
2. Add the rest of the water, 2/3 C sugar, the eggs, the butter and the salt and mix together. It won’t fully incorporate, just kind of mix it all around.
3. Mix the flour in, one cup at a time, until a slightly sticky dough forms. Knead for 200 turns on a floured board–or, if you’re lazy like “yours truly,” let the stand mixer go for 10 – 15 minutes.
4. Cover with a towel and let raise till doubled in size.
5. Punch Down and make something YUMMY!

~Recipe halves easily!
~Can be refrigerated for up to 1 week for later use.

Source: My friend, Stasha P.

~Kara

Bread Excellent – White or Wheat

This bread lives up to its name – it is delicious! The title of this bread comes from my mom’s recipe. This recipe is a compilation of her recipe, my additions, and a “Make-a-Mix” recipe. I use my bread machine as a dough machine then put the dough into bread pans – but this works just as well being made in a bowl by hand. I make a bread “mix” and store it for making bread throughout the week. The process is the same for White or Wheat Bread.

Ingredients for White Bread Mix:
20 cups bread flour
1 1/2 cups powdered milk
1 1/3 cups gran. sugar
4 1/2 tsp salt

Ingredients for Whole Wheat Bread Mix:
20 cups whole wheat flour ( I grind my own flour to insure we are getting all the goodness. I use 12 cups Hard White flour, 3 cups Hard Red or Bronze flour, 5 cups Spelt flour – you can use what works for you)
1½ cups powdered milk
1 1/3 cups gran. Sugar
6 tsp salt

1. Mix all ingredients together in a large container. This will store for 4 months in the pantry.

Ingredients for Bread:
1 tbsp Instant Yeast
7 Cups Bread Mix
1 tbsp Lecithin Powder (optional)
1/3 cup oil (I use olive)
1 egg beaten
2 cups very warm water
Butter

1. Put yeast, bread mix, Lecithin Powder, and oil in large bowl or bread machine
2. Add Olive Oil
3. Add beaten egg with enough of the very warm water to make 2 ¼ cup liquid.
4. Mix all ingredients together until very well blended adding additional mix 1 tablespoon at a time, if dough is too sticky

If using a bread machine set on dough setting, if not:

5. Pour out onto flour covered or non-stick sprayed surface. Knead for 10 minutes.
6. Place dough in large greased bowl , cover and let the dough rise in a warm place until double.
7. Punch dough down. Let rise about 20 min more.
8. Turn dough out onto non-stick sprayed surface.
9. This will make 2 large loaves, 3 medium loaves or 6 baguette shapes. Separate bread according to how many loaves you are making. and roll into bread loaf shape.
10. Place into non-stick sprayed bread pans or large cookie sheet for baguettes. Let rise for 30 minutes in warm place. I turn my oven on at this point and let the bread raise in the pans on top of the oven covered with a cloth – if they are raising fast they will only need 20 min to raise.
11. Bake for 18-25 (depends on the size of your loaf) minutes in 350 oven or until golden – wheat bread will take longer than white and will be darker.
12. When bread is done, remove from pans, place on cooling rack and brush tops with butter.

Enjoy!

Source: My mom, Make-a-Mix and me

Butterfly Crescent Rolls

Nothing takes me back “home” more than the smell of freshly baked bread permeating the air. Grandma and Mom are the best bread bakers I know and, with Grandma’s permission, I share this delicious recipe. Big holiday dinners just would not be the same without these rolls!

Ingredients:

1 Cup Boiling Water
1/4 Cup Sugar
1/2  Cup (1 stick) BUTTER
1 Egg
1 Tbsp Yeast
4 Cups Flour (divided)
1/2 tsp Salt
1/2 tsp Baking Powder
1. Preheat the oven to 350 degrees.
2. In your favorite mixer* (I own a Kitchen Aide, which I LOVE–but I’d prefer a Bosch for bread…here’s to someday!), mix the water, sugar and butter until the butter is melted.
3. Add the eggs and the yeast. (Test the temperature before dumping in your yeast. If it’s too hot, the water will kill it.) Mix well.
4. Add half of the flour, and all of the salt and baking powder. Mix until fully incorporated.
5. Add the remaining flour. The dough should be slightly stiff.
6. Let your machine knead the dough for 10 minutes.
7. Move your dough to a Large Bowl (optional) and cover with a towel. Let rise until doubled in size.
8. Punch the dough down.
9. On a lightly floured surface, roll 1/2 of the dough out in a circle (pizza shaped) until 1/2 an inch thick.
10. With a sharp knife (I use a pizza cutter), cut the dough like you would a pizza into several slices. The number of slices depends on what you’re making the rolls for. The fewer the slices, the bigger the rolls–good for sandwiches. The more slices, the smaller the rolls–good for a dinner side!

11. Take a slice by the fat end and roll it up to the point.
12. Place on a slightly greased cookie sheet, point down so it doesn’t come unrolled while baking and make bird shaped bread–NOT that I’m speaking from experience! *ahem*. Place them about 2 inches apart.
13. Continue until all the slices are shaped into rolls and on cookie sheets.
14. Cover with a towel and let rise until doubled.
15. Repeat steps 9 – 14 for the other 1/2 of the dough.
16. Bake rolls for 15 – 20 minutes, or until the rolls are a nice golden brown color.
Doubles easily.

*If you don’t have a mixer, that’s fine! I used to make these by hand. When you get the kneading part, turn the dough out onto a floured surface and knead by hand, turning about 200 times or for 10 minutes.

Source: My wonderful grandma, KaraLyn Taylor

ENJOY!
~Kara