How To Make Melissa’s Yummy Cinnamon Rolls – Photo Tutorial

I originally posted this on my own blog, but wanted to share it here also since so many people are enjoying this recipe! Perfect for Christmas morning, or to take to Christmas parties! I promise they are easy to make, and they are sooooo delicious! 

Cinnamon Rolls


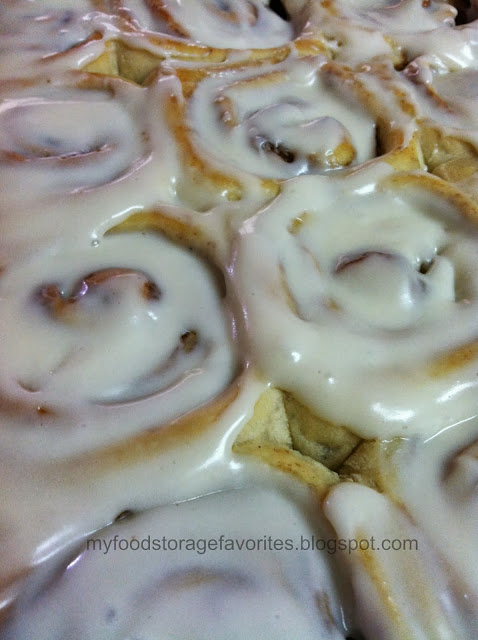
(I know this picture is obnoxiously large, but I wanted you to be able to get up close and personal with these cinnamon rolls. ha! ha!)


1. Start with the 30 Minute Roll Recipe
Note: This recipe makes about 50 cinnamon rolls! You might want to half the recipe!


Mix and rest 10 minutes:
3 ½ cups warm water                          
¾ cup sugar (OR 1/2 cup honey)
1 cup oil                                                
6 TBSP Yeast (Less yeast may be used, but rising time will be longer)

Add:
1 TBSP Salt                                          
3 eggs (can use egg powder and water)
10 ½ cups flour (wheat flour turns out really light and fluffy)
Mix in mixer or knead. Shape into rolls. Raise 10 minutes. *Bake at 425° for 10-12 minutes or until done. 

2. Here’s How to “Shape into Rolls”
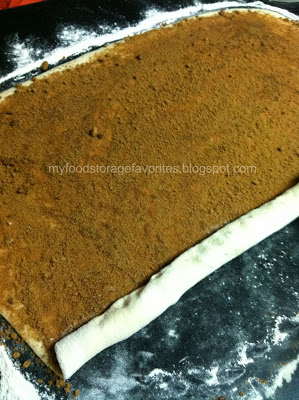
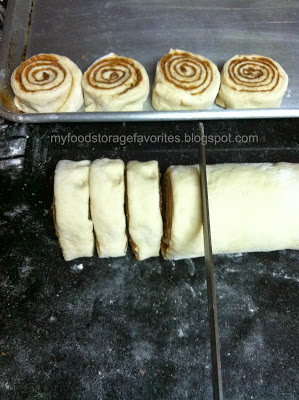
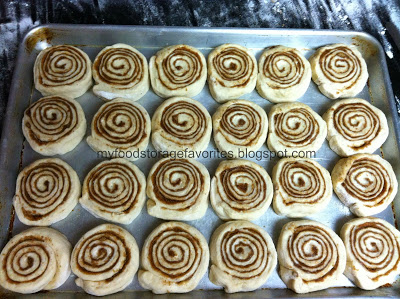
Cut dough in half. Roll out one of the sections into a rectangle about ¼ inch thick (or so!) Spread soft or melted butter over the dough. Spread a mixture of brown sugar and cinnamon over the butter. (I use about 4 cups of brown sugar to 3-4 TBSP of cinnamon. I go heavy on the cinnamon and never really measure. I just dump it in until it taste the way I want it to.) Roll up. Cut into 1 inch sections and place on cookie sheet. Let rise for about 10 minutes or so. Repeat with other section of dough, or just make them into dinner rolls.

*I prefer to bake them at 375 degrees until they are starting to lightly brown and dough is done in the middle. Take out of oven and let cool for about 5 minutes or so. Spread on or drizzle on the frosting.

Photo Tutorial:

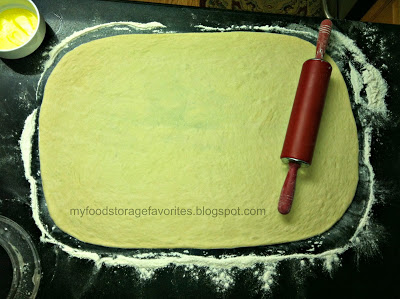
Start off by shaping the dough roughly into a rectangle.
Cinnamon Rolls
Roll out the dough about 1/4″ thick. This will take practice.
Roll out dough
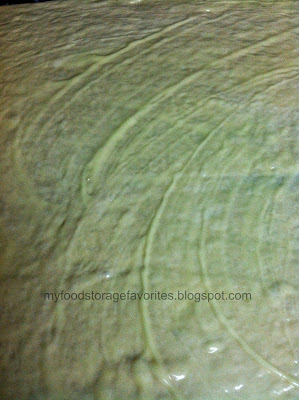
Spread soft or melted butter over dough. 
Spread on the Butter
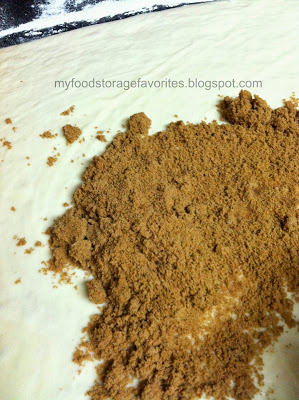
Put cinnamon sugar on the dough.
Cinnamon Sugar
Spread it out smoothly – feel free to use your hands.
Spread out Cinnamon Sugar
Roll up the dough.
Roll up the dough
Cut into 1 inch slices.
Cut the dough
Place them neatly on a cookie sheet and let them rise. This is a “jelly roll pan”, which is half of a sheet cake. You can put them on smaller pans that just hold 12 cinnamon rolls.
Let them rise
Bake them in the oven and look how beautiful they are!
Bake in oven
Oh. My. Yumminess!
The best cinnamon rolls
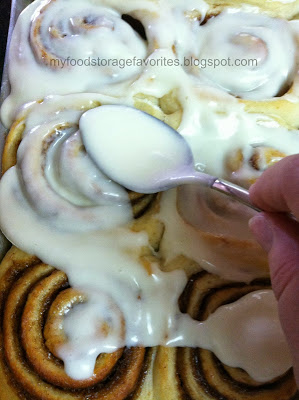
Spread on your cream cheese frosting. (Recipe below)
Spread on Frosting
I wish you could smell these and taste them! Make some! YUM!!!! 
The best cinnamon rolls

3. Here’s How to Make the Frosting
Okay, I have to admit that I never measure! But here is an estimate….Soften about 8 oz of cream cheese and 3 tablespoon of butter in a large plastic bowl. Add 3-4 cups powdered sugar, 1 teaspoon of vanilla extract, and a few (maybe 4??) tablespoons of milk. Mix with hand mixer…you may need to add more milk or powdered sugar to get the right consistency you like. I like it kinda thin like a cake batter, not thick like cake icing.

4. Enjoy!

Eat immediately with a glass of milk and enjoy! They are good for a few days, but you will want to warm them up for about 8 seconds in the microwave!

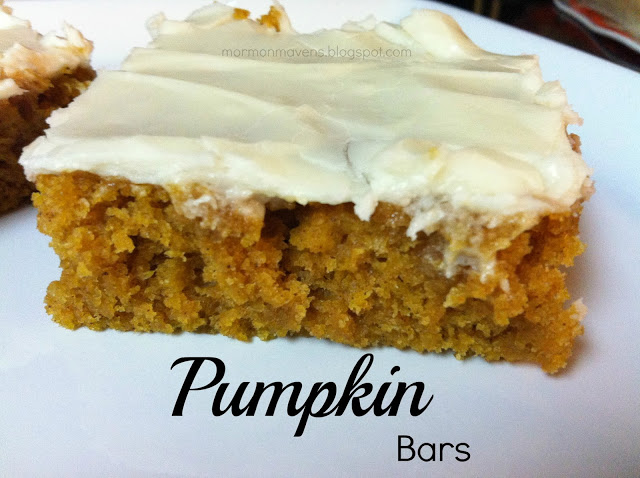
Pumpkin Bars

This is such a moist and delicious cake! Every time I make it for church or family activities, it is eaten down to the very last crumb! 

Ingredients:
1 cup oil
2 cups sugar
4 eggs 
1 tsp baking soda 
2 cups flour   
½ tsp salt   
2 tsp baking powder                               
2 tsp cinnamon                                    
2 cups canned pumpkin
Directions:
1. With wire whisk or electric beater, blend together oil, sugar and eggs until creamy. 

2. Combine baking soda, flour, salt, and baking powder. Then add to creamy mixture. Add cinnamon and pumpkin. Stir until well mixed. 

3. Pour into jelly roll pan. (Or two 9×13 casserole dishes.) 

4. Bake 350° for 25-30 minutes, making sure center is done. Let cake cool before frosting.
Frosting:
3 oz cream cheese               
6 TBSP butter                       
1 tsp milk
1 tsp vanilla                          
2 cups powdered sugar       
dash of salt

Cream together and spread on cooled cake. ENJOY!!

Nectarine Tart

This is a super simple, delicate and delicious tart. You can use any stone fruit.

Nectarine Tart
Makes one 12-inch tart

1 cup all-purpose flour
¼ teaspoon Kosher salt
8 tablespoons (1 stick) very cold unsalted butter
1½ pounds ripe nectarines, sliced into ¼-inch-thick wedges
2 to 3 tablespoons granulated sugar, depending on the sweetness of the fruit

1. Fill a cup with cold water and place it in the freezer.
2. Combine flour and salt in a large bowl. Use a sharp knife to cut the butter into thin slices, then toss the slices into the bowl with the flour mixture. Using your fingers or two knives, rub the butter and flour together until there are no butter pieces larger than the size of a pea, about 10 to 15 seconds.
Remove the cup of water from the freezer. Drizzle 3 tablespoons of water over the butter-and-flour mixture. Give it a few strong squeezes to see if the dough will clump together. If not, pour in another tablespoon of water. Quickly shape the dough into a flattened disk, wrap it in plastic, and place it in the refrigerator to chill for at least one hour.
3. Preheat the oven to 425 F.
4. On a floured surface, roll the dough out into a 1/8-inch-thick circle — place in a tart pan. Trim the excess off the edge. Bake in the oven for about 5-8 mins til slightly firm. Remove and cool slightly.
5. Reduce oven temp to 375 F.
6. Arrange the nectarine wedges on the dough in overlapping concentric circles, Sprinkle the tart evenly with the granulated sugar. Bake it until the fruit juices bubble and the crust turns golden brown about 45 mins. Give or take several minutes. 
7. Let the tart cool on the baking sheet for a few minutes, then slice it into wedges. Serve each wedge with a generous dollop of whipped cream.

source: kcet.org

Pumpkin Lust Cake

Ingredients:

1 stick butter, melted
1 c. flour
1 c. chopped pecans
2 T. sugar
8 oz pkg of cream cheese, softened
1 c. powdered sugar
16 oz container cool whip
2 pkg (3.4 oz) jello instant pumpkin spice pudding
3 c. cold milk
nutmeg for sprinkling

Directions:

1.  For the crust:  Combine butter, flour, chopped pecans and sugar and press into a 9 x 13 baking dish.  Bake at 375 for 10-15 minutes.  Let cool completely.

2.  For the cream cheese layer:  Beat cream cheese, powdered sugar, and 1 1/2 c. cool whip until smooth.

3.  For the pumpkin layer:  Mix pudding mixes with cold milk, whisking for several minutes.  Set it in the fridge for 5-10 minutes to let it thicken.  Spread over the cream cheese layer.  Top with remaining container of cool whip.  Sprinkle with nutmeg.

4.  Cut into squares and serve.  Keep refrigerated.

Source:  Just a pinch recipes

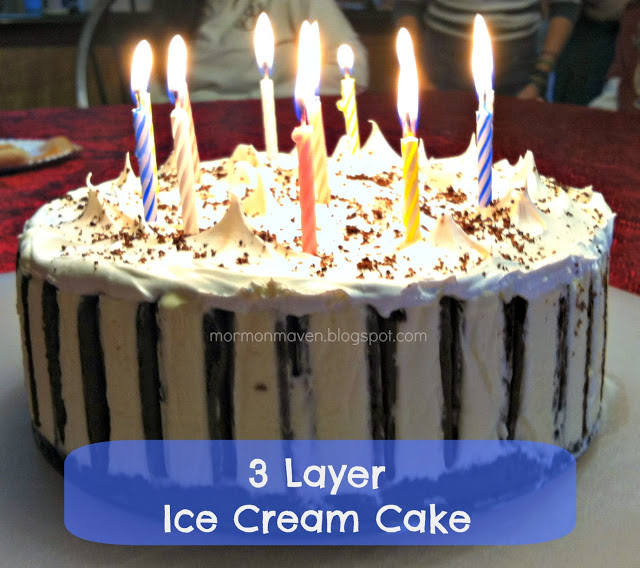
3 Layer Ice Cream Cake

This is the most awesome ice cream cake, and it’s so easy to make! You have to try this!
Ingredients:
1 pack of Oreos
3 quarts of your favorite ice cream
1 box ice cream sandwiches – keep in freezer until ready to use
Cool Whip

Instructions:
1. You will need a springform pan. Spray the pan with non-stick cooking spray. Cut strips of wax paper to line the pan. The spray will help the wax paper stick to the pan.

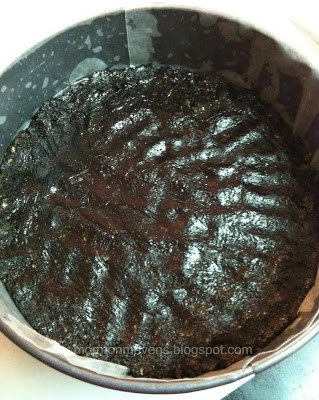
2.. Put about half of the Oreos in a blender and blend to make fine crumbs, or small chunks, whichever you prefer. (You can also put the Oreos in a bowl or zip lock bag and crush with a wooden mallet. Sometimes I use the bottom of a drinking glass and gently tap to break the cookies into small pieces.) Save a tablespoon of crumbs or chunks to sprinkle on top of the final layer. Add a little water to your crushed Oreos so that they stick together a bit and you can press them into the bottom of your springform pan. I used a little too much water by accident and made almost an Oreo brownie. : )  It was good, but I prefer the bottom more crumbly instead of gooey.

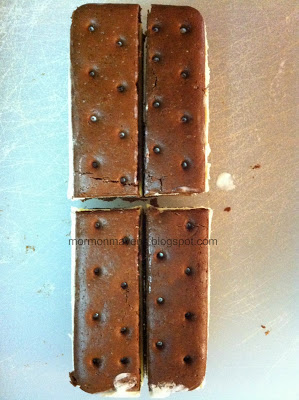
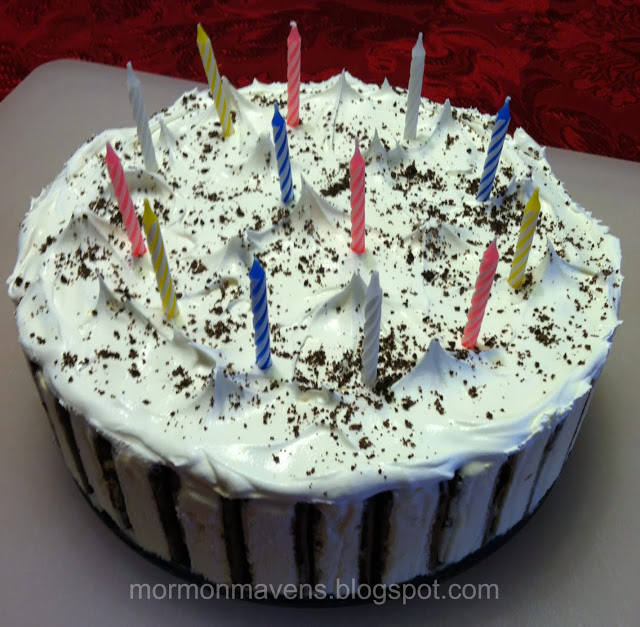
3. Cut several ice cream sandwiches into 4ths like the picture shows. You will need enough to line the whole pan. That will depend on the size of your springform pan. I used about 8 ice cream sandwiches for mine. I personally like the WalMart brand better than some of the name brands I have tried.They have a good shape and texture for this. It’s a messy job, so be prepared to ruin a few and eat them.

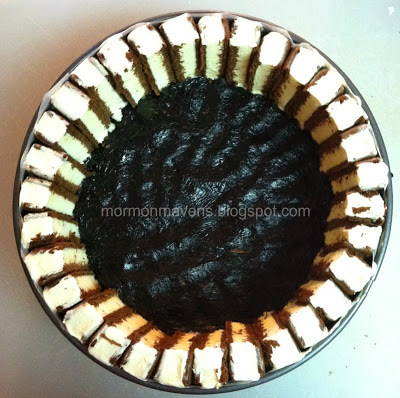
4. Line the pan with the pieces of ice cream sandwich. Make sure the outside rounded edge of the icecream sandwich is facing up and against the pan. This will be what everyone sees when you take off the springform pan, so try to make it pretty.

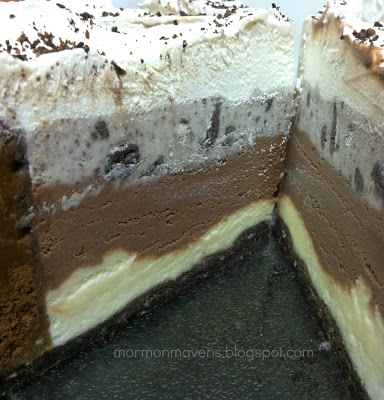
5. Scoop out about 3/4 of the ice cream for your first layer and put into a bowl. The whole quart would be too much. If you have a smaller springform pan, then maybe half of it would do…I have bought the fancy pints of ice cream for making these in a smaller springform pan. Stir the ice cream until soft and smooth. We have been known to add chunks of brownie, nuts, huge Oreo chunks, or whatever we are craving in each layer! Yum! Pour into pan. You may want to put it in the freezer for 15-30 minutes or so to let that layer get firm. if you don’t, your layers will not be straight.


6. Repeat step 5 for the 2nd layer.

7. Repeat step 5 for the 3rd layer. 

8. Spread Cool Whip over the top. Try to make it look pretty. I make little peaks on mine by using the back of the spoon. I can’t explain that…just try to make it look pretty. : )

 9. Sprinkle some Oreo crumbs on the top. This is as creative as I get, but I’m sure you could add some special touches to make it look really pretty. 

10. Put it in the freezer and let it freeze hard for 24 hours. Every time I have made it in the morning and tried to serve it that night, it was not frozen enough and it was more of a blob than beautiful layers. Take out of freezer and remove the outside of the springform pan and the wax paper. Cut and serve! Everyone will love it! : )

Notes: 

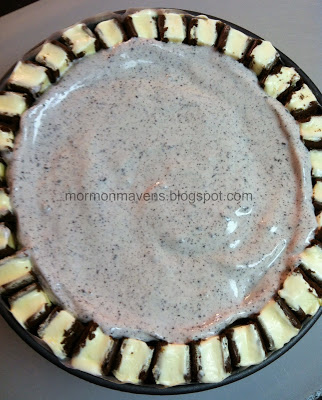
1. I did not freeze each layer before I added the next because I was trying to hurry, and I ended up with waves of color and not exact layers. (See picture below.) No one cared though and we ate every last bite of this! 

2. My favorite one I have made had pink, white and green layers. The colors were beautiful with the Oreo bottom and the Cool Whip topping. I used a strawberry ice cream, but the ice cream was white, so we added a drop or two of red food coloring to make it pink. Then we used a vanilla bean vanilla ice cream for the middle. For the 3rd layer, we used a mint chocolate chip ice cream, but the ice cream was white, so we added a few drops of green food coloring. It was stunning and the flavors were amazing!

3. Feel free to add cookie pieces, brownie chunks, nuts, mini marshmallows, or whatever you like in your ice cream! 

PUDcakes

When someone at church needs a meal brought to them, I always like to take dessert.  I know, I know….we shouldn’t eat so many sweets.  But I just can’t help myself.  And, as I’m always looking for new recipes to put on the blog, it’s also a good opportunity to taste test some new recipes!  This recipe provides a fun new way to enjoy Pineapple Upside Down Cake–in neat, individual servings now affectionately known around my house as PUDcakes!

Ingredients:
2 eggs
2/3 cup sugar
4 Tbsp. pineapple juice (from the can of pineapple slices)
2/3 cup all-purpose flour
1 tsp. baking powder
1/4 tsp. salt
 1/4 cup butter (1/2 stick or 4 Tbsp)
2/3 cup brown sugar
1 can pineapple rings/slices
6 maraschino cherries

1.  Set oven to 350 degrees.  Spray a jumbo muffin tin with non-stick cooking spray.
2.  In a mixing bowl combine the eggs, sugar, and pineapple juice.  Whisk together for a couple of minutes until smooth and well combined. In another bowl sift together the flour, baking powder, and salt.  Add this to the wet ingredients and whisk together until well-blended.  (You can also use a hand- or stand-mixer for this step).
3.  In a small saucepan melt the butter and brown sugar together on low heat.  Stir for one minute on low heat.  Spoon enough of this into the bottoms of the jumbo muffin tin to just cover the bottom.  Place a pineapple ring in each muffin section and place a cherry in the center of each ring.  Now fill each section 3/4 of the way with the cake batter.
4.  Bake for 20-25 minutes or until a toothpick inserted into the cake part comes out clean or with just a titch of crumbs.  Allow to cool for three minutes, then run a knife around each cake to loosen the sides.  Place a cooling rack over the pan and carefully flip the pan/rack over onto a baking sheet (which will catch the drips).

Makes about 6 jumbo muffins

Source:  Big Mama’s Home Kitchen

Easy Donuts

 
Every once in a while my mom would break out the canned biscuit dough and make us these sugary treats. They are so simple and so yummy! Maybe everyone know about these already, but I thought they were worth the reminder. These are best with Pillsbury Grands, but you can use the smaller ones too.
 
Pillsbury Grands, 1-2 cans
sugar
oil, for frying
 
Pour oil into a pot until its about 2-3 inches deep, and heat on medium. While its heating up, open the biscuits and use something to cut a perfect circle into the center of each biscuit. Then drop 2-3  donuts at a time into the oil to fry. The trick to this, is you don’t want the donuts to cook too fast or they will be doughy in the center. So, it should take 25-30 seconds on each side, maybe a bit more if you cook it on lower heat. Using tongs, lift the donuts out of the oil and let the oil drip off good then place the donut into the sugar. Lift all of the donuts and place into the sugar and then transfer to a plate to rest.  Toss the donuts around in the sugar until they are thoroughly coated.  These are really great and so quick.


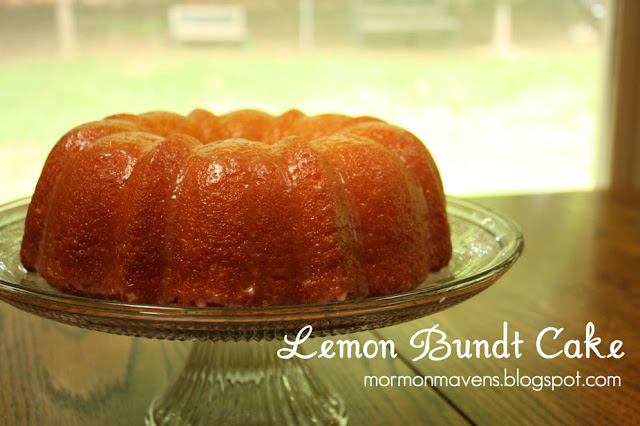
Lemon Bundt Cake

This lemon bundt cake is by far one of the favorites in my family. For sure we have it atleast three or four times a year. (This is THE birthday cake for my grandma, husband, brother, and often times my mom) It is so easy, but tastes super impressive. Your guests will never know that it’s a jazzed up cake mix!

Lemon Bundt Cake 

Ingredients

Cake:
Duncan Hines Lemon Supreme Cake Mix
¾ cup oil
4 eggs
1 large or 2 small boxes lemon jello
1 cup cold water
1 grated lemon rind (finely grated) (at least 1 tsp)

Glaze:
1 cup powdered sugar (sift so there are no lumps) ¼ cup lemon juice stir until smooth

Directions
1. Mix according to cake mix directions.
2. Pour into well greased and floured Bundt Pan.
3. Bake at 350 degrees for 40 minutes or until toothpick comes out clean.
4. Turn out unto serving plate.
5. Poke holes in cake with skewer and pour glaze slowly over cake while cake is still warm. I actually cover the entire cake surface using icing on the back of a spoon or after all these years use a pastry brush and brush it on!!

 *** MUST spray bundt pan with Baker’s Joy or grease and flour! *** It will stick in the pan if you just use Pam!

Source: My momma!

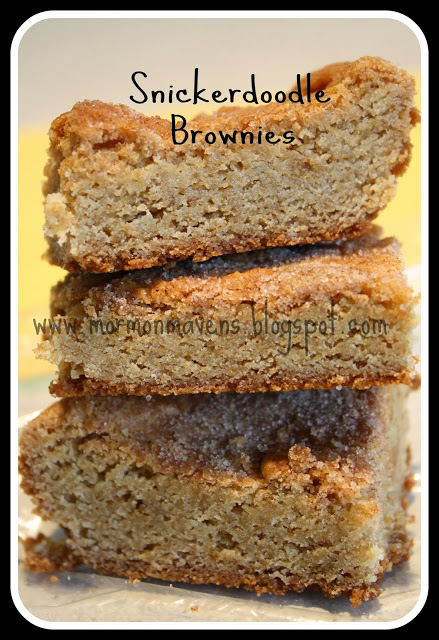
Snickerdoodle Brownies

 
So, you should know, that unless you are prepared to pretty much eat the whole pan of these you might not want to make this recipe! You think I’m kidding!? These have the perfect texture, a little chewy and just the right amount of sweet. This is definitely going down as a family favorite! I did find this recipe on “pin-interest”. (That’s how my mom pronounces it. LOL!) This is a great fall dessert. The cinnamon and sugar are warm and cozy.
 
Recipe:

 2 2/3 cups all-purpose flour
2 teaspoons baking powder
1 teaspoon salt
2 cups packed brown sugar
1 cup butter, at room temperature
2 eggs, at room temperature
1 Tablespoon vanilla
2 Tablespoons white sugar
2 teaspoons ground cinnamon

Preheat oven to 350 degrees. Lightly grease a 9 x 13 inch baking pan.

Get out three separate bowls.
1-In a medium bowl, whisk together the flour, baking powder, salt and set that aside.
2-In  small bowl combine the white sugar and cinnamon, and set that aside.
3- n a large bowl, mix together the butter, brown sugar, eggs and vanilla until smooth. Add the flour mixture to the egg mixture and beat until well blended.
Spread the mixture into the 9×13 baking dish.

Sprinkle the sugar cinnamon mixture evenly over the batter.

Bake for 25-30 minute or until it springs back at touch.
Let the brownies cool on a wire rack for a bit and serve.
 
 
original recipe from Dozen Flours


Blueberries on Snow

(this recipe post is from my personal blog)

Years ago I came a cross a recipe with this title and it intrigued me. I mean, who doesn’t want to try something called “Blueberries on Snow?” I’m so glad I tried it. Every time I take it to a potluck, it is one of the first things to disappear!

Ingredients 
 2 cups graham cracker crumbs
1/2 cup butter, softened (8 Tbsp.)
3 Tbsp. powdered sugar
2 packets Dream Whip
1 cup sugar
1 cup cold milk
1 tsp. vanilla
8 ounces cream cheese, softened
1 can blueberry pie filling

Instructions 
1.  Heat oven to 350 degrees. Combine crumbs, butter, and powdered sugar in a bowl, mixing to combine well. Press into bottom and 1/2″ up the sides of a 9″x13″ baking pan. Bake for 5 minutes. Cool completely. 2.  Pour contents of Dream Whip packets into a large mixing bowl. Add sugar, milk, and vanilla. Beat until you get soft peaks. Gradually add the cream cheese, beating well. Spread over cooled crust.
3.  Carefully spoon pie filling over cream filling. Chill for several hours.

Dream Whip is a powdered non-dairy whipped topping and can be found in the baking aisle at most grocery stores.