Peach Preserves

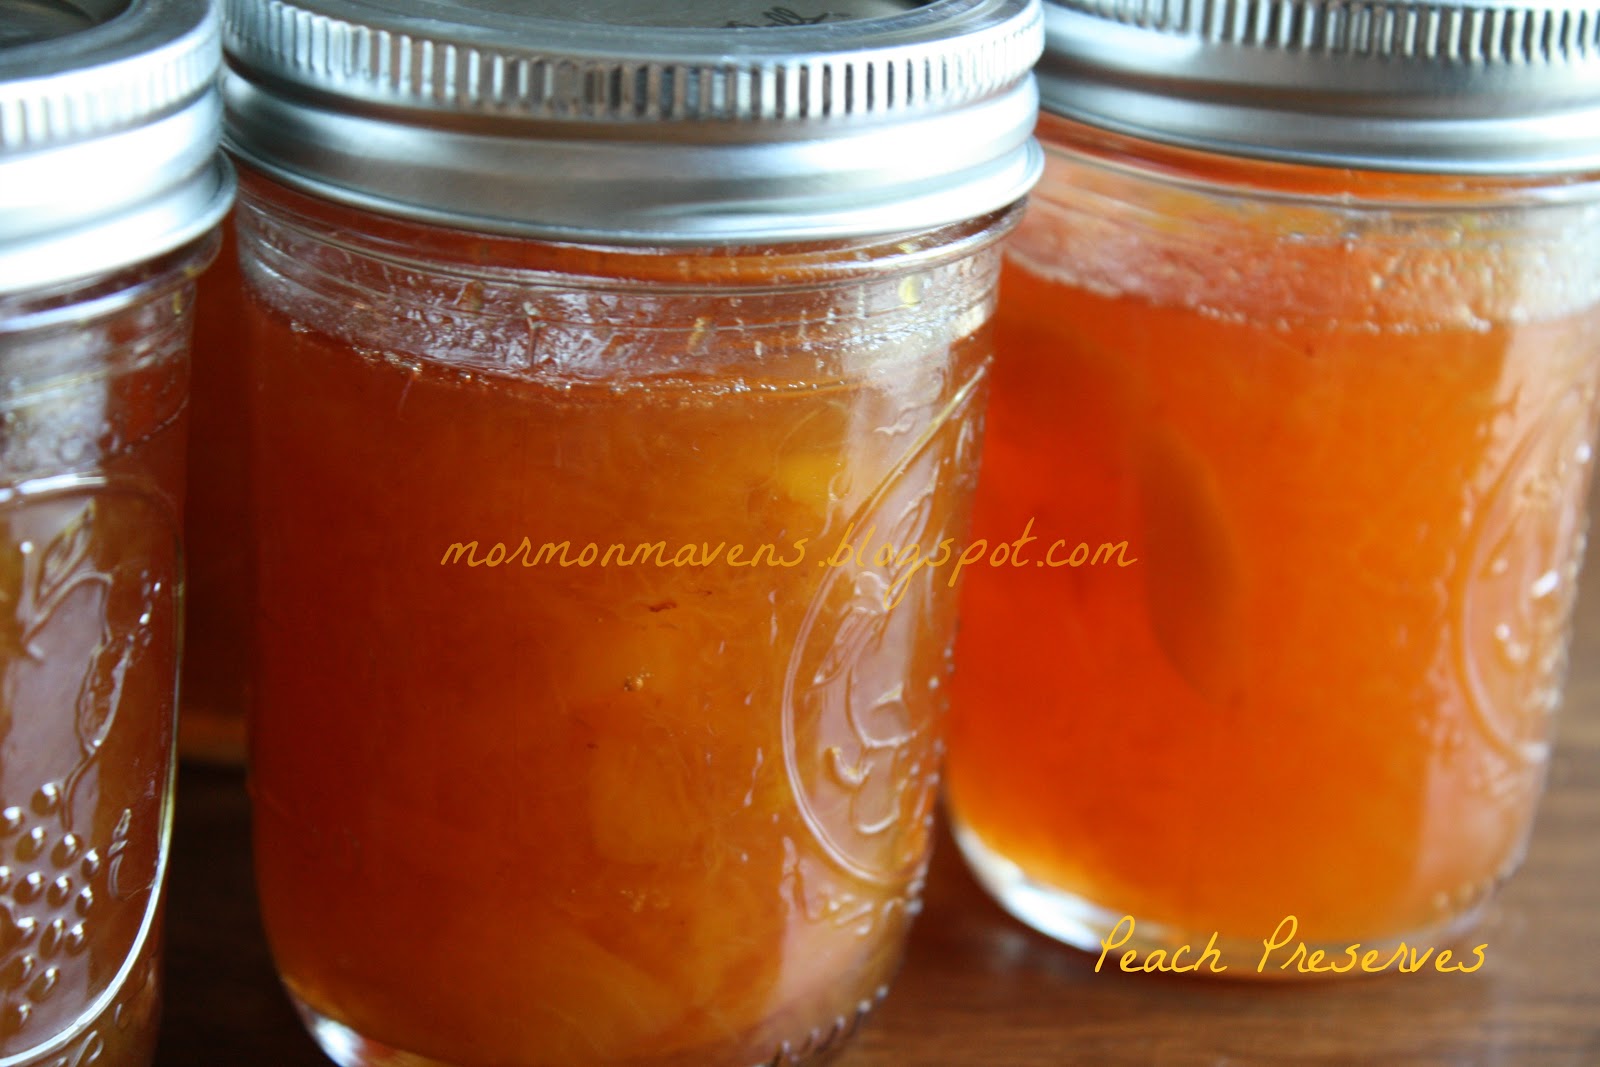
We moved two weeks ago into a new home on the Eastern Shore of Maryland.  The previous owner was an outdoor lover and put lots of time and care into her beautiful yard.  When we were moving into the home I glanced out the kitchen window and saw our new peach tree was OVERLOADED with peaches! Into my wanna be domestic mind came one thought, “Oh! I get to make peach preserves!”  Well, two weeks later as the peaches started to fall off the tree and the neighbors started coming over and asking if they could have some, I remembered I wanted to try my hand at making some preserves.  So, I stopped unpacking and arranging the house and set to making preserves.  Which, I have NEVER done before! Long story short, it wasn’t hard!  It went really great!  (Aside from the fact that I had the heat turned up too high at one point and it popped all over my arm while I tried to stir the concoction! That burned like crazy! But, I’m okay now.) This recipe is scrumptious!  And we have probably gained a few lbs this week because we can’t stop eating it! That probably has something to do with all the sugar in this, but I keep telling myself its the fresh peaches…they are so healthy for you!  This is my recipe. Its a combination of at least 3 or 4 I have read in preparation for this. And believe it or not, I didn’t add as much sugar as some of the recipes suggested! 

12 cups peaches, fresh whole peaches, peeled and chopped, about 20 peaches size of tennis ball
3 TBSP. lemon juice, freshly squeezed, no seeds please
8 cups white granulated sugar, for every 3 lbs of peaches use 3-4 cups of sugar
1 box of pectin
12- 1/2 pint sterilized canning jars and lids, and I also used 2 pint sized jars for immediate use.
tongs, to remove the jars from the canning process in the hot pot of water
wide mouth funnel, but I didn’t have one and all went well

     The first thing I did was set a big pot of water on the stove to boil.  Sterilize everything! Then set to dry on a sterile rack.
    Then boil some more water and get all the peaches washed while waiting for the water to boil.  I filled the sink with the peaches and then filled it with water. Washed them off really well again as I was draining the sink and rinsing it out.  Place all the peaches in a huge bowl and then one by one cut an “x” across the bottom of the peaches and placed them into the pot.  Add about 6-8 peaches at a time and let them boil for about 1-2 minutes.  Then take them out and place them into another large bowl. Add more peaches to the pot of boiling water.
     The purpose of this is to loosen the peach skin so you can peel it right off!  It works pretty well. Although, you might not find it necessary if you just want to dig in and start peeling away with your knife. But, I think the boiling method helps you save more of the peach flesh when peeling.
     After you have seeded and peeled and chopped all the peaches,you should do a bit of clean up and get out the sugar. Add 8 cups of white granulated sugar to the peaches in the bowl and stir really well. Let it sit for about 30 minutes to an hour.  Stir periodically to get the settled sugar off the bottom.
     Add the peach and sugar mixture to a big stock pot and stir in the pectin. Bring the mixture to a boil then lower it as needed to keep yourself from getting burned as you stir constantly to keep it from sticking. Boil and reduce this while stirring for about 30 minutes, maybe longer if it needs to thicken more. Cut off the heat. Funnel the peach preserves into the jars and tighten the lids.
     Bring another pot of water to boil that will be deep enough for your jars to sit in. Water should reach the lids. Add about 5 jars at a time and boil for about 10 min per group.  You should hear the lids popping.  That is the suction being created!  Remove and set aside on a rack to cool.  I even heard the popping after the jars had been removed!  It was like an applause for  a job well done!!!!
    We immediately spooned some hot peach preserves over ice cream and thought we had died and gone to heaven.  This stuff is divine!

Snicker Doodles

Every time I make Snicker Doodles, I always wonder why I don’t make them more often. They don’t take long and they are super tasty! Cooked right, these have that perfect crunchiness around the outside edge with a soft middle. Mm-MMM!

Ingredients:


1 C Shortening
1.5 C White Sugar
2 Eggs
2 3/4 C All-purpose White Flour
1 tsp Baking Soda
2 tsp Cream of Tartar
1/2 tsp Salt


 3 Tbsp White Sugar
2.5 tsp Ground Cinnamon

1. Preheat the oven to 375 degrees F.

2. In a Medium bowl, cream together the Shortening, Sugar (1.5 Cups), and Eggs. I have a superstition about beating the sugar/egg/shortening mixture for five minutes until it’s good and fluffy. I do this with all cookies (or try to) and have no idea it it does anything special, but I like to think it does.

3. In a Small bowl, sift together the Flour, Soda, Tartar, and Salt (or not. Sometimes I add them separately.). Gradually add the dry mixture into the Sugar mixture until nice and incorporated.

4. In a cereal bowl, mix together the Tbsp Sugar and tsp Cinnamon.

5. Taking a heaping teaspoon full, roll the dough into a little ball and then roll it around in the cinnamon until the entire ball is coated.

6. Place on an unprepared cookie sheet two inches apart.

 7. Bake for 7 – 10 minutes. I do mine for 7 minutes and they’re perfect! Cool on a wire rack.

8. Share them. Or DEVOUR them. Whichever you prefer.

Source: LKUEHL, on All Recipes.com, a little personal variation added

~Kara

Hot Fudge Sundae Sauce

I may have mentioned before that I come from a family of sweet-tooths…sweet-teeth…whatever. You can blame my mother (and her mother before her) for my appreciation of Hot Fudge Sundaes.

A sweet lady in Colorado gave me this recipe for Hot Fudge Sundae Sauce after I begged her for it when I tasted its goodness at a Relief Society meeting. It’s so easy to make and 5,000 times better* than that microwavable junk you can buy at the store (no offense, Microwavable Junk!). Now, that’s what I’m talkin’ about!

Ingredients:

1/2 C Karo Light Corn Syrup
1/2 C Evaporated Milk (not Sweet and Condensed!)
2 Tbsp Water
2 C Semi-Sweet Chocolate Chips
1 tsp Vanilla

1. In a medium-sized sauce pan, combine Karo syrup, evaporated milk, and water. Stir over medium heat until it just comes to a boil.
2. Remove from heat and immediately stir in the chocolate chips until smooth.
3. Stir in vanilla.

Yield: About 1 pint

This picture was taken after we and another family dipped into it for dessert, so the amount you see in the jar is not the full amount that was made.

The sauce stores very well in the fridge for a long time. Warm it up in the microwave or over the stove when you’re ready to use it again.

Source: B. Buss, Greeley, CO

*Have I ever mentioned that I may exaggerate a bit? Yeah, I’m an exaggerator. But in my defense, it is better than store bought! 5,000 times better? That’s for you to decide.

~Kara

Mini Berry Tarts

I really love spring. A fresh start in so many ways! One of my favorite spring activities is going to the strawberry patch and picking big, juicy fruit right off the bush. Most of the strawberries make it into our basket, but I will admit that a fair share go from vine to mouth in one swift motion.

 
Once we get the berries home, it’s a race to see how may ways we can use them before they spoil. Among many of the strawberry dishes we have had over the past week were these little babies:
 
I bet you are glad you stopped by, because I am going to tell you how to make them!!! And once you do, share them at your spring brunch, or take some to a neighbor!
 
You will need some sort of tart pan, which looks a lot like a regular sized muffin tin, but with shallower pockets.
 

You could attempt to make the tart shells in a muffin tin, but I am not taking responsibility for stuck and broken shells. Just be sure to grease and flour the pan before you place your pastry in the cups.
 
Tart Shells:
6 T. sugar
2/3 cup margarine
1 1/2 T. cream
1 egg yolk
1/2 tsp. vanilla or almond extract
1 1/4 C. cake flour, plus extra if your dough seems too sticky
 
Directions:
1. Cream sugar and margarine together in a medium bowl. Add cream, egg yolk, and vanilla/almond extract and mix until well blended. Add the 1 1/4 cups of cake flour. If the dough is really sticky, and doesn’t come together or leave the sides of the bowl, add more flour in small increments until it does.
2. Remove dough from bowl and wrap it in plastic wrap. Refrigerate 30 min. to 1 hour.
3. Roll chilled dough out on a floured surface and use a cookie cutter or glass to cut circles about an inch larger than the tart pan cups. Transfer circles of dough to each cup, easing them into the bottom and up the sides. Press gently around the sides and cut away the excess dough on top. Cover the pan with foil and bake at 350 degrees F. for 10 minutes. Remove the foil and bake for 5-10 minutes more or until golden brown (watch them carefully for the color you want, they can over-brown quickly). You want the shells to be crunchy though, not soft.
Allow to cool before filling.
Makes 24 mini tart shells or one 9-inch tart shell*
 
* If you would like to make one large tart shell, roll out dough to 1 inch larger than the pan and gently lay the dough into the bottom and up the sides. Roll the rolling pin over the top of the pan to seal the edges and cut away excess. Lay foil over the dough, gently pressing it against the bottom and sides. Pour 1 1/2 cups baking beads, dry beans, or rice on top of the foil (this is to prevent the dough from rising during baking) Bake this way at 350 degrees F. for 15 min. Remove foil and return the crust to the oven for 10 minutes until golden brown.
 
Tart Filling:
1 C. strawberries
1 C. blueberries (*if you are making a 9-inch tart add another cup of berries)
3 oz. cream cheese, room temperature
4 T. sugar, divided
4 oz. frozen whipped topping, thawed in the refrigerator (that’s 1/2 of an 8 oz. container)
 
Directions:
1. Rinse the berries and dry on paper towels. Cut the strawberries into quarters.
2. Beat cream cheese and 1 T. sugar until smooth. Add whipped topping and mix until well blended.
3. Spread filling into tart shells, and arrange berries on top of filling.
4. Sprinkle with the remaining 3 T. of sugar.
 
Source: adapted from a Lion House Pies recipe.

German Chocolate Caramel Brownies

Do you see that ooey-gooey, nutty goodness amidst the chocolate? Oh yeah, baby. THAT’S why I LOVE these brownies. THAT’S why they’re my all time FAVORITE. Mmm-MMM! And don’t let the steps (or the margarine) fool you, either. They’re pretty easy and most definitely worth it.
Ingredients:
50 Kraft caramels (1 pkg)
1 Cup Evaporated Milk, divided
1 German Chocolate Cake Mix
3/4 Cup (1.5 sticks) Margarine, melted (as much as I LOATH to say it, butter does an ok job, but margarine does it better. Please tell me I never have to say those words again…)
1.5 Cups Chocolate Chips (your favorite–we use semi-sweet)
1 Cup Chopped Walnuts or Pecans–pecans are shown here, optional
1. Preheat oven to 350 degress F, and unwrap all the caramels into a medium-small microwavable bowl.
2. Add 1/2 Cup Evaporated Milk to the caramels and microwave for 1 minute increments (about 5 increments), stirring between each minute until smooth and creamy (or melt in a double broiler). Set aside.
3. Mix the cake mix, the last half cup of evaporated milk, and melted margarine with a mixer for 3-4 minutes until everything is well incorporated, smooth, and light brown in color. The batter should be fairly stiff.
4. Pour 1/2 of the cake batter into a greased 9×13″ cake pan and smooth to the edges.
5. Bake for 6 minutes.
6. Sprinkle chocolate chips and nuts over the cake, immediately after removing it from the oven. They may sink a little and that’s ok.

I was trying to appease the nut-lovers (myself and Mr. Blue Eyes) and the nut-haters (the kids) and did half and half. What we won’t do for love? (notice they’re equal halves…muahahahaha!)

7. Pour creamy caramel mixture over the chips and nuts.

8. Using the unused portion of the cake batter, drop spoonfuls over the caramel. Try to smooth it out over the top as best you can. Sometimes it seems like it doesn’t work too well, but don’t give up! Even if you can still see mostly caramel, it’s ok. (That has happened to me.) The cake batter seems to have a mind of its own and knows to bake up over the caramel.

9. Pop it into the still-hot oven and bake again for 18 minutes. Voila! The yummiest brownies you’ll ever eat!
10. Cool completely and dive in!

A Few Notes:
~Kraft caramels melt the best. 
~German Chocolate Cake mix tastes and bakes the best, although I have used Devil’s Food and Swiss Chocolate and they turned out fine, too. The German Chocolate seems to hold the chips and nuts up best.
~I have seen recipes that use caramel ice cream topping–the kind in the microwavable jar–in place of the caramel/milk mixture. I have never tried it, but it seems like a good idea if you’re in a pinch.
~There is really no way (that I know of) to test to see if these are done. Because of the caramel, they will always be slightly “jell-o-ish” (is that even a word?!) right after you get them out of the oven. There’s no harm in leaving them in for a few extra minutes just in case, but be careful not to overcook them. Hard brownies/hard caramel = No Bueno!
~I don’t know why, but I have never made a batch that didn’t “fall” a little. If you know why this is and how to prevent it, PLEASE let me in on your secret!
~And this is the most important! These are a taste-melding brownie. As much as I love hot, fresh-from-the-oven brownies, these taste the best when they are made the day before (or the morning of at the latest). Trust me.
Source: The best mama in the world, Karri H!
~Kara

Sweet Potato Bread

Happy New Year, Everyone! Having a New Year’s Eve party? Try serving this yummy quick bread; it’s full of flavor. The taste reminds me more of Amish Friendship Bread than of sweet potato, but the yams make it healthier–or at least make you think it is so you don’t feel as guilty when you eat half a loaf in one day…

Ingredients:
3 1/2 C all-purpose flour
1 1/2 t salt
2 t baking soda
2 t ground cinnamon
2 t ground nutmeg
1/2 t ground allspice
1/2 t ground cloves
3 C white sugar, plus topping
4 eggs
1 C vegetable oil
3/4 C orange juice
2 C mashed sweet potatoes aka yams (I used canned; see link below for instructions on how to use from fresh)
1. If you haven’t already done so, mash the sweet potatoes in a bowl with a flat bottom using a potato masher. Preheat oven to 350 degrees.
2. Mix most of your dry ingredients in a large mixing bowl: flour, salt, baking soda, cinnamon, nutmeg, allspice, and cloves.
3. In a separate large mixing bowl, beat together sugar, eggs, and oil. Stir in orange juice and sweet potatoes. Stir flour mixture into egg/sweet potato mixture until just combined.
4. Pour batter into prepared pans. Sprinkle tops with sugar. Bake in preheated oven for 1 hour 25 minutes, or until golden brown and a toothpick inserted into the center of a loaf comes out clean. (This recipe yields 2 9×5 loaves. If you’re making mini loaves like I did, check them after 30 minutes.)
Source: lightly adapted from Sweet Potato Bread II as submitted to Allrecipes.com by Umm Asiyah

Butterfly Crescent Rolls

Nothing takes me back “home” more than the smell of freshly baked bread permeating the air. Grandma and Mom are the best bread bakers I know and, with Grandma’s permission, I share this delicious recipe. Big holiday dinners just would not be the same without these rolls!

Ingredients:

1 Cup Boiling Water
1/4 Cup Sugar
1/2  Cup (1 stick) BUTTER
1 Egg
1 Tbsp Yeast
4 Cups Flour (divided)
1/2 tsp Salt
1/2 tsp Baking Powder
1. Preheat the oven to 350 degrees.
2. In your favorite mixer* (I own a Kitchen Aide, which I LOVE–but I’d prefer a Bosch for bread…here’s to someday!), mix the water, sugar and butter until the butter is melted.
3. Add the eggs and the yeast. (Test the temperature before dumping in your yeast. If it’s too hot, the water will kill it.) Mix well.
4. Add half of the flour, and all of the salt and baking powder. Mix until fully incorporated.
5. Add the remaining flour. The dough should be slightly stiff.
6. Let your machine knead the dough for 10 minutes.
7. Move your dough to a Large Bowl (optional) and cover with a towel. Let rise until doubled in size.
8. Punch the dough down.
9. On a lightly floured surface, roll 1/2 of the dough out in a circle (pizza shaped) until 1/2 an inch thick.
10. With a sharp knife (I use a pizza cutter), cut the dough like you would a pizza into several slices. The number of slices depends on what you’re making the rolls for. The fewer the slices, the bigger the rolls–good for sandwiches. The more slices, the smaller the rolls–good for a dinner side!

11. Take a slice by the fat end and roll it up to the point.
12. Place on a slightly greased cookie sheet, point down so it doesn’t come unrolled while baking and make bird shaped bread–NOT that I’m speaking from experience! *ahem*. Place them about 2 inches apart.
13. Continue until all the slices are shaped into rolls and on cookie sheets.
14. Cover with a towel and let rise until doubled.
15. Repeat steps 9 – 14 for the other 1/2 of the dough.
16. Bake rolls for 15 – 20 minutes, or until the rolls are a nice golden brown color.
Doubles easily.

*If you don’t have a mixer, that’s fine! I used to make these by hand. When you get the kneading part, turn the dough out onto a floured surface and knead by hand, turning about 200 times or for 10 minutes.

Source: My wonderful grandma, KaraLyn Taylor

ENJOY!
~Kara

Instant Christmas Wassail

Just in time for Christmas! If you’ve never had wassail before, I’ve been told it’s similar in taste to Russian tea. I’ve never had Russian tea, but I know I like wassail!
Ingredients:
1 C Tang
2 C sugar
1 1/2 C lemonade mix
2 t cinnamon
1 t ground cloves
1. Mix well.
Source: My mom

When serving I like to pour the water in first and then add the wassail mix and stir; I think it incorporates better that way as opposed to putting the mix in your mug and then adding the water.
Yields more than the quart pictured above (not more than a cup more–I didn’t measure it).

Chocolate Raspberry Cupcakes

Mr. Blue Eyes (yes, my husband cooks!–Thankfully!) and I made these earlier this month for my birthday. They. were. DELISH! You must try them! The frosting was a little complicated for us, being our first time using a meringue-type, but it was worth it! I don’t generally care for frosting. I’m the weirdo at all the parties who scrapes the frosting off the cake to eat it plain. But I’m telling you I REALLY liked this frosting. Very light. Truly worth every minute!

Chocolate Cupcakes

Ingredients:
18 Paper Cupcake Liners (plus a few extra…we needed them)
1 1/2 Cups all-purpose Flour
1/2 Cups Dutch-processed cocoa powder (we used Hersey’s Cocoa Powder)
3/4 tsp Baking Soda
1/4 tsp Salt
1/2 Cup (1 stick) unsalted butter, at room temp, cut into small pieces
1 1/3 Cups Sugar
1 tsp Vanilla Extract
2 Large Eggs
1 Cup Milk, at room temp
*3/4 – 1 Cup Fresh Raspberries (or frozen, thawed and well drained)–OPTIONAL

1. Preheat oven to 350 degrees F. Place paper liners in all wells of Cupcake Tins (we used one 12 cup tin, and one 6 cup tin.)

2. In a small bowl, sift together Flour, Cocoa Powder, Baking Soda, and Salt. Set aside.

3. In a Large bowl with an electric mixer, beat butter until creamy–about 2 minutes. (We used our Kitchen Aide for this.) Add sugar gradually, beating until light and fluffy, about 3 minutes. Be sure to scrape the bowl once or twice. Beat in the vanilla and eggs, one at a time until they are each mixed in well.

4. Alternating about 4 times, mix in the flour mixture and the milk. Beat briefly between each add-in to make sure it’s well incorporated and the batter is smooth.

5. If you’re using Raspberries, this is where you fold them into the batter. We only did 3/4 Cup, but next time I think we’ll do a full 1 cup.

6. Divide batter evenly among the cupcake wells. Bake for 22 minutes, or until a toothpick inserted in the center shows a few moist crumbs.

7. Cool on racks for 5 minutes, then remove cupcakes to cooling racks to cool completely.

Italian Meringue Butter Cream Frosting

Ingredients:
Scant 2/3 Cup, plus 3 Tbsp Sugar
1/4 Cup water
4 Large egg whites, at room temperature
1/2 tsp cream of tartar
1 1/2 Cups (3 sticks) unsalted butter, at room temp, cut into small pieces
*3/4 Cup Raspberries (OPTIONAL)

1. Place 2/3 Cup Sugar and the water in a small saucepan. Stir to wet the sugar. Bring to a boil over medium-high heat, stirring constantly. Dip pastry brush in cold water and wash down the sugar crystals from the sides of the pot once or twice. Turn down the heat to simmer gently.

2. Place the egg whites in a clean, grease-free mixing bowl and whip until frothy on low speed using balloon whip attachment to your standing mixer. Add cream of tartar and turn speed to medium-high. When soft peaks form add remaining 3 Tablespoons sugar gradually. (This is the meringue part of the butter-cream, and the frosting may be used at this point for low-fat, marshmallow-like frosting; it must be used immediately.)

3. Bring the sugar-water mixture to a rapid boil and cook until it reaches 248 – 250 degrees F. (We don’t have a thermometer *GASP!* and so the following directions were vital.) As syrup cooks, look for visual clues to assess temperature. It starts out thin with many small bubbles over the surface. The water will begin to evaporate and the mixture will become thicker. The bubbles get larger and sticky and pop more slowly. At this point the syrup looks thickened, but it has not begun to color. If you drop a bit of the syrup into a glass of cold water it will form into a ball. This is the firm-ball stage, and the syrup is ready.

4. Pour a thin, steady stream over meringue, without pouring any on the rotating whip or the sides of the bowl. (Be quick! We didn’t do it fast enough and had to make the syrup a 2nd time.) Whip meringue on high speed until cool. When the bowl is no longer warm, stop the machine and touch the surface of the meringue with your finger to check that it is cooled. With mixer on medium speed, add the butter, a couple Tablespoons at a time. Keep beating until the buttercream is completely smooth. It is now ready to use. Any flavorings or variations can be added at this time.

5. This is where you beat the raspberries into the frosting. Just keep the beater going and add the berries. The buttercream will turn pink and you will see bits of fruit (YUM!) suspended here and there. (Beautiful!)

6. Frost cupcakes smoothly using an icing spatula or a spoon. Top with garnish, candles, or whatever you prefer!

*You don’t have to use Raspberries. Use the cupcake and frosting recipes as is, or with your own variation. That’s what I love about these recipes! Make them your own.

Yield: The recipe says 18 cupcakes, but we got 18 big cupcakes + 10 small ones, and we weren’t skimpy when filling either!

Notes:
     ~Like I said before, the frosting was a little more difficult than we expected and we had a few hiccoughs in the procedure. Mr. Blue Eyes was in charge of the syrup, while I did the meringue. Having four hands worked well for us first-timers.

Source: A Baker’s Field Guide to Cupcakes: By Dede Wilson

~Kara