Honey Sweet Cornbread

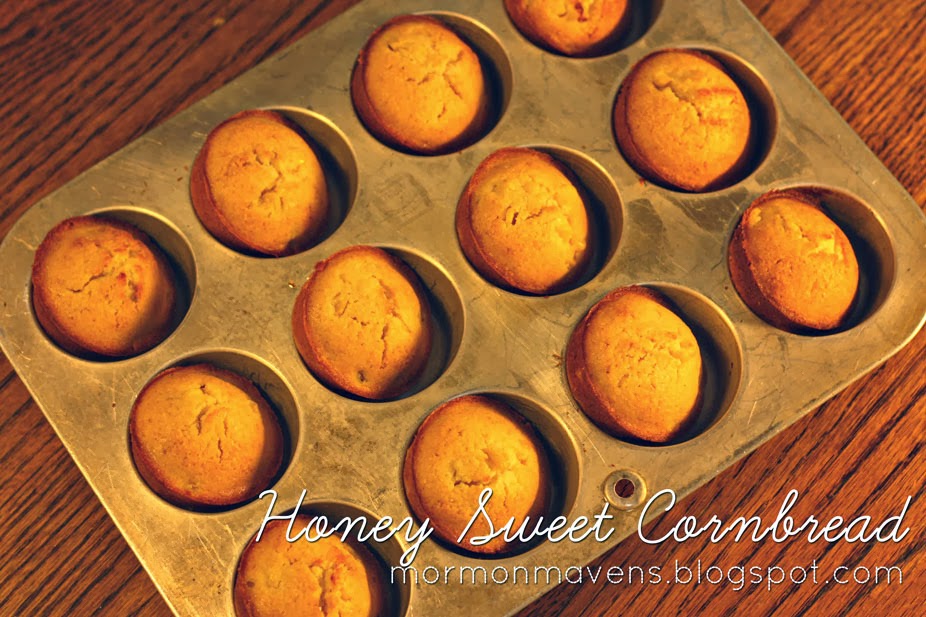
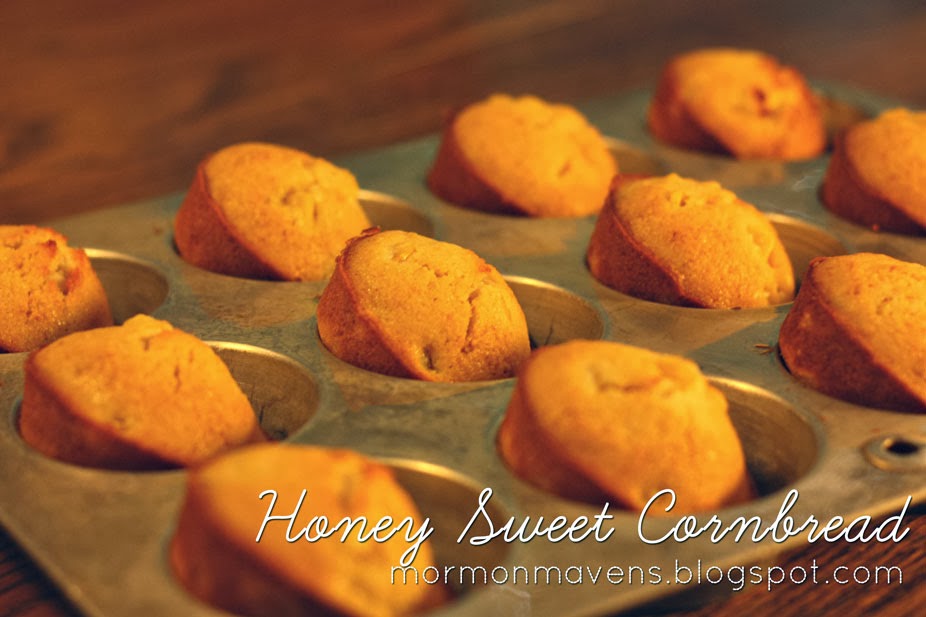
My sister Laura loves honey. I mean, really loves honey. She’s known to make little caves in all of her rolls, muffins, what have you and then proceeds to fill it to the brim with honey. I was making these corn muffins while she was over. She grabbed a few on her way out. She proceeded to call me from the car telling me how amazing these muffins are…. no honey needed. (say what?!) I’m not totally sure if the remaining muffin she had actually made it home to her husband.

Really, these corn muffins are pretty great. They are super easy too. I’m positive that they’ll become a family favorite in your home!

Ingredients
1/2 cup butter, softened
2/3 cup white sugar
1/4 cup honey
2 eggs
1/2 teaspoon salt
1 1/2 cups all-purpose flour
3/4 cup cornmeal
1/2 teaspoon baking powder
1/2 cup milk
3/4 cup frozen corn kernels, thawed

Directions
1. Preheat oven to 400 degrees F. Grease or line 12 muffin cups. (My muffin pans have shallower muffin cups, I was able to make 18 from this recipe)
2. In a large bowl, cream together butter, sugar, honey, eggs and salt. Mix in flour, cornmeal and baking powder; blend thoroughly. Stir in milk and corn. Pour or spoon batter into prepared muffin cups.
3. Bake in preheated oven for 20 to 25 minutes, or until a toothpick inserted into center of a muffin comes out clean.

Grilled Pizza

Last summer I decided to try making my pizza on the grill. I think I saw some chef on the Food Network make some grilled pizza years ago. I didn’t look up a recipe. I just used my favorite dough recipe and added the toppings I liked. I made it again this summer and realized that I really really love it. You might just find me firing up my grill come January and going out in my winter clothes to grill my pizza! 

Start with your dough. Here is the recipe I use (makes about two thin crust pizzas)

Easy Pizza Dough

1 Tbsp. Yeast
1 C. warm water
2 Tbsp. olive oil
1 1/2 tsp. salt
1 1/2 tsp. sugar
2 1/2 C. flour

Dissolve the yeast in water and oil. Stir in salt, sugar and flour. Mix until ball forms. Allow to rise for 5 or 10 minutes. 
Get all your favorite pizza toppings ready (our favorite pizza was the olive oil, tomato, sauteed onion, mozzarella and fresh basil pizza.) 
Meanwhile heat your grill to med.high heat.

At this point I spread my dough out on a greased cookie sheet (normally I would use corn meal, but this is going on the grill)


Take your dough out to your hot grill and throw it on there. I just made a rustic rectangle dough shape.
 After just a few short minutes you will want to turn your crust over.
 Then, working quickly, add your desired toppings. Also, sprinkle a bit of kosher salt over the top of your pizzas. It just boosts the flavor. Close the lid to your grill and give your pizzas 3-7 minutes or until the cheese melts. If you think your crust is going to burn, go ahead and lower the grill heat.


Remove from the grill, cut up and enjoy!


Ice Cream Cookie Treats

A treat now and then is good for everyone!  This is really ridiculously yummy!  So, easy to put together and the kids love them, ofcourse.

Ingredients:
1 c. Butter Flavored Crisco
3/4 c. Granulated Sugar
3/4 c. Brown Sugar
1 tsp. Vanilla Extract
2 Eggs
*Blend these ingredients until smooth.
2 1/2 c. All-Purpose Flour
1 tsp. Baking Soda
1 tsp. Salt
*Add these ingredients to the first mixture.
1/2 c. Semi-Sweet Chocolate Chips
1/2 c. White chocolate chips
*Add chips to mixture.
—————–
Vanilla icecream

Directions:
Drop by rounded tablespoons on a greased cookie sheet. Bake in preheated oven at 375 degrees for 9-12 minutes or until barely golden brown! Remove cookies from baking tray and place on cooling rack. Let them cool completely then add a tablespoon of vanilla icecream to the cookie and gently press another cookie on top. Serve immediately.

 *You can add any kind of chocolate chips, or nuts, candies, anything to these!

Skinny Pumpkin Butter

Welcome Fall! Time to have your soaps, candles, and breakfast smell of pumpkin. This pumpkin butter is SO yummy on toast or mixed into a bowl of oatmeal. What’s super nice about this is if you are counting points for Weight Watchers, 2 tablespoons of this yummy pumpkin butter is only 1 point. Yeah!

Skinny Pumpkin Butter
1 (29 oz.) can pumpkin puree
2 tsp. vanilla extract
3/4 C. apple cider (or juice)
1 C. packed brown sugar
2-3 cinnamon STICKS (trust me, must be sticks)
1-2 tsp. pumpkin pie spice (to taste)

Directions:
– Combine all ingredients in a saucepan.
– Bring mixture to a boil.
– Reduce heat, and simmer for 30 – 40 minutes or until thickened. Stir frequently.
– Adjust spices to your taste.
– Makes 3 3/4 cups.

Storage Options:
– Freeze for a few months
– Refrigerate for a few weeks

**DO NOT CAN THIS! It is not safe to can pumpkin, due to its low acidity and variable water content there is a high risk of harboring botulism causing bacteria. (According to University of Georgia Agriculture Extension)

From Skinnytaste

Fresh Tomato Pie

A friend who was moving away 🙁 brought this over when we invited her family over for dinner before they left.  I have always wanted to make a tomato pie and this recipe is scrumptious.  She got it  HERE. As for the pie crust recipe, I tried a new one and that is why you see the funkiness in the photo.  I decided to NOT give you a link to that one quite yet (although it tasted really good), until I have used it more than once.  The link I have provided for the crust is my tried and true pie crust recipe.

Ingredients:
Pastry for 1-crust 9 inch pie (see this  RECIPE )
evaporated milk
4 cups sliced firm ripe tomatoes
1 1/2 tsp. salt (okay, I typed this up before I actually made the pie–too much salt.  Tweak it.)
1/8 tsp. pepper
1/4-1/2 tsp. dried leaf basil
1/3 cup mayonnaise
1/3 cup Parmesan cheese (I used the grated)
1 large clove garlic, smashed and minced


1.  Line pie plate with pastry.  Flute the edges.  Brush shell with evaporated milk.

2.  Bake shell at 450 degrees for 5 minutes .

3.  Fill the baked shell with sliced tomatoes and sprinkle with salt, pepper and basil.

4.  Combine mayonnaise, Parmesan, and garlic; spread over the layered tomatoes.

5.  Bake at 350 degrees for 35-45 minutes, or until tomatoes are cooked and pie is golden.

Source:  southernfood.about.com

Summer Garden Vegetable Soup

    As summer winds itself to a bounteous close, I wanted to share this recipe while the veggies in it are still in season. It is a GREAT way to use up some of that zucchini and those tomatoes I never have quite enough uses for. My kids (who hate zucchini and said tomatoes) even like it. Win-win!

Summer Garden Vegetable Soup
     Source: Mel’s Kitchen Cafe

  • 3 medium zucchini, chopped into bite-size pieces
  • 4 medium tomatoes, chopped into bite-size pieces
  • 1 teaspoon dried basil (or 1 tablespoon fresh basil, chopped)
  • 2 Tbsp fresh parsley, minced
  • 2 tablespoons butter
  • 1 medium onion, chopped
  • ¼ cup flour
  • 1 teaspoon salt
  • 1/4 teaspoon pepper
  • 3 cups chicken broth
  • 1 teaspoon lemon juice
  • 1 (12 oz.) can evaporated milk
  • 1 ½ cups frozen or fresh corn kernels
  • 1/4 cup freshly grated Parmesan cheese, or more 🙂 to taste
Directions
  1. In a large pot or dutch oven, melt butter over medium heat. Add the zucchini, basil, parsley and onion and saute, stirring occasionally, for 2-3 minutes (I always do it longer, until it is pretty tender). Add the flour, salt and pepper and stir and cook for one minute to remove the raw flour taste. Gradually add the chicken broth, whisking or stirring constantly. Add the lemon juice; mix well. Bring the soup to a simmer, stirring to prevent sticking, and cook for 2-3 minutes, until the zucchini is tender but still has some bite to it (it will continue cooking for a few more minutes). Add the tomatoes, evaporated milk, and corn.
  2. Bring the soup to a boil and reduce the heat to medium-low. Cover the soup and simmer until the corn and zucchini are tender. Stir in the cheese just before serving.

Cake Batter Chocolate Chip Cookies

These cookies are fun and festive and pretty darn tasty.  It’s a party in a cookie!

Ingredients:

1 1/4 c. flour
1 1/4 c. yellow or white boxed cake mix (I used a funfetti mix)
1/2 t. baking soda
3/4 c. (1.5 sticks) unsalted butter, softened to room temperature
1/2 c. sugar
1/2 c. light brown sugar
1 egg
1 1/2 t. vanilla
1 c. chocolate chips (I used 1/2 white and 1/2 semi-sweet)
1/2 c. sprinkles

Directions:

1.  In a large bowl, sift together flour, cake mix, and baking soda.  Set aside.  In a separate bowl, cream together the butter and sugars on medium speed.  Mix in the egg and vanilla until creamy.

2.  Add the flour mixture to the wet ingredients and mix until just combined.  Do not overmix the dough.

3.  Cover and refrigerate dough for at least 1 hour, or up to 4 days.  This step is mandatory.  The dough is fairly sticky, so chilling the dough is required in order to keep the cookie from spreading too much.

4.  Scoop rounded tablespoons of the cold dough onto an ungreased baking sheet.  Shape your cookie dough balls to be “taller” than they are wide.  Make sure to keep dough chilled when working in batches.  Bake for 10-12 minutes until edges are slightly browned.  The centers will still appear very soft, but the cookies will set as they cool.

6.  Allow the cookies to cool on the baking sheet for 4 minutes and transfer to a wire rack to cool completely.

Source:  sallysbakingaddiction.com

Easy French Bread

 If you have never made bread before, this is a perfect place to start! This is such an easy, delicious bread! And really it’s hard to mess it up! It makes fabulous garlic bread, French toast, delicious sandwiches and bread bowls! It will be a family favorite!

Easy French Bread

Ingredients:
2 TBSP yeast     
5 TBSP oil
2 ½ cups warm water                      
1 TBSP salt                           
2 TBSP sugar                                       
6 cups white flour 

Directions:

1. Mix all ingredients together and knead in a mixer (like a Bosch or Kitchen Aid) for 10 minutes. You can do it by hand with a bowl and spoon, but just add half of the flour at first and stir for a while until the “batter” seems smooth. Then add in more flour and mix until it gets too difficult to stir by spoon. Dump it out onto a floured surface and knead in the remaining of the flour. I actually do not ever exactly measure the flour. I know I have enough flour when the dough is no longer really sticky, but be careful to not add too much. You do not want the dough to be stiff or dry. A little less flour is better than too much!

2. Let the dough rise in the bowl until doubled. Punch down. (I usually cover the dough with a damp kitchen towel to keep it from drying out.)

3. Divide and form into 2 french loaves. (Or you can braid it!) Cut top of loaves three times with a serrated knife. You can also brush with beaten egg white and sprinkle with sesame seeds.  

4. Let rise until double – 30 mins or so. Bake for 20 to 30 minutes at 400 °. (Shorter for a soft crust, longer for a thick and chewy crust.)  

Notes: 

*You can also put balls of this dough on a cookie sheet to make “Bread Bowls”. Once baked, cut out center of round loaf and  pour in a creamy soup. Make the Bread Bowls any size you want.
*People love to receive this as a gift, especially the braided bread below!

Here is how I form the loaves:

Then put it on a baking sheet and cut the top of the loaf, and let it rise.
If you want to braid it, divide one half of the dough into 3 equal pieces, and roll out each piece with your hands into a long skinny “snake”. Pinch the ends together, or start braiding it however you can. I often have to rebraid it because I get messed up a bit, like in the picture below. I eventually got it right. : ) Pinch the ends together and tuck them under and try to make it pretty. Even if it’s not perfect, it will still look pretty and taste delicious!

 I forgot about my bread that morning while I was homeschooling my children, and I let it rise a little too much. It got huge, but it was still gorgeous and delicious! You can spread a little butter on the top of the hot loaves when it comes out of the oven. ENJOY!!!

Keep The Commandments


“Consider on the blessed and happy state of those that keep the commandments of God” (Mosiah 2:41).

“Commandments are the laws and requirements that a loving Heavenly Father gives His children to bless them, protect them, and guide them back to Him. When we keep the commandments, we show our love for Heavenly Father and His Son, Jesus Christ. As we obey the commandments and continually repent, we become more like the Savior and we are blessed with happiness, peace, testimony, and the companionship of the Holy Ghost.”

Two scriptures that illustrate the point that Heavenly Father will bless us with so much if we will be obedient to him follow.

1 Nephi 17:3 “And thus we see that the commandments of God must be fulfilled. And if it so be that the children of men keep the commandments of God he doth nourish them, and astrengthen them, and provide means whereby they can accomplish the thing which he has commanded them; wherefore, he did  means for us while we did sojourn in the wilderness.”

 Mosiah 24:14 “And I will also ease the aburdens which are put upon your shoulders, that even you cannot feel them upon your backs, even while you are in bondage; and this will I do that ye may stand as bwitnesses for me hereafter, and that ye may know of a surety that I, the Lord God, do visit my people in their cafflictions.

“Good choices make us happy”. I say this to my children all the time. Not only will we feel happy when we have been obedient to the commandments, but Heavenly Father will bless us and that will make it even sweeter. Finding our way back to Heavenly Father can be done if we stay on the path that he has given us.