Fresh Tomato & Basil Pie


This Fresh Tomato & Basil Pie recipe is adapted from a friend’s pie, which she brought to dinner one night before she and her family moved away.  Sad to see her go but glad she shared the recipe with me.

I have always wanted to make tomato pie and this one is scrumptious!  Especially with the addition of the fresh basil.  And the crust?  So flaky and delicious, if I do say so myself.  I promise to share that in another post.

So we put in a garden this year–with the help of friends who are great at growing stuff, and canning, and freezing, and  drying, etc. Our tomatoes and basil have gone crazy!  I even made fried green tomatoes the other night. Never tried those?  Well, then that is something else I need to share later.

Fresh Tomato & Basil Pie
A scrumptious way to use fresh produce from your garden.
Write a review
Print
Ingredients
  1. Pastry for 1-crust 9 inch pie
  2. 2 T. evaporated milk
  3. 4 cups sliced, firm ripe tomatoes
  4. 1 t. salt
  5. 1/8 t. black pepper
  6. 1 T. fresh basil, finely chopped
  7. 1/3 c. mayonnaise
  8. 1/3 c. Parmesan cheese, shredded
  9. 1 large clove garlic, smashed and minced
  10. whole fresh basil leaves for garnish (opt.)
Instructions
  1. Preheat oven to 450 degrees F.
  2. Line pie plate with pastry. Flute the edges. Brush shell with evaporated milk.
  3. Bake shell for 5 minutes. Remove from oven. Reduce oven temperature to 350.
  4. Fill baked shell with layered, sliced tomatoes and sprinkle with salt, pepper, and chopped basil.
  5. Combine mayonnaise, Parmesan, and garlic and spread over the tomatoes.
  6. Bake at 350 degrees for approx 45 minutes, or until pie is golden brown.
Mormon Mavens https://www.mormonmavens.com/

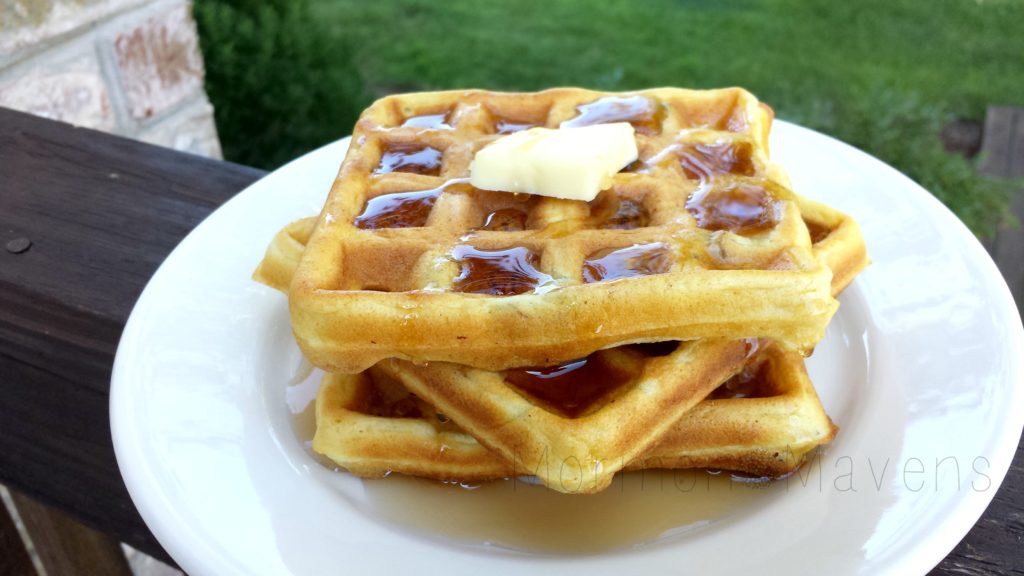
Buttermilk-Pecan Waffles

buttermilk-pecan waffles


I thought I would re-post something from our Breakfast category today and as I was going through some of the older posts, this one caught my eye from August  18, 2016.  I don’t know what it is about waffles but they are magical to me.  And elusive.  I never seem to have the time to make them lately, especially since I am drinking my protein shakes these days while trying to lose weight AGAIN!  Anyway, I do remember these and they were DELISH.  Hope you enjoy…

Good mornin‘!  Today’s breakfast is brought to you by The Hen-Apple Bed & Breakfast in Palmyra, Pennsylvania.  No I am not there, yes I made waffles.  Years ago, when my girls were still little and in elementary school, I would often volunteer in their school library.  This was my favorite place at their school for many reasons–there were the books, of course, but we had an amazing librarian, and those Scholastic Book Fairs!  Loved working those and I always had time to browse the sale, so one day I picked up this cookbook called “Rise & Dine America: Savory Secrets from America’s Bed & Breakfast Inns.” I have often fantasized about running a B & B, haven’t you?  End of story, on with the recipe…

Buttermilk-Pecan Waffles
Breakfast of champions!
Write a review
Print
Ingredients
  1. 2 cups all-purpose flour
  2. 1 T. baking powder
  3. 1 t. baking soda
  4. 1/2 t. salt
  5. 4 eggs
  6. 2 cups buttermilk
  7. 1/2 cup butter, melted
  8. chopped pecans
Instructions
  1. Combine the flour, baking powder, baking soda and salt; set aside.
  2. Beat the eggs until light, add buttermilk and beat until smooth.
  3. Stir in the melted butter and chopped pecans.
  4. Pour about 3/4 cup of batter onto a greased, preheated waffle iron. Cook until done.
Notes
  1. I think this recipe was written for a single waffle application. My waffle iron makes 4 individual waffles. Adjust batter amount as needed for yours.
Adapted from Rise & Dine America
Mormon Mavens https://www.mormonmavens.com/

Slow Cooker Chicken Chile Verde

If you follow us on Instagram, you have already seen this picture.  Not your typical beautifully crafted finished product recipe image, right?  But, the technique used to shred this chicken is such a game changer, you will appreciate why I shared this.  

Besides, there wasn’t a particular dish that I was preparing this chicken for.  There are many ways you can use this Chicken Chile Verde.  Let your imagination run wild with that.

When I made this yesterday, I just scooped some of the chicken into a couple of romaine lettuce leaves and added chunks of avocado–low carb diet is happening right now.  Sort of.  You know what I mean.  My husband, however, made a burrito with his portion.

So, enjoy this recipe and the many ways in which you can use it. I would bet you could freeze it, as well, for future use.  

Slow Cooker Chicken Chile Verde
Write a review
Print
Ingredients
  1. 4 boneless, skinless chicken breasts*
  2. 1 medium onion, diced
  3. 1 bottle Herdez Salsa Verde
  4. 2 t. chili powder
  5. 1-2 t. ground cumin
  6. 2 cloves garlic, minced
Instructions
  1. Rub the chicken with the chili powder and cumin. Place in a covered dish and marinate overnight in the refrigerator.
  2. When ready to cook, place chicken in slow cooker; add garlic, onion and then top with the Salsa Verde.
  3. Turn slow cooker to low and cook for 8 hours.
  4. To shred, remove the chicken from the slow cooker to a large mixing bowl, leaving the liquid inside.
  5. With a mixer (I used a hand mixer) shred the chicken--literally takes less than 10 seconds. I think I had my setting on about 2 or 3.
  6. Return shredded chicken to the slow cooker and toss to coat with the liquid.
  7. Serve in a variety of ways.
Notes
  1. Original recipe calls for 6-8 chicken breasts, but I used a pack of 4. You may want to increase your seasonings if you use that much chicken.
Adapted from PaleoBurn Fat Burning Cookbook
Mormon Mavens https://www.mormonmavens.com/

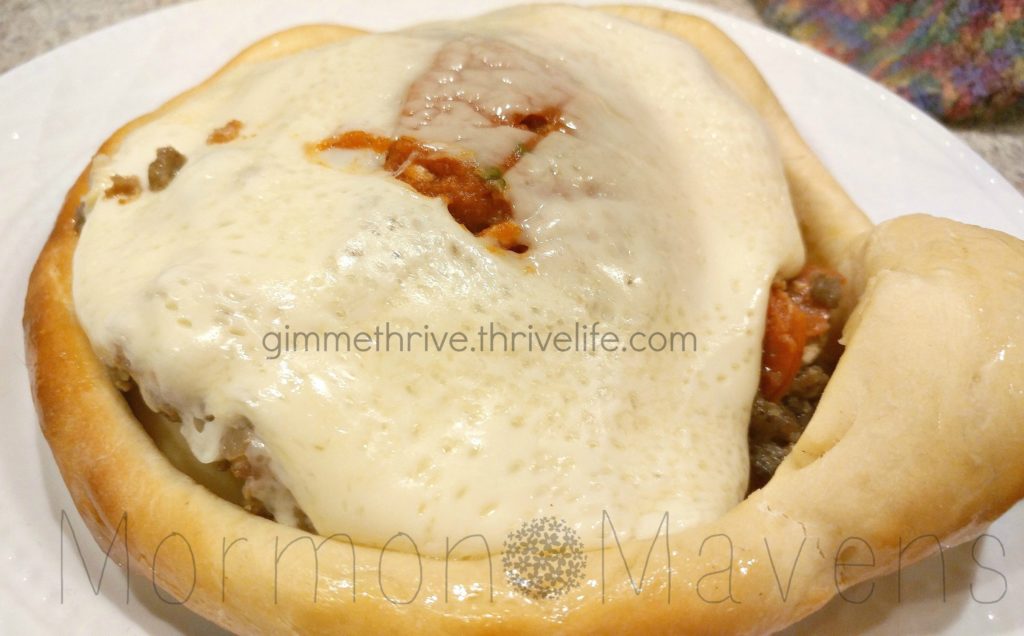
Pizza Bowls


Hey, the kids are home for the summer !  Here’s a recipe–originally posted by Julie on November 21, 2016–that you can do together and it’s sure to please everyone at your house.  I’m thinking I might need to try this one soon…


You know those videos you see on Facebook?  The ones where they show amazing food?  Well, I save those.  And sometimes I actually make the recipes!  But this one…this one was different.

A Food Network dude was talking about one of his favorite places and that they served these Pizza Pot Pies.  I was drooling!  I mean, they looked amazing.  But hey, this place had some kind of Sicilian crust thing going on and, of course, a fancy restaurant oven.  I can’t make that at home, can I?

Challenge accepted.

I had to work with what I had.  So I took some poetic license with their concept.  With the crust.  With the oven.  With the name, even.

But the result was, well…..UH-MAZING!!!

These things are the bomb at my house–every single person in my family loves them.  And, they are so customizable!  Plus, they are fun to experiment with.

pizza-bowl-varieties

Adjust your cheese, sauce, and toppings to fit your mood, taste, or leftovers in the fridge!  here’s what I used to make the above 3 experiments:

  • Philly Cheesesteak:  leftover flank steak, provolone cheese, Thrive Bechamel sauce, Thrive red peppers, Thrive green peppers, Thrive onion slices
  • Chicken & Broccoli Alfredo:  mozzarella cheese, grated Parmesan, Thrive Seasoned Chicken Slices, Thrive Broccoli, Thrive Onion Slices
  • Meat Lovers:  mozzarella cheese, bacon, diced pepperoni, Thrive Sausage Crumbles, Thrive Ground Beef

I can see my oldest daughter wanting an experiment with pineapple and ham.  And I’d love to give a dessert pizza a try maybe with some ricotta and cream cheese, Nutella, and strawberries!

Pizza Bowls
Serves 4
Upside down pizza pot pie goodness baked in a bowl!
Write a review
Print
Prep Time
1 hr 20 min
Cook Time
15 min
Prep Time
1 hr 20 min
Cook Time
15 min
Ingredients
  1. 2 1/4 tsp. active dry yeast
  2. 1 cup plus 2 Tbsp. very warm water
  3. 3 3/4 cup Thrive Country White Dough Mix
  4. cheese of your choice (mozzarella, provolone, cheddar, etc.)
  5. sauce of your choice (spaghetti, pizza, Alfredo, Bechamel, etc.)
  6. toppings of your choice (pizza meats, veggies, etc.)
Instructions
  1. In the bowl of a stand mixer, combine the yeast and the 1 cup + 2 Tbsp. very warm water. With the dough hook on the mixer, slowly add in the dough mix until well-combined, then let the machine knead for 5 minutes.
  2. Remove the dough to an oiled bowl, turning dough over to coat. Cover bowl with a clean towel and allow to rest and rise for about 40 minutes or until doubled in bulk. Punch down and allow to rise again.
  3. Punch down and separate into 4 equal chunks. On a counter or floured board, roll or press out each chunk into a circle wide enough to cover the bowl and come down the sides of the bowl by at least an inch.
  4. Spray each bowl with nonstick cooking spray thoroughly. Also spray the outside rims a little. Layer 4-6 cheese slices in the bottom of each bowl.
  5. Mix the Tomato Sauce with the water until smooth. Pour 1/2 cup of sauce into each bowl.
  6. Add pizza toppings of your choice. It's okay to fill up the bowl to the top or even have it be mounded a little.
  7. (Note: you can use Thrive veggies and meats for toppings. Just refresh them first!)
  8. Take a circle of dough and carefully cover each filled bowl so that the dough goes over the edge and down the sides of the bowl by at least an inch.
  9. Place bowls on a large baking sheet making sure to leave space between them. Bake at 425 degrees for 15 minutes or until deep golden brown on top.
  10. Remove from oven and brush the crusts with melted butter.
  11. Remove a bowl from the baking sheet and place it on a dinner plate. Take another dinner plate and place it upside down over the pizza bowl. Using both hands--thumbs on top plate and fingers under bottom plate--firmly and carefully turn the plates over. Remove the top plate.
  12. Using a couple of spoons, carefully release the bowl from the crust/filling by lifting up on one side. If cheese has stuck to the bottom of the bowl, use the other spoon to scrape it out. Carefully remove the hot bowl and set aside.
  13. Enjoy! You'll want to eat this with a fork and knife!
Notes
  1. Because I sell Thrive, I have a LOT of Thrive. So I used our bread mix. But you can use your favorite bread dough mix or bread recipe. Just use what you'd use for 1 loaf.
  2. I made this using our family's cereal bowls, which are OVEN SAFE*****. But you can use any oven safe bowl/ramekin. I've even used kid sized real baking tins. I like using the ramekins we have because it makes a smaller portion which is just right for me.
Mormon Mavens https://www.mormonmavens.com/

Sausage Okra Gumbo


Today I am sharing a family favorite recipe that gets rave reviews no matter when I serve it.  Just had it the other night–8 of us for dinner and I doubled the recipe and had one serving left.  Yeah, that good.  I use Kielbasa, but feel free to used whatever type of smoked sausage you would like to.  Turkey Kielbasa is also very good. 
 
Mom always made this with Kielbasa.  Don’t you love saying that word?  Kielbasa, kielbasa, kielbasa…

Ingredients:
1 1/2 lbs. Polska Kielbasa ( I just use 2 packages.  You can’t have too much sausage in gumbo, can you?)
2-3 T. butter
3 T. flour
2 cups chicken broth
18-oz. frozen gumbo vegetables*
14-oz. can of tomatoes, chopped, with juice
1 1/2 t. salt (you may want to adjust down, depending on how salty your meat choice is)
1/4 t. garlic powder
1/4 t. ground red pepper 
1 T. Old Bay Seafood Seasoning

3 cups hot, cooked rice

1.  Saute cut sausage for a few minutes in a Dutch oven or large pot.  Even though these are precooked, I think it improves the overall taste to brown them up just a little bit and it also helps your roux.  Remove and set aside.
 
2.  Melt the butter in the Dutch oven.  Add flour and cook, stirring constantly, until mixture is deep brown, about the color of an old penny (this is known as making a roux).
 
3.  Add broth, vegetables, tomatoes, seasonings, and sausages.  Bring to a boil; reduce heat, cover and simmer for 25 minutes.
 
4.  Remove from heat.
 
5.  Ladle gumbo into bowls and top with a scoop of rice.  Some people think you should put a bunch of rice in the bowl and then add the gumbo on top.  Personally, I like less of a rice ratio to my gumbo.  A little scoop of rice on top is perfect for me.


* You can use a combination of okra, corn, onions, celery and sweet red pepper instead of the frozen vegetables. These days that combo is hard to find in the frozen food section.
 

Source:  Pat Brew, Brew Family Cook Book, 1st Edition.

Originally posted on January 24, 2014.

Baked French Toast


Originally posted on November 16, 2011.

It’s not my day to post a recipe, but I couldn’t help sharing this absolutely delicious recipe with y’all!  It.  is.  so.  good.

I found it last night while searching for a make-ahead recipe for breakfast (I’m trying to get as much done the night before as possible so I can get all my exercising in early….which is a good thing ‘cuz this ain’t no diet-friendly recipe!).  I started searching Pinterest for overnight breakfasts, but then thought, “Oooh, I bet P-Dub has something good on her site!”  I was not disappointed.

I told my kids this morning that we were trying a new recipe from Pioneer Woman.  My oldest daughter said, “Oh, then it’ll be really good.”

And it is.

Really good.

Like, make you wanna slap yo’self good.

Ingredients:
1 loaf sourdough bread (I used Pepperidge Farm, 1.5 pound loaf)
8 eggs
2 cups milk (I used 1%)
1/2 cup heavy cream
3/4 cup sugar
2 Tbsp. vanilla

Topping:
1/2 cup all-purpose flour
1/2 cup packed brown sugar
1 tsp. cinnamon
1/4 tsp. salt
1 stick cold butter, cut into pieces (1/4 lb.)

1.  Grease a 9 x 13 pan with butter.  Tear bread into bite-size chunks and place evenly in the pan.
2.  Mix together the eggs, milk, cream, sugar, and vanilla.  Pour evenly over bread.  Cover tightly and store in the fridge for several hours (I put mine in overnight….it was about 12 hours).
3.  In a medium bowl mix together the flour, brown sugar, cinnamon, and salt.  Cut in the butter with a pastry blender until it all looks nice and crumbly (like small pebbles, according to P-Dub).  Place in a ziploc bag and put in fridge.
4.  When ready to bake, take pan and bag out of fridge.  Remove wrap and evenly sprinkle the crumb mixture over the top.  Bake for 1 hour at 350 degrees (or 45 minutes if you like it more soft and pudding-like).

Notes:
Update:  IMPORTANT!!!!!!!  You must use a dense bread or this dish will turn out soggy.  After getting a few comments below about soggy outcomes, I figured I’d better make sure you understand that.  You can’t use regular ol’ sandwich bread because it will NOT soak up the egg mixture!  I highly recommend starting with the bread listed in the ingredients above as this has ALWAYS turned out perfectly for me.

  • You can serve with syrup, but we made a quick glaze with powdered sugar and milk.  Delish!
  • If you don’t have brown sugar, mix 1/2 Tbsp. molasses with 1/2 cup sugar until well blended.
  • Like I said, you can bake it for less time if you like it softer, but I love how the top gets crispy when it’s baked for an hour.  The underneath part is still somewhat soft.  One hour in my 350-oven was just right.
  • The directions said to scoop out, but I wanted to be able to control the portions so I cut it into 12 servings (they were large, and this is rich, so you could serve other breakfast dishes and use this as more of a side dish and get 24 servings).
  • If you have a hot oven, cover the dish with foil for the last 15 minutes or so if you notice that it’s starting to get too brown (I have never had to do this, though).
  • If you don’t have a pastry cutter, use two knives moving away from each other to cut in the butter for the topping.  Do NOT use a fork to mash!  It will be a globby mess!
 
Makes 12 large servings
 
Source:  slightly adapted from The Pioneer Woman Cooks

Thanksgiving Menu Share


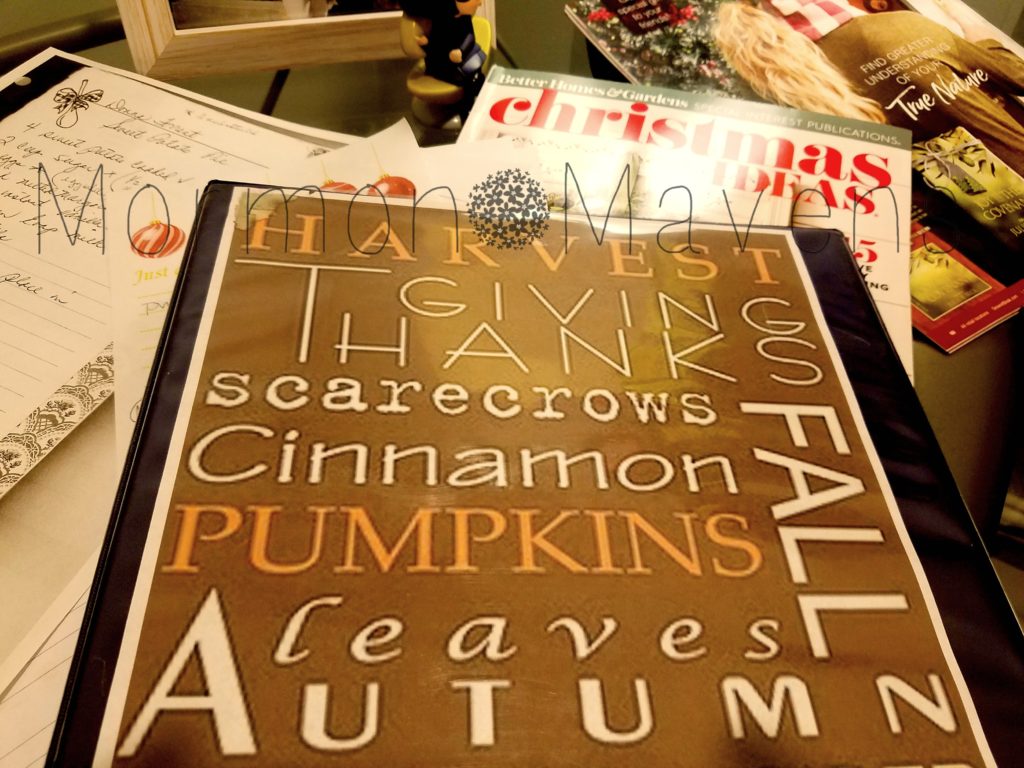
Hi everyone!  I am sitting here at my desk organizing my Christmas and Thanksgiving planners–I like to have everything for each of these holidays in 1-inch binders so I can grab them and go when I have time to prep.  

Every year I tell myself I will be ready earlier than the previous year, and this year is no exception.  We will have Thanksgiving at our place this year with a couple of extra family members driving in from down east. 

I love a houseful for holidays, don’t you?  

I thought that I would share our traditional Thanksgiving Menu, just so you can see what I will be doing over the next week..wait WHAT?!  Yes, it’s a week away. 

OMGracious. (see what I did there?  Because “thanks” giving…)

Where does the time go? Seriously.  So here is that menu–got a little sidetracked–and I have provided a link to the dishes that we already have recipes for here on the blog. 

If you see another one on the list that you would like to have the recipe for just let me know! For the yeast rolls, we have several recipes to choose from but the one I use is not on the blog yet.

I will be glad to post an extra recipe this week to help out with your big feast. It might not have a photo because I really won’t be making it until next week, but I can add that later, right?


Thanksgiving Menu from Our House to Yours

Deep Fried Turkey
Mother’s Southern Cornbread Dressing
Sweet Potato Pudding/Souffle
Cranberry Relish
James’ Fruit Salad
Copper Penny Carrots
Seasoned Baby Lima Beans
Giblet Gravy
Homemade Yeast Rolls
Pumpkin Pie with Homemade Whipped Cream


Well, that’s a mouthful–which is why I am using Chinet Platters this year.

Feel free to share your Thanksgiving favorites in the comments!  We love hearing from you.


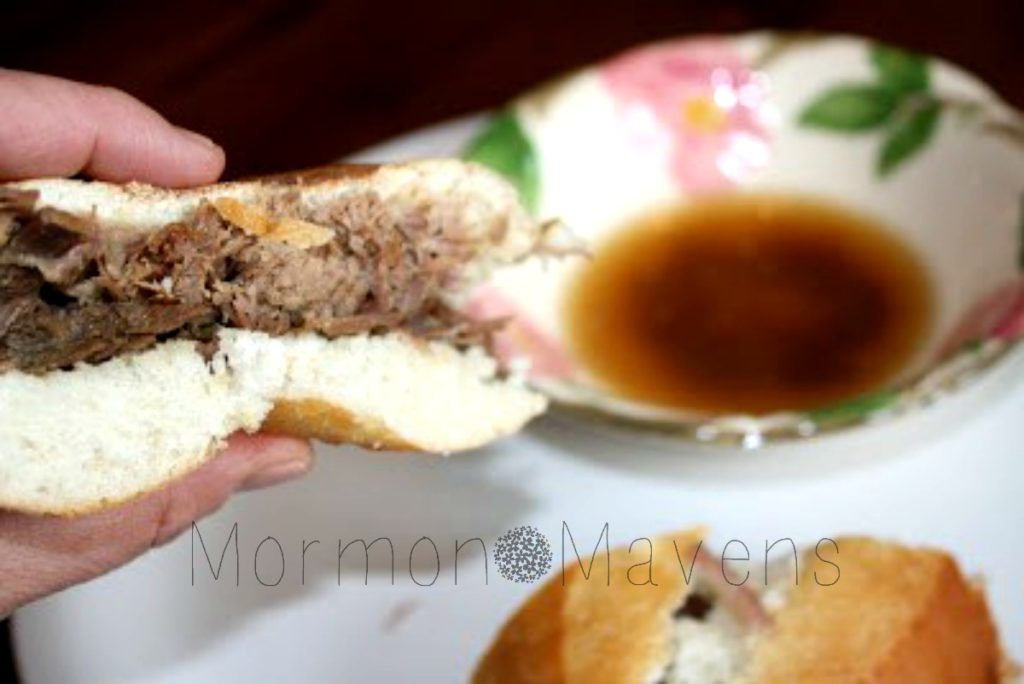
Slow Cooker French Dip Sandwiches


Is it Throwback Thursday, or do they still do that?  It’s the time of year when you want to pull out the slow cooker and make your house smell like “yum”.  This post is an oldie but a goodie from a past Maven.  Enjoy!

“Oh my goodness these are delicious! My family was completely quiet while they ate these. It was so funny! No one had time to talk…too busy eating! We were so craving a roast for Sunday dinner. I wanted something a bit different. I found a recipe for French Dip sandwiches and tweaked it for my family and this is what happened! Very yummy.”

3-1/2 lbs beef chuck roast
16 oz beef broth
1- 10.5 oz can condensed French onion soup
1/4 cup red wine vinegar
1 tsp. garlic powder
2-3 TBSP. Worchestershire sauce
salt and pepper, to taste
4-6 French rolls
olive oil
sliced provolone cheese, optional

1.  Trim excess fat off beef roast and season meat with salt and pepper.

2.  Into the slow cooker add the following ingredients: beef broth, condensed French onion soup, red wine vinegar, garlic powder, Worchestershire sauce and mix well. Then add the beef roast.

3.  Set your slow cooker on high! Set the time for 5 1/2 to 6 hours. This will be falling apart when you next look at it! But, you need to adjust this to your slow cooker. My slow cooker cooks really hot and fast. So think about yours before you set it. If you have time, put this on earlier in the day and set it to low. Since this is cooking in liquid it will not dry out.

4.  When it’s time, take beef out and rest it, covered with aluminum foil, for about 15 minutes. Slice beef and return to slow cooker on low for another 20 minutes.

5.  Slice French rolls and brush them with olive oil. Lay cut side down onto baking sheet and toast them to your liking. If someone wants cheese on their sandwich add the cheese onto roll to melt in the oven face up!

6.  Divide beef onto rolls and spoon the au jus sauce into little bowls for each person. (no one wants to share their au jus sauce!) Serve while hot! Your family will love this!

Originally posted on March 6, 2012.


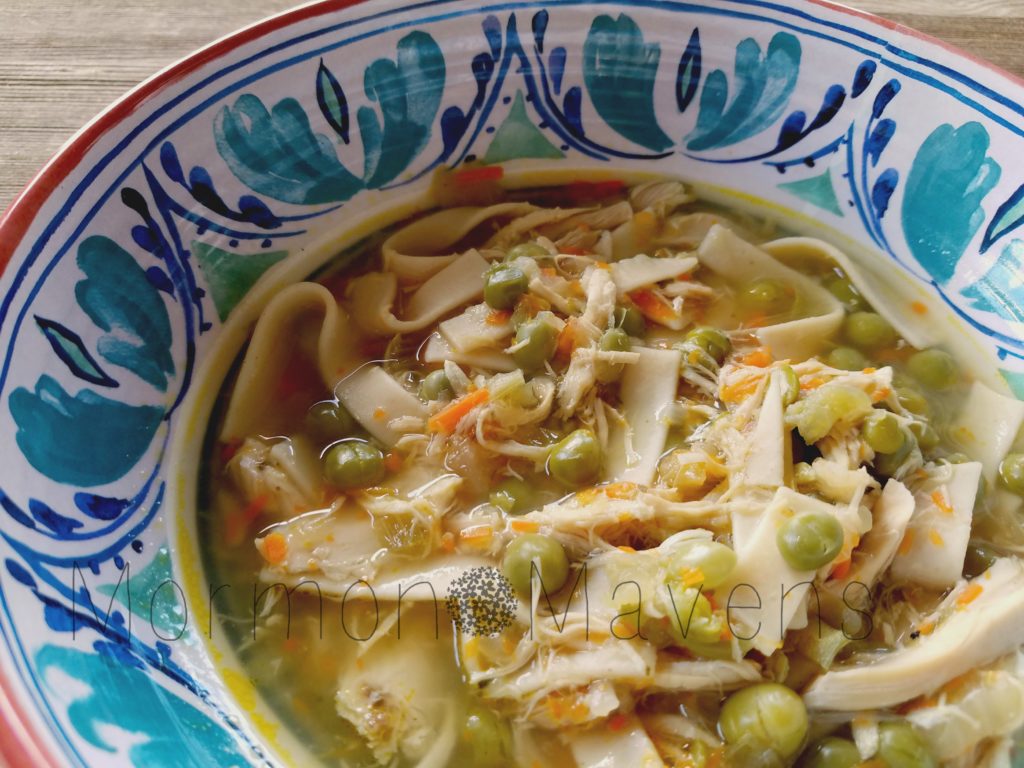
Chicken Noodle Soup


I used to love volunteering at my girls’ elementary schools.  Yes plural on schools.  They went to two different ones because we moved in the middle of those years.

One of my favorite places to volunteer was in the school library.  All those books!  And the librarian at their second school became a good friend–before working in the library she was one daughter’s 2nd grade teacher.  She was amazing.

Anyway, one aspect of volunteering in the library was working the Scholastic Book Fairs and, since I had been a bank teller for several years in my single days, I usually worked “register” and did the deposit at the end of the fair.

Why am I telling you all of this?  Well, when you work at the book fairs you have early access to the books on sale and I would always check them out to see if their were any books that appealed to me.  Cookbooks were a favorite and I still have one called “Rise and Dine America”, full of Bed & Breakfast recipes from across the country.  Perhaps I will share a few at some point.  

Today’s recipe comes from one of those book fair cookbooks, entitled “Is it Soup Yet?”   I haven’t tried very many of these soups but this happens to be the very first recipe in the book and we really like it.  I actually have substituted Thrive Foods for several of the ingredients, and have noted that in the recipe.

It’s Fall y’all, and at some point–not right now because in the South we are still pretty darn warm–you are going to be craving some good old comfort food and that will include soups and stews, so get ready!

Chicken Noodle Soup
Write a review
Print
Ingredients
  1. 3 lb. fryer
  2. 3 bay leaves
  3. 6 peppercorns
  4. 7 stalks of celery (I used 3 stalks, then 2 cups of sliced Thrive celery, cut up)
  5. 2 cups chicken broth (I used Thrive Chicken Bouillion)
  6. 1 large onion minced (1.5 cups Thrive Chopped Onion)
  7. 3 carrots, julienne sliced
  8. 1 T. dried parsley (Thrive)
  9. 1/2 lb. thin egg noodles (Thrive)
  10. 1 (10 oz.) package frozen peas (Thrive)
  11. 3 t. salt (Thrive)
  12. 1 t. ground white pepper
  13. 1 t. of your favorite all-purpose seasoning
Instructions
  1. Remove the neck and gizzard pack from the cavity of the chicken.
  2. Place the chicken into a 6 quart stock pot and cover with water. Add the bay leaves, peppercorns and 3 stalks of celery, broken in half.
  3. Cook over high heat until the water comes to a boil. Reduce the heat and simmer for 1 hour or until the chicken falls off the bone.
  4. Remove the chicken to cool and strain the broth.
  5. Return the liquid to the pot, then add 2 cups of chicken broth, minced onion, 4 stalks of celery minced or Thrive celery slices cut up, carrots, dried parsley, and egg noodles. Cook over high heat until the noodles are soft.
  6. Chop the chicken into bite size pieces and add along with the peas to the broth.
  7. Season with salt, white pepper and other seasoning of choice.
  8. Cook for approximately 10 minutes or until the peas are heated through.
Notes
  1. Original recipe calls for Accent seasoning but I did not include that. I had a packet of Thrive seasoning left from something else and wanted to use it instead. I believe that Accent actually contains MSG, so no.
Adapted from Is It Soup Yet?
Mormon Mavens https://www.mormonmavens.com/

Pan-Roasted Chicken & Vegetables


Have you ever purchased anything from The Pampered Chef and received a cute little multi-folded “brochure” on how to use the particular item that you ordered?  So, they usually include recipes for you to use with that item.  Somewhere in time, I saved the this recipe to use at some later date.  Much later date, obviously.  

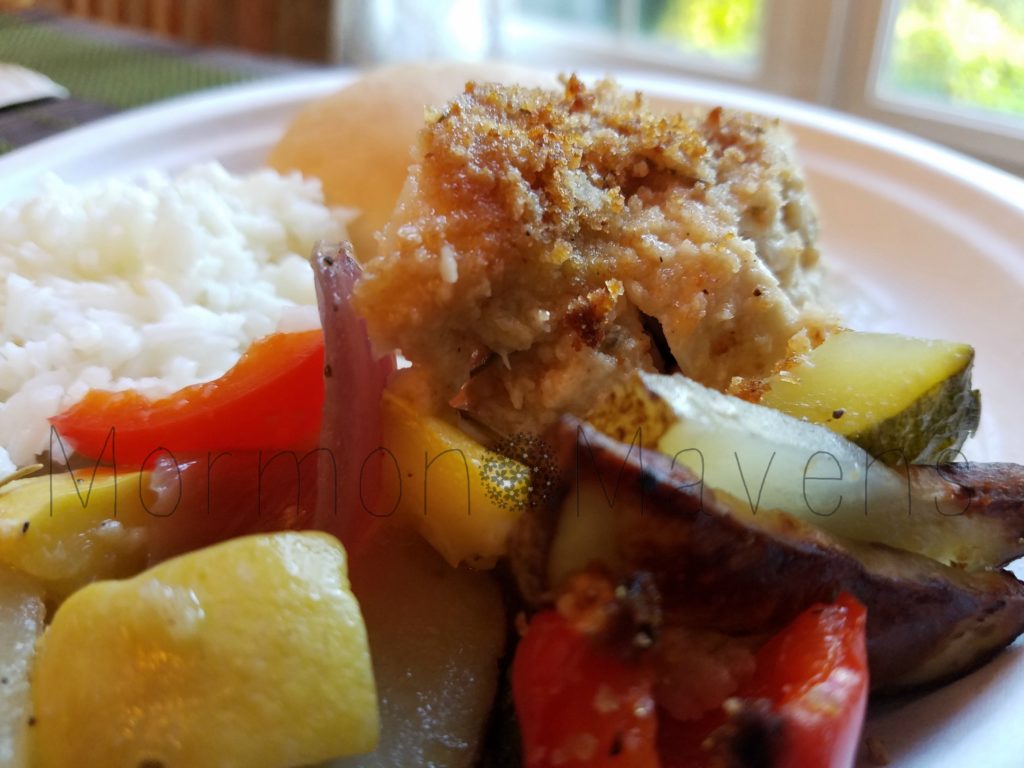
I have seen a lot of these one pan wonders on Facebook and Pinterest recently and knew that I wanted to prepare this dish.  It smells divine while it’s baking and it is so delicious.  Easy peasy, too.  I even had some leftover rice that I paired with it!  Doesn’t get much easier than that.

Pan-Roasted Chicken & Vegetables
Serves 4
Write a review
Print
Ingredients
  1. 2 large unpeeled baking potatoes, cut into 1/4-inch slices
  2. 1 each medium zucchini, yellow summer squash and red bell pepper, cut into 1-in. pieces
  3. 1 medium red onion, cut into wedges
  4. 4 T olive oil, divided
  5. 2 garlic cloves, pressed
  6. 1 t. crushed dried rosemary, divided
  7. 1/2 t. plus 1/8 t. salt divided
  8. 1/8 t. ground black pepper
  9. 1 egg
  10. 1/2 c. seasoned dry bread crumbs
  11. 4 boneless, skinless chicken breast halves (about 1/4 lb)
Instructions
  1. Preheat oven to 425 degrees F.
  2. Cut potato slices crosswise in half. Place vegetables into large bowl and toss with 2 T. of the olive oil, garlic, 1/2 t. of the rosemary, 1/2 t. salt and the black pepper; mix well.
  3. Arrange vegetables around the inside of a baking dish--I used the one that is slightly larger than a 9 x 13--leaving an opening in the center for the chicken.
  4. Lightly beat egg in a flat bowl. Combine bread crumbs, remaining rosemary and salt in another flat bowl. Add remaining oil to crumb mixture; mix well.
  5. Dip chicken into egg and then into crumb mixture, coating completely. Place chicken in center of baking dish.
  6. Bake 22-25 minutes or until chicken is no longer pink in center.
Adapted from The Pampered Chef
Mormon Mavens https://www.mormonmavens.com/