Chicken Satay and Thai Peanut Sauce

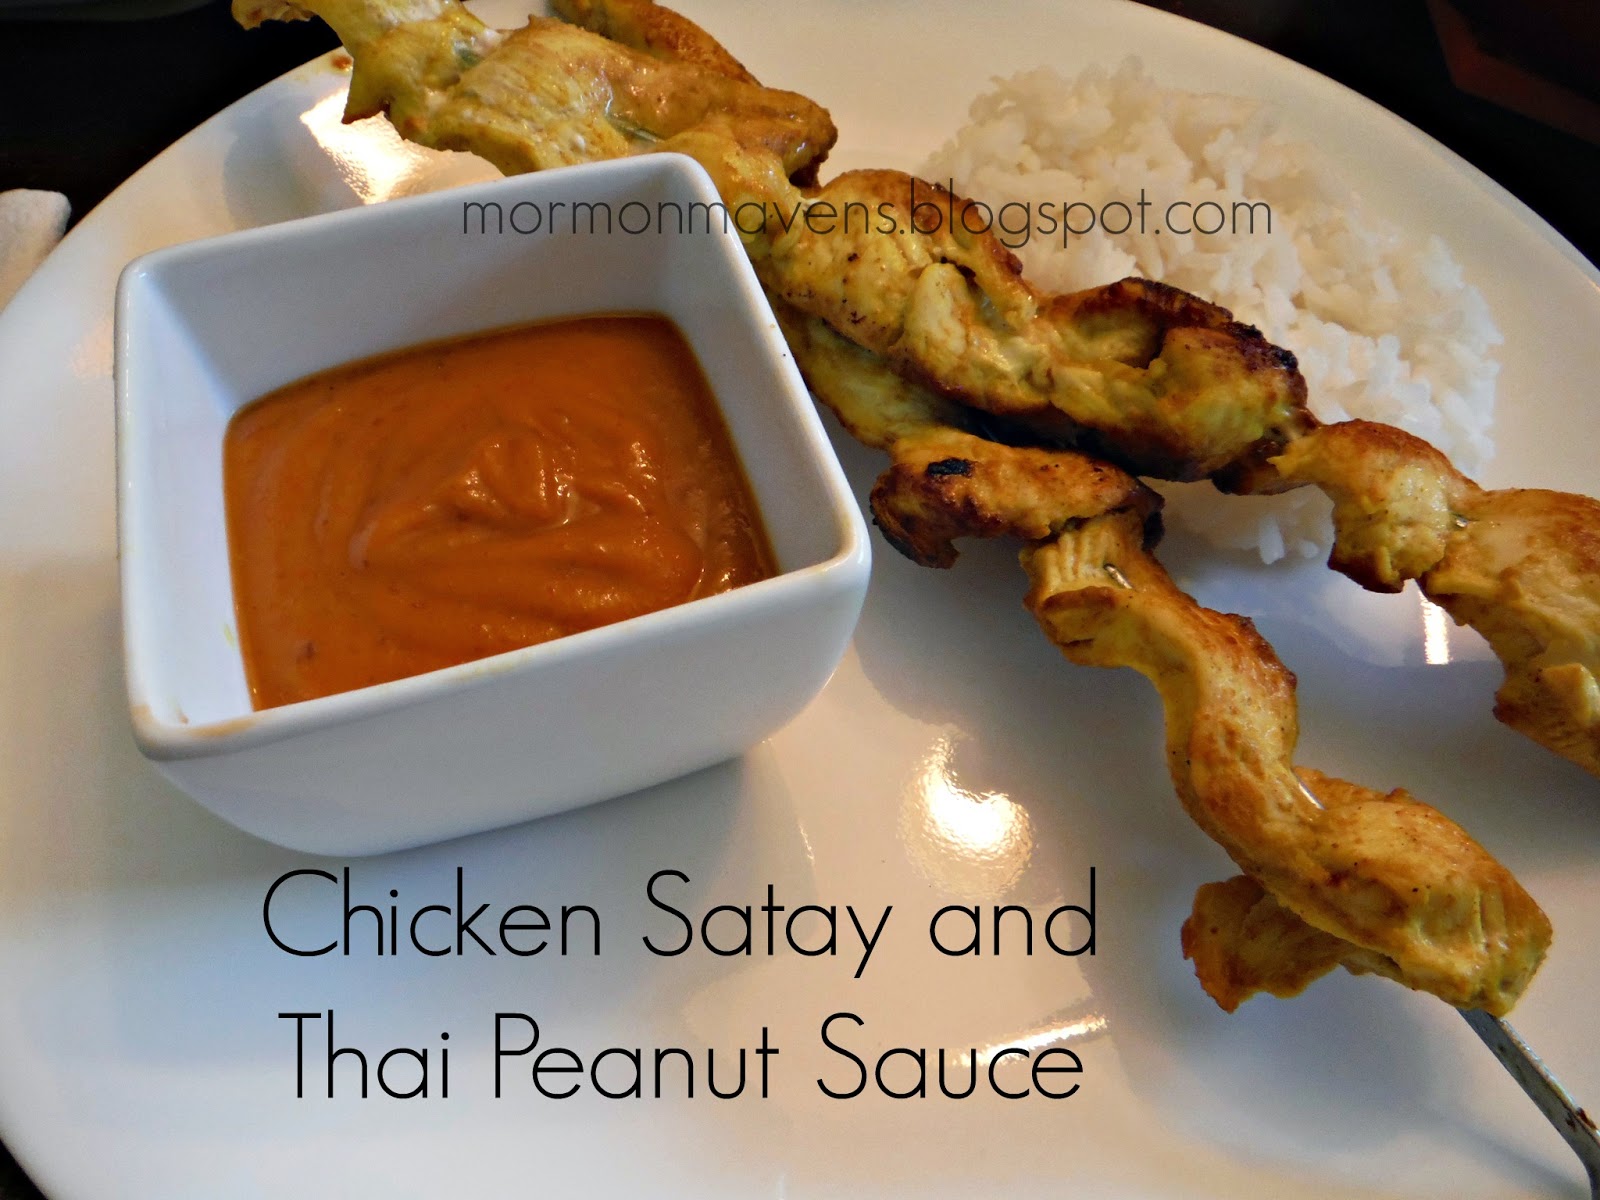
For this post, you get two recipes in one! The chicken satay recipe came from here. And the most amazing Thai Peanut Sauce recipe came from here.

Thai Chicken Satay:

2 normal to large sized chicken breasts
1/2 cup coconut milk
1 tablespoon curry powder
1 teaspoon turmeric powder
1 teaspoon sugar
1/2 teaspoon salt
12 wooden skewers
Directions:
1. Soak the skewers in water while prepping your chicken and sauce. This will help keep the skewers from burning when you place them on the grill. 

2. Cut the chicken into thin slices. 

3. Mix all of the ingredients together in a bowl, add the chicken and massage. The chicken does not need to marinate in the sauce for very long, in fact only a few minutes. Place the chicken on skewers and drop them on the grill at medium heat. Flip the skewer just before you start to see grill marks on the chicken. This makes for the perfect “doneness” without drying it out. 
This marinade also goes great with shrimp! 
For the Thai Peanut Sauce:

One 13.5-ounce can of full-fat, unsweetened coconut milk
2 ounces (approximately ¼ cup) of Thai red or Massaman curry paste
¾ cup unsweetened (natural) creamy peanut butter (Do not use regular peanut butter or anything with added emulsifiers. I get mine fresh ground in the bulk section at Winco.)
½ tablespoon salt
¾ cup sugar
2 tablespoons of apple cider vinegar or white vinegar (Do not use white wine, red wine, balsamic, or anything else — not even rice vinegar)
½ cup water
Instructions:
Put everything into a medium heavy-bottomed pot and bring to a very gentle boil over medium heat, whisking constantly.
Let the mixture simmer for 3-5 minutes over low heat; be careful not to let the mixture scorch at the bottom of the pot.
Take the pot off the heat, let the sauce cool down to room temperature (or slightly warmer), and serve the sauce with satay or fried tofu.
Notes
This peanut sauce keeps in a glass container in the refrigerator for weeks. Refrigerated sauce will thicken up considerably. All you have to do is thin it out with a little bit of water to desired consistency, reheat, and serve. The sauce also freezes beautifully.


Lasagna Soup

Have I told you how much I absolutely love Thrive?  I mean, seriously.  It’s amazing.  I have saved so much time in the kitchen just by using Thrive foods–they are ready to use right out of the packaging–no more chopping onions, no more greasy meat prep, etc.  And the taste is unmatched!  Not to mention the nutrition bonus of eating freeze dried foods of the highest quality.  You are really missing out if you haven’t tried Thrive for yourself.

I love “throw and go” cooking with Thrive foods.  The other day I made some spaghetti sauce using that method; and for me, that means just tossing in what I like and adding enough water along the way to rehydrate the foods to perfection.  This is all without any measuring!!!  Love it.  And my spaghetti meat sauce, which I began making AFTER I started the pasta, was done before the pasta was!

But sometimes I do like to try recipes and measure.  Lasagna Soup intrigued me when I saw it and, lemme tell you, it did NOT disappoint my taste buds.  Several in the family went back up for seconds of this tasty dish.  This one is definitely going to be made many times in our house!  And, bonus, you can also vacuum seal this (layered in the order listed) in a quart mason jar and keep it on the shelf for emergency quick meals (although going directly into the pot was fast to begin with).  Just dump and go.  (Email me at gimmethrive@gmail.com for more info on jar meals!)

Ingredients:

¼ cup Thrive Tomato Powder
1 tsp Thrive Chef’s Choice Seasoning
 ¼ cup Thrive Tomato Sauce 
3 TBSP Thrive Mixed Bell Peppers
 1 TBSP Thrive Chicken Bouillon
¼ cup Thrive Freeze Dried Onions
 1 tsp  Garlic powder
¾ cup Thrive Freeze Dried Sausage Crumbles 
¼ tsp Crushed Red Pepper
2 cups Thrive Farfalle (Bowtie) Noodles

1. Dump all the ingredients into a pot or Dutch oven.  Stir in 8 cups of water.
2.  Bring to a boil.  Turn the heat down to medium.  Simmer for 10-15 minutes until the noodles are al dente.

Top with shredded mozzarella cheese and serve with salad and breadsticks!  Easy peasy!


For more information on how you can save time and money while eating nutritious, convenient food from Thrive, 
email me at gimmethrive@gmail.com.  
You can also visit my website to learn more.


To Bridle


I was reading an article the other day entitled “Bridle All Your Passions.”  It was interesting to me to read about what that really means.  My first thought would be that I have to give up something, but that is not the case and that is not the purpose of a bridle.  I don’t ride horses, but I have friends who do.  I am sure they understand the importance and usefulness of the bridle they put on their horse.  Are you starting to get a feel for where this is going?
 
 
Elder David A. Bednar, a member of the Quorum of the Twelve Apostles for the Church of Jesus Christ of Latter-day Saints quoted in this article: 
 
“We are told to bridle all our passions, not to suppress or kill all our passions.  Controlling our emotions and desires does not mean to stamp all of them out because they are all bad.  Just as we bridle animals because they are useful and helpful, we bridle our passions so that we control them and allow them to serve a higher purpose.”
 
I really like that.  We all have things that we are passionate about that are good things or better things or best things.  I am passionate about de-cluttering and organizing.  That can go two ways.  I can either go bonkers and organize every “jot and tittle” of my home or I can take some of that energy and help a friend who might be drowning in clutter or laundry or paper or whatever.  
 
What we must learn to do is harness the passions and energy in our life and make them work 
 for our good, as well as for the good of others.
 
Source:  David A. Bednar


Sauteed Brussels Sprouts

Brussels Sprouts get a bad wrap, but if cooked right, they are delicious. This is a simply sauteed then slightly steamed recipe to get some good carmelization and still cook them through.

Sauteed Brussels Sprouts

1 lb. Brussels Sprouts, washed and cut in half
2 Tbsp. olive oil
1 Tbsp. butter
S and P to taste
1/2 C. water

In a large saute pan with a tight fitting lid, heat up olive oil and butter over med/high heat. Add cleaned Brussels sprouts. Flip them so the cut side is down. Sprinkle with kosher salt and fresh ground pepper. Saute in olive oil and butter til cut side is golden brown, just a few minutes. Stir the Brussels sprouts around, then add water to the pan and cover with the lid. Continue cooking (add more water if needed) until sprouts are tender crisp, about 10 minutes or so. Remove lid and let excess water evaporate. Remove from pan, add more S and P if needed, serve.

Gluten-free and Dairy-Free Blueberry Muffins

Are you gluten-free?  Do you find that you are sometimes less than thrilled to try new gluten-free recipes because they often don’t satisfy?  Maybe it’s just me.  I guess I’m jaded now.  Nevertheless, I decided to try this one for breakfast today because, well, I suppose I haven’t lost all hope.

I wasn’t expecting much.  Actually, I was expecting a slightly sweet blob of cardboard.  But I was really happy with the result.  Happy, as in, I will make these again.  And that’s saying a lot….for me, anyway.


Gluten-Free and Dairy-Free Blueberry Muffins

2 large eggs, at room temp
2 Tbsp. lemon juice
1/3 cup palm shortening, softened
1 tsp. vanilla extract
1/3 cup honey
1/2 cup warm water
1 3/4 cup Pancake Mix (see recipe below)
1/2 tsp. ground cinnamon
1/2 cup fresh blueberries (or reconstituted freeze-dried blueberries–what I used)

Topping
1/3 cup pecan halves
1 Tbsp. unsweetened shredded coconut
1 Tbsp. solid coconut oil
1 Tbsp. blanched almond flour
1 Tbsp. honey
3/4 tsp. ground cinnamon
1 large date, pit removed
pinch of sea salt

1.  Preheat oven to 350 degrees.  Place an oven-safe dish filled with 2 cups of water on the bottom oven rack.  Place a rack in the middle–this is where the muffins will bake.
2.  Place all the muffin ingredients, except the blueberries, in a blender.  Process for half a minute, scrape down, and process again until smooth.  Pour mixture into a bowl and stir in the blueberries.
3.  In a muffin tin, place 10 paper liners.  Fill each liner 2/3 full.
4.  In a food processor, combine all the topping ingredients.  Pulse them together until like coarse crumbs.  Sprinkle atop each muffin.
5.  Bake for 20-25 minutes.  Test with a toothpick by inserting into the middle of a muffin; if it comes out clean, it should be ready.  Remove the baked muffins to a wire rack to cool for a bit.

Pancake Mix
3 cups blanched almond flour
1 cup coconut flour
1 Tbsp. baking soda
2 tsp. cream of tartar
3/4 tsp. sea salt
Whisk together and store in airtight container in fridge (will last for 6 months).

Source:  Against All Grain by Danielle Walker

Long Grain & Wild Rice with Cranberries & Pecans

Have you tried any items off of Applebee’s new Pub Diet?  Seriously, you should at least try the Cedar Grilled Lemon Chicken, Granny Smith Apple Relish, Lemon Olive Oil Vinaigrette, Quinoa Cranberry Pecan Rice Blend.  Yes that was a mouthful–a mouthful of deliciousness! That rice was to die for.  I could not even concentrate on the dinner conversation.  I am attempting to replicate that recipe right here.  My recipe is good, but it is not the real deal.  Plus, I didn’t use quinoa.  Not sure what kind Applebee’s had in their rice. I will try this recipe again, after I have done some more field studies, i.e., gone back to Applebee’s for more. Also, while putting this recipe together I found a quick way to toast pecans.  Yummy.  Future post. Stay-tuned.
Ingredients:
1 pkg. Long Grain & Wild Rice Blend (I thought the wild rice was a nice addition)
Dried cranberries
Pecans, toasted (you can leave them halved or chop coarsely)
Olive oil
Cranberry Juice Cocktail (little tip from the waiter)

1.  Cook the rice according to package directions and taste preferences.  I used my rice cooker for this because at the end of steaming, I added about 1/4 cup of cranberry juice cocktail and let it steam a bit more.  The waiter told me about that little step when I was raving about the rice.
2.  Add in desired amount of dried cranberries, and the toasted pecans.  Fluff the rice and evenly distribute the other ingredients.


Baked Spinach-Artichoke Dip

This may not look like much, but it is so yummy. It’s from a Betty Crocker quick and easy cookbook that I have. I have been making it for years and it is always a hit. 
Ingredients:
1 C. mayonnaise
1 C. grated Parmesan cheese
1 Can (14 oz) artichoke hearts, drained and coarsely chopped
1 package (10 oz.) spinach
1/2 C. chopped red bell pepper
1/4 C. shredded mozzarella or Monterey Jack cheese
 Toasted baguette slices or assorted crackers (I slice my baguette in half lengthwise, spread with a bit of butter and toast in the oven til just golden on the edges. then I cut it into triangles or simple slices.)
Directions:
Heat oven to 350 degrees. 
Cook spinach by microwaving in a microwave safe bowl with a touch of water until fully wilted, or by steaming in a pot until wilted. Let cool slightly, then squeeze to drain and roughly chop. 
Meanwhile, combine, mayonnaise, Parmesan cheese, artichokes, bell peppers in a bowl. Add the chopped spinach. Mix til fully combined.
Place mixture into a baking dish (I use my deep pie dish) and sprinkle with the mozzarella or Monterey Jack cheese. 
Cover and bake about 20 minutes or until cheese is melted. Serve warm with baguette slices or crackers.

Toasting Pecans in the Microwave

Yes, I toasted my pecans in the dang microwave.  Does that sound like cheating?  Perhaps, but if time is an issue, this is a great alternative to the standard oven procedure.  Here it is, in a nutshell.  
Ingredients:
4 cups pecans, shelled
1/4 cup butter
sea salt

1.  Place the pecans in a microwave-proof pie plate.  Add the butter, then salt to taste.
2.  Microwave on high for 3 minutes, then stir to distribute the butter.
3.  Microwave on high for another 3 minutes.  You can certainly check on the pecans and make sure they are not getting too done.
4.  Taste immediately, or wait until they have cooled a little.  These suckers are yum!
5.  Coarsely chop or not.  Add to whatever recipe needs them.
Source:  Food.com

Mushroom Marsala Risotto

I found this recipe a couple years ago. It takes some time (like most Risottos) and is a labor of love, but it is so very very worth it! It is absolutely delicious. It is one of my favorite things to eat. I normally double the recipe too.

Serves 2 as a main course or 4 as a side dish.
Ingredients:
2 tablespoons unsalted butter
1 medium shallot, minced
2 cloves garlic, minced
1 tablespoon tomato paste
3/4 cup Arborio rice
1 cup Marsala wine, divided
3-4 cups low-sodium broth (chicken or vegetable)
2 cups cremini or baby bella mushrooms, sliced
1/4 cup freshly grated parmigiano-reggiano (I used a lovely grana padano cheese)
2 tablespoons fresh basil, minced (additional whole leaves for garnish, if desired)
kosher salt and fresh ground pepper to taste
Instructions:
Melt 1 tablespoon of butter in a large heavy-bottomed skillet or saute pan over medium heat until foaming subsides.

Add shallots and saute until soft, 2-3 minutes.

Add garlic, tomato paste, and 1/4 teaspoon each of salt and pepper and stir to combine. Cook until fragrant, 1 minute.

Meanwhile, heat the chicken stock in a separate medium saucepan until simmering.
Add the Arborio rice to the skillet and toast until opaque around the edges, 3-5 minutes.

Add 3/4 cup of the Marsala wine and cook, stirring often, until absorbed, approximately 5 minutes.

Stir in 1 cup of the broth, and stir occasionally until almost absorbed, 8-12 minutes.

Working 1 ladle of broth at at time, continue to add broth, stirring constantly.  Add the next ladle when the broth is almost completely absorbed.

After you have been cooking the risotto for 10 minutes, stir in the mushrooms.  Continue to cook risotto, stirring constantly, until it is al dente, a total of 20-25 minutes.

Remove from heat, and stir in remaining 1/4 cup of Marsala wine, Parmigiano-Reggiano (or Grana Padano) cheese, basil, and remaining 1 tablespoon butter.  Season with salt and pepper, to taste, if necessary.

Garnish with basil leaves.  Serve immediately.

Source

Mom’s Beef Stew

I love simple, tasty food.  Especially when it’s comfort food.  And this Beef Stew hits all those attributes for me.  I just love it.

Ingredients:
2 pounds stew beef
2 Tbsp. bacon grease (or shortening)
1 large onion (sliced)
1 tsp. minced garlic (from the jar)
1 quart hot water
1 Tbsp. salt
1 Tbsp. lemon juice
1 tsp. sugar
1 tsp. Worcestershire sauce
1/2 tsp. black pepper
1 bay leaf

6 small potatoes, cut in chunks
6 small onions, cut in chunks
3 carrots cut into 1″ pieces
1/2 cup flour
1/2 cup cold water

1.  In large pot, heat bacon grease over medium-high heat.  Brown stew beef.
2.  Add remaining ingredients up to and including the bay leaf.  Bring to a boil; then reduce heat, cover, and simmer for 1 1/2 hours.
3.  Add veggies.  Cover and simmer 1 hour.
4.  Remove and discard bay leaf.  Combine flour and water in a small bowl to form a paste.  Stir this into the stew.  Cover and cook over medium heat until thick and bubbly.

Makes 2 1/2 quarts of stew.

Notes:

  • Though I always use the same type of ingredients, their form varies from time to time for me.  This time I didn’t have any fresh onions so I used my freeze-dried Thrive onions.  
  • To make this GLUTEN FREE, use an alternative flour like I did this time.  I used Krusteaz Gluten Free flour.
Source:  my mom