Homemade Chicken Stock

I owe Ina Garten, The Barefoot Contessa, so much!  The kids and I used to love to watch her show on Food Network.  I found it so relaxing to watch her whip up all sorts of plain and fancy food.  But it was when I saw how she roasted chicken breasts that the quality of many of our meals changed for the better.

Ina Garten, The Barefoot Contessa

I now use nothing but bone-in, skin-on chicken breasts rubbed with olive oil and sprinkled with kosher salt and fresh ground pepper, baked at 350 degrees for one hour.  After the chicken has cooled, I remove the meat and pull it apart into bite size pieces.  It’s so moist and tender, even after it’s been refrigerated.  I ALWAYS SAVE THE SKIN, BONES, AND PAN DRIPPINGS and place them in a bag in the freezer!!  This is what I use to make one of my favorite ingredients…..homemade chicken stock.
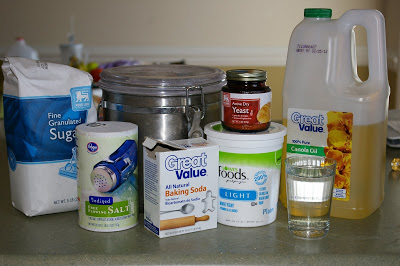
Ingredients:
bones, skin, drippings from baked chicken
onions
carrots
celery
salt
pepper
herbs of your choice
water

1.  Place chicken “scraps” into a large stock pot.  Chop veggies in half and toss in the pot.  (You don’t even have to prep the veggies, beyond making sure that they are not dirty.  Carrot tops, celery leaves, and onion skins all add extra flavor.)
2.  Fill pot an inch or two above level of ingredients.  Bring to a boil, then to a simmer for several hours, adding more water as necessary.
3.  Once the stock is done, allow it to cool until it can be poured into freezer containers.  (I like to use these 32 oz containers from plasticcontainercity.com; they are awesome!)
32 oz plastic deli container
4.  Strain chicken stock through a sieve either before pouring into containers, or as you pour (depending on the size of your sieve).  Leave 1/2″ to 1″ head space.  Allow to cool until they are just warm before putting on lids, and placing in freezer.

To use:  Sometimes I remember to thaw a container or two, but usually I just run the container under hot water until the “stock block” slips out.  Then I put it straight into a pot on medium high heat until it has melted. This is great for homemade soups, risotto (obviously), and for cooking lima beans in instead of water.

Source:   adapted from Ina Garten’s recipe

Stuffed Zucchini


I inherited this recipe from my husband after we were married. It’s super easy, quick and incorporates lots of food groups (sort of)!

Ingredients:

4 whole zucchinis

1 pound lean ground beef, browned and drained of excess grease

1 box wild rice (I use Rice A Roni in the 4.3 oz box), cooked

2 cups shredded mozzarella cheese

Directions:

1. Preheat oven to 350 degrees.

2. Divide each zucchini in half. Scoop/cut out the insides, leaving a nice-looking “zucchini boat.”

3. Bake zucchi for 15-20 minutes, just to soften the skin.

4. Layer each zucchini, beginning with meat and then with the rice.

5. Sprinkle as much of the mozzarella on top as possible!

6. Bake for another 15-20 minutes, or until cheese is melted.

Pumpkin Chocolate Chip Cookies

These cookies are nummy and nostalgic.

They remind me of many fall things – raking leaves and jumping in them, hay rides, the crunch of a fresh picked apple, football games, the harvest, the way the air smells in the late afternoon, and of course, watching – It’s the Great Pumpkin Charlie Brown. Families stopped what they were doing to watch this. Friends came over because this was something to enjoy. It only came on once. There was no such thing as a DVD or a DVR. If you missed it you missed it.

In honor of The Great Pumpkin – Enjoy.

If your not a fan of pumpkin this works well with pureed Sweet Potatoes or Carrots.

Ingredients:

1 cup butter

2 cups packed brown sugar

2 eggs

2 cups canned pumpkin

1 teaspoon vanilla

2 tsp baking powder

2 tsp ground cinnamon

1 tsp baking soda

1 tsp ground nutmeg

4 cups all purpose or whole wheat flour (if you grind your own wheat, soft white works best)

2 cups mini semi sweet chocolate chips

1 cup chopped walnuts or pecans (optional)

1. Pre-heat oven to 375

2. In a mixing bowl beat butter for 30 seconds.

3. Add brown sugar and beat until fluffy.

4. Add eggs, pumpkin, and vanilla; beat well.

5. Add dry ingredients and chocolate chips beating until well combined.

6. Stir in nuts if using them (Dough will be soft.)

7. Drop dough from a teaspoon 2 inches apart onto a greased cookie sheet.

8. Bake in a 375 oven for 8-10 minutes.

9. Cool on wire rack

Source: Adapted from Better Homes and Gardens

German Apple Pancakes


This here, is another way of saying, “Guess what, kids! We’re having dessert for breakfast!”…And was also a tradition in my husband’s family growing up.  It’s a bit time consuming, but well worth it!  We love enjoying it for birthdays, holiday breakfasts and sometimes when we all just have a major sweet tooth.

Pancake Ingredients:
5T butter (to melt in bottom of pan)
6 eggs
1c All-purpose flour
1c milk
pinch of salt

 
*Featured above is my lovely Pampered Chef apple peeler which quickly 
peels, cores and spiral slices the apple! 
  1. Preheat oven to 400*, cut butter into chunks and put in a 9×13 pan, melt the butter in the oven while it is preheating.  In the mean time, make the pancake batter (keep an eye on that butter).
  2. In a medium or large bowl, mix the eggs, flour, milk and salt.  It will get super lumpy and thick.  Just keep whisking!  Sometimes I even use my blender for the pancake batter. 
  3. Take the pan out of the oven when the butter is just beginning to brown and sizzle.  Pour the pancake batter into the center of the pan so the butter spreads evenly to all sides. 
  4. Carefully put it back in the oven. Bake for 25 minutes.  (Towards the end of baking time, the sides of the pancake rise above the pan forming a puffy bowl-like shape, But don’t be alarmed when it begins to deflate a bit after a minute or so…this is completely normal =) 
  5. While the pancake is baking, make the sauce:
 
Sauce Ingredients:
1/2c white sugar
1T corn starch

1tsp ground cinnamon
dash of salt
2T butter
1c boiling water
1/4 tsp orange extract
1 tsp vanilla extract
3 large Granny Smith apples, peeled and sliced (other apple varieties will work, but just like a good apple pie, the tart ones are best)

  1. In a medium or large sauce pan, stir together the sugar, corn starch, cinnamon and salt.  
  2. Add butter and boiling water and bring the whole mixture to a boil, stirring constantly, until sauce begins to thicken.  
  3. Fold in the sliced apples until covered in sauce.  Lower heat.  Cover and simmer for about 15 minutes or until the apples are tender.  
  4. Remove sauce from the heat and stir in the vanilla and orange extracts.  
  5. The sauce can be poured directly into the puffy pancake or on individual slices.

*For my family of 6, we double the whole recipe!
*Leftover sauce goes great over a toasted English muffin!
*Hope you’re not on a diet today 😉

Source:  Adapted from Masterpieces From Our Kitchen: Virginia, MN High School Choir 1999

Southern Fried Corn

There are so many different ways to prepare fried corn. But, this is one of our families favorites.

4 slices of bacon
2 T. flour
1 c. water
1/4 c. milk
*1/2 small onion, chopped fine (optional)
salt & pepper to taste
6 ears of corn, cut off cob & scrape ears to get all the juice out

(When I don’t have fresh corn I use frozen corn or canned corn. This recipe will use about 3 -4 cans of corn.)

In a cast-iron skillet, fry the bacon. In a large bowl, combine flour, water, milk, salt, pepper and corn removed from cobs. Mix thoroughly. Remove bacon pieces and pour in the corn mixture. Chop the bacon into pieces and add back into the mixture. Constantly stirring and scraping the bottom of the pan will prevent sticking. It will be thick and creamy.

adapted from Beth Taylor

El Torito Sweet Corn Cake


This is by far one of my family’s all time favorite recipes. I serve it alongside chili or other tex-mex meals. I used to make the version that used masa harina and cooked it in a water bath. This version is much more convenient and tastes just as good.

Ingredients:

1 (7 1/2 oz.) package sweet cornbread mix

1/4 cup butter, melted

1/4 cup water

1/4 cup sugar

1 (15 oz.) can cream-style corn

Directions:

1. In bowl, combine corn cake mix with melted butter. Add water, sugar and can of cream style

corn. Mix until ingredients are combined.

2. Pour mixture into a 9×5 inch loaf pan.

3. Bake, uncovered at 350 degrees for 40-45 minutes or until liquid has been absorbed.

4. Use an ice cream scoop to serve sweet corn cake as a side dish or for dessert. (Yes, it’s that

sweet!)

Source: copycat recipe

Sweet Potato Puree


Before too long sweet potatoes will be in season. I love to go ahead and roast and puree them for the freezer so that I can pull out a bag to use them for Sweet Potato Chocolate Chip Muffins (recipe found here).

Sweet Potato Puree
1-Preheat oven to 400
2-Wash your sweet potatoes.
3-Line your pan with aluminum foil (easier clean-up-trust me).
4-Place unpeeled sweet potatoes on the pan.
5-Roast in oven for about an hour (or a fork inserts easily).
6-Remove and let cool.
7-Scoop out the flesh and puree in a food processor until smooth.
8-Use in your recipe immediately or freeze for future use.

*I put 2 cup values (2 cups or 4 cups) into a freezer bags so that it’s already pre-measured for making the Sweet Potato Chocolate Chip Muffins.

Source: Deceptively Delicious by Jessica Seinfeld

Reese’s Cup Chocolate Peanut Butter Cake

For you peanut butter and chocolate lovers out there…


The Cake
Ingredients:
2 cups all-purpose flour
1/2 cup unsweetened cocoa powder
1/2 tsp. baking powder
1/2 tsp. baking soda
1/2 tsp. salt
2 sticks butter, softened
1 1/2 cups sugar
2 large eggs
2 large egg yolks
1 tsp. vanilla
1 cup buttermilk
4 oz. bittersweet chocolate, melted and cooled

1.  Place oven rack in center position and preheat oven to 350 degrees.  Grease and flour two 9″ round cake pans.  Place a round of parchment paper or wax paper in the bottom of each pan.
2.  In a medium bowl, sift together the flour, cocoa, baking powder, baking soda, and salt.  Set aside.
3.  In a mixer fitted with the paddle attachment, beat the butter on medium speed until soft and creamy.  Add the sugar and beat for about 2 minutes, until thoroughly blended into the butter.  Add the eggs and yolks one at a time, beating for one minute after each addition and scraping the down the sides of the bowl as needed.  Beat in the vanilla.  Reduce the mixer speed to low and add the dry ingredients alternately with the buttermilk;  add dry ingredients in 3 additions and the buttermilk in 2 (beginning and ending with the dry ingredients).  Mix each addition only until it is blended into the batter.  Scrape down bowl and add the melted chocolate, folding it in with a spatula.  Divide the batter between the prepared cake pans.
4.  Bake for 26-30 minutes or until the cakes feel springy and start to pull away from the sides of the pans.  Transfer to wire racks to cool for 5 minutes, then run a knife around the sides of the cakes, unmold them and peel off the paper liners.  Invert and cool to room temperature right side up.

The Frosting
Ingredients:
2 cups powdered sugar
2 cups peanut butter
10 Tbsp. butter, softened
1 1/2 tsp. vanilla
1/2 tsp. kosher salt
2/3 cup heavy cream

1.  In a mixer bowl, combine all but heavy cream and mix with paddle attachment on medium speed until creamy.  Scrape down bowl with spatula as you work.
2.  Slowly add cream and beat on high speed until mixture is light and smooth, adding a bit more powdered sugar if frosting is too thin.
3.  Frost cake and enjoy!

NOTE:  I used a package of mini Reese’s cups when decorating the cake.  I found it helpful to refrigerate them, as my hands are always warm and tend to melt the chocolate.  After unwrapping, turn the cups upside down and carefully slice in half with a paring knife.  There were enough in the package to decorate the top and base, with a few leftover to dice up and sprinkle on top.

Source:  Annie’s Eats

Indian Naan


Last week I talked about loving naan, so I thought it would be appropriate to share how to make it in your own oven. Traditionally naan is made in a tandoori oven like in this video:

 
To cook naan in your home oven a *pizza stone will substitute for the tandoori oven.
You can eat your naan with any indian main dish, hummus, dill yogurt dip, honey butter, or make it into flatbread pizza.

Naan
1 tsp. active dry yeast
3/4 C. warm water
2 C. flour
1 tsp. salt
1. tsp. sugar
pinch of baking soda
2 T. oil
2 1/2 T. plain yogurt


Directions:
1. Dissolve active dry yeast in warm water (100 degrees F) and let sit for 10 min or until it becomes frothy.
2. Mix flour, salt, sugar, and baking soda together in a large bowl.
3. Add the oil and yogurt and mix. Dough will be crumbly like this:
 

4. Add the water/yeast mixture and make into soft dough.
5. Knead in bowl until the dough is smooth. (this will be a very sticky endeavor!)

6.Cover and keep in a warm place 3-4 hours. The dough will almost double in volume.
7. Pre-heat oven and pizza stone to 500 degrees. Then, set the oven to broil.
8. Dust the counter with flour and knead the dough for about 2-3 minutes. Divide the dough into six equal parts.

9. One at a time, roll each piece of dough into an 8-inch oval. (Use a dusting of flour to help prevent sticking.

10. Before putting naan in oven, lightly wet your hands, take the rolled naan and flip it between your palms and place on the pizza stone. (this will moisten the dough and stretch it out a bit more)

11. Bake 2-3 minutes or until golden brown and bubbly on top.
12. Remove from oven with a spatula or tongs and continue until all the dough is cooked.
13. Brush with butter, and enjoy!
 

*Check what kind of temperatures your stone can withstand, some stoneware can crack in extreme heat.

Source: An Indian woman on YouTube, but now I can’t find her. I am pretty sure she can cook naan blindfolded though.

Pasta de Teague

My husband and I made up this recipe one night and it’s been a favorite ever since. It’s kind of a “make-your-own” pasta like you see in Italian restaurant menus because you can put as much or as little of what you like with just a few basic ingredients. Feel free to add other things you think would be great additions!

Ingredients:
3/4 – 1 package non-long-noodle pasta (bowtie, penne, cartoon shapes…something fairly bite-size)
2-3 Italian sausages (we typically use mild, I don’t think the brand matters)
2-3 tsp minced garlic
Olive oil (3 T or more)
Roma tomatoes, to taste
1-2 red bell peppers
Basil, thyme, and oregano–preferably fresh–to taste
Salt, pepper, and whatever spices your tastebuds desire–to taste
1 1/2 – 2 C shredded parmesan cheese (opt.)
1. Cook the pasta according to package directions.
2. While the water for the pasta is cooking, remove sausage from skins (I think it’s easiest to slice lengthwise down the middle then pull the skin from the top…) and begin cooking in skillet on medium – medium-high heat (…with the flat part down first).
3. While the pasta and Italian sausage is cooking, slice and chop your vegetables.
4. Once the Italian sausage is cooked enough to cut with a wooden spoon, add the vegetables to the skillet and continue cooking.
5. When pasta is cooked, strain and return to pot. Toss with olive oil, add skillet contents and all remaining ingredients, toss again.
6. At this point you can serve as is OR transfer to a baking dish, cover with parmesan cheese, and broil in oven until cheese is melted. Makes approximately 4 servings as a main dish.
Source: brainpower