Hearty Italian Sausage & Spinach Soup

To quote my husband, “I don’t want this to go to your head or anything, but this is so good, I don’t even want to eat it with crackers.” Hahaha! And even my 19-month-old liked it. He picked out the sausage (and ate it), dipped crackers in the soup, then sucked the soup off the cracker.

Ingredients:
4 Italian sausages or 1 pkg ground Italian sausage
2 cans (14 oz each) reduced-sodium chicken broth
3/4 C chopped onion (or dehydrated onion)
2 garlic cloves
olive oil (I used EVOO)
1 14.5 oz can diced tomatoes, undrained
1 10-oz. package frozen chopped spinach, thawed and well drained (Or you can use frozen bagged chopped spinach like me–then you don’t have to drain it. The bags are usually 16 oz. instead of 10 but I still use the whole thing and add water to the soup if needed.)
1 1/2 t dried oregano leaves
1/2 t salt (varies according to the amount of sodium in your broth)
1/4 t ground black pepper
1/4 t dried basil
1. Gather all your ingredients so that the spinach can begin to thaw while you form the Italian sausage into balls. Remove sausage from casing and form into balls about the size of a nickel (or whatever size you’d prefer). If you’re using ground Italian sausage, begin browning it over medium heat.
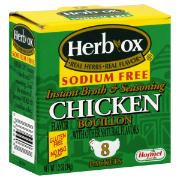
2. Start your chicken broth if you’re using bullion. (I like to add 28 oz. of water and then 2 packets of Herb-Ox chicken bullion powder. I think these packets have great flavor and they’re sodium free.)
3. Chop the onion and garlic.
4. Cook and stir onion and garlic in hot oil in Dutch oven or large stock-pot on med-high heat for 3-5 minutes or until onion is tender. (If using dehydrated onion, wait to add until after broth.)
5. Add broth, tomatoes with their liquid, spinach, oregano, salt, pepper, and basil; bring to a boil.
6. Add sausage.
7. Reduce heat to low; cover.
8. Simmer until sausage is cooked through, about 15 minutes. Makes 4-6 servings.
Source: Adapted from “Hearty Meatball Spinach Soup” recipe found on the back of an old Premium crackers box; that recipe can be found here.

Homemade Butterfingers

It’s not my normal recipe posting day, but I just had to go ahead and share this for two reasons.  One, it involves an ingredient that is going to be more prevalent right now and will, after Halloween, be on super sale.  Two, I seem to have an obsession with peanut butter and chocolate.  Butterfinger is one of my favorite candy bars, so when I saw this recipe floating around Pinterest, I had to give it a try.  I was skeptical because, really…three ingredients?  But one bite and I was forced to exclaim (exclaim, people!) “Oh my gosh, it tastes just like it!”  I hope you enjoy it.  I’ll be stocking up on some cheap candy corn this season!


Ingredients:
1 lb. candy corn*
1 lb. creamy peanut butter
1 lb. chocolate candy coating**
 
1.  Prepare an 8″x8″ pan with a light coat of cooking spray.  Lay parchment paper or wax paper in the pan so that it covers the bottom of the pan, leaving the ends hanging over two edges.  (You will use these “handles” to lift out the bars, making it easier to cut them and set them out for chocolate coating.)  
2.  Lightly coat a glass mixing bowl with cooking spray.   Place the candy corn in the bowl and microwave in 30 second increments, stirring in between, until the candy corn is melted.  Stir in the peanut butter and continue to stir until the mixture is smooth.  Pour this mixture into your prepared pan and spread evenly.  Chill until set.
3.  Remove the bars by lifting the parchment paper “handles” and place on a cutting board.  Cut into bars.  Place a piece of wax paper on a cookie sheet and set a wire rack over it.  Set bars one inch apart onto the wire rack.
4.  Melt the chocolate candy coating according to the directions.  Using a small spoon, pour chocolate on top of a bar along its length; then using an small offset spatula or a butter knife and spread the chocolate flat along the top.  The chocolate will ooze down the sides, so use the knife to spread the chocolate along the sides of the bars.  Allow to set, or place in fridge to set.


Note:
*The first time I made these I used the only candy corn I could find at Walmart, but it’s technically Indian Corn.  It’s the one with brown instead of yellow, and it DOES have a different flavor.  The final product was good but did not taste very much like Butterfinger and did not have that bright orange color.  So DON’T use anything but the traditional candy corn.  Also, the recipe calls for a pound, but I found it in 14 ounce bags.  That worked fine.
**You can find this in the baking aisle at the grocery store.  It usually comes in a flat package that has a tray inside that can be used as its own microwave container.  I was able to use it for 2 batches because I didn’t dip the entire bar in it, like the original recipe stated.


Source:  It’s on multiple sites and blogs, but I got it from Plain Chicken

Cafe Rio Goodness: Cilantro Ranch Dressing

Hooray! Here’s your last installment for Cafe Rio’s AMAZING salad! So far I’ve shared the Pork Barbacoa, Cilantro Lime Rice, and Black Beans. Today I’m sharing their wonderful Creamy Cilantro Ranch Dressing. It is so good. You will not need any sour cream on this salad. This dressing does the trick. 

Cilantro Ranch Dressing

1 packet TRADITIONAL Hidden Valley Ranch mix (not BUTTERMILK)
1 c. mayonnaise
1 c. buttermilk
2 tomatillos, remove husk, diced
1/2 bunch of fresh cilantro
1 clove garlic
juice of 1 lime
1 jalapeno, seeds removed

Mix all ingredients together in the blender. That’s it!

So, now that you have all the recipes needed. Let’s talk about assembling this salad. You’re going to need a big plate. 🙂 First, lay out a big flour tortilla that’s been warmed. Then add the pork, then the rice, then the beans. Throw a handful of romaine salad on top. Next, you’ll see tortilla strips – I can find these in the produce section close to the salads and croutons. THEN top with this amazing dressing.

I assure you this will become a favorite in your house. It is in mine!!

Cucumber Dressing (over Fresh Tomatoes)

One of the things I love best about summer is the fresh produce, especially fresh tomatoes. Roma are my favorite for just about everything except sandwiches. In honor of these delectable divas, I’m sharing two of my favorite ‘tomato’ recipes with you today.

2 cucumbers, washed and cut into thirds or fourths
2 Tbsp dry onion soup mix*
1 cup lite mayonnaise
2 tsp lemon juice
Salt and pepper, to taste
Fresh tomatoes, sliced or cut into large chunks

1. In a blender or food processor, shred the unpeeled cucumbers.

2. Mix with onion soup mix, mayo and lemon juice.

3. Refrigerate for at least two hours (for best taste, allow it to mesh overnight).

4. Serve over fresh tomatoes.


*This is a very mild dressing. If you prefer a stronger flavor (as my husband does), use the whole (~4 Tbsp) packet of dry onion mix and increase the amount of salt and pepper.

Adapted from Southern Living

Broiled Tomatoes with Feta

I love that window of time in the summer when tomatoes are in season. It’s the best time of year for BLTs, fresh salads and these broiled tomatoes.


Ingredients:
6 Roma tomatoes
0.7 oz. Italian seasoning packet (used to make dressings or marinades)*
2/3 cup crumbled Feta cheese


1. Cut tomatoes in half lengthwise and place, cut sides up, on a baking sheet lined with aluminum foil.
2. Sprinkle each tomato half with Italian seasoning and feta.
3. Broil 3 inches from heat 2 to 3 minutes or just until cheese starts to brown. [If you’re like me and forget to move the oven rack up until you’ve already preheated the oven, you can broil them at for an extra minute or two with the same results.]

*If you choose to use Italian seasoning in a spice bottle, you’ll need to also sprinkle on salt and pepper; if you choose the dressing/ marinade powder it already has salt and pepper in it.

Source: Southern Living (magazine)

Grandma’s Swedish Pancakes

When I say “Grandma’s,” I mean MY grandma. We used to go to her house almost every week for Sunday dinner. It was common knowledge that we had a big lunch and “no dinner.” By “no dinner” I mean we had a big dessert. I attribute my sweet tooth to Grandma (and my mom. Yep, it’s totally genetic!)!

 
Swedish Pancakes were often on the “no dinner” menu. They are essentially Crepes, and though there are many various ways to eat them, the following way is the best. Trust me.
 
6 eggs
2 1/2 Cups Milk
1 1/2 Cups Flour
2 Tbsp Sugar
1 tsp Salt
 
1. Turn on your griddle to 350 F. A frying pan works, too–medium heat.
2. In a Medium bowl, beat your eggs until thick and foamy.
3. Stir in your milk.
4. Sift together dry ingredients (or if you’re naughty like me, don’t…) and add them to the egg mixture.
5. Beat until smooth.
 
This is where it may get a little tricky…
 
6. Making sure your griddle is nice and hot, spray it with Cooking Spray (don’t forget!!).
7. Using a Ladle, cover your griddle in a thin layer of batter (apx 3 ladles-full).
 
8. Wait until the batter looks a little dry, then use the corner of your Spatula and “cut” the pancake width-wise on the griddle into 4 rectangles (Sorry there’s no picture of this. My hands were tied and I don’t trust the Ruffians with the camera yet.).
9. Flip the rectangles over and butter them while the other side is cooking–I don’t time it, but by the time I’m done buttering the last rectangle, they’re done.
10. Don’t worry if you have a few that turn out like this:
Just butter them, or lather them with jam or syrup and eat ’em anyway! OR if you’re mad at it, THROW. IT. AWAY! That’ll teach it! And it may make you feel better. (NOT that I would know about this from experience…)
 
11. Take the pancakes off the griddle and pile them on a plate. Repeat Steps 6 – 11 till all the batter is gone.
12. Take a sugar shaker***, if you have one–if not, your hand and a spoon will do just as well!–and shake a GENEROUS amount of sugar onto the buttery side, coating the entire thing. When I say “generous” I mean, GENEROUS. You should SEE the sugar! After you’ve done it a few times, you’ll know how you like it and can do it your way.
 
13. Starting at a short end, roll one rectangle to the other end. Repeat steps 12 and 13 till all your pancakes are rolled up.
 
Now you can eat away! Your hands will be a little sticky, your tummies will feel full, and if you’re like my Ruffians, your faces should look like this:
Ruffian3 smiling as he takes a bite. Ruffian2 likes to unroll hers. She always did like a mess!
 
 
Makes about 16.
 
***You really can use a variety of fillings. We’ve done jam, peanut butter and syrup, fruit and whipped cream, and Nutella–all VERY GOOD!
 
Source: Grandma Taylor, one of the greatest women alive!
 
~Kara

Fudgy Bonbons

I can’t really remember the year that I got this recipe.  I think maybe the first Christmas that we flew home from El Paso, Texas–maybe 1996 or 1997.  Anyway, we were at my mother-in-law’s house and I was trying to find something sweet to eat.  There were some holiday cookies and stuff over on top of her chest freezer and so I picked up something chocolate.  I thought it tasted pretty good, although it was dry from sitting out a long time. I asked Verna where they came from and she said her sister, Gertie Sutton, had brought them over.  So I contacted Gertie and she sent me the recipe.  The first time I made them I thought I was in Chocolate Heaven!  These have wowed my friends and family for years.  This recipe, from Mary Anne Tyndall of North Carolina, won $50,000 in the 1994 Pillsbury Bake-Off.
WARNING: Side effects of this product include addiction and sheer pleasure!

Ingredients:
60 milk chocolate Hershey’s Kisses or Hershey’s Hugs, unwrapped
1 (12-oz.) pkg. semi-sweet chocolate chips
1/4 cup butter or margarine
1 (14-oz.) can sweetened condensed milk
2 cups all-purpose flour
1 tsp. vanilla extract
1/3 cup white chocolate chips

1.  Heat oven to 350.  In medium saucepan combine Hugs and butter.  Cook and stir over very low heat until chips are melted and smooth.
2.  Add sweetened condensed milk to chocolate mixture and mix well.  Remove from heat.
3.  Lightly spoon flour into measuring cup and level off before putting in stand mixer bowl.  Add chocolate mixture and vanilla.  Mix well on medium speed.
4.  Shape 1 tablespoon of dough around each Hug, covering completely.  Place bonbons 1 inch apart on UNGREASED cookie sheet (I use parchment for ease of release from pan for cooling).
5.  Bake for 6-8 minutes.  DO NOT OVER BAKE.  Cookies will be soft and shiny but will become firm as they cool.  
6.  Cool bonbons completely on cooling racks.
7.  Melt the white chocolate chips in the microwave according to package directions.  You can add a little shortening to thin, if necessary.
8.  Dip the tip of each bonbon into the white chocolate or drizzle over .  Get creative.  You can even color the white chocolate to go with your event. 
SECRETS TO SUCCESS:
  • This is an easy recipe, but time-consuming.  
  • Try to work quickly as the dough will become harder to form around the Hugs toward the end of the batch.  
  • I just pinch off about a tablespoon of dough, roll it into a ball and then flatten in the palm of my hand, then place the Hug in the middle and fold the dough up and over the Hug.
  • The parchment I use is actually a reusable sheet and “shimmies” easily off of the cookie sheet.
  • The original recipe included nuts and used white baking bar/white candy coating melted in a saucepan with the shortening or oil.  I find using the chips and microwave more efficient and just as good.
  • Store the bonbons in an air-tight container to prevent drying out.
  • When I first tasted the bonbons, Hugs were used so they are my preference.  I did try Hershey’s Kisses with Almonds and those were really good.  Experiment with your candies.  I bet caramel would be interesting…
Source:  Mary Anne Tyndall, Pillsbury Bake-Off Winner, 1994.

Chicken and Dumplings

This recipe comes from my favorite cookbook! Better Homes and Gardens, fifth edition, printed 1968. It’s pretty awesome

Ingredients:
3 large chicken breasts, on the bone and with skin
3 cups chicken stock (this will remain after chicken has been boiled)
2 cups sifted, all-purpose flour
4 teaspoons baking powder
1 teaspoon salt
1 cup milk
4 tablespoons vegetable oil
Salt and pepper to taste

1. Boil chicken in a large pot.
2. When chicken is almost tender, sift together flour, baking powder and salt.
3. Combine milk and oil; add to dry ingredients; stir just until moisten.
4. When chicken is fully cooked, discard all bones and skin. Coarsely chop the white meat in to 1-2 inch pieces. Set aside.
5. Place chicken back in your large pot. Allow only enough chicken stock in the pot to just cover the chicken pieces.
6. Return chicken and stock to a boil.
7. Use a large spoon to drop batter into the pot. For best results, drop batter directly on to chicken, not into the liquid.
8. Cover tightly and reduce heat to a simmer.
9. Allow dumplings to steam for 12 minutes.

Easy Breakfast Casserole

This is so easy and delicious! It is a very modified version of a Bisquick Recipe. This works well with sausage, ham, shredded beef, or hamburger and can be used as a main dish. Garnish this with chopped tomatoes and a sprinkle of Parmesan Cheese and use as an Appetizer. I often get requests to bring this dish to events and activities.

Ingredients:

1 lb Bass Farms Mild Sausage
1 large onion chopped
1 1/2 cups baking mix such as Bisquick
2 cups milk
6 eggs
1 1/2 cups shredded sharp cheddar cheese
1 1/2 cups grated baked potato or frozen hash browns (optional)
1/2 medium red pepper finely chopped (optional)

If using as an Appetizer:
2 large Roma Tomatoes finely chopped

1/3 cup shredded Parmesan Cheese

1. Heat oven to 400. Spray 13×9 cake pan with non stick spray and set aside.
2. Brown sausage in skillet and drain off excess fat
3. Return sausage to skillet and add chopped onion and pepper. Continue cooking for 3-4 minutes or until onion starts to soften – stirring often.
4. Mix baking mix, milk, and eggs together until well blended.
5. Fold cheese and grated potatoes into egg mixture.

6. Layer Sausage and veggies into prepared pan.
7. Pour egg mixture over sausage
8. Bake at 400 for 20-25 minutes

For Garnish:
Sprinkle top with chopped tomatoes and cheese

Source: Adapted from Original Bisquick

Stuffed Peppers

Looovvvee these! (in my singing voice) These are easy and yummy! You can add anything to this recipe! Its soo good! Try it!

1/2 lb lean ground beef
1 c rice, cooked
1 small onion, chopped
1 egg
1/4 c green bell pepper, chopped fine
1/2 c – 3/4 c Italian flavored bread crumbs,add as desired
1/2c Sweet Baby Rae’s BBQ sauce, or your favorite
1/2 c cheese, cheddar or colby jack
salt
pepper
dash of worcestershire sauce
4 green bell peppers, halved, and cleaned

Sauce:
1/2 c Sweet Baby Rae’s BBQ sauce
1/2c ketcup
1/2c-3/4c brown sugar
8 thin rectangular slices of cheese, big enough to cover the pepper

Boil a pot of water. When water begins to boil, add the halved bell peppers. Cook just to soften a bit. About, 5 min. Take them out of the water and let them cool.

In a mixing bowl, add the above listed ingredients and mix well. You may need to add more bbq sauce if mixture is to dry. Spoon the ingredients into each halved pepper and place in a baking dish. Add to the bottom of the baking dish 1/4 c water. Cook the peppers in a 350 degree oven for 35 min.

Remove baking dish from oven and spoon sauce over peppers. Add a slice of cheese on top of each pepper. Spoon a little bit more sauce over the cheese. Place back into the oven and bake for another 5-7 min or until the cheese is melted good.

*Obviously, you can also cut the top off of the pepper, clean it out and stuff the whole thing. But, so the peppers stretch farther, and so my kids can not be stressed out about seeing an entire bell pepper sitting before them to eat, I cut them in half.